[student@localhost ~]$ sudo systemctl status oc-cluster
Lab 3 - Analyzing a microservices application

Typically, it is best to break down services into the simplest components and then containerize each of them independently. However, when initially migrating an application it is not always easy to break it up into little pieces but you can start with big containers and work towards breaking them into smaller pieces.
In this lab we will create a project which contains multiple container images comprised of multiple services since our application is already a microservices application. In lab 3 we will describe and run the microservices application which is already split up into more manageable pieces.
This lab should be performed on the machine in front of you unless otherwise instructed.
Expected completion: 20-30 minutes
Topics:
-
Prerequisites
-
Overview microservices application
-
Exploring OpenShift template
-
Setup OCP environment based on pre-built OpenShift template
-
Exploring the running containers
-
Connecting to the application
Prerequisites
To check if OpenShift Container Platform (OCP) is running execute:
source,bash]
If you get no cluster running start ODP with
[student@localhost ~]$ sudo systemctl start oc-clusterNow log in to OpenShift with username developer and password developer :
[student@localhost ~]$ oc login -u developer -p developer
Login successful.
You have one project on this server: "myproject"
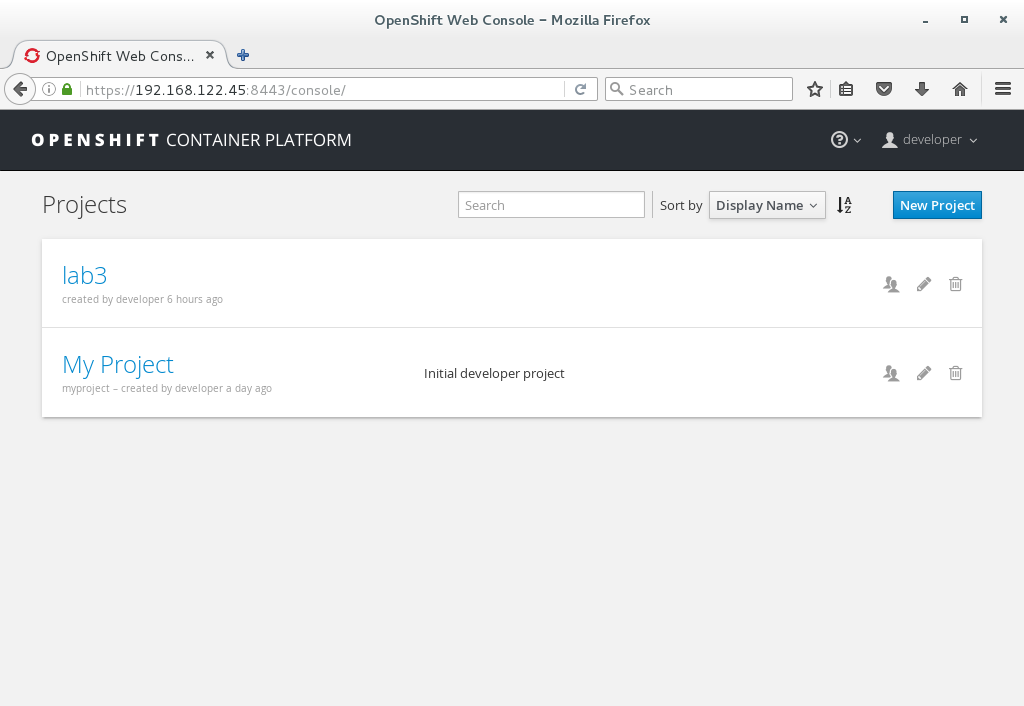
Using project "myproject".You are now logged in to OpenShift and are using the myproject project. You can also view the OpenShift web console by using the same credentials to log in using Firefox Web Browser as depicted below.

First we are going to create a new project called lab3.
[student@localhost ~]$ oc new-project lab3
Now using project "lab3" on server "https://192.168.122.45:8443".

You can add applications to this project with the 'new-app' command. For example, try:

oc new-app centos/ruby-22-centos7~https://github.com/openshift/ruby-ex.git

to build a new example application in Ruby.
Overview microservices application
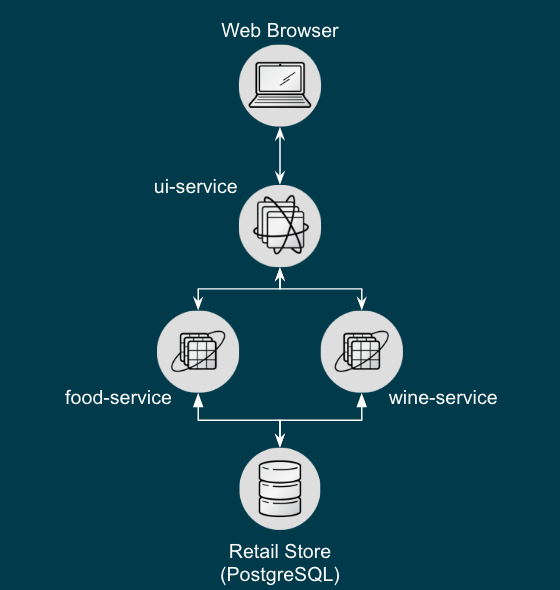
The microservices application we are going to use in lab 3 is a simple AngularJS (https://angularjs.org/) and Spring (http://spring.io/) application using food and wine datas.
Our initial OpenShift template will be using the following four services:
-
ui-service: AngularJS and Spring application
-
food-service: Backend service providing food data
-
wine-service: Backend service providing wine data
-
PostgreSQL service serving the food and wine data
The food- and wine-service are connecting directly to the PostgreSQL environment. The illustration below depicts the starting point of our microservices application.
In the next steps, we are going to setup and run the above environment in OCP. Exploring Microservices Application Familiarize yourself with the initial Microservices Application by opening a code editor using the following steps:
[student@localhost ~]$ cd ~/summit-2017-dataservices/labs/lab3/projects
[student@localhost ~] code .
Dive into the code
|
Caution
|
In the ui-service, food-services and wine-services directory you’ll find all maven based java projects. To limit the use of wifi during this Summit lab all the projects are prebuilt and the WAR files containing the ui and business logic are already available for your convenience, see target directory. I.e. /home/student/summit-2017-dataservices/labs/lab3/projects/ui-service/target/ROOT.war /home/student/summit-2017-dataservices/labs/lab3/projects/food-service/target/ROOT.war /home/student/summit-2017-dataservices/labs/lab3/projects/wine-service/target/ROOT.war Same applies for the projects used in lab 4. |
Exploring OpenShift template
An OpenShift template describes a set of objects that can be parameterized and processed to produce a list of objects for creation by OpenShift Container Platform. The objects to create can include anything that users have permission to create within a project, for example services, build configurations, and deployment configurations. A template may also define a set of labels to apply to every object defined in the template. See the template guide for details about creating and using templates. Check out directory ~/summit-2017-dataservices/labs/lab3_ocp/templates.
[student@localhost ~]$ cd ~/summit-2017-dataservices/labs/lab3_ocpIn this directory you will find the OpenShift template containing the configuration needed to setup a complete OCP environment for lab3. Take a look at lab3-template.json using a pre-installed code editor.
[student@localhost lab3_ocp]$ code templates/lab3-template.jsonSetup OCP environment based on pre-built OpenShift template
If you have a JSON or YAML file that defines a template, for example in our case we are using lab3-template.json, you can upload the template to projects using the CLI. This saves the template to the project for repeated use by any user with appropriate access to that project. See for more instructions on writing your own templates. Furthermore you can use the CLI to process templates and use the configuration that is generated to create objects as shown below.
[student@localhost lab3_ocp]$ oc process -f templates/lab3-template.json | oc create -f -
service "wineapp-wine-service" created
service "wineapp-food-service" created
service "wineapp-postgresql" created
service "wineapp-ui" created
route "wineapp-route" created
imagestream "wineapp-ui" created
imagestream "wineapp-food-service" created
imagestream "wineapp-wine-service" created
buildconfig "wineapp-food-service" created
buildconfig "wineapp-ui" created
buildconfig "wineapp-wine-service" created
deploymentconfig "wineapp-food-service" created
deploymentconfig "wineapp-postgresql" created
deploymentconfig "wineapp-ui" created
deploymentconfig "wineapp-wine-service" created
As mentioned earlier we would like to minimize the use of wifi during this Summit lab. Typically the template will build the pod downloading the source code from a github repository. Since we have already built our projects using maven (mvn clean package -DskipTests), we can use binary deployment with following command:
[student@localhost lab3_ocp]$ cd ~/summit-2017-dataservices/labs/lab3
[student@localhost lab3]$ oc start-build <build config> <options>
For more information How Builds works, see the OpenShift Cotainer Platform documentation: https://docs.openshift.com/container-platform/3.4/dev_guide/builds/index.html
Get all available build configs
[student@localhost lab3_ocp]$ oc get bc
NAME TYPE FROM LATEST
wineapp-food-service Source	Binary	0
wineapp-ui Source	Binary	0
wineapp-wine-service Source	Binary	0
Now start the binary builds using the following commands:
[student@localhost lab3]$ cd ~/summit-2017-dataservices/labs/lab3/projects

[student@localhost projects]$ oc start-build wineapp-food-service --from-dir=food-service/deployments
Uploading directory "food-service/deployments" as binary input for the build ...
build "wineapp-food-service-1" started

[student@localhost projects]$ oc start-build wineapp-wine-service --from-dir=wine-service/deployments
Uploading directory "wine-service/deployments" as binary input for the build ...
build "wineapp-wine-service-1" started

[student@localhost projects]$ oc start-build wineapp-ui --from-dir=ui-service/deployments
Uploading directory "ui-service/deployments" as binary input for the build ...
build "wineapp-ui-1" started
Now the containers will be built and deployed. Let’s see how it looks like in the OpenShift Web Console.
Exploring the running the containers
Login into the OpenShift Web Console and login with username developer
Click on project lab3 and the lab3 overview page should appear as depicted below.
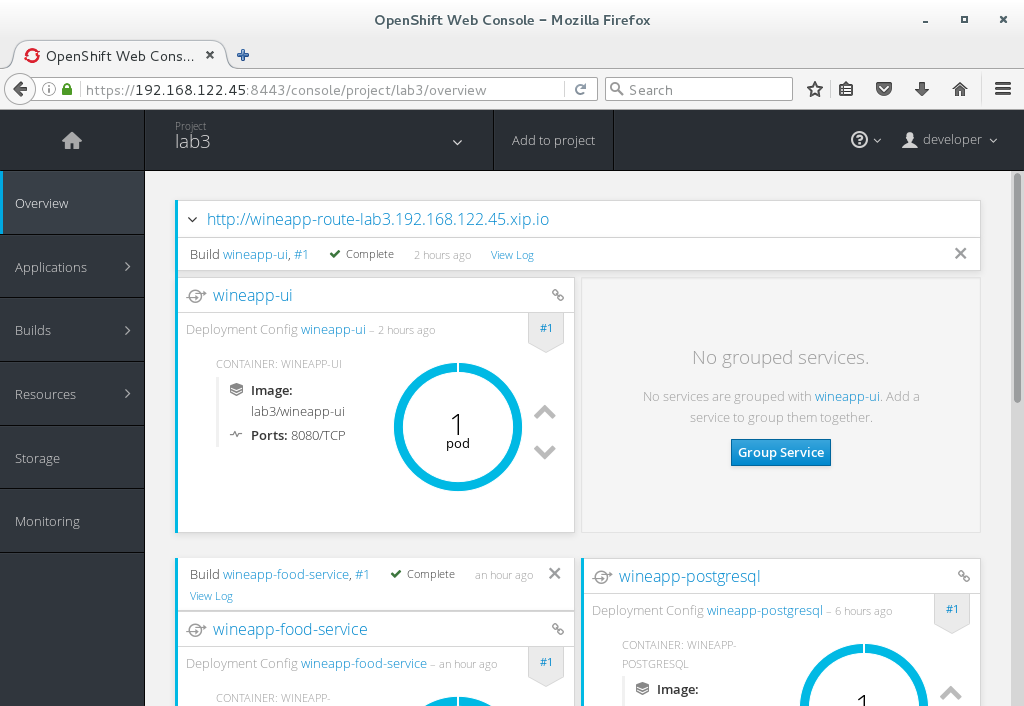
Scroll down and use the menu options to familiarize with the OpenShift lab3 containers.
Connecting to the application
An OpenShift Container Platform route exposes a service at a host name, like www.example.com, so that external clients can reach it by name.
In the example depicted in screenshots before we can see a route defined in lab3 project which expose the webui of our food and wine microservices application at url: http://wineapp-route-lab3.192.168.122.45.xip.io
Another way to get the routes is to navigate to the Browse → Routes page. Click on the URL of the route and you should be redirected to the food and wine microservices application as depicted below.

The wineapp microservices application showcases a web application providing create and read functionality. Click on Wine and/or Food and see if existing data is retrieved from the PostgreSQL database. Furthermore try to add your favorite wine and food using the application.
Cleanup lab 3
Delete project using OpenShift CLI
[student@localhost projects]$ oc delete project lab3Remove the docker images To remove the created docker images during this lab you can do
[student@localhost projects]$ docker images | grep wineapp
REPOSITORY TAG IMAGE ID CREATED SIZE
172.30.1.1:5000/lab3/wineapp-food-service latest 1af952bac3a7 About an hour ago 877.8 MB
172.30.1.1:5000/lab3/wineapp-wine-service latest d934bcff78c4 About an hour ago 873 MB
172.30.1.1:5000/lab3/wineapp-ui latest 3db40e59a493 About an hour ago 775.9 MB
You can remove the image one by one using:
[student@localhost projects]$ docker rmi <image id>For you convenience we have a script called rmlab3 available which removes all images with wineapp in the name:
[student@localhost projects]$ rmlab3