Create a Teiid project and Import Data Source
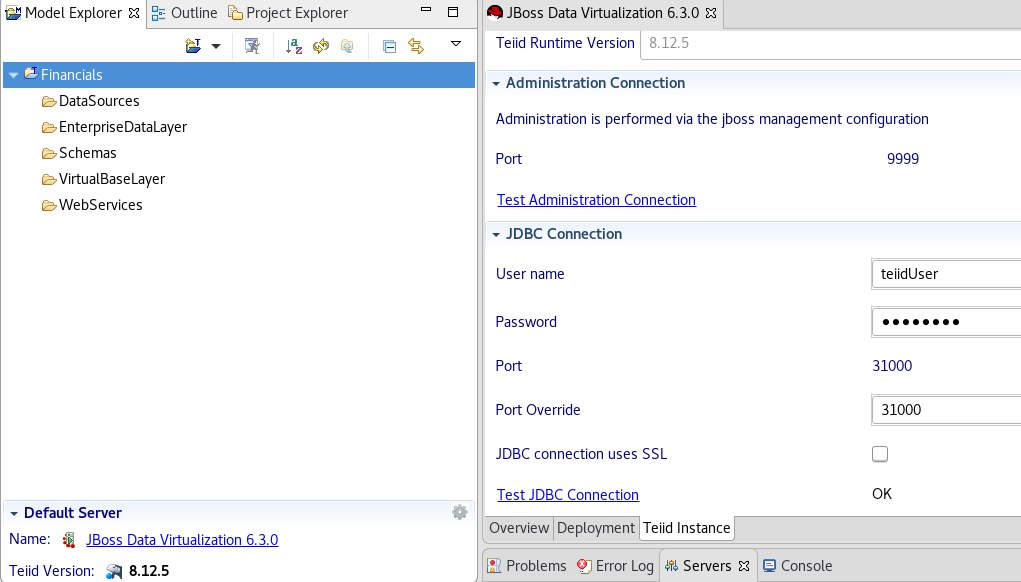
Make sure that the previous labs have been completed so that a Red Hat JBoss Data Virtualization instance is running and JBDS is connected to the Red Hat JBoss Data Virtualization server.
Prerequisites
-
If using the embedded H2 database, you are all set.
-
If using PostgreSQL database, download the PostgreSQL JDBC Driver. If you are using JDK 1.6 then you should use the JDBC4 version. If you are using JDK 1.7 or JDK 1.8 then you should use the JDBC41 version.
-
If using MySQL database, download the MySQL JDBC Driver.
-
Save the JDBC driver in a "well-known" directory
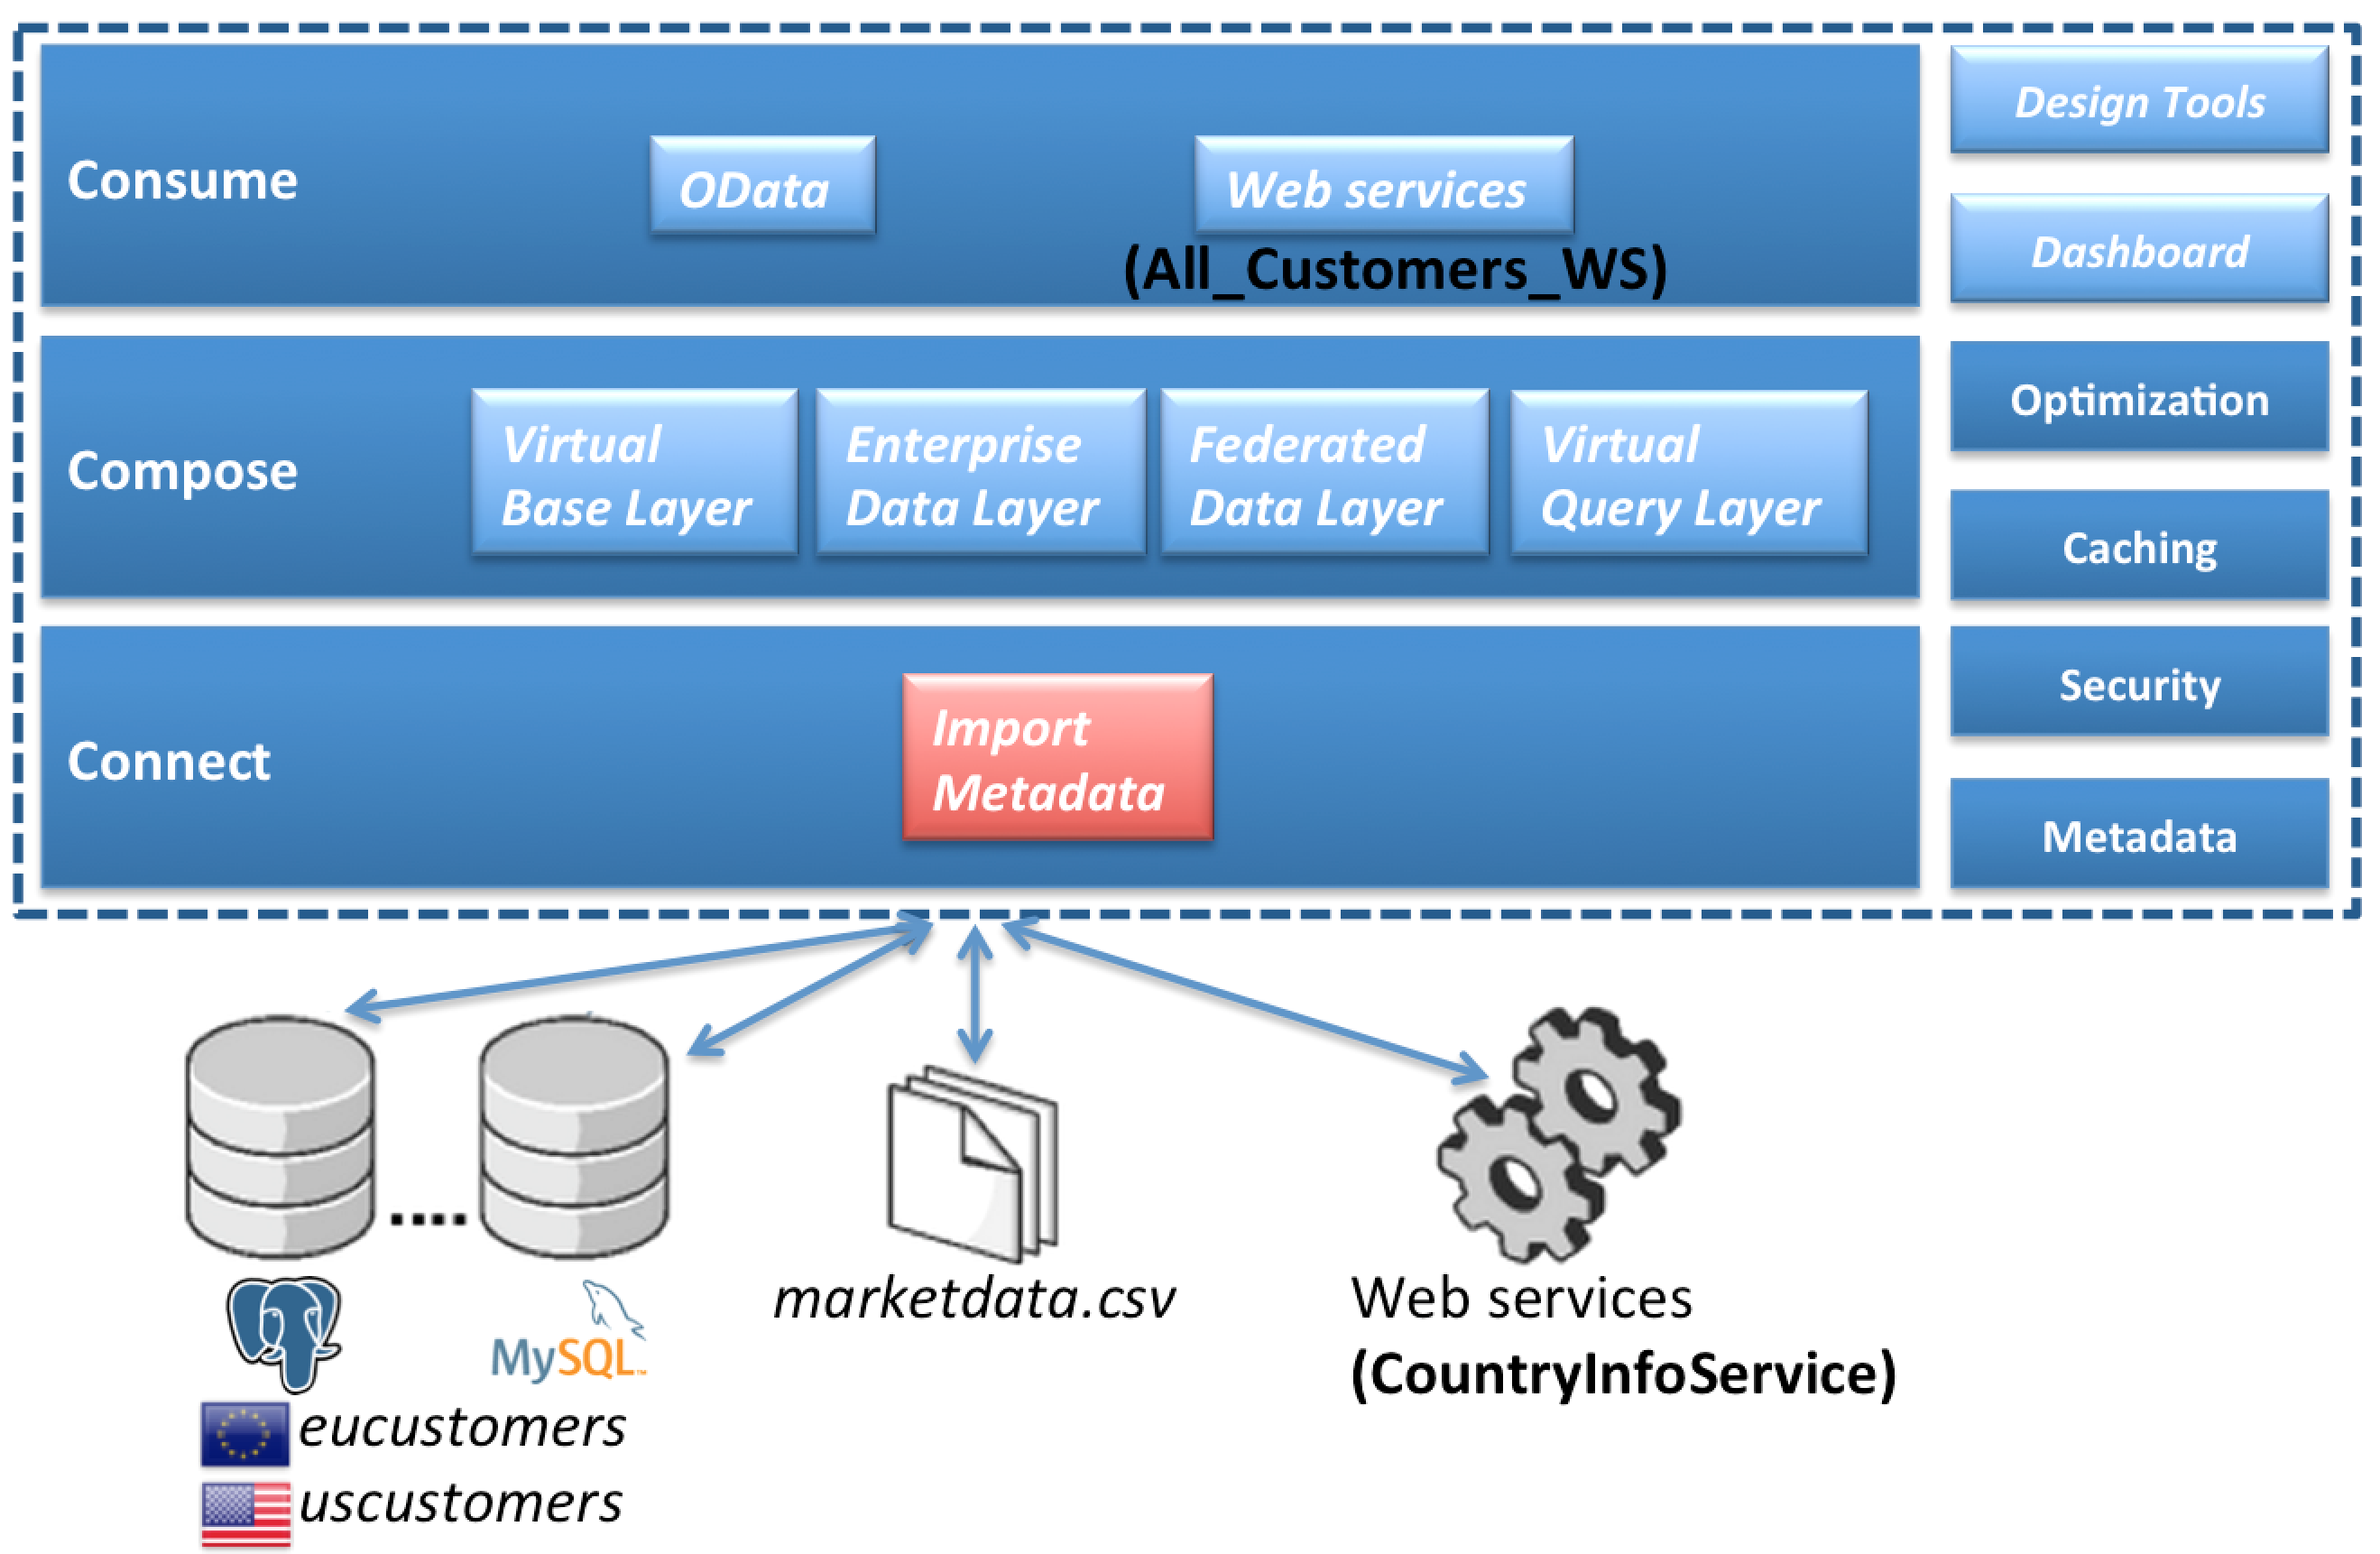
Where are we?
Creating a Teiid Project
Before you can create models of how your data will be exposed or used, you must first create a project. For the purposes of these labs, we will create a project named Financials. This Financials project will be where we create all of our source and view models and Virtual Database (VDB) files. To create the project, from the menu bar on JBDS, select File → New → Teiid Model Project.
The New Model Project wizard will be displayed as below.
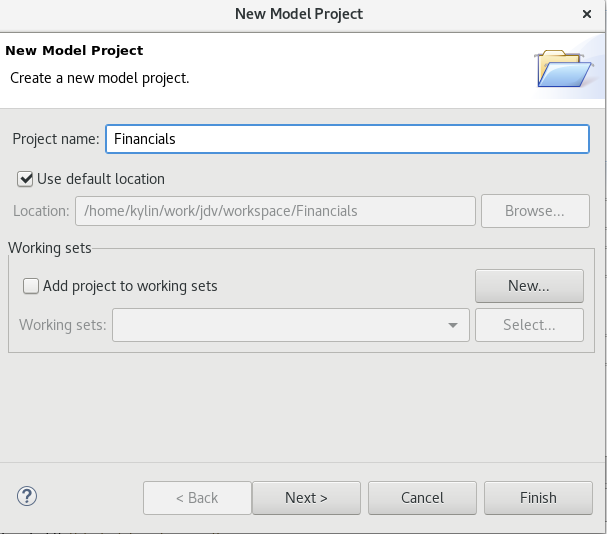
In the project name, enter Financials and keep the remaining defaults. Select the  button.
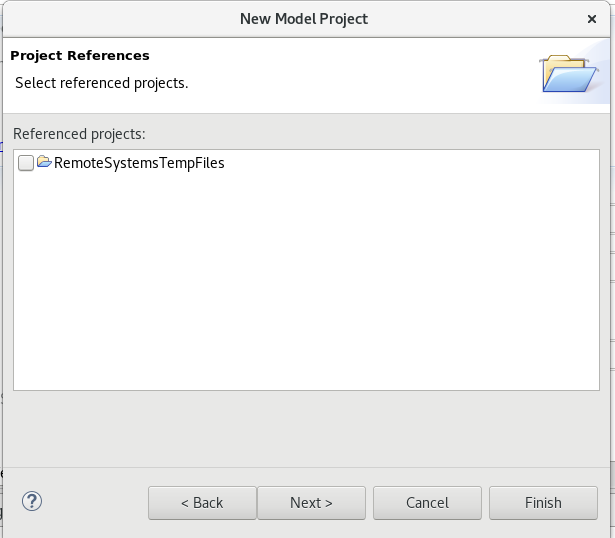
After clicking , the following window is presented for Project References.
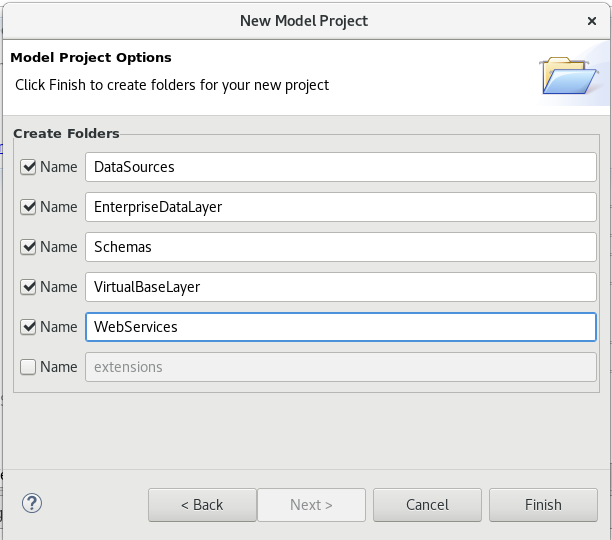
Keep the default and click again. The next window that is presented is the Model Project Options. These are the folders that we will use during the course of building our Financials project. For this lab we will enter DataSources, EnterpriseDataLayer, Schemas, VirtualBaseLayer and WebServices. The Model Project Options window should look like that below.
At this point, you can click the  button.
After expanding the Financials Project, the JBDS Teiid Designer Perspective should look similar to the figure below below.
Creating a Source Model
We must create a source model in order to access physical data or information from a source. The source model (also referred to as the physical model) contains all the metadata necessary for a Virtual Database (VDB) and its associated connectors to access or query data from a target source. There are a few different ways of creating source models. We will first go over the process of creating a source model using the Metadata Import Wizard.
The Metadata Import Wizard helps you create new models in the workspace by importing metadata information from a physical enterprise information system or other data source. When you import metadata, the Designer creates a new metadata model for you. Once you have created this metadata model, you can alter it as you would any other. Keep in mind that any changes you make to an imported metadata model do not impact the underlying structure of the enterprise information system the model represents.
In some cases you can also use the Metadata Import Wizard to update the information within the models based on changes to the underlying data source.
The Teiid Designer comes with a number of plug-ins to import metadata from sources such as JDBC-compliant databases, text files, Salesforce.com, WSDL’s, XML Schemas, and DDL files.
More information on the Import Wizard (and all of the features in the Teiid Designer) is available in the Designer Users Guide.
Importing Metadata from the Product Database
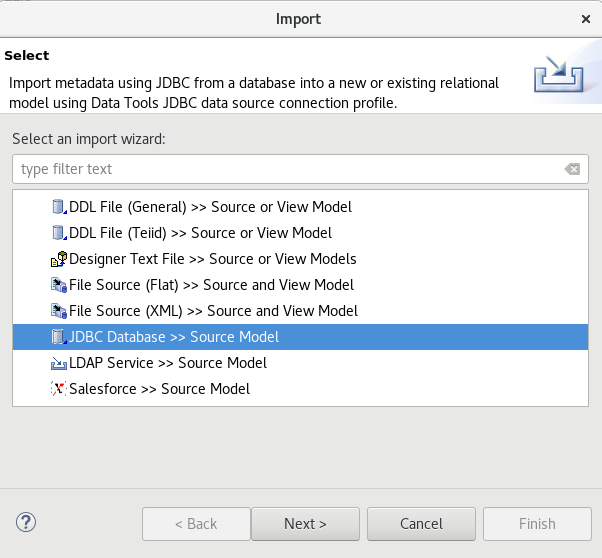
Right-click on the DataSources folder and select Import…. In the Import wizard dialog, select the arrow next to Teiid Designer to expand the import options. Now, select JDBC Database >> Source Model and click .
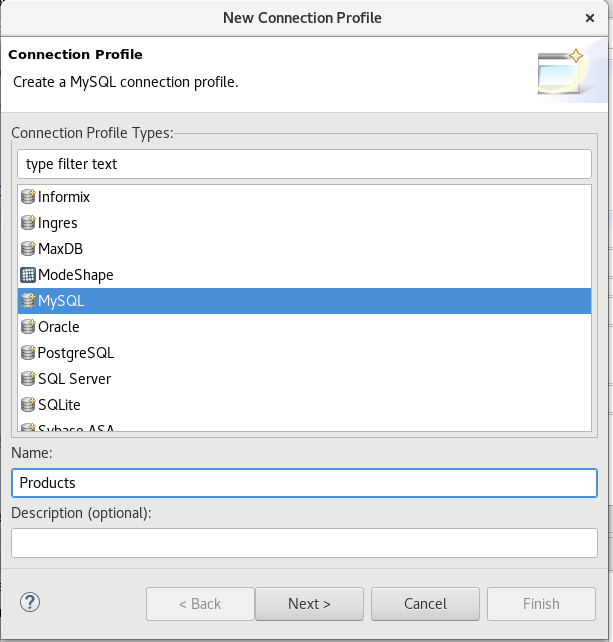
In the Import JDBC Database >> Source Model wizard, you will need to select a Connection Profile. If a connection profile does not exist for the database that contains the Product Schema, then select the New… button to create it.
The Connection Profile Wizard will come up. Scroll through the list to see the supported databases, then choose Generic JDBC for the connection profile type when using the embedded H2 database.
|
Note
|
Do you use the other database types then select the appropriate connectionprofile of your database. |
Enter Products for the Name and click .
The next step of setting up the connection profile is selecting the driver to use. If the driver you need is not listed in the drop-down list of Drivers (and it should not be if this is your first time through these steps).
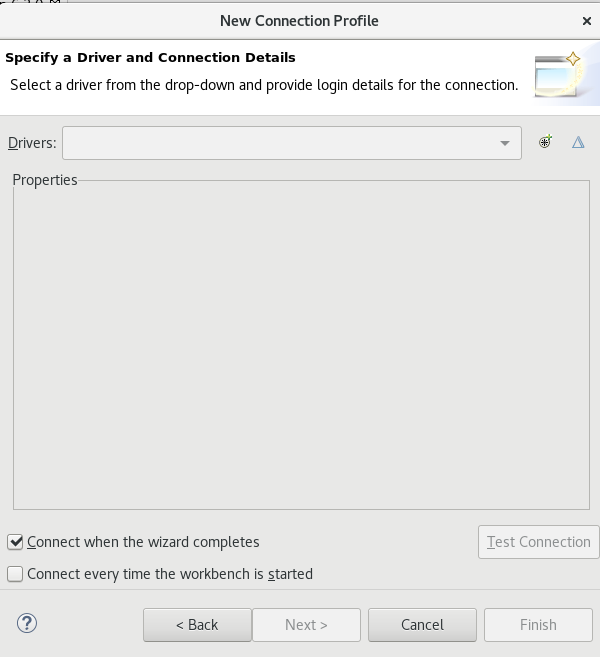
Then select the cross-haired icon New Driver Definition which is the first button to the right of Drivers drop-down list.
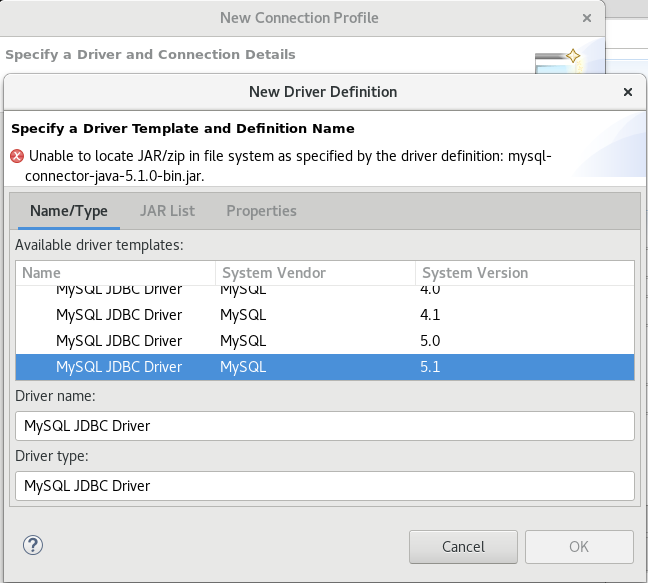
In the New Driver Definition dialog, select the Generic JDBC driver for Mysql JDBC Driver. It will indicate that the driver JAR is not found.

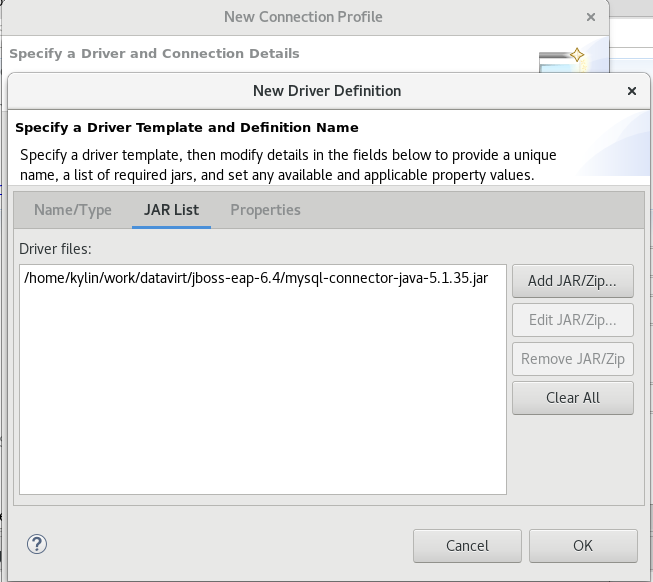
Click on the JAR List tab in the New Driver Definition wizard and click the Add JAR/Zip button to select the MYSQL JDBC driver file to use to access the Mysql jar that is part of your JDV installation. Select the Mysql JDBC driver file from the directory where this file is created after the installation.
Click on the Properties tab to set the properties of the Mysql JDBC driver as depicted below.
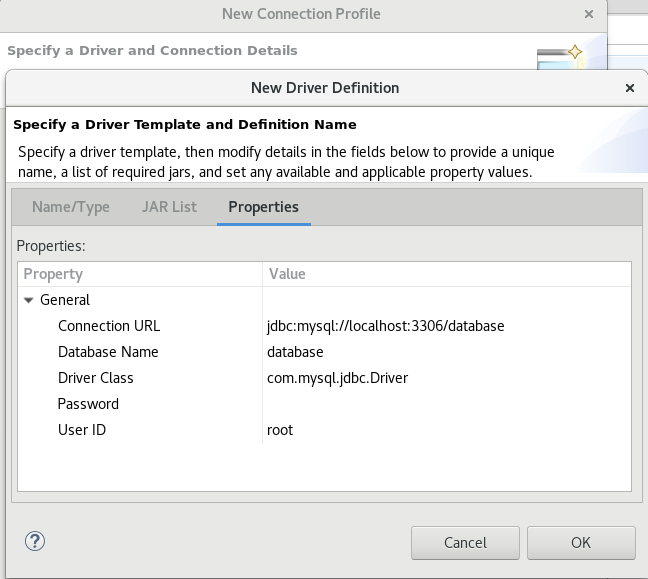
Click  . After clicking , the warning that the JAR file could not be found will go away. Click to return to the previous wizard.
Now that If the H2 driver has been selected, you can fill in the database, url, username, and password for the connection profile.
Use the following values:
| Database | URL | Username | Password |
|---|---|---|---|
Products |
jdbc:h2:/Users/cvanball/Projects/git/DVWorkshop/dv-docker/h2-layer/products |
sa |
sa |
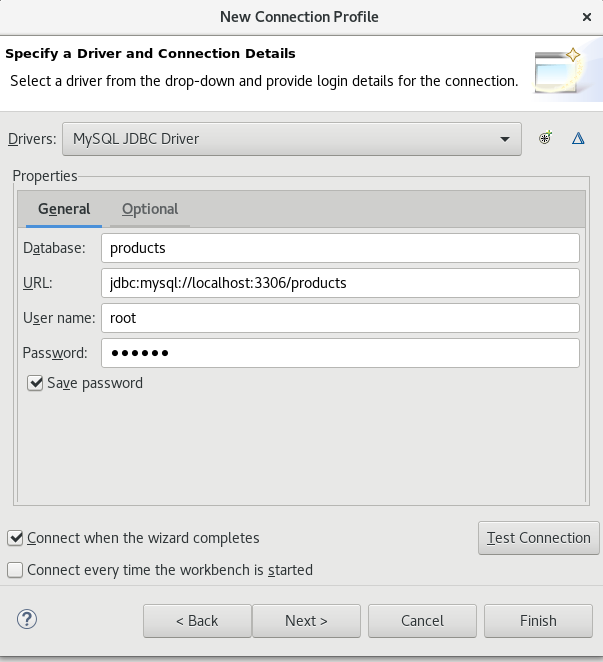
Go ahead and check the Save password checkbox. Your JDBC Connection Profile wizard should resemble that below. Click Test Connection. A successful ping should return. If it does not, please raise your hand. Click .
After clicking Finish, your Import Database via JDBC wizard should look like that below.
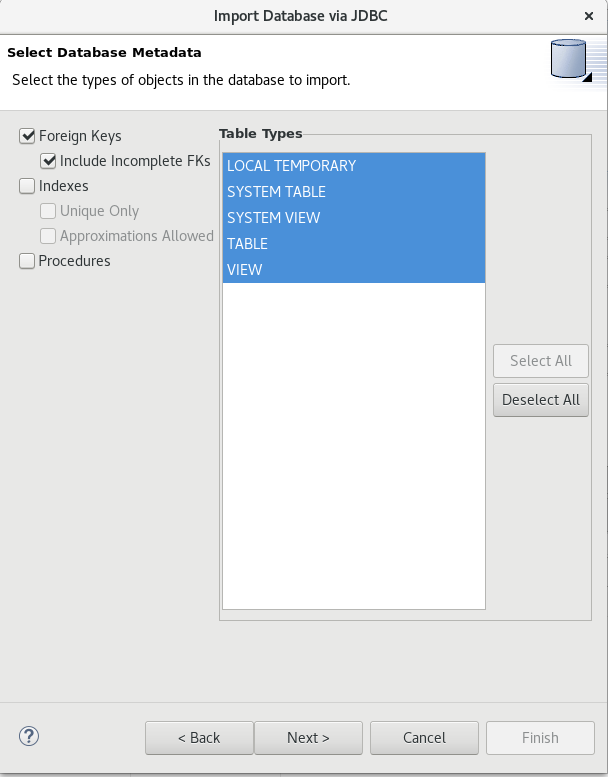
From this point, clicking will take you to the dialog to select the metadata types that will be included when imported. The metadata that will be selected is indicated in the illustration below.
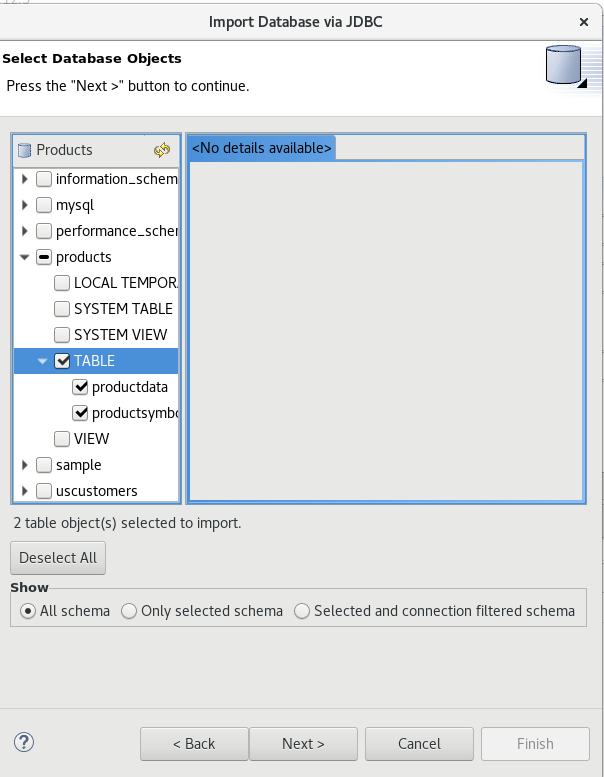
Once your database metadata selections have been made, click the button. This will bring up the Select Database Objects dialogue. Be sure to click the arrow icon next to public in the Products database to expand the tree to show all objects available to import. Select the TABLE option, this will select the two tables we want to import.
Specifically, your dialogue for select database objects should look like that below.
If your dialogue looks like that above, click the button. This will bring up the final screen of the JDBC Import Wizard as indicated below.
Notice that there is a requirement to select which folder this model should be created in. To the right of the Into Folder attribute, there is a button with … on it. Click this button and the following screen will be shown.
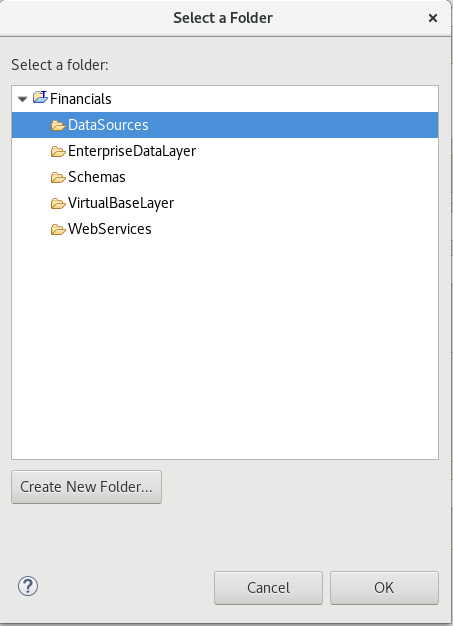
Select the DataSources folder as indicated above. Once the folder has been selected, click the button. This will bring us back to the final screen of the Import Database via JDBC wizard. Your screen should look like the one below.
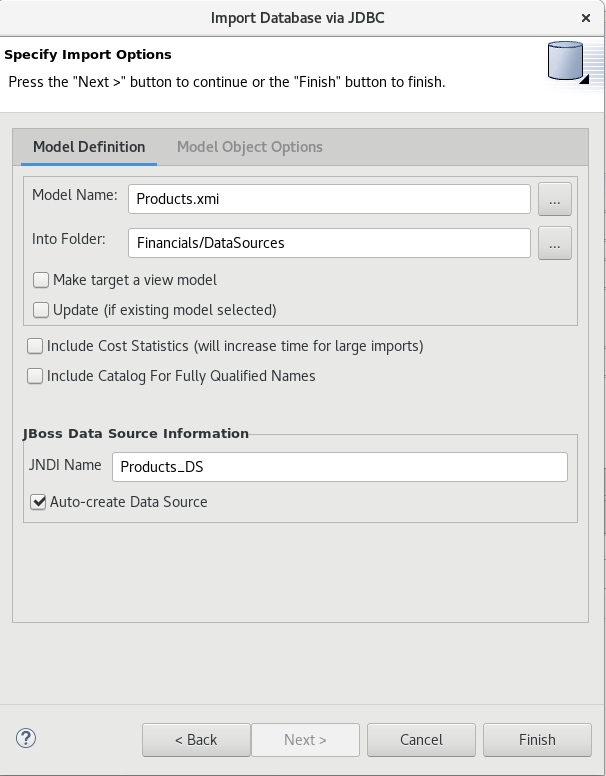
To keep the table names simple, make sure the Use Fully Qualified Names checkbox is unchecked. After verifying it matches, click the button.
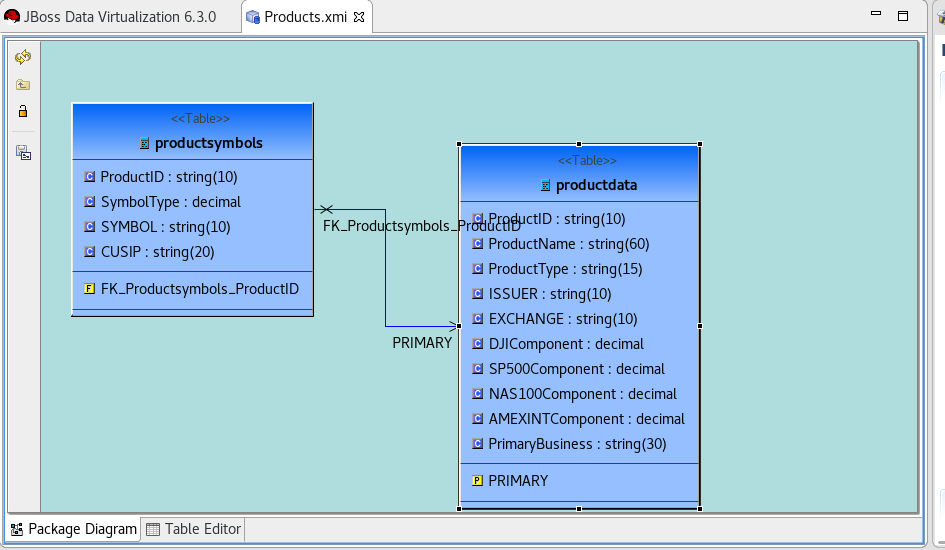
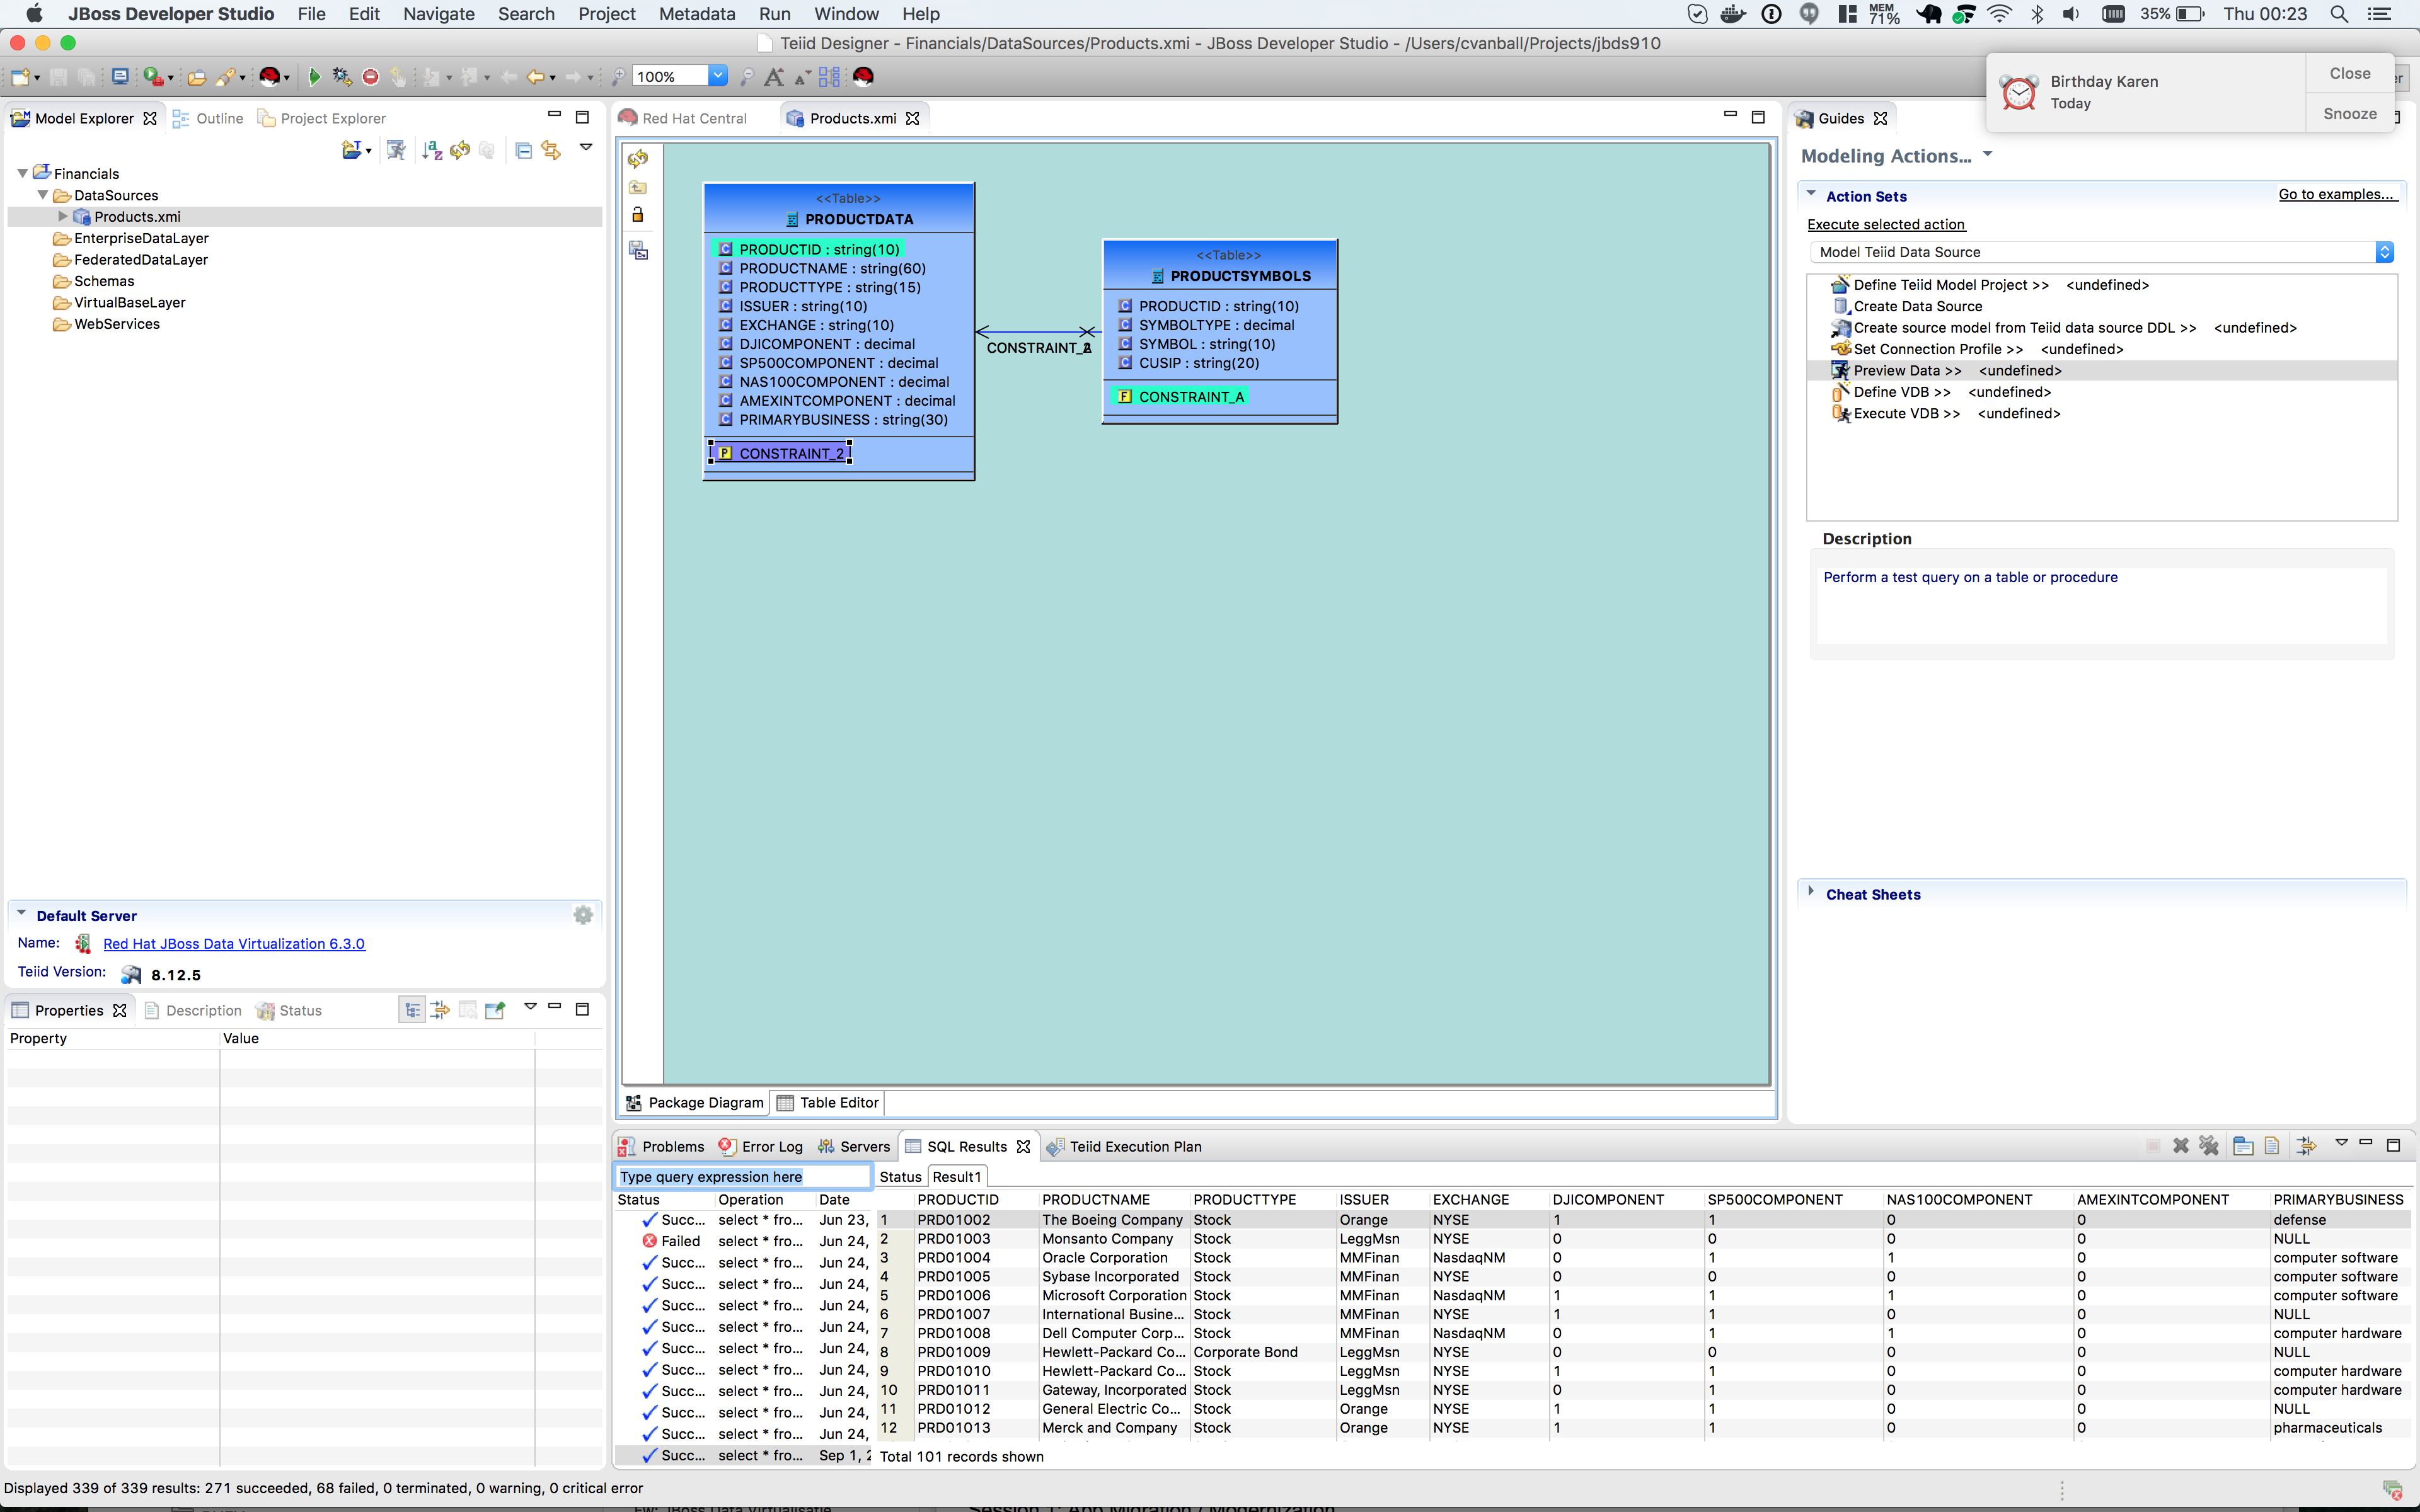
You will now see the Products.xmi source model was opened and its Package Diagram can be seen in the model view area. Click on productdata_pkey (the primary key of the productdata table at the bottom) and note that the Primary Key (productid) in productdata and the Foreign Key (productid) in the productssymbols table are highlighted. This is because Teiid Designer knows via the metadata that all of these elements are related.
Preview Data via the Teiid Server
With an active Teiid Server connection, all physical models that have been imported, along with any virtual models that are built on top of them, can be sampled (previewed) with the simple click of a button.
To do this, let’s utilize the Modeling Actions palette on the right-hand side of the Designer. Select Model JDBC Source and to Preview data, double-click on the Preview Data action. This will bring up the Preview Data dialogue as indicated below.
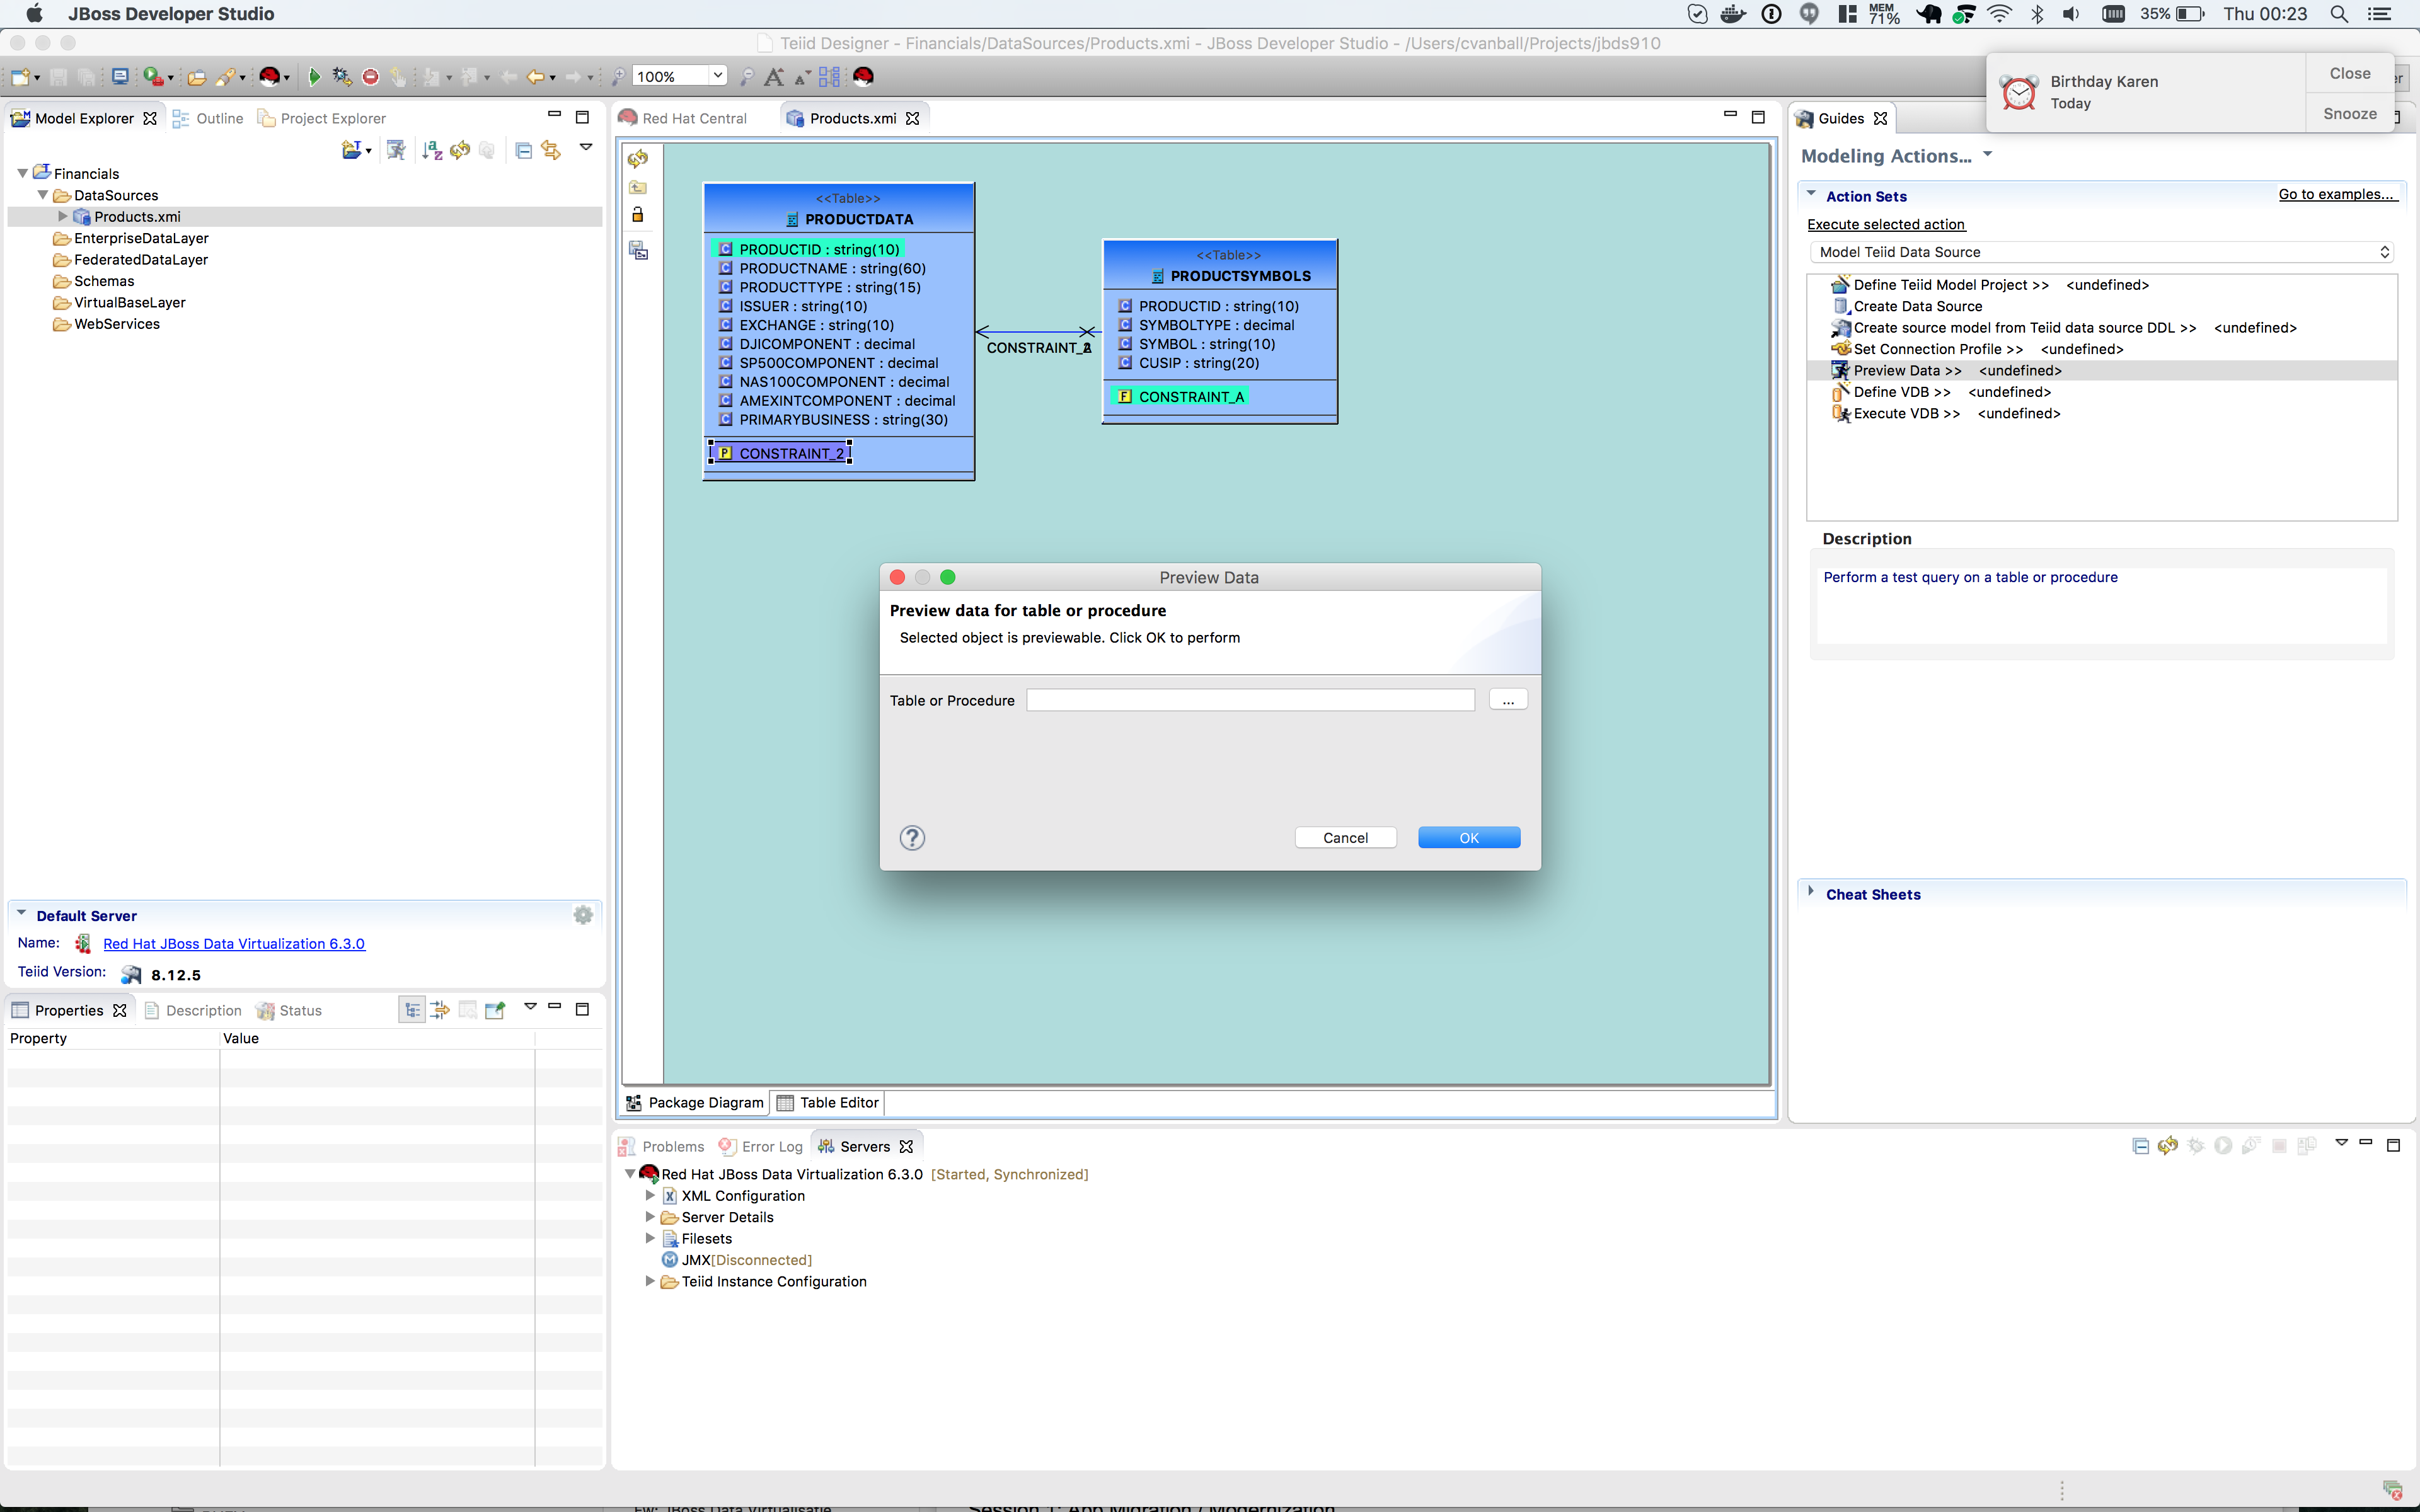
Click the btn:[…] button to open up a Table or Procedure Selection window. This allows us to drill-down into the tables that we wish to preview data for.
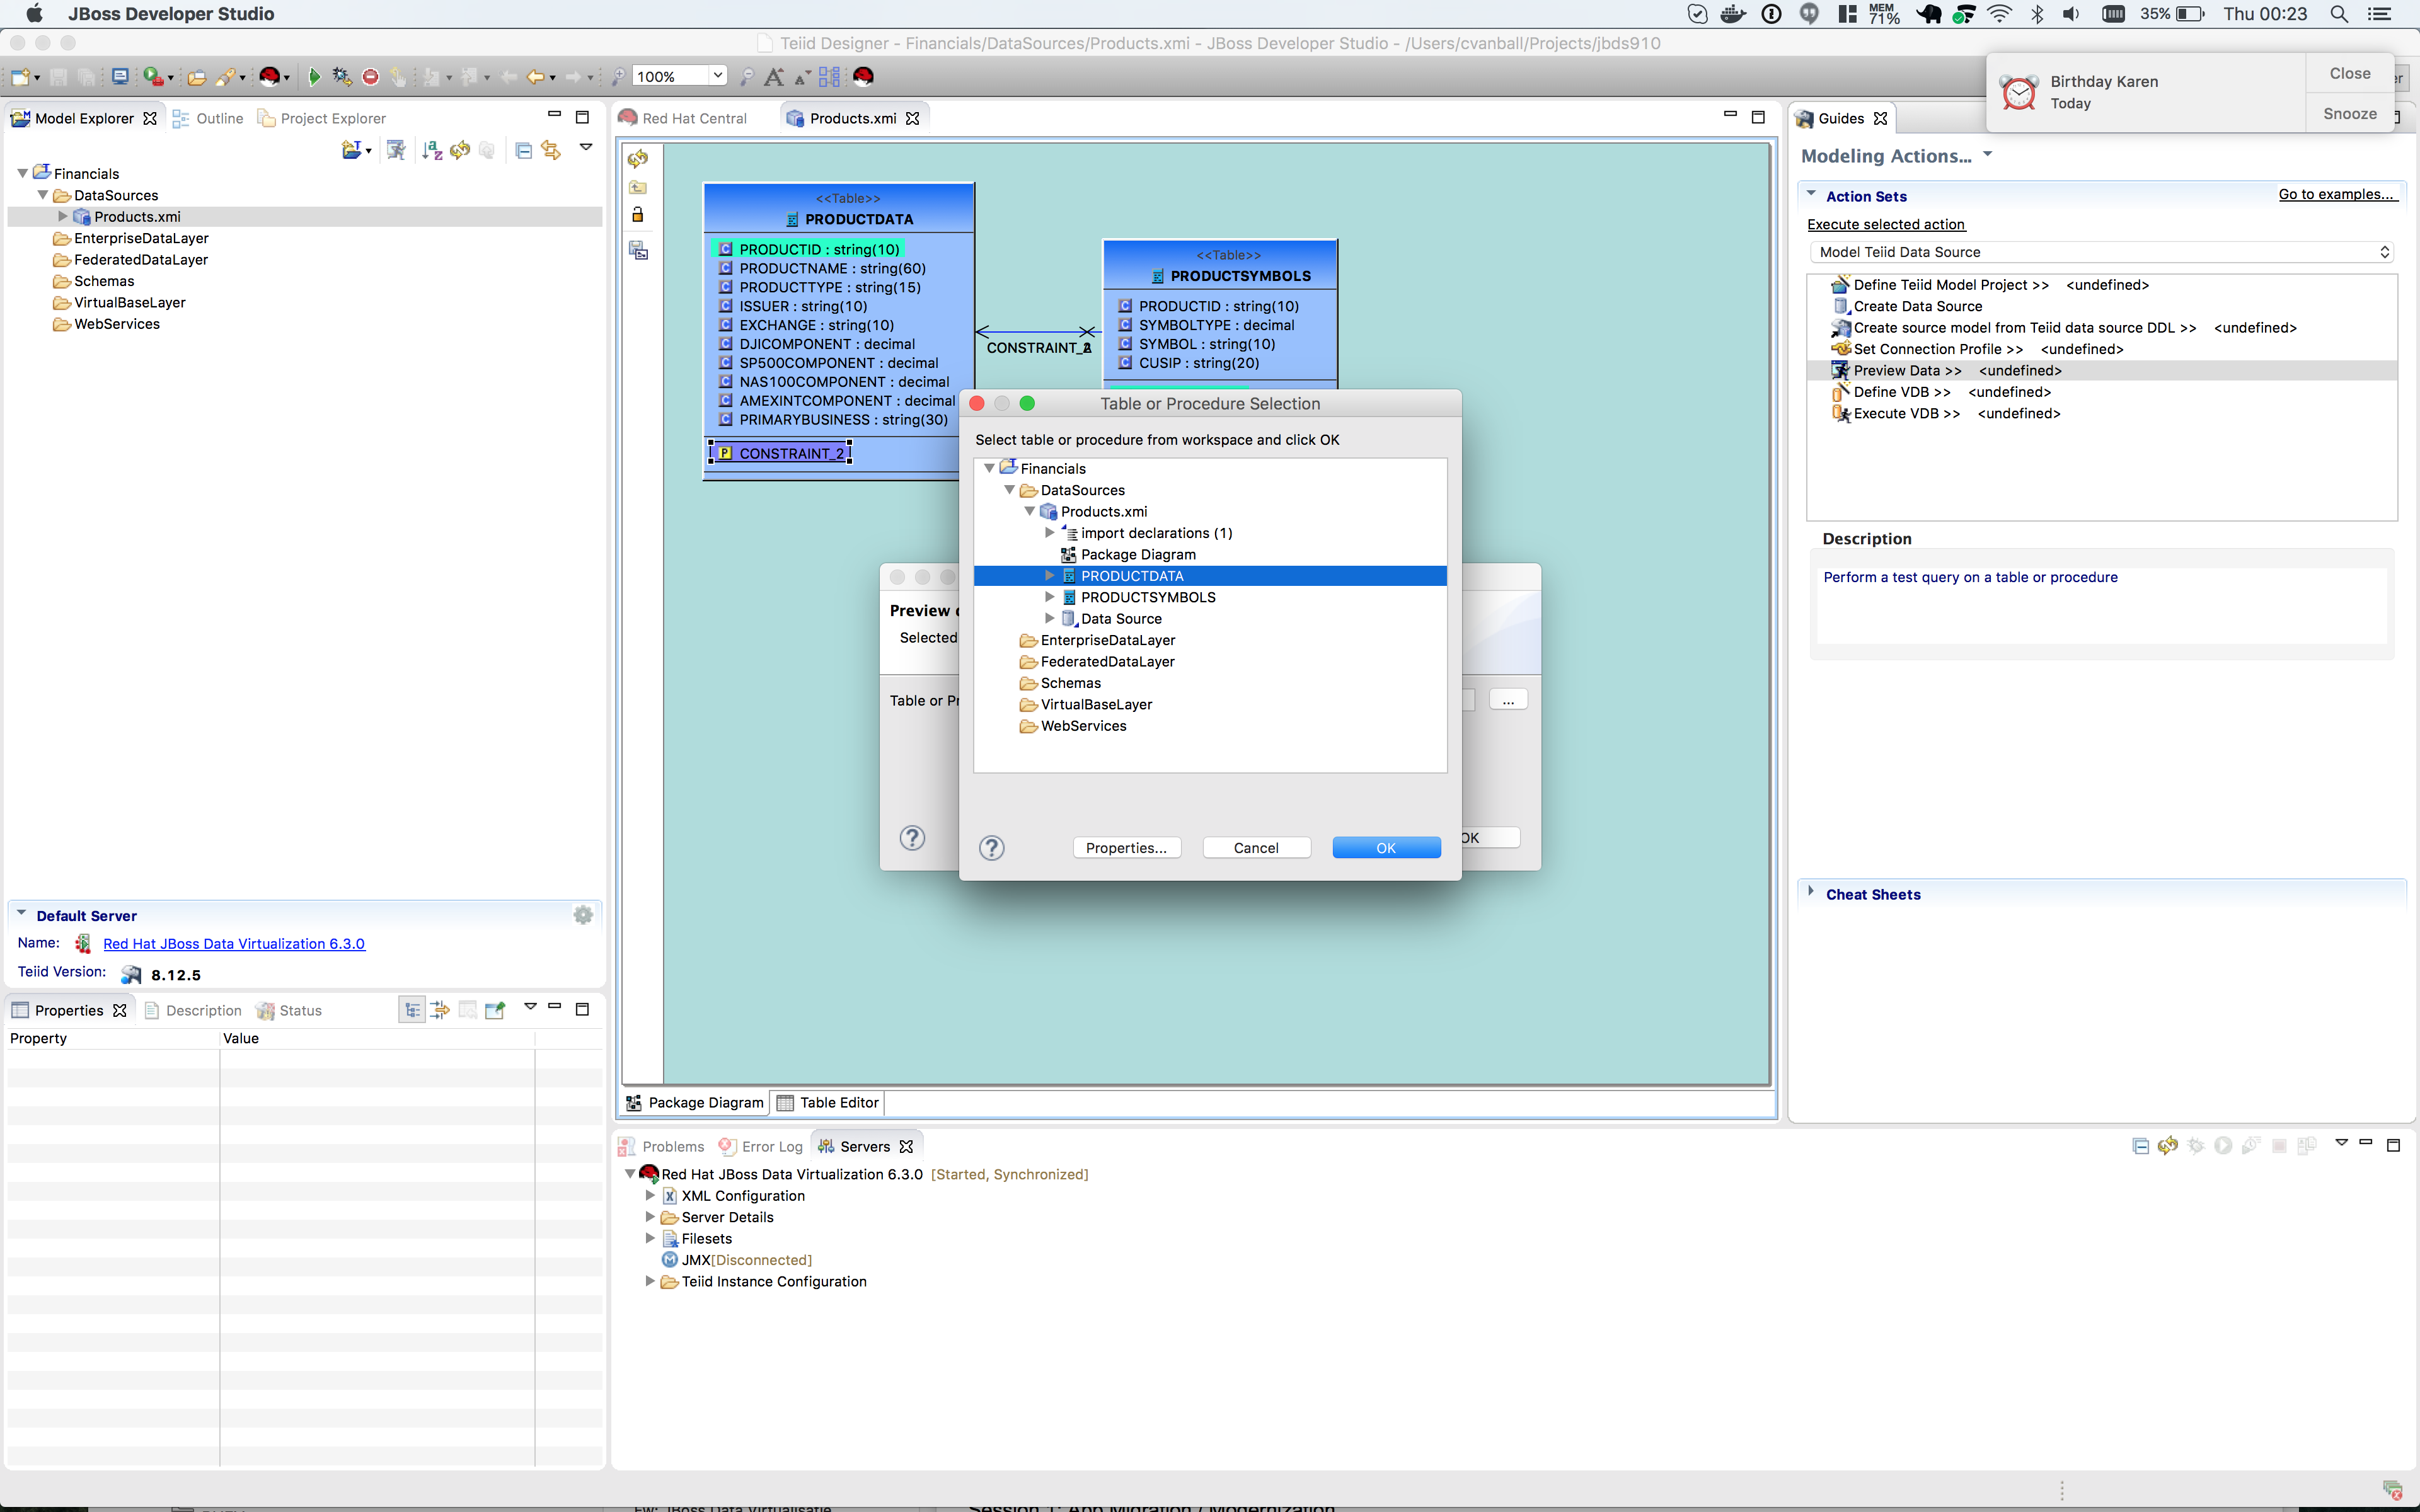
For this lab, simply expand Financials, DataSources, and Products.xmi in order to select the productdata table as indicated in the illustration below.
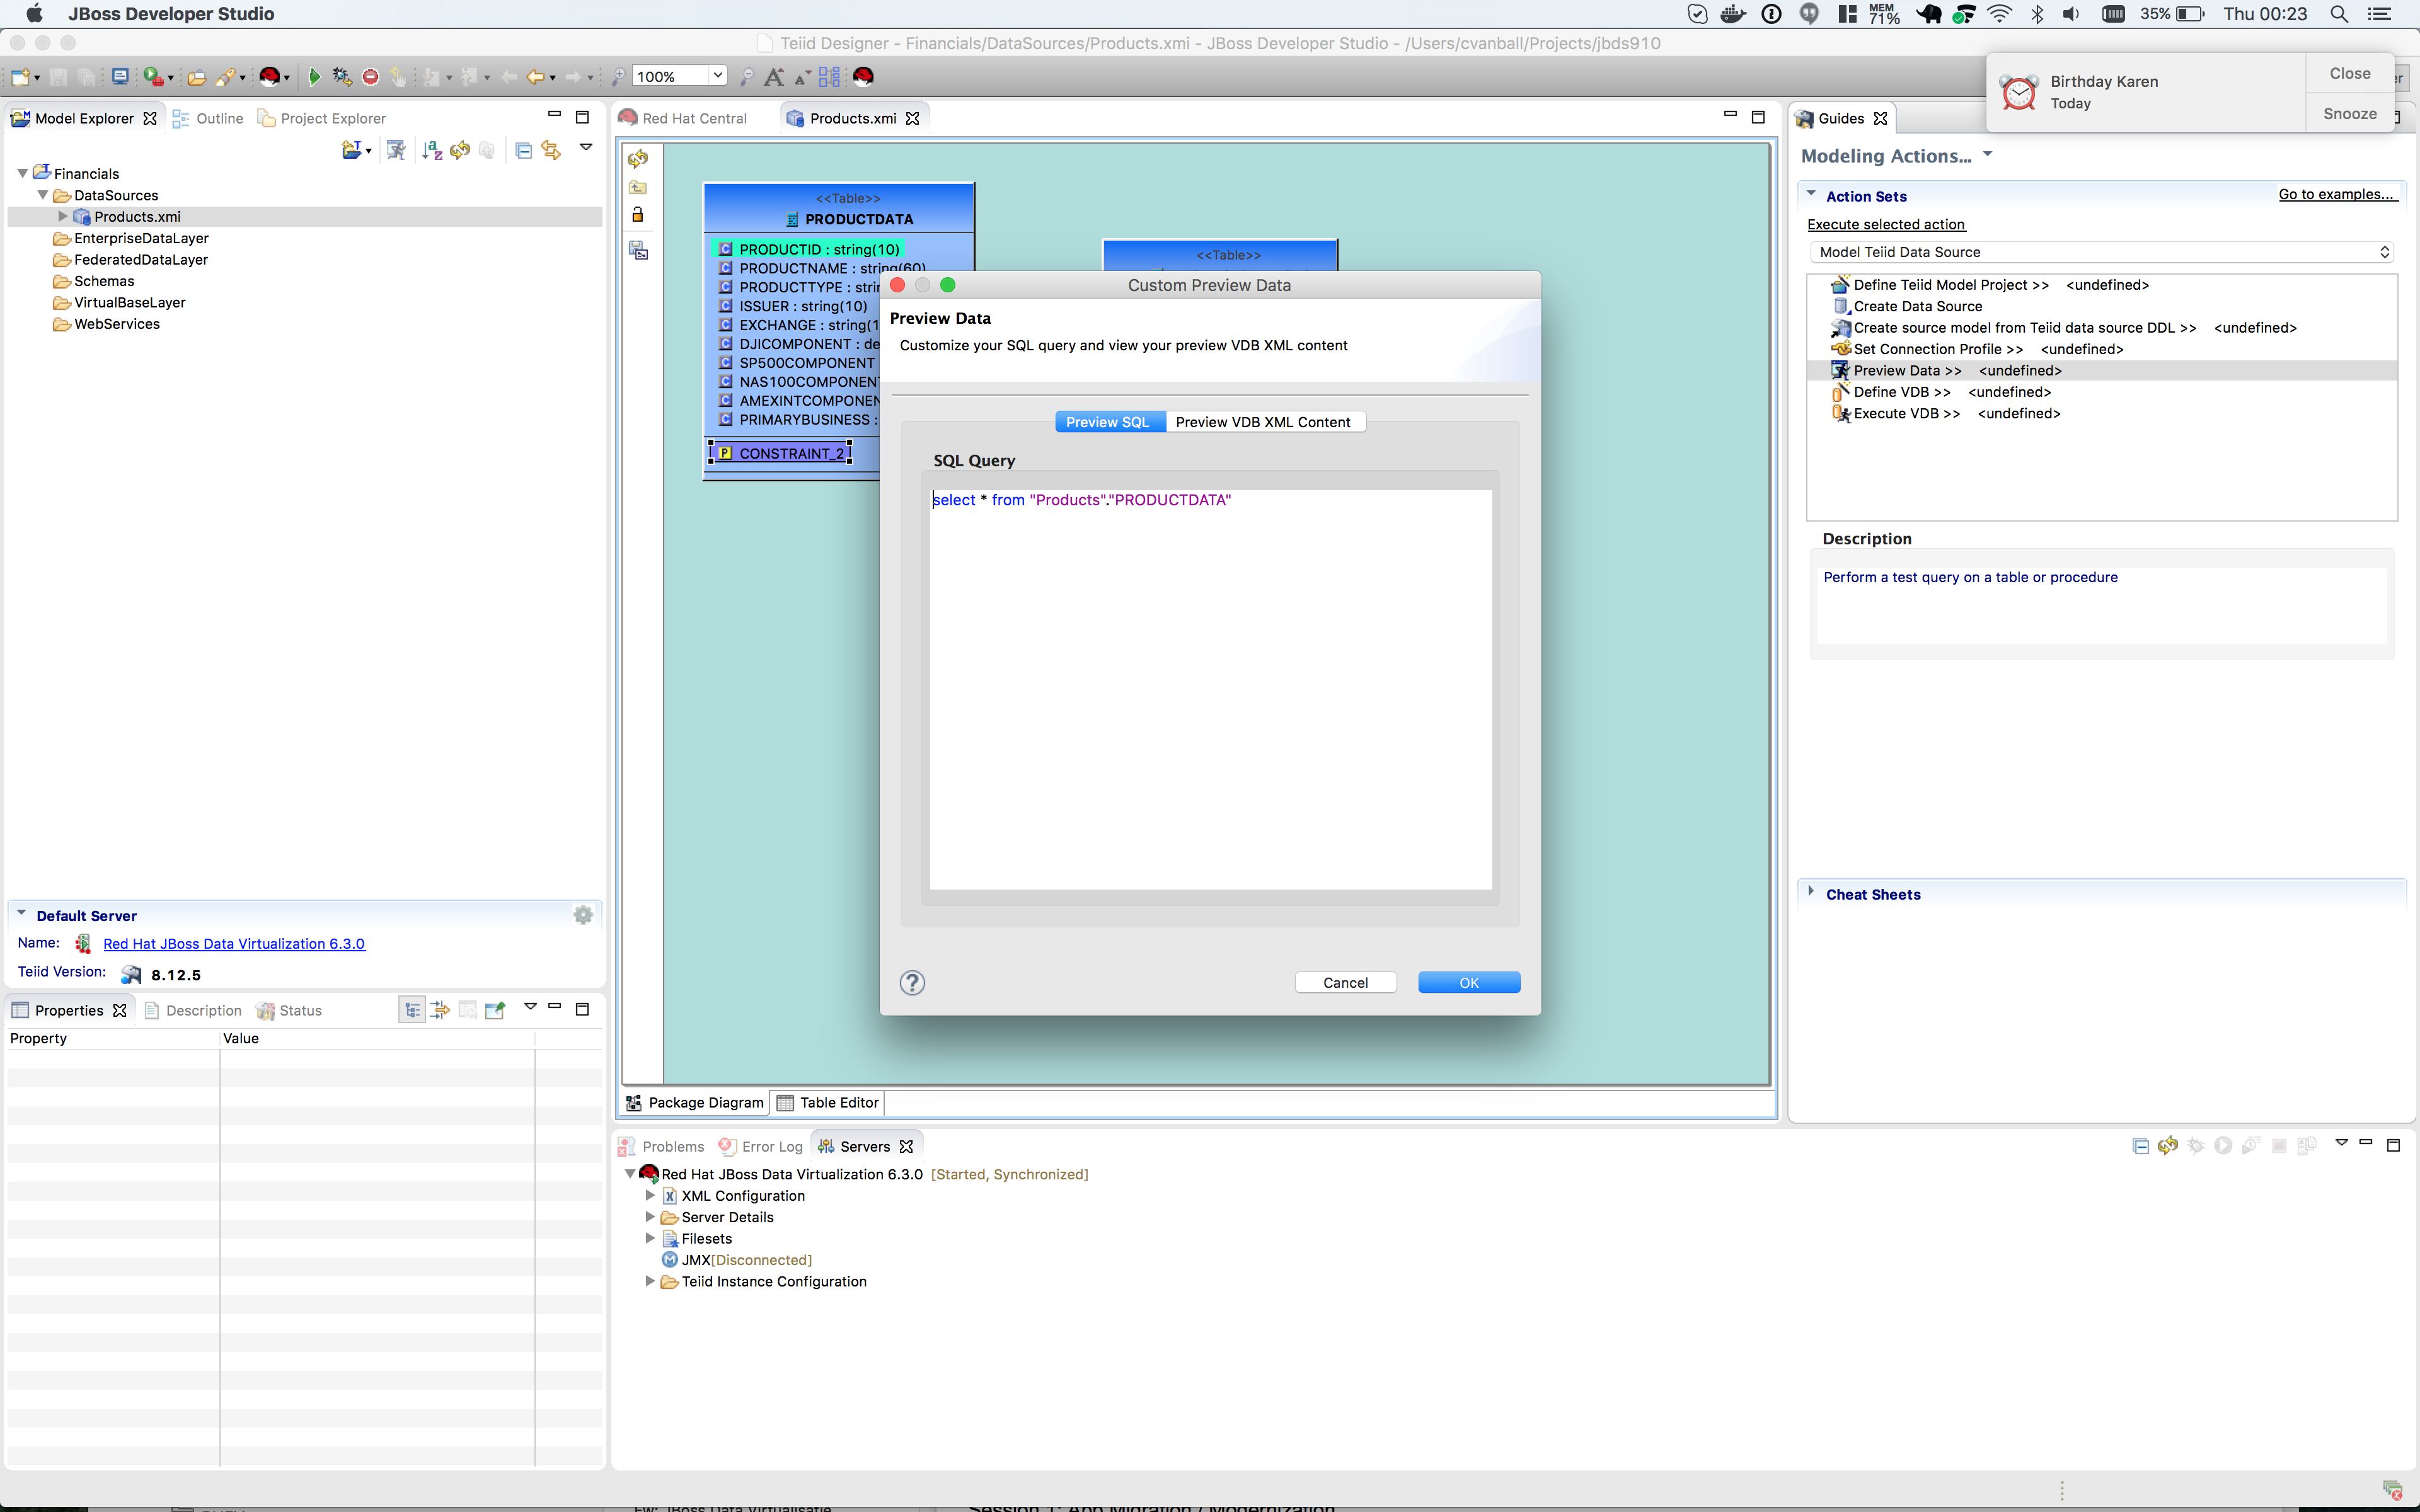
This will bring us back to the Preview Data window where it should look like the one below.

Once you click btn:[OK], the Custom Preview Data window will appear and give the possibility to customize the SQL statement.
Click btn:[OK]. A dialog window indicate that there are some temporary artifacts being deployed to the Teiid Server in order to preview the data.
Finally, there will be two additional views that will open along the bottom of JBDS. Specifically, the SQL Results and Teiid Execution Plan tab views.
A successful execution will yield sample results as indicated in the illustration below.
Import Metadata from the uscustomers and eucustomers Databases
We will now create source models that represent the US_Customers and EU_Customers from our databases. We will again import the metadata using the Import Database via JDBC Wizard to create the model. Use the steps from the previous section to import the two schemas.
Name the Models US_Customers and EU_Customers and only import the table metadata for the tables ACCOUNT, ACCOUNTHOLDINGS, and CUSTOMER. The database names for these two sources are uscustomers and eucustomers respectively. The username/password combination is the same as for the products database. You will need to create a new Connection Profile for each source but you can reuse the H2 JDBC driver that was previously referenced.
Additionally, feel free to preview data for these two additional data sources using the steps that were outlined above.
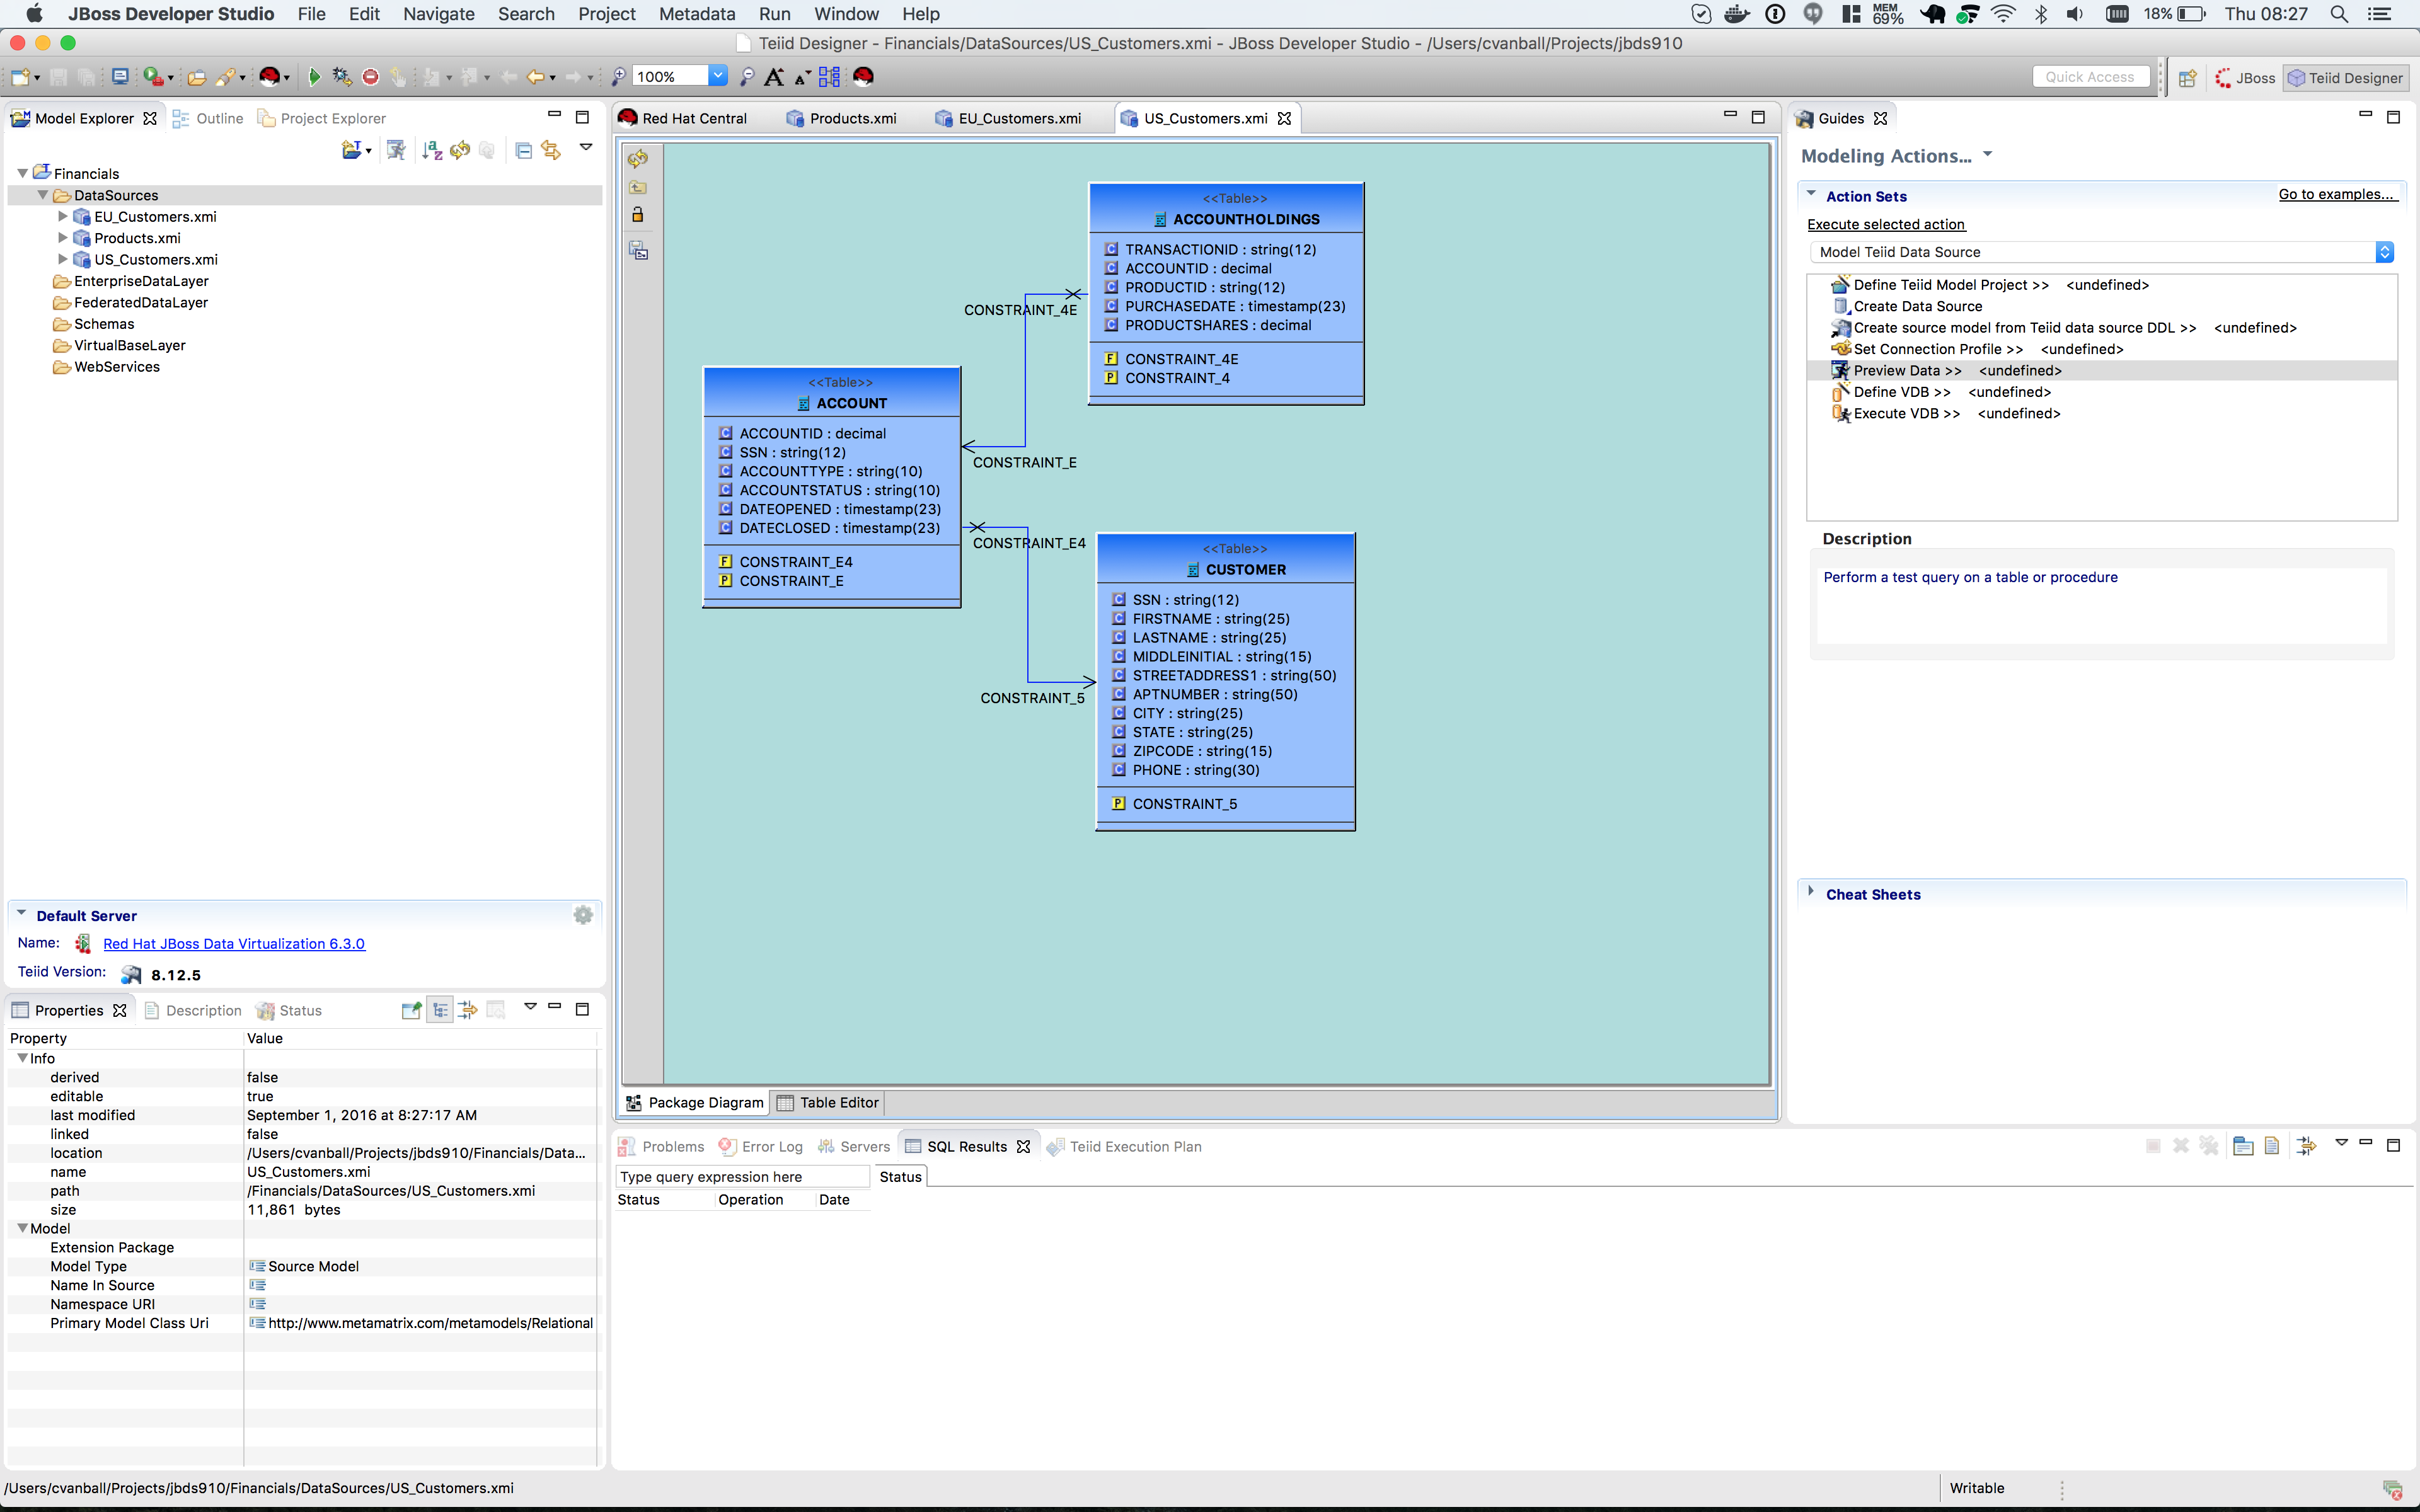
When you have completed the imports, the Package Diagram and Model Explorer for US_Customers, for example, will look similar to the following illustration.
Import Metadata from a flat file
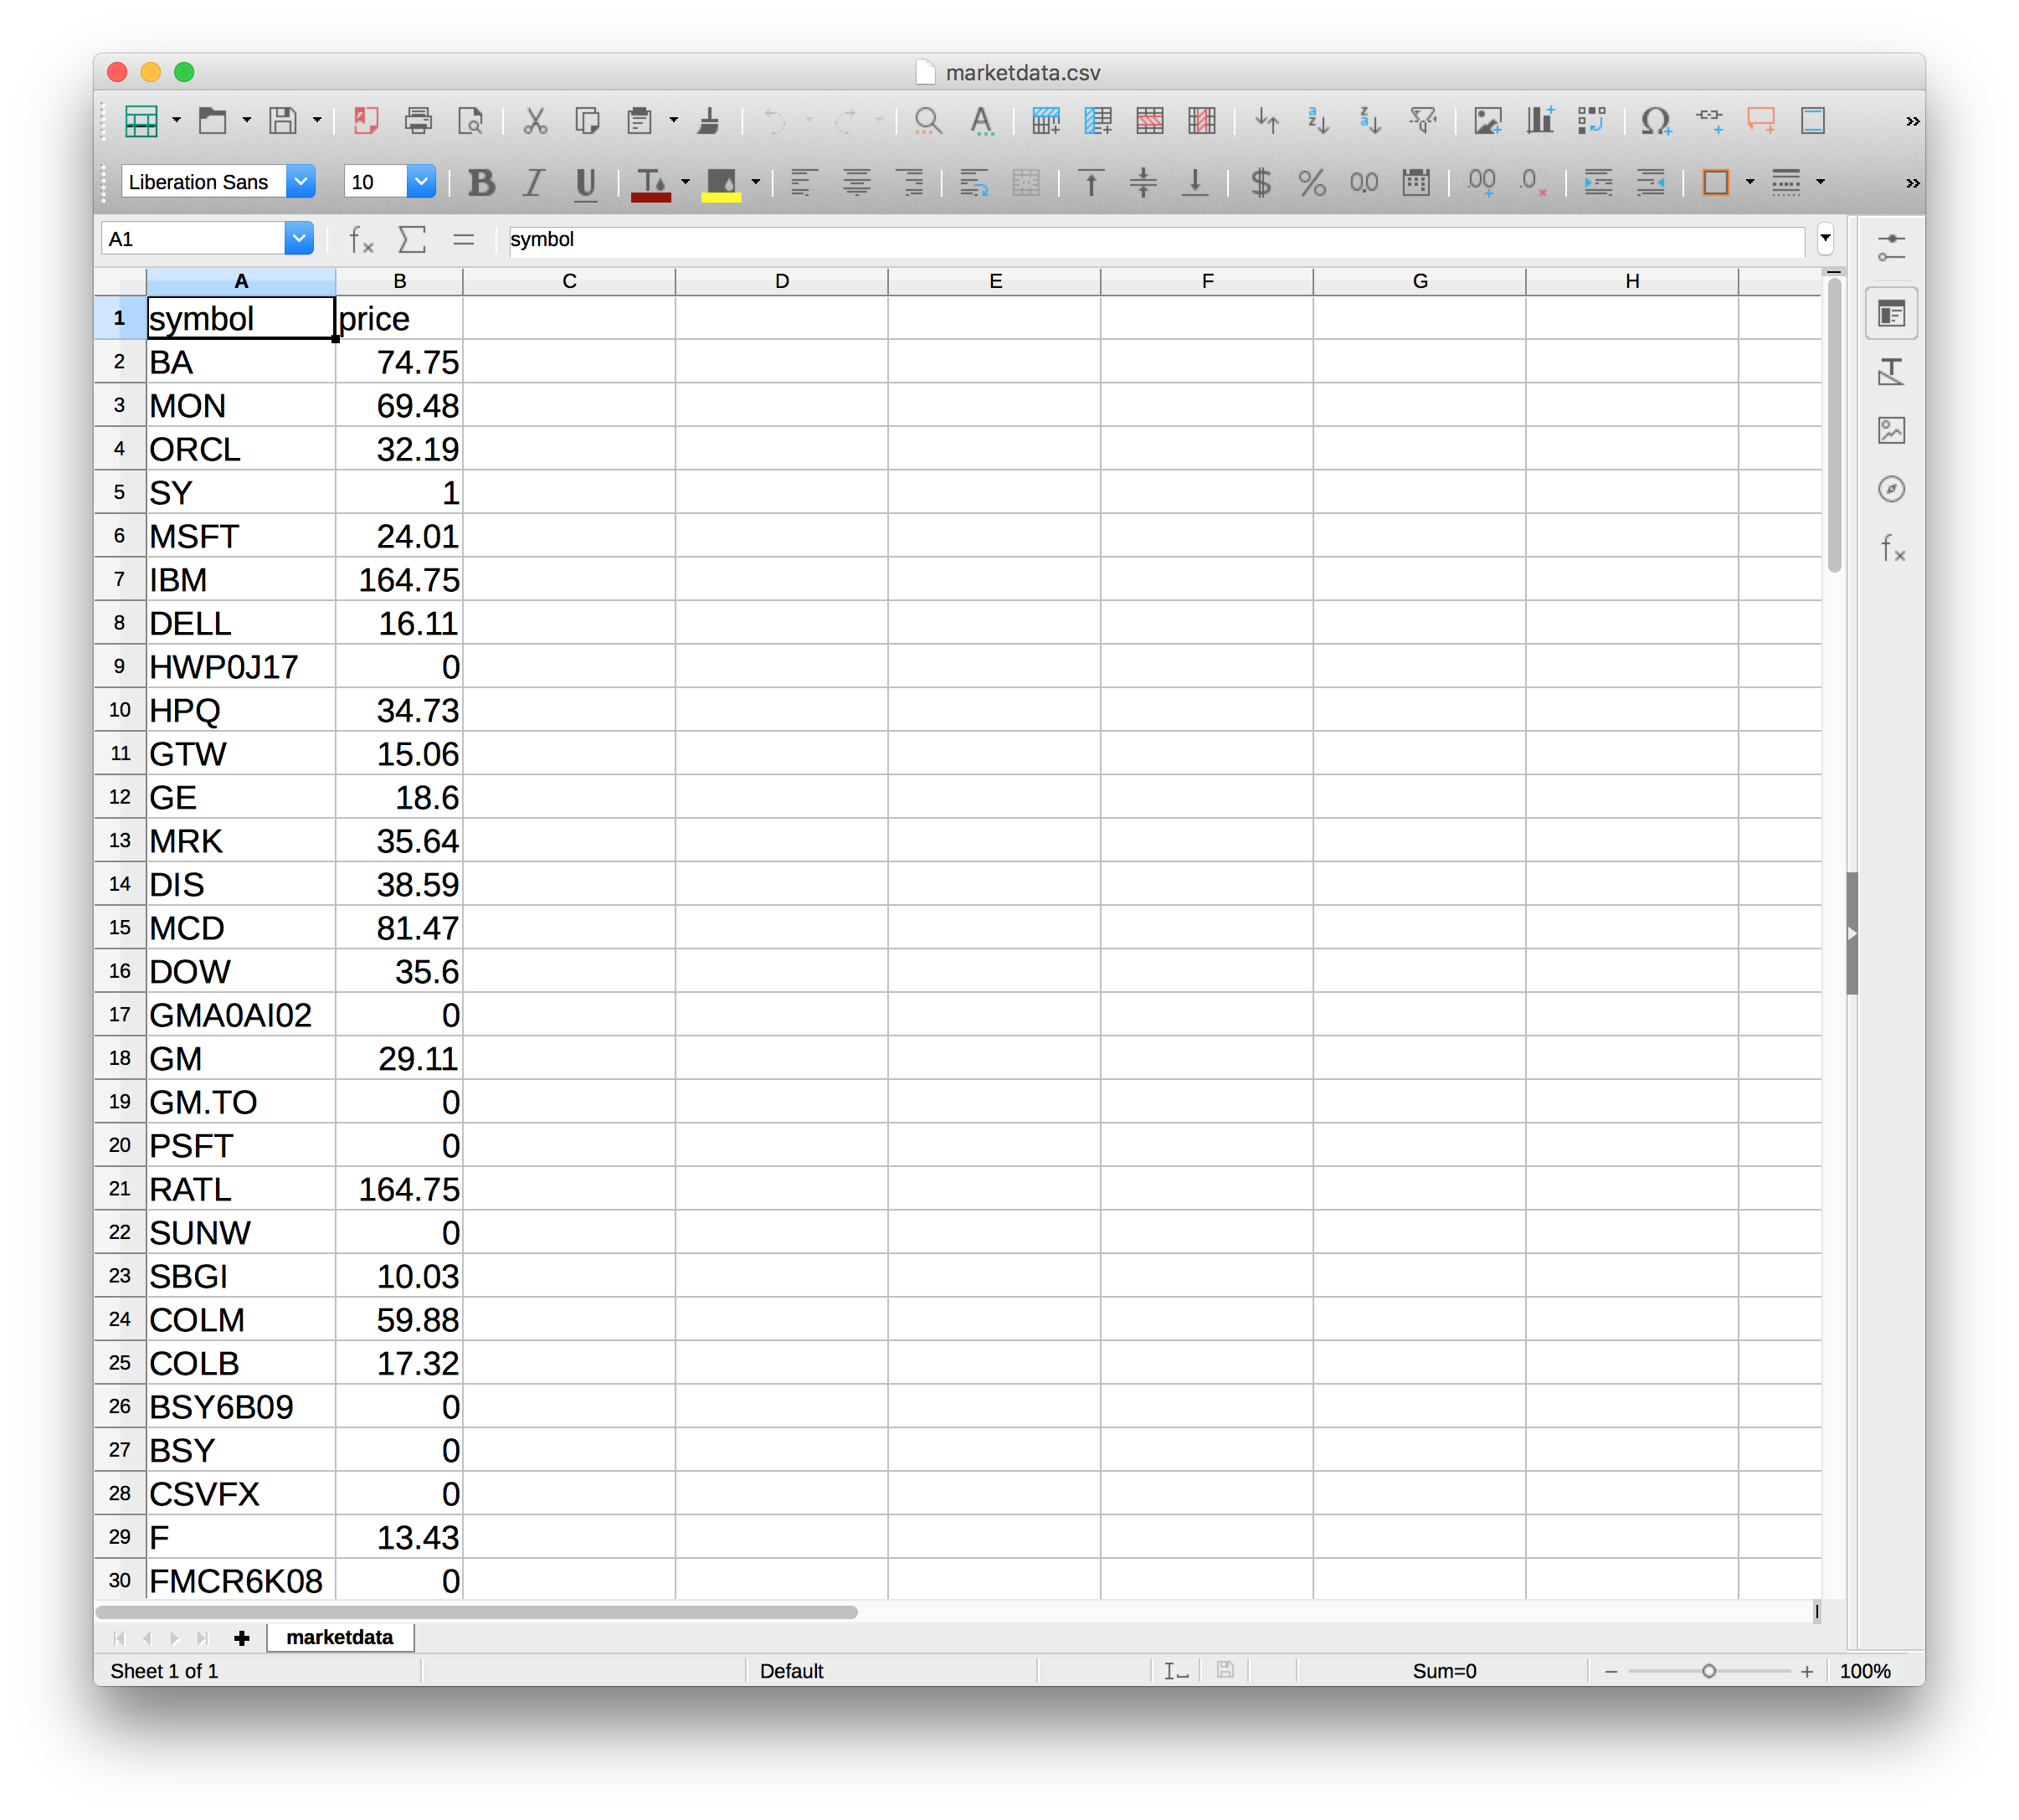
So far we have been connecting to relational databases and their tables. You can connect to other types of data sources within the perspective. In this section we will connect to a flat file in a CSV (Comma Separated Values) format which contains market information as seen in the image below:
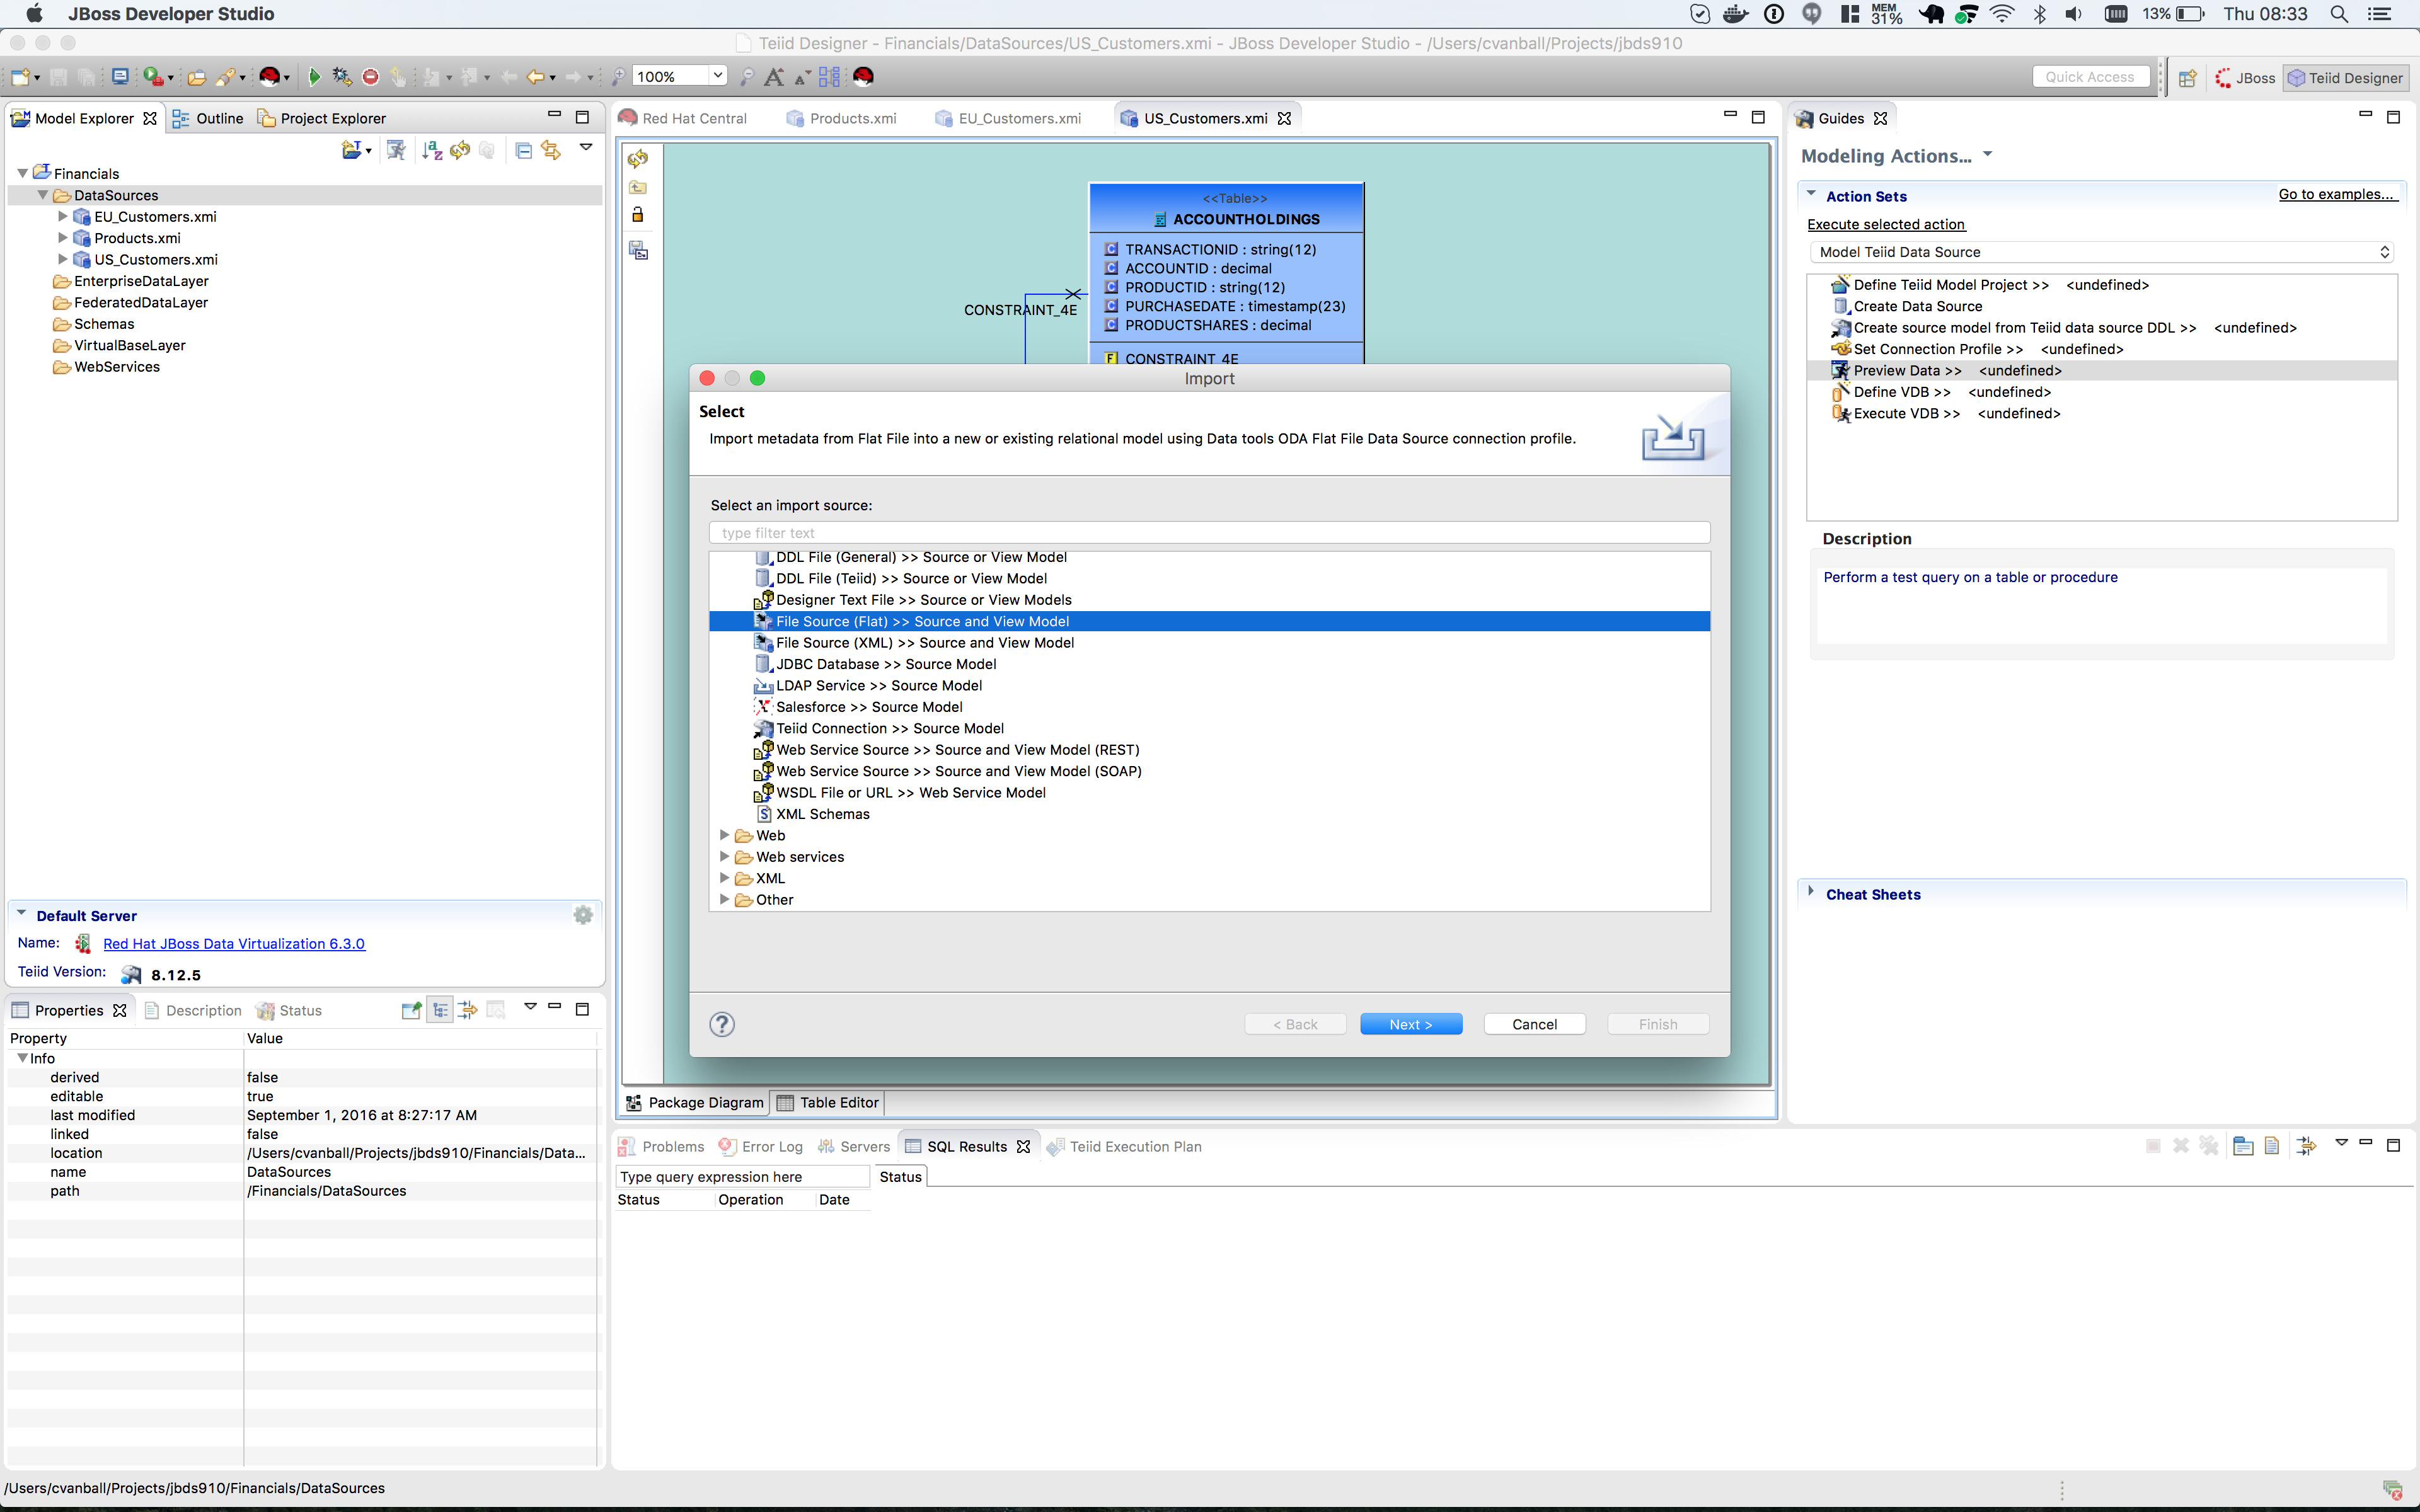
As with the steps above you will need to right-click on the DataSources folder and select import. This time you will select the File Source (Flat) >> Source and View Model to import a data source.
Click the btn:[Next >] button. The File Import File Options dialog box will appear.
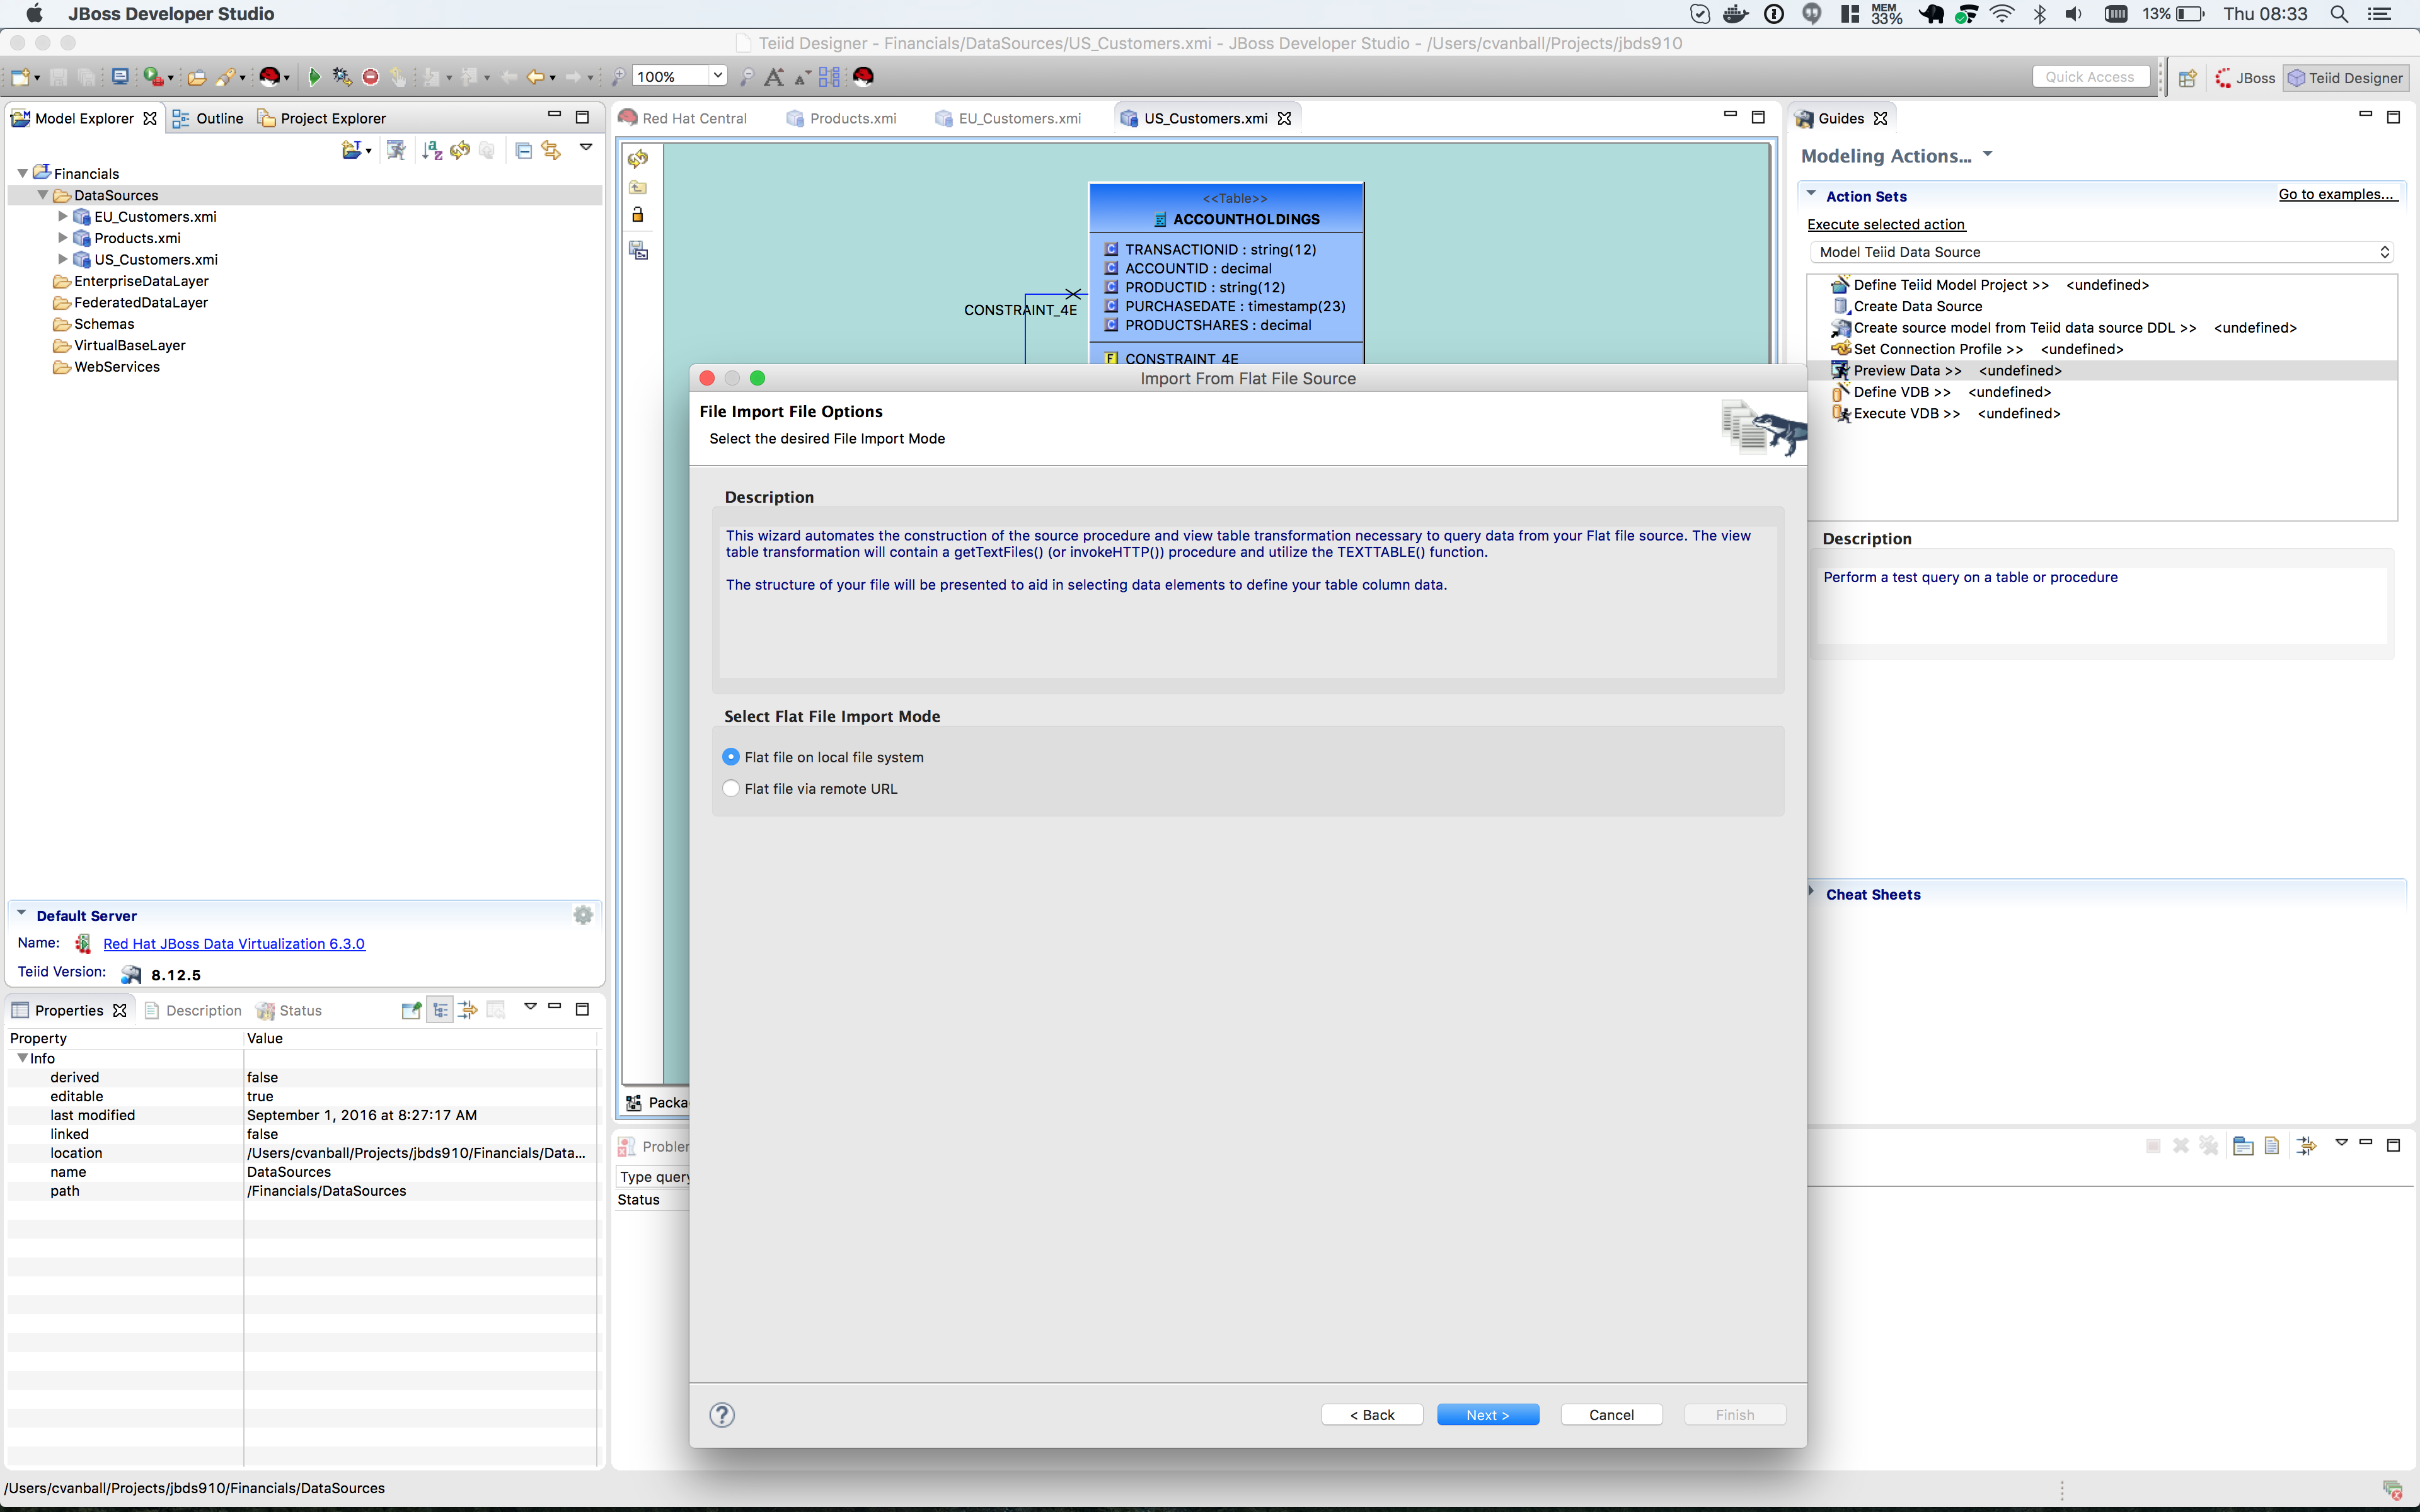
Select option Flat file on local file system and click the btn:[Next >] button.
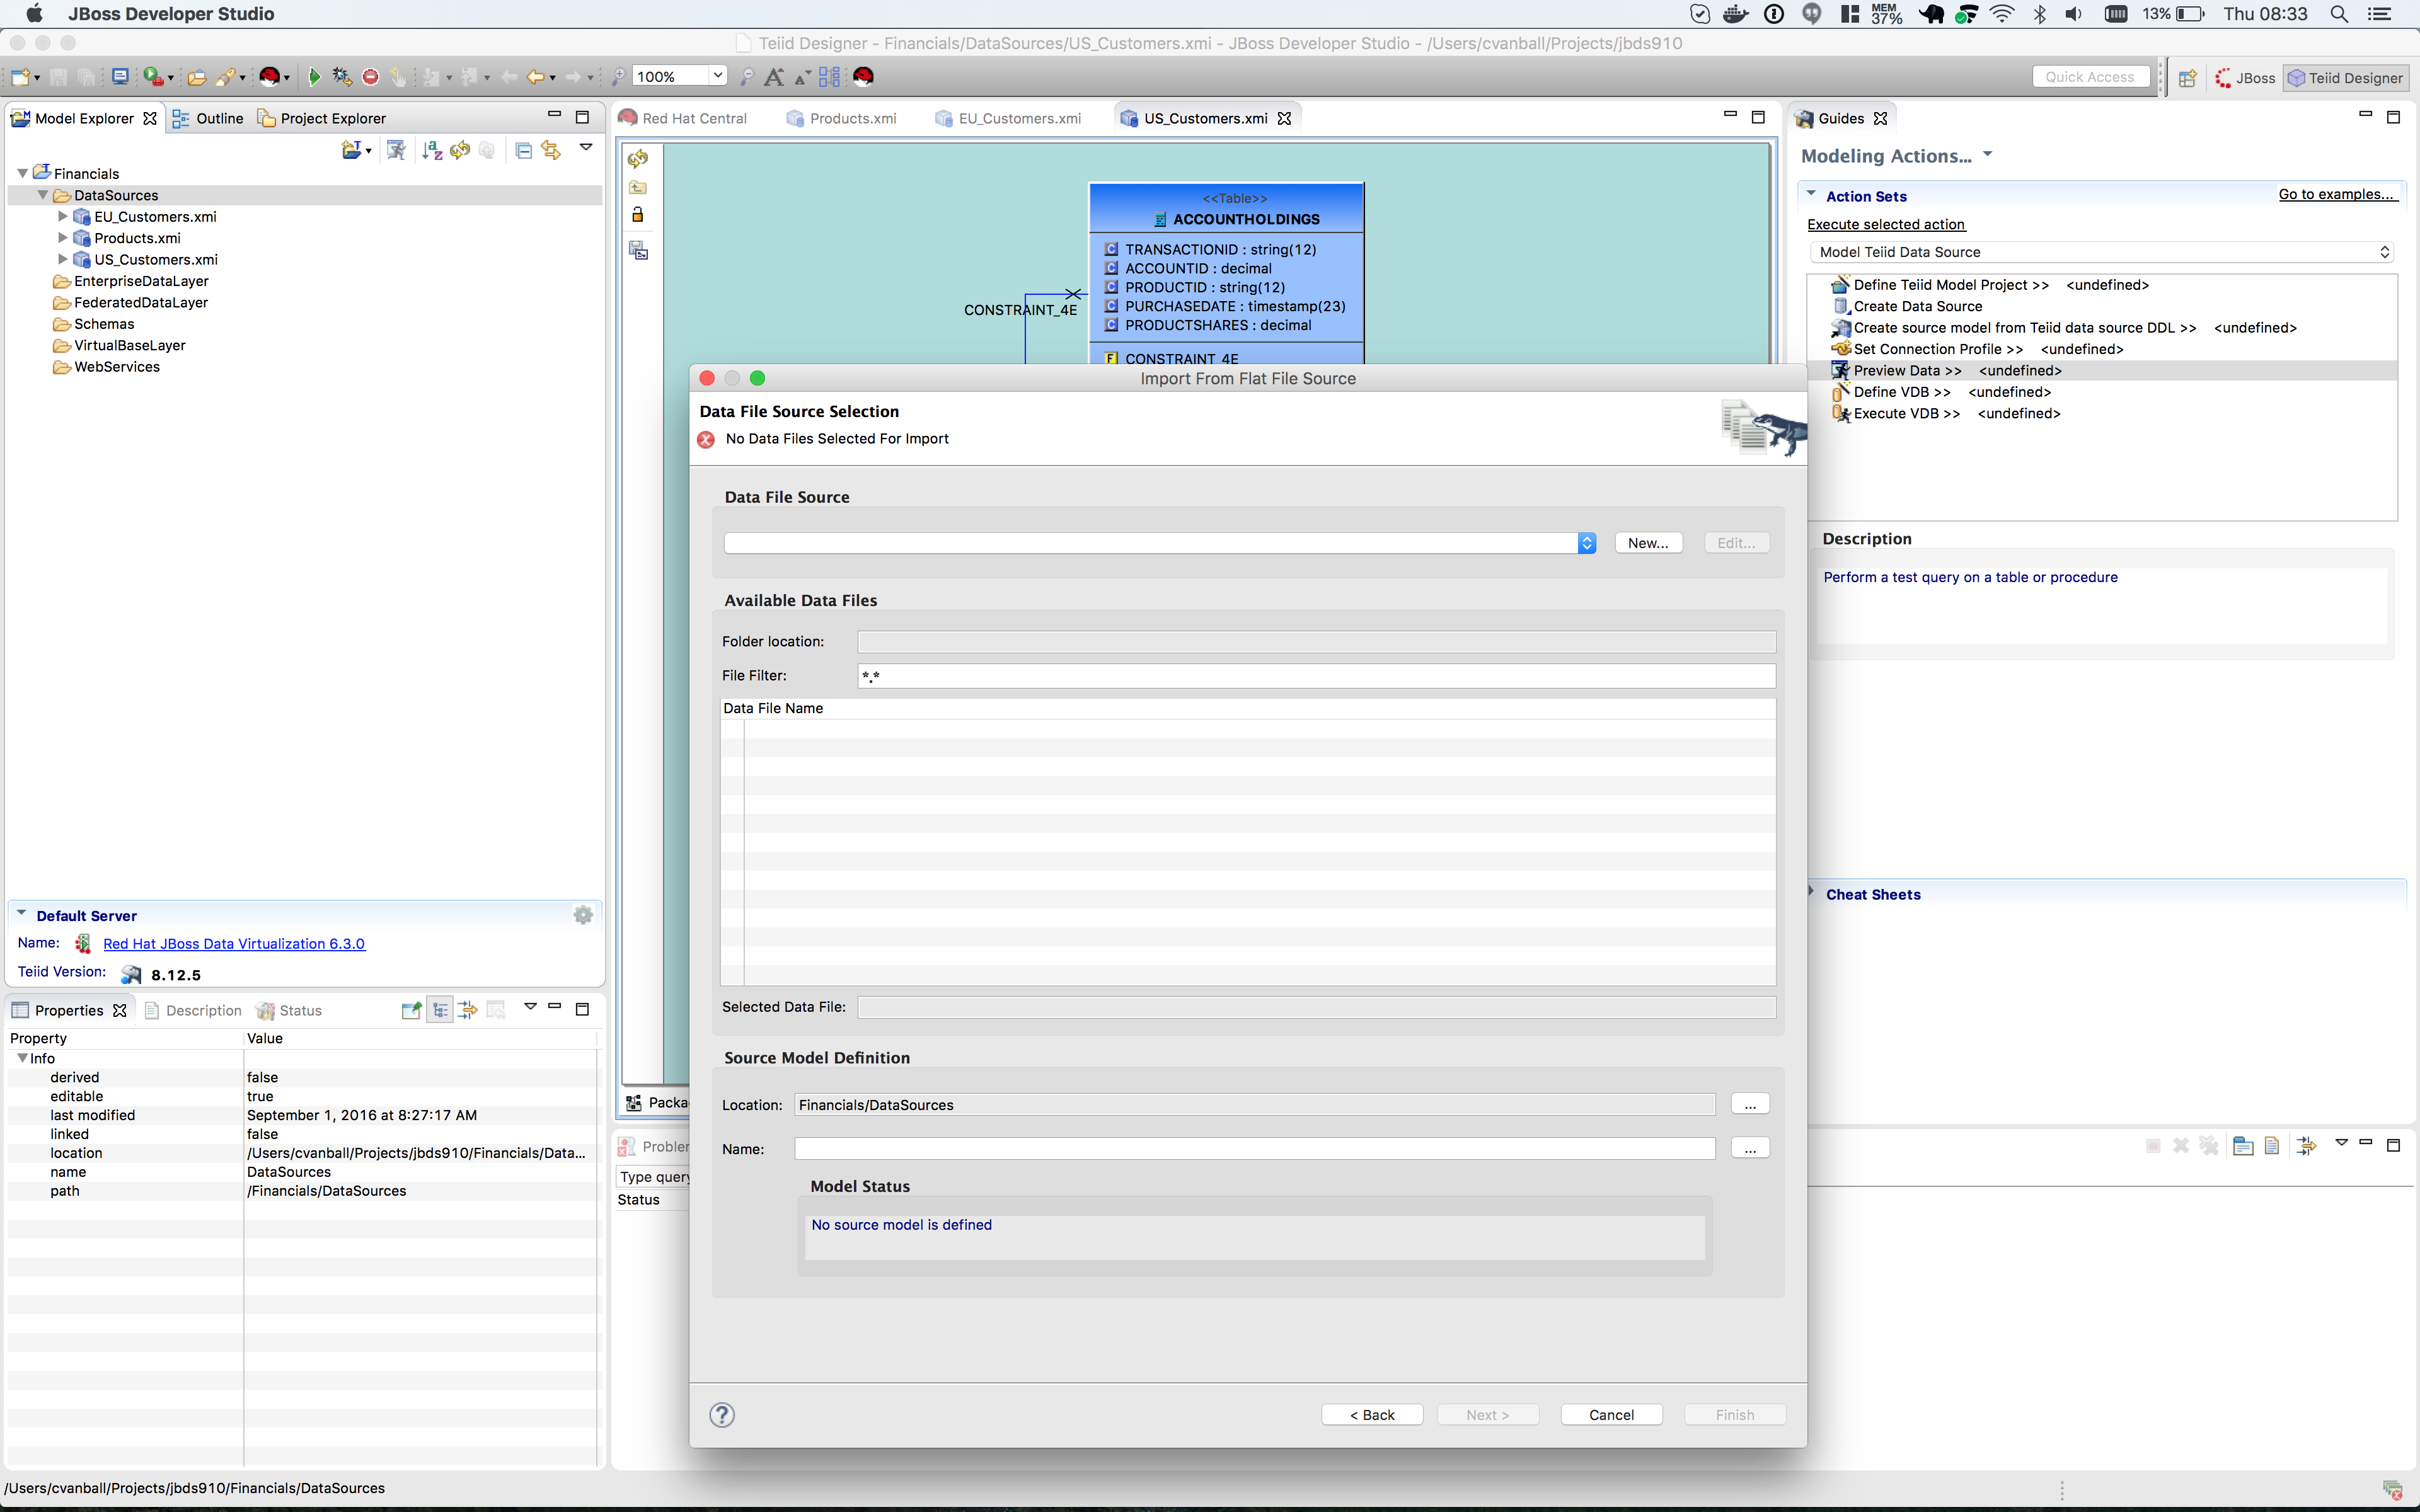
The next screen that is displayed is the dialog box to create a new connection profile. Click on the btn:[New…] button.
The new connection profile dialog is displayed.
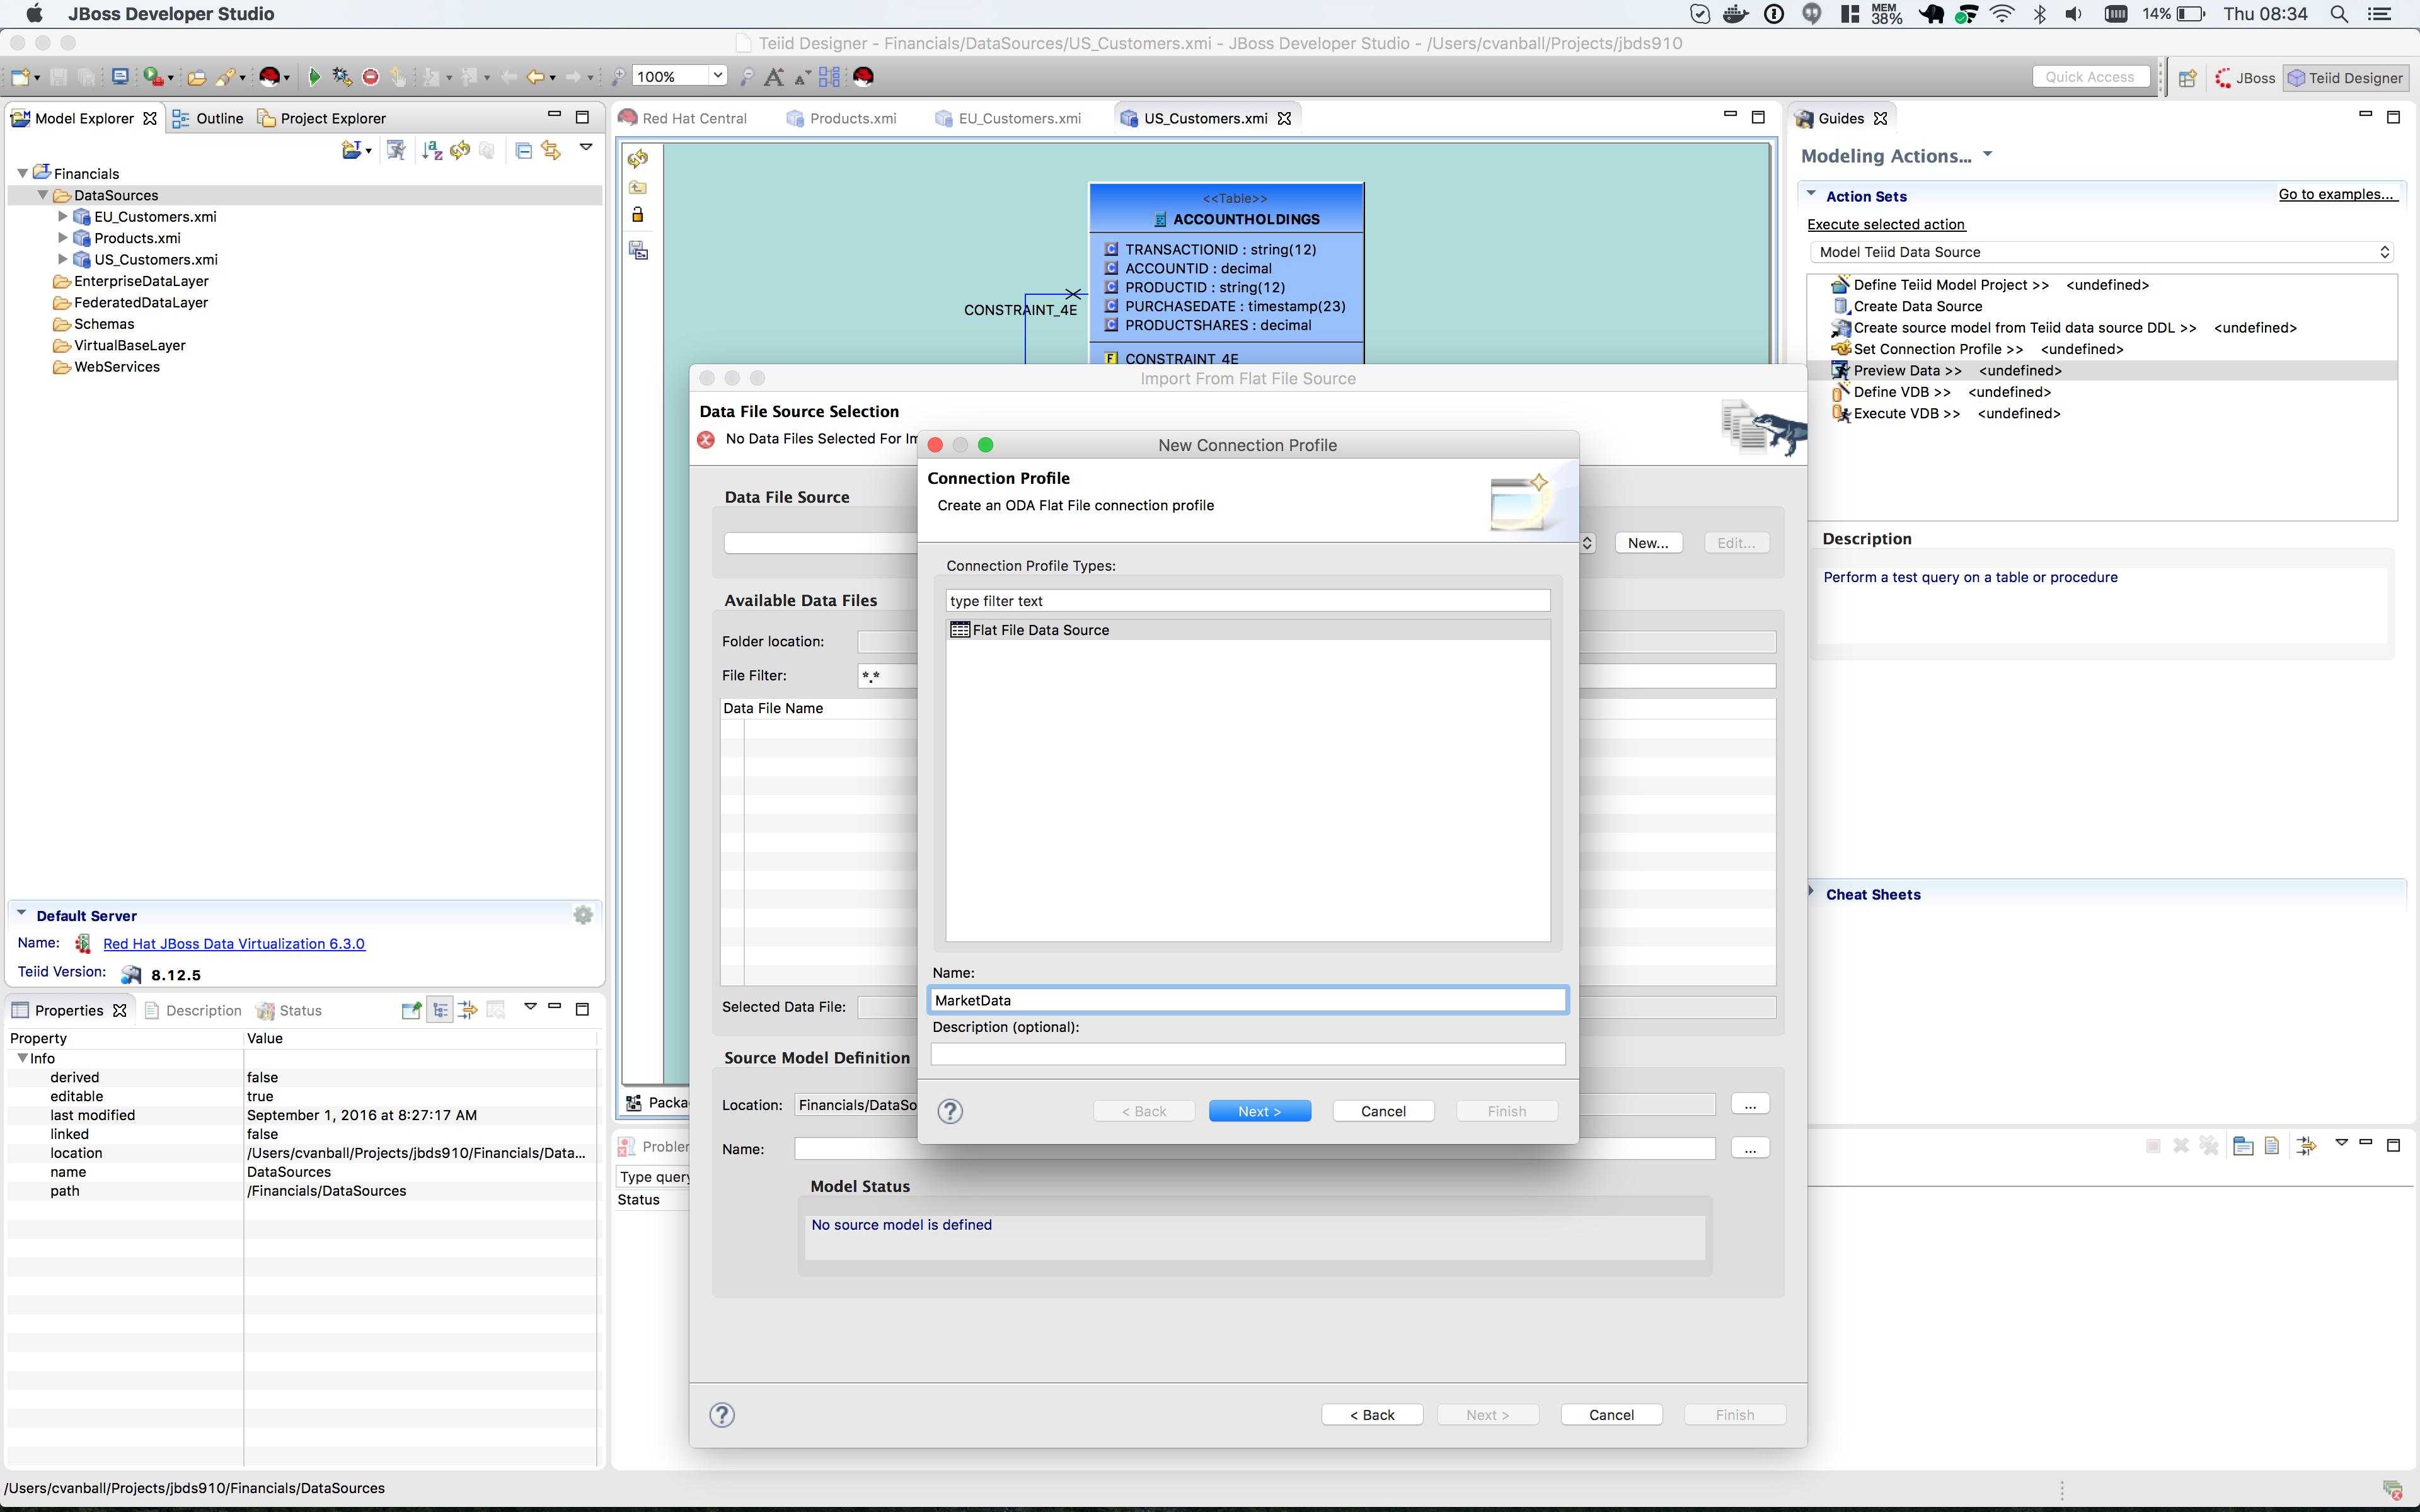
Type in MarketData for the name and click the btn:[Next >] button.
Use the btn:[Browse…] button (see image below) to locate the folder where the market data CSV file resides. The location should be DVWorkshop/dv_docker/demo.
Ensure Use first line as column name indicator is checked. You can click the Test Connection button, it will just ensure that the program can get to the directory specified.
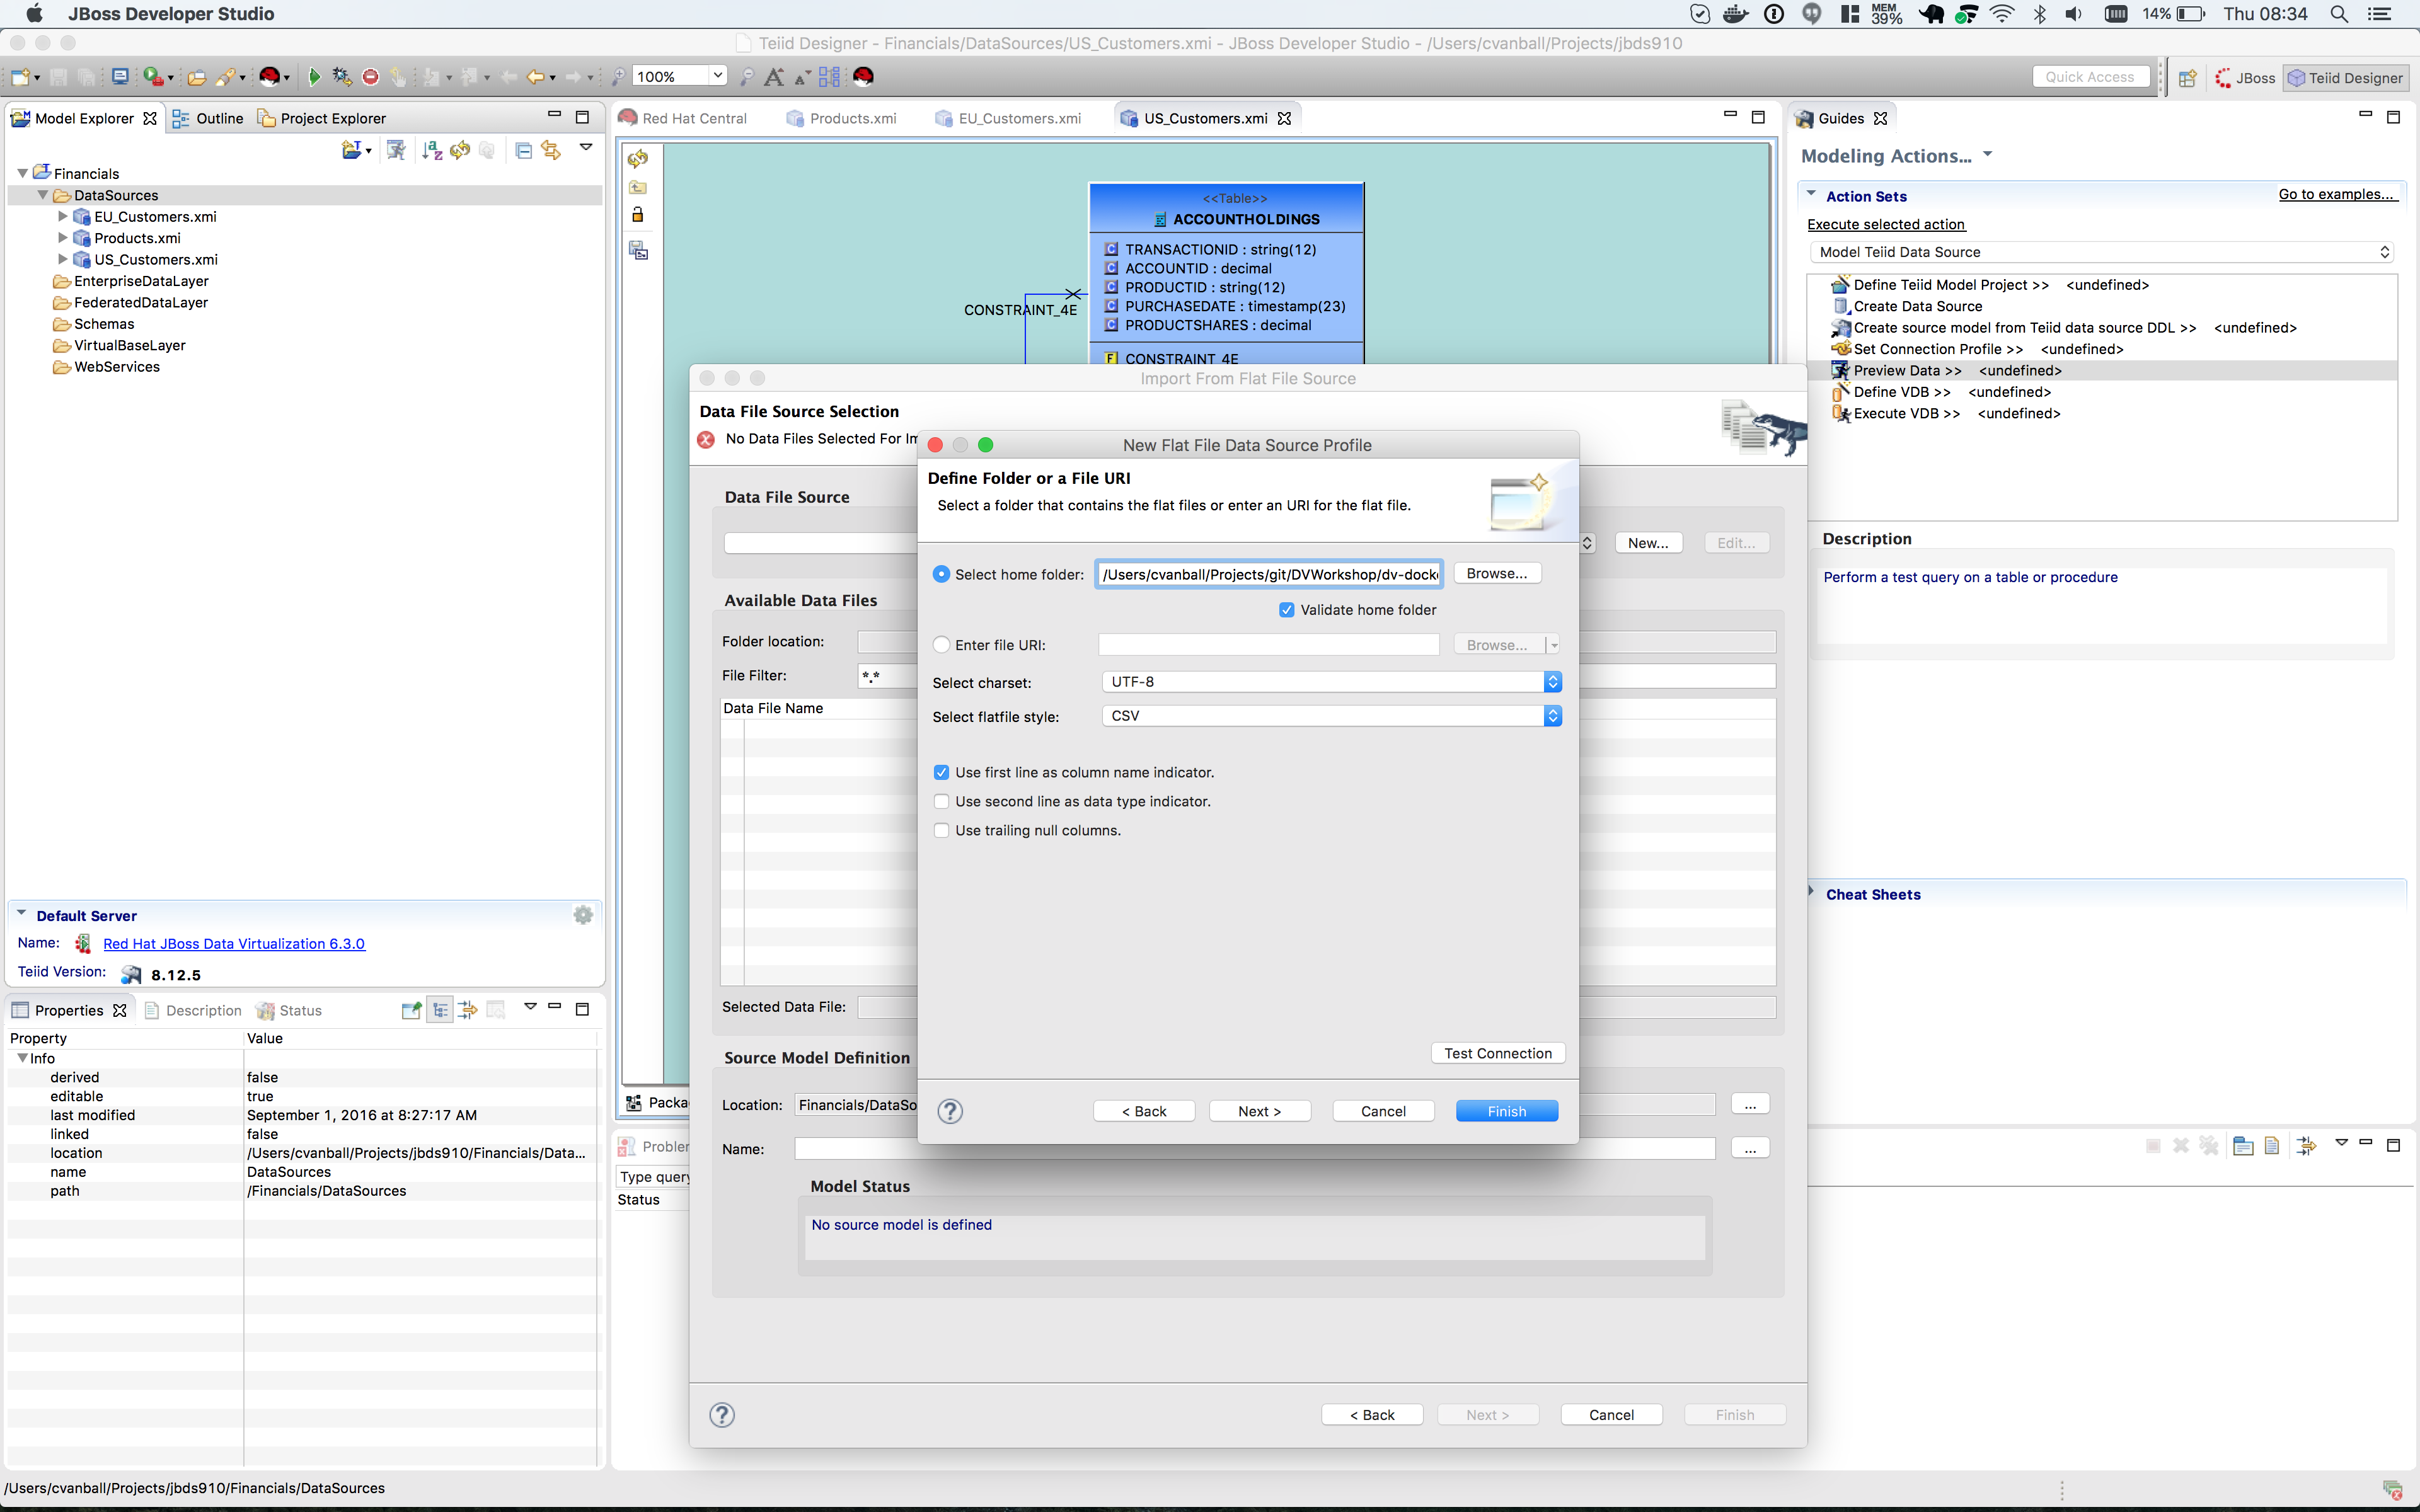
Click the btn:[Next >] button.
The next dialog is the Summary dialog box that displays what has been selected for this connection so far.
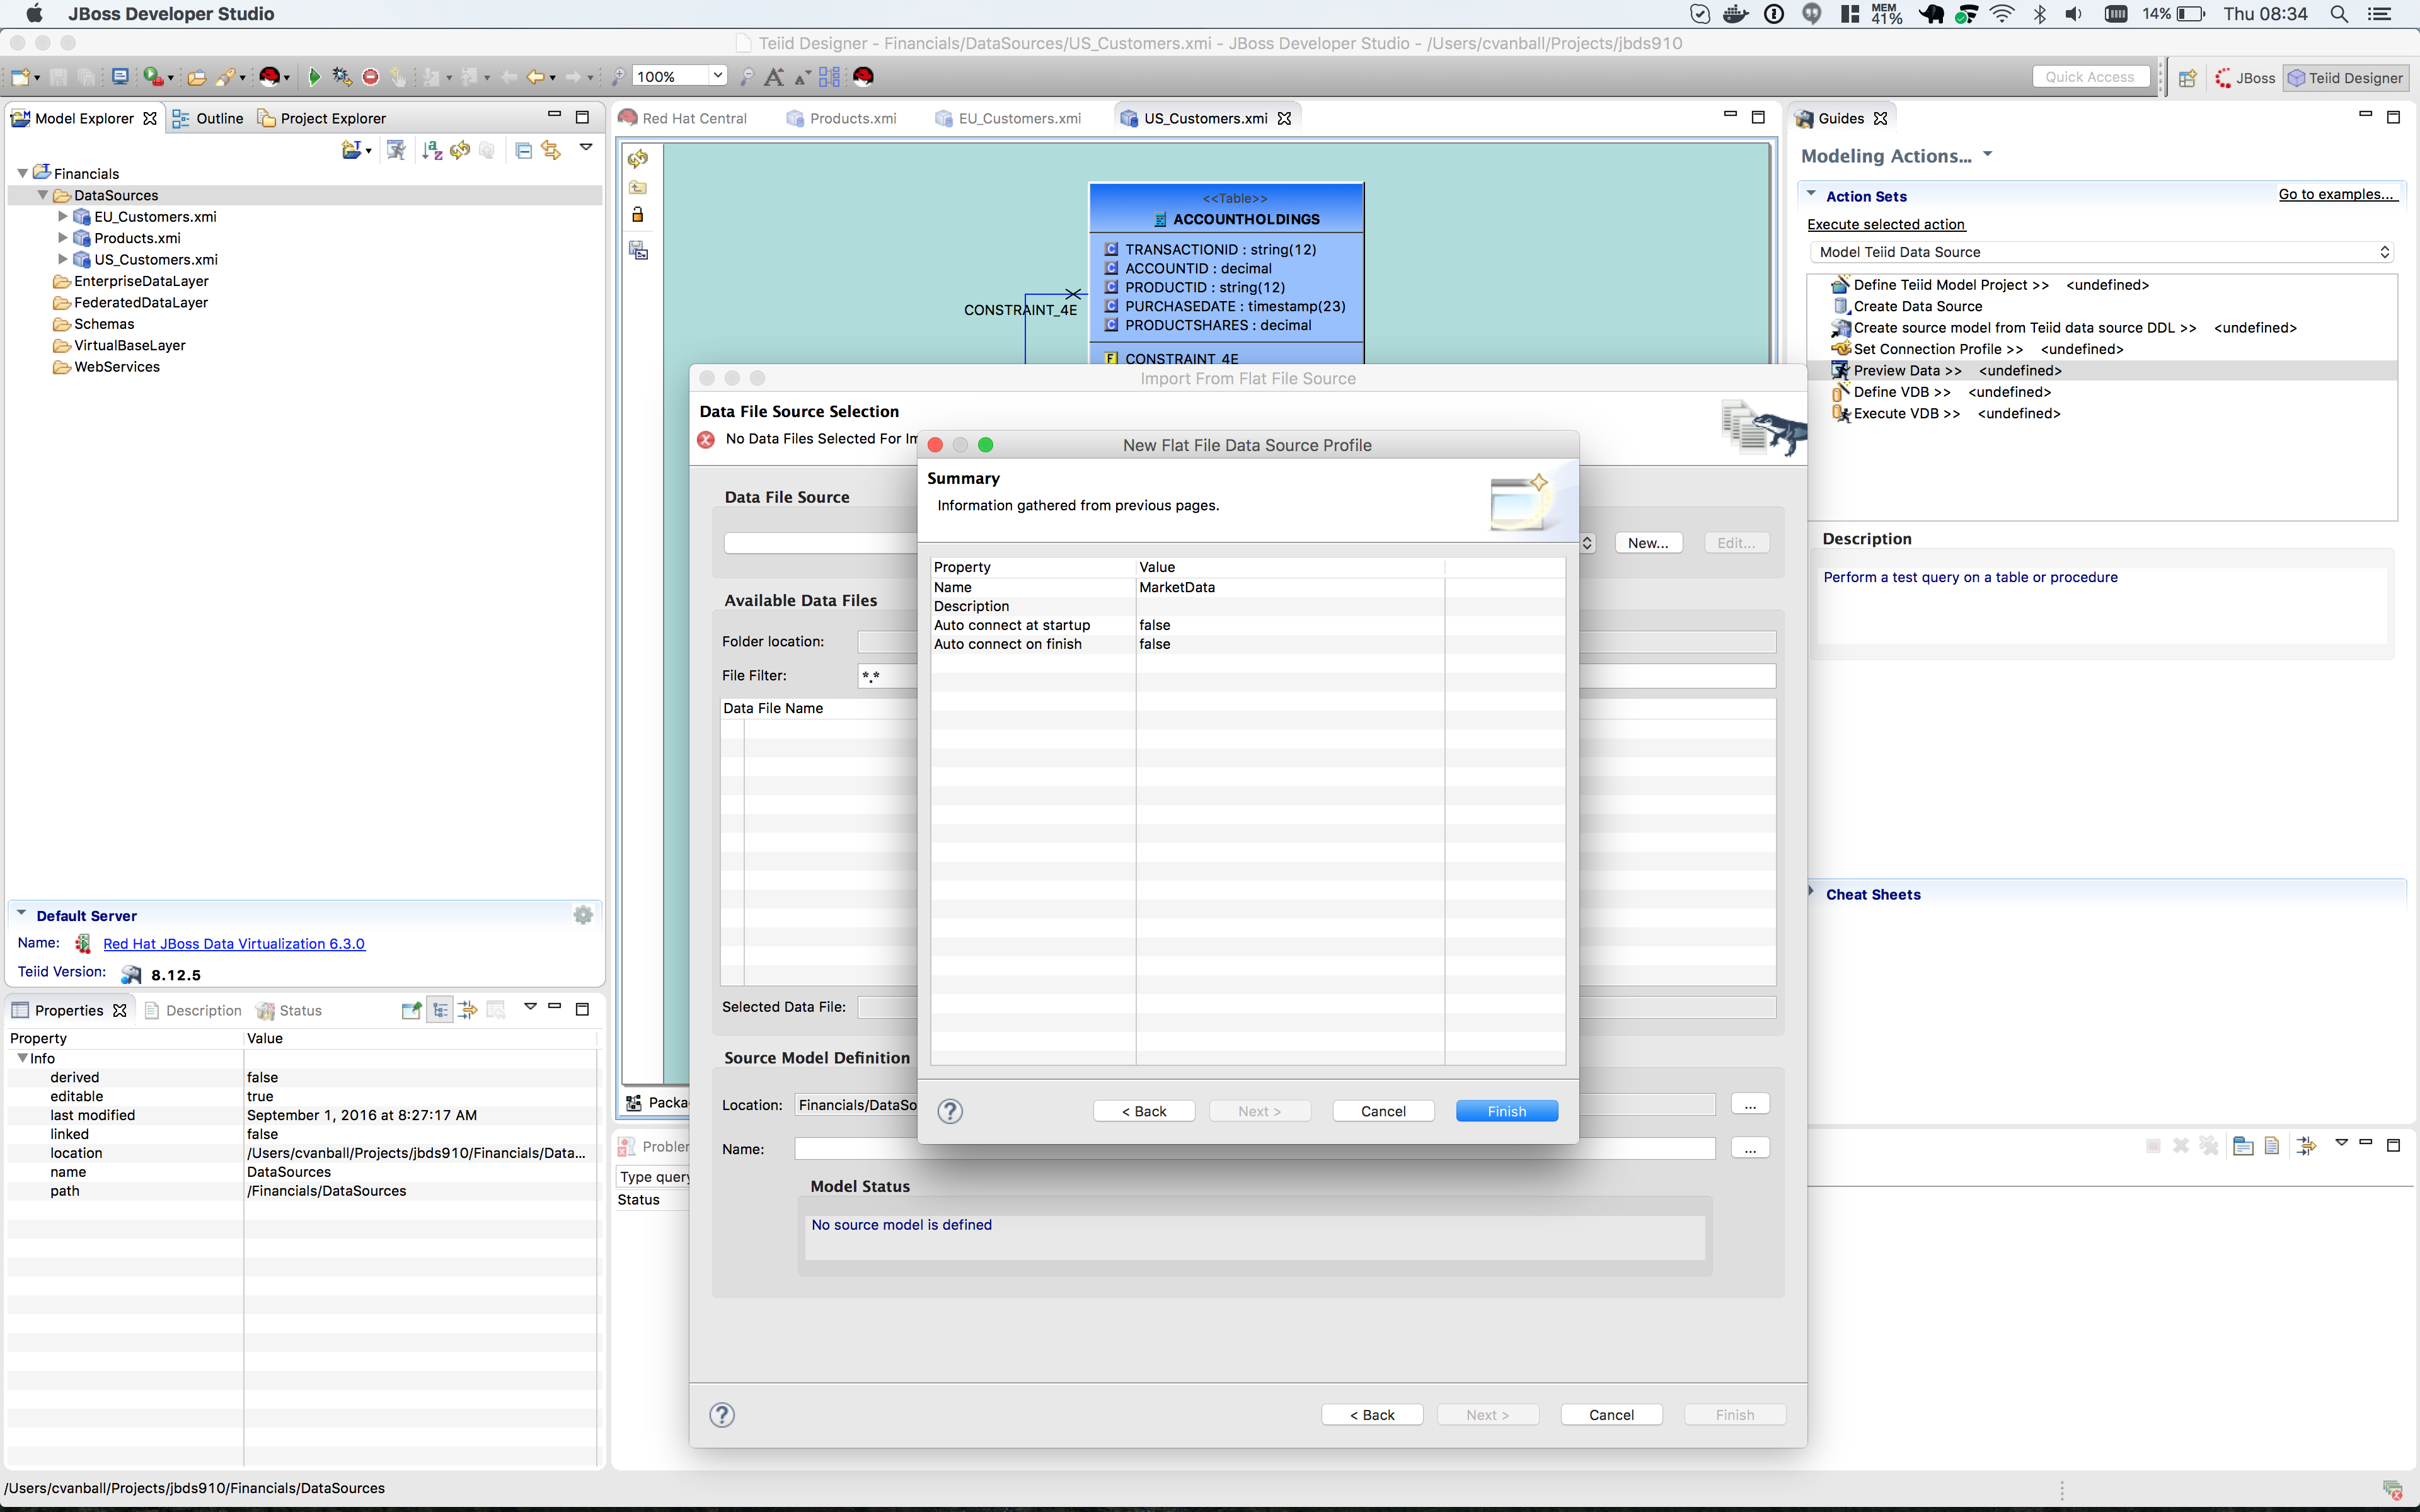
Click the btn:[Finish] button to continue.
All of the CSV files are listed from the data source folder selected in the previous steps. We want to make sure that the check box is checked beside the marketdata.csv file, the file that you need to connect to.
In the Source Model Definition, enter for the model name, MarketData in the Name: field (see image below).
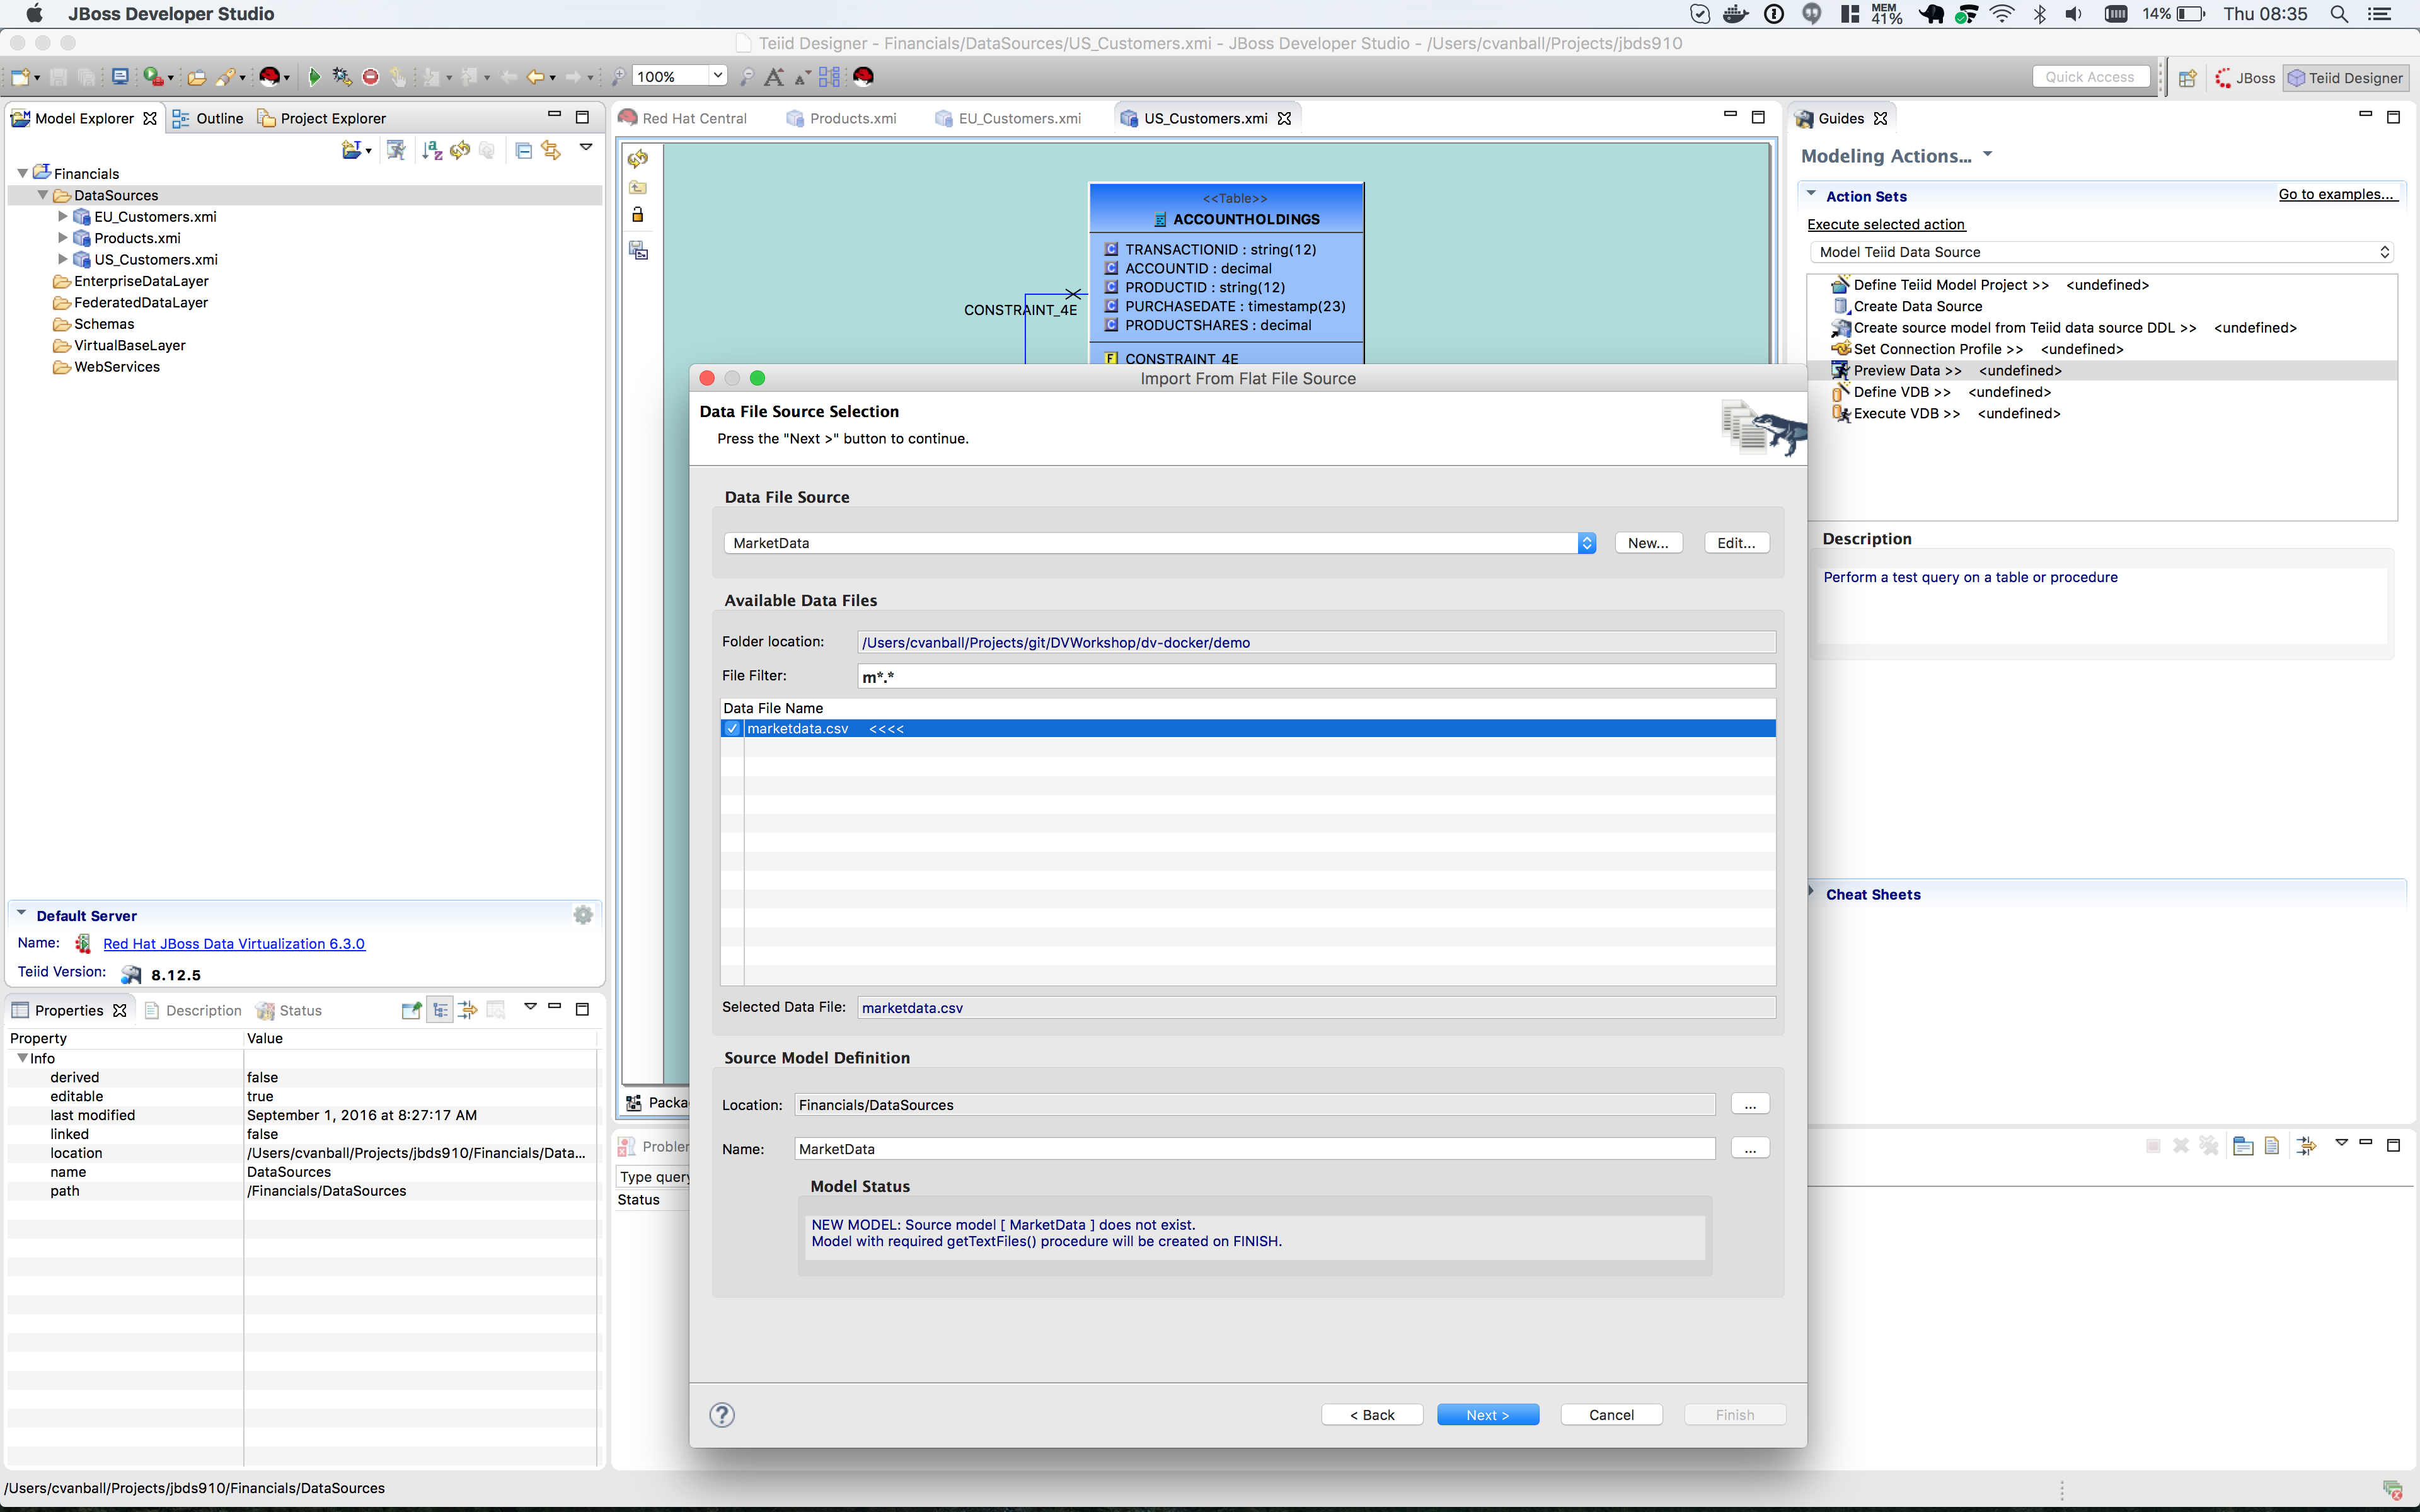
Click on the btn:[Next >] button to continue.
The next dialog box that opens allows you can specify the datasource definition. See the image below.
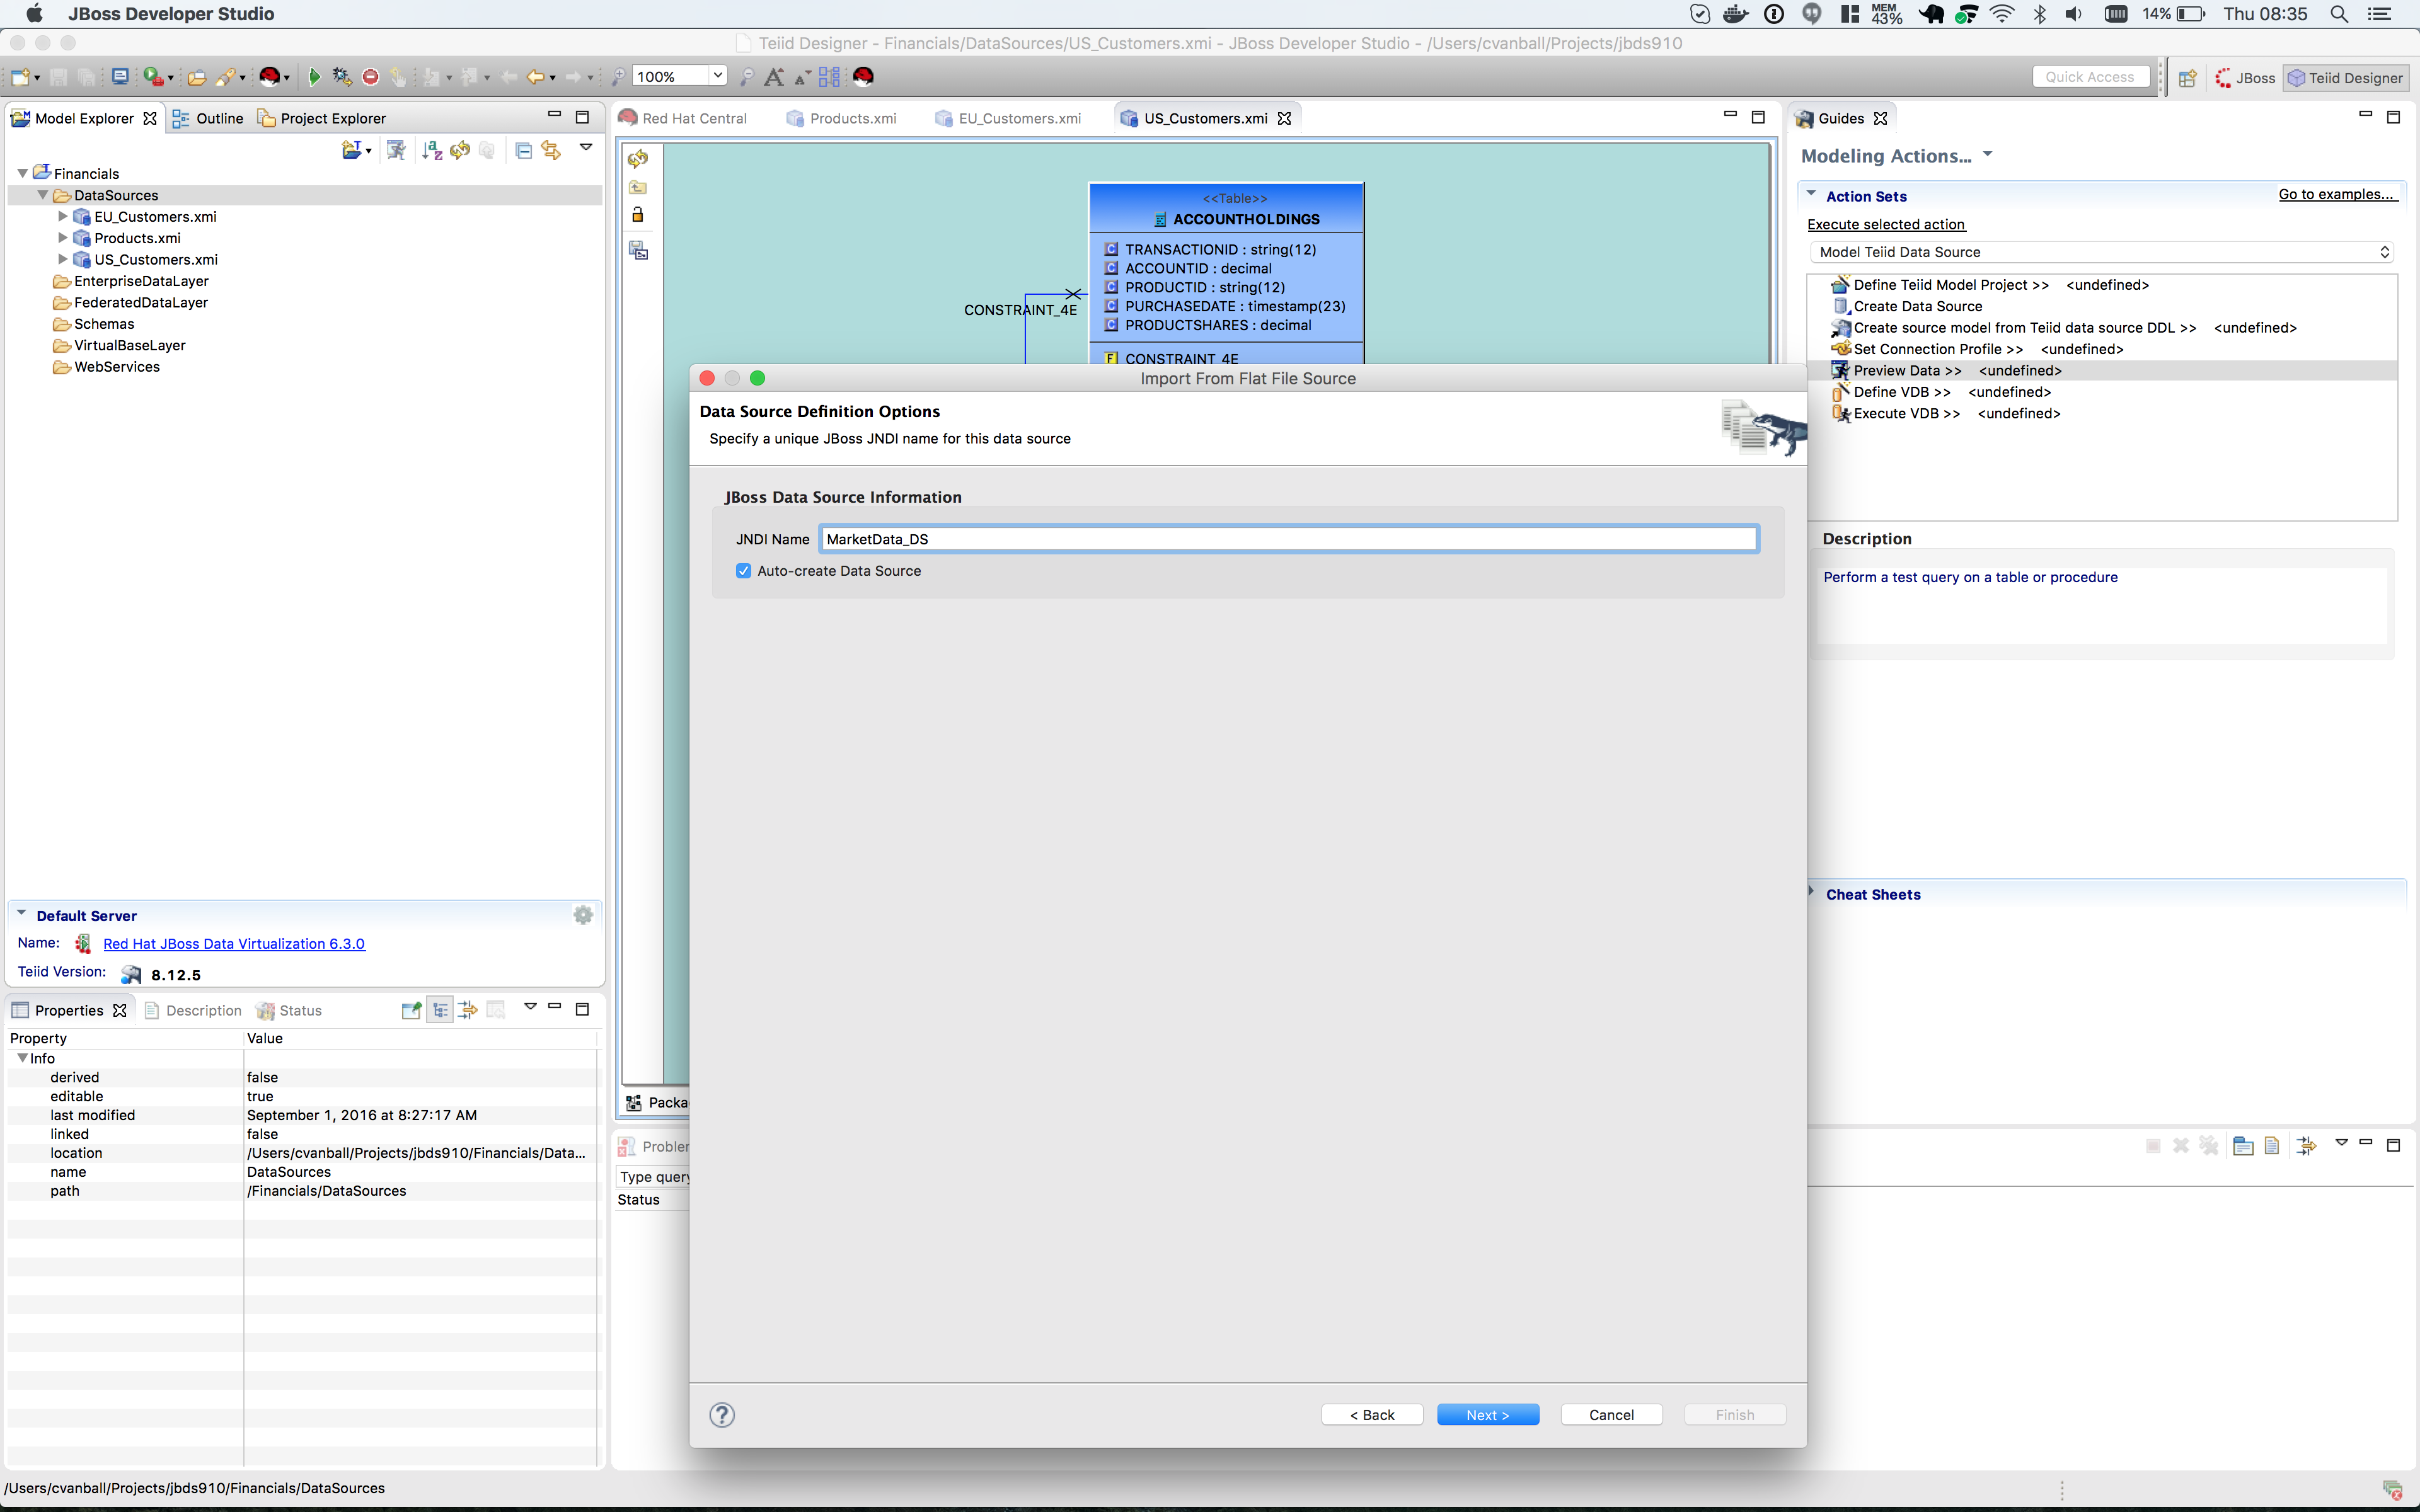
Click on the btn:[Next >] button to continue.
The next dialog box that opens allows you to select how the CSV file is formatted. In this case, the file is Character delimited (Delimited with a comma). See the image below for the settings that you need to select.
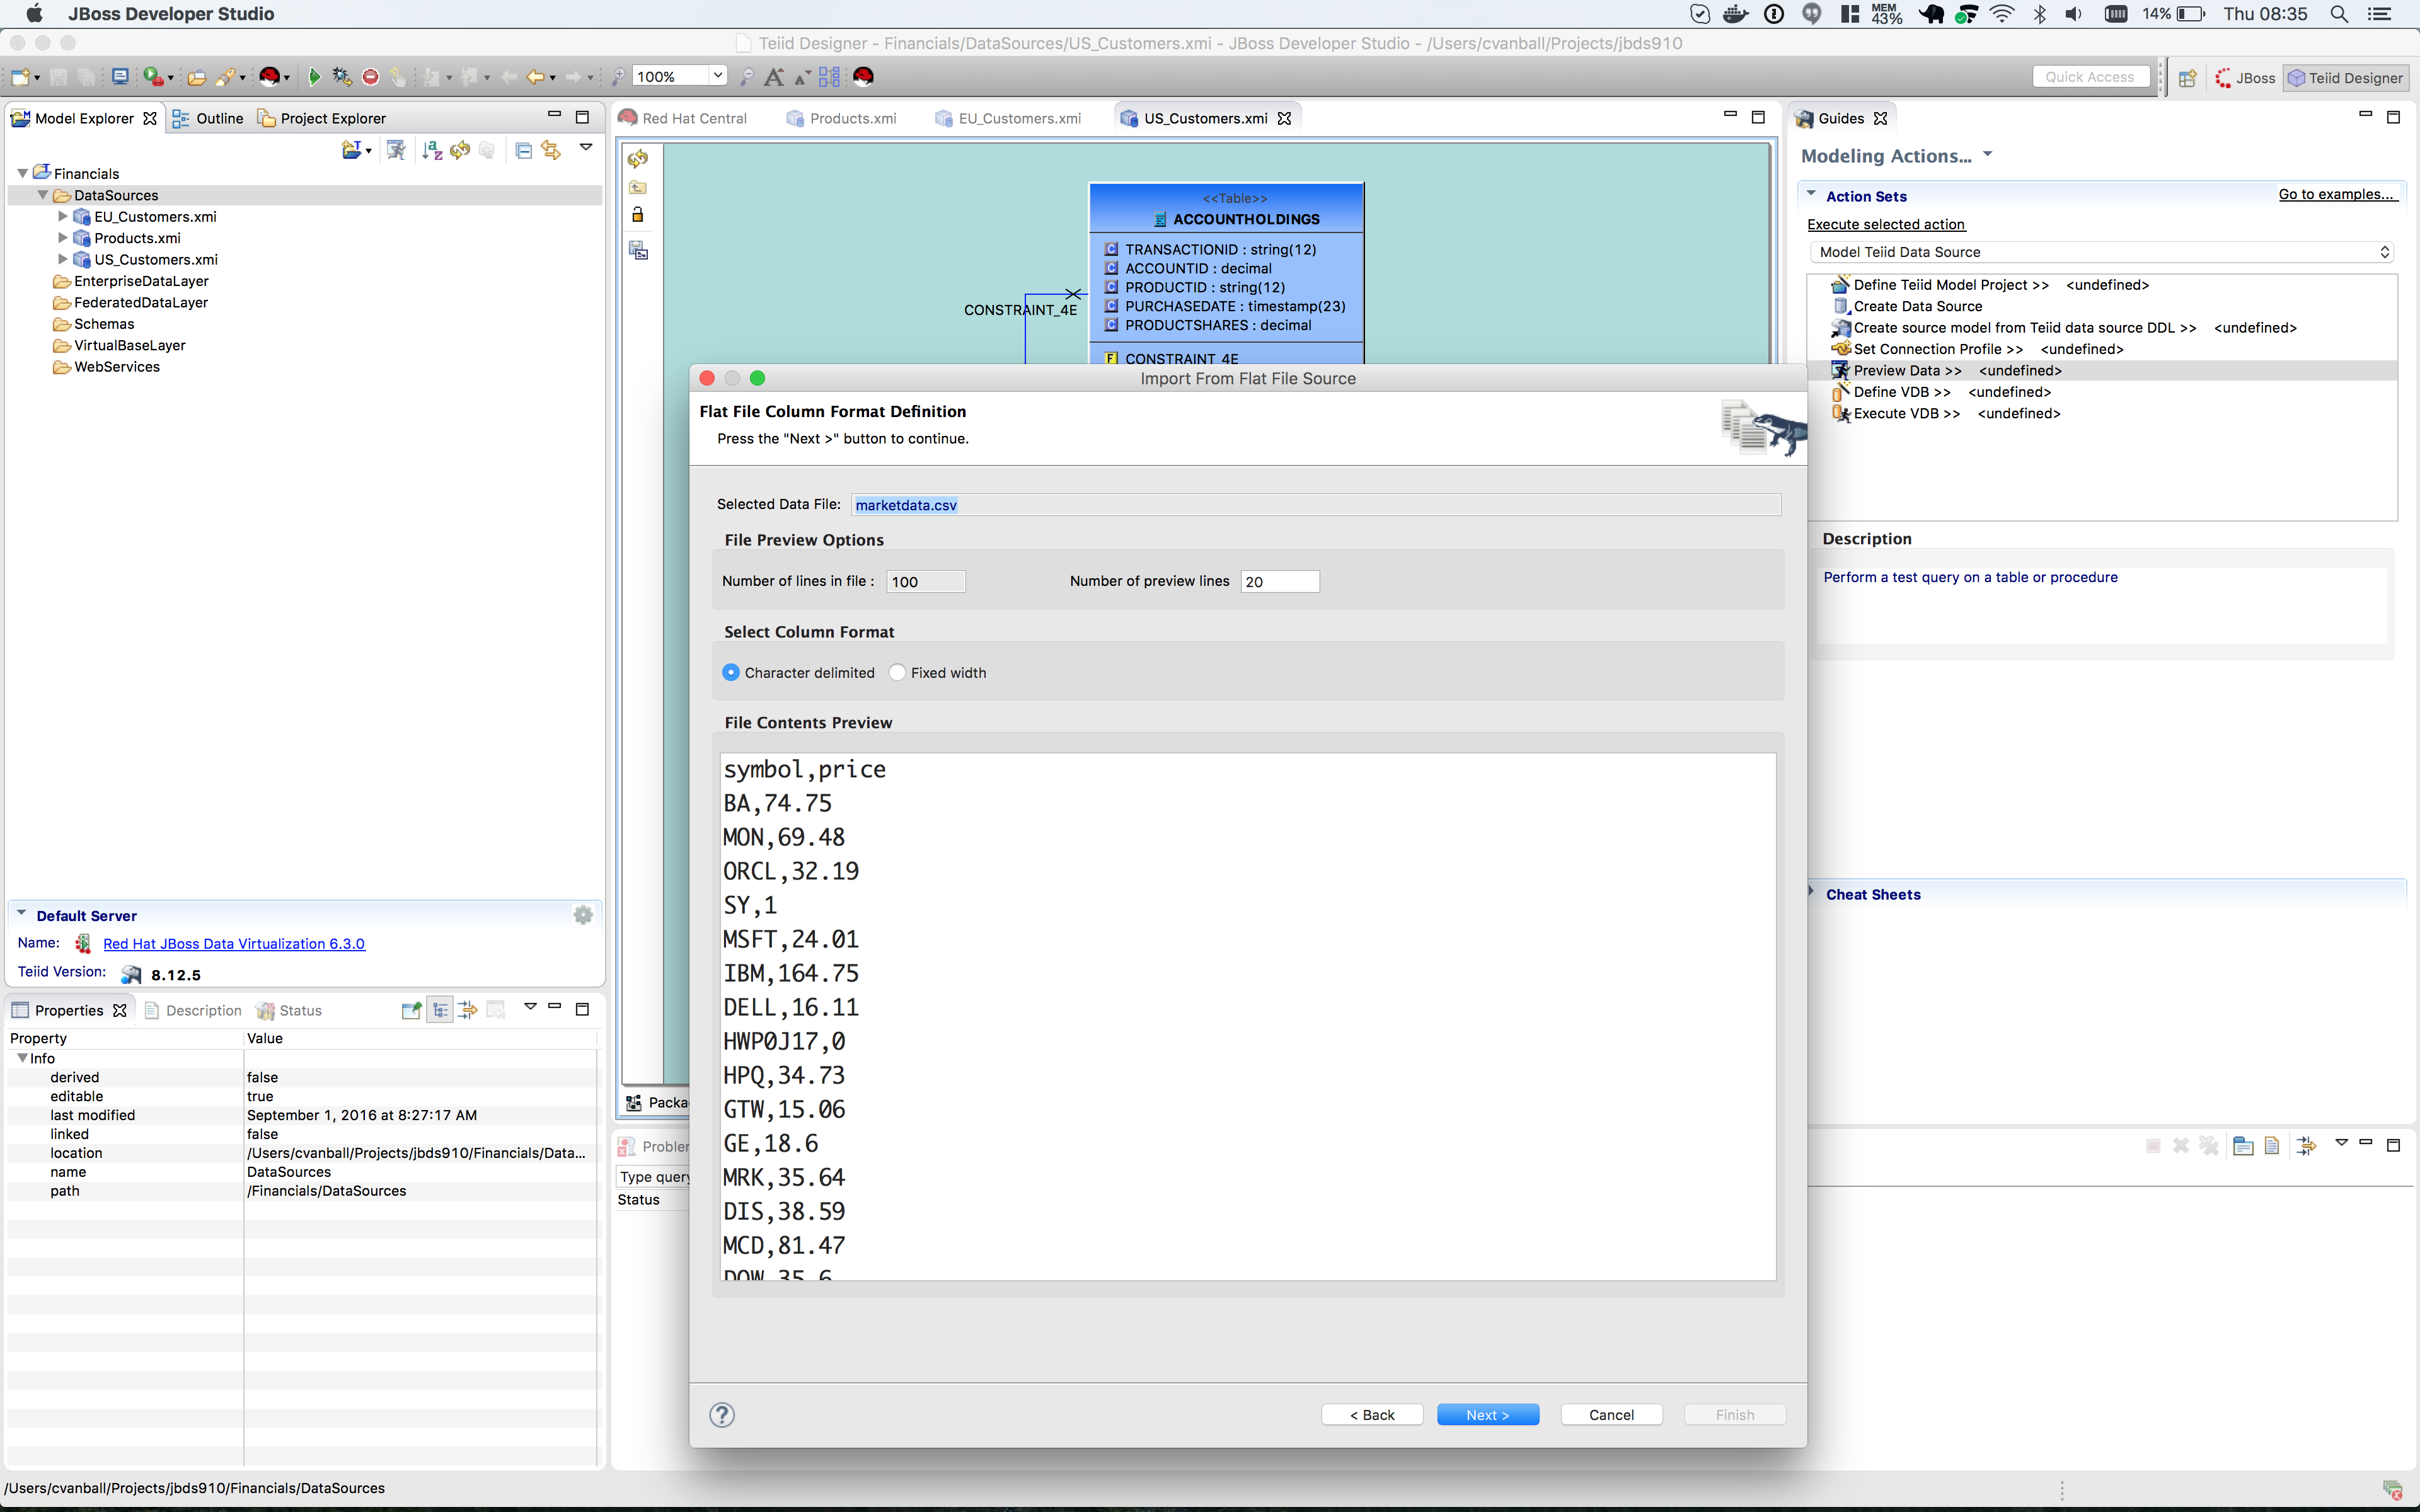
Click on the btn:[Next >] button to continue.
Next specify the flat file delimited columns parser settings for how the CSV file to be imported. You will change the Datatype of the price column to bigdecimal.
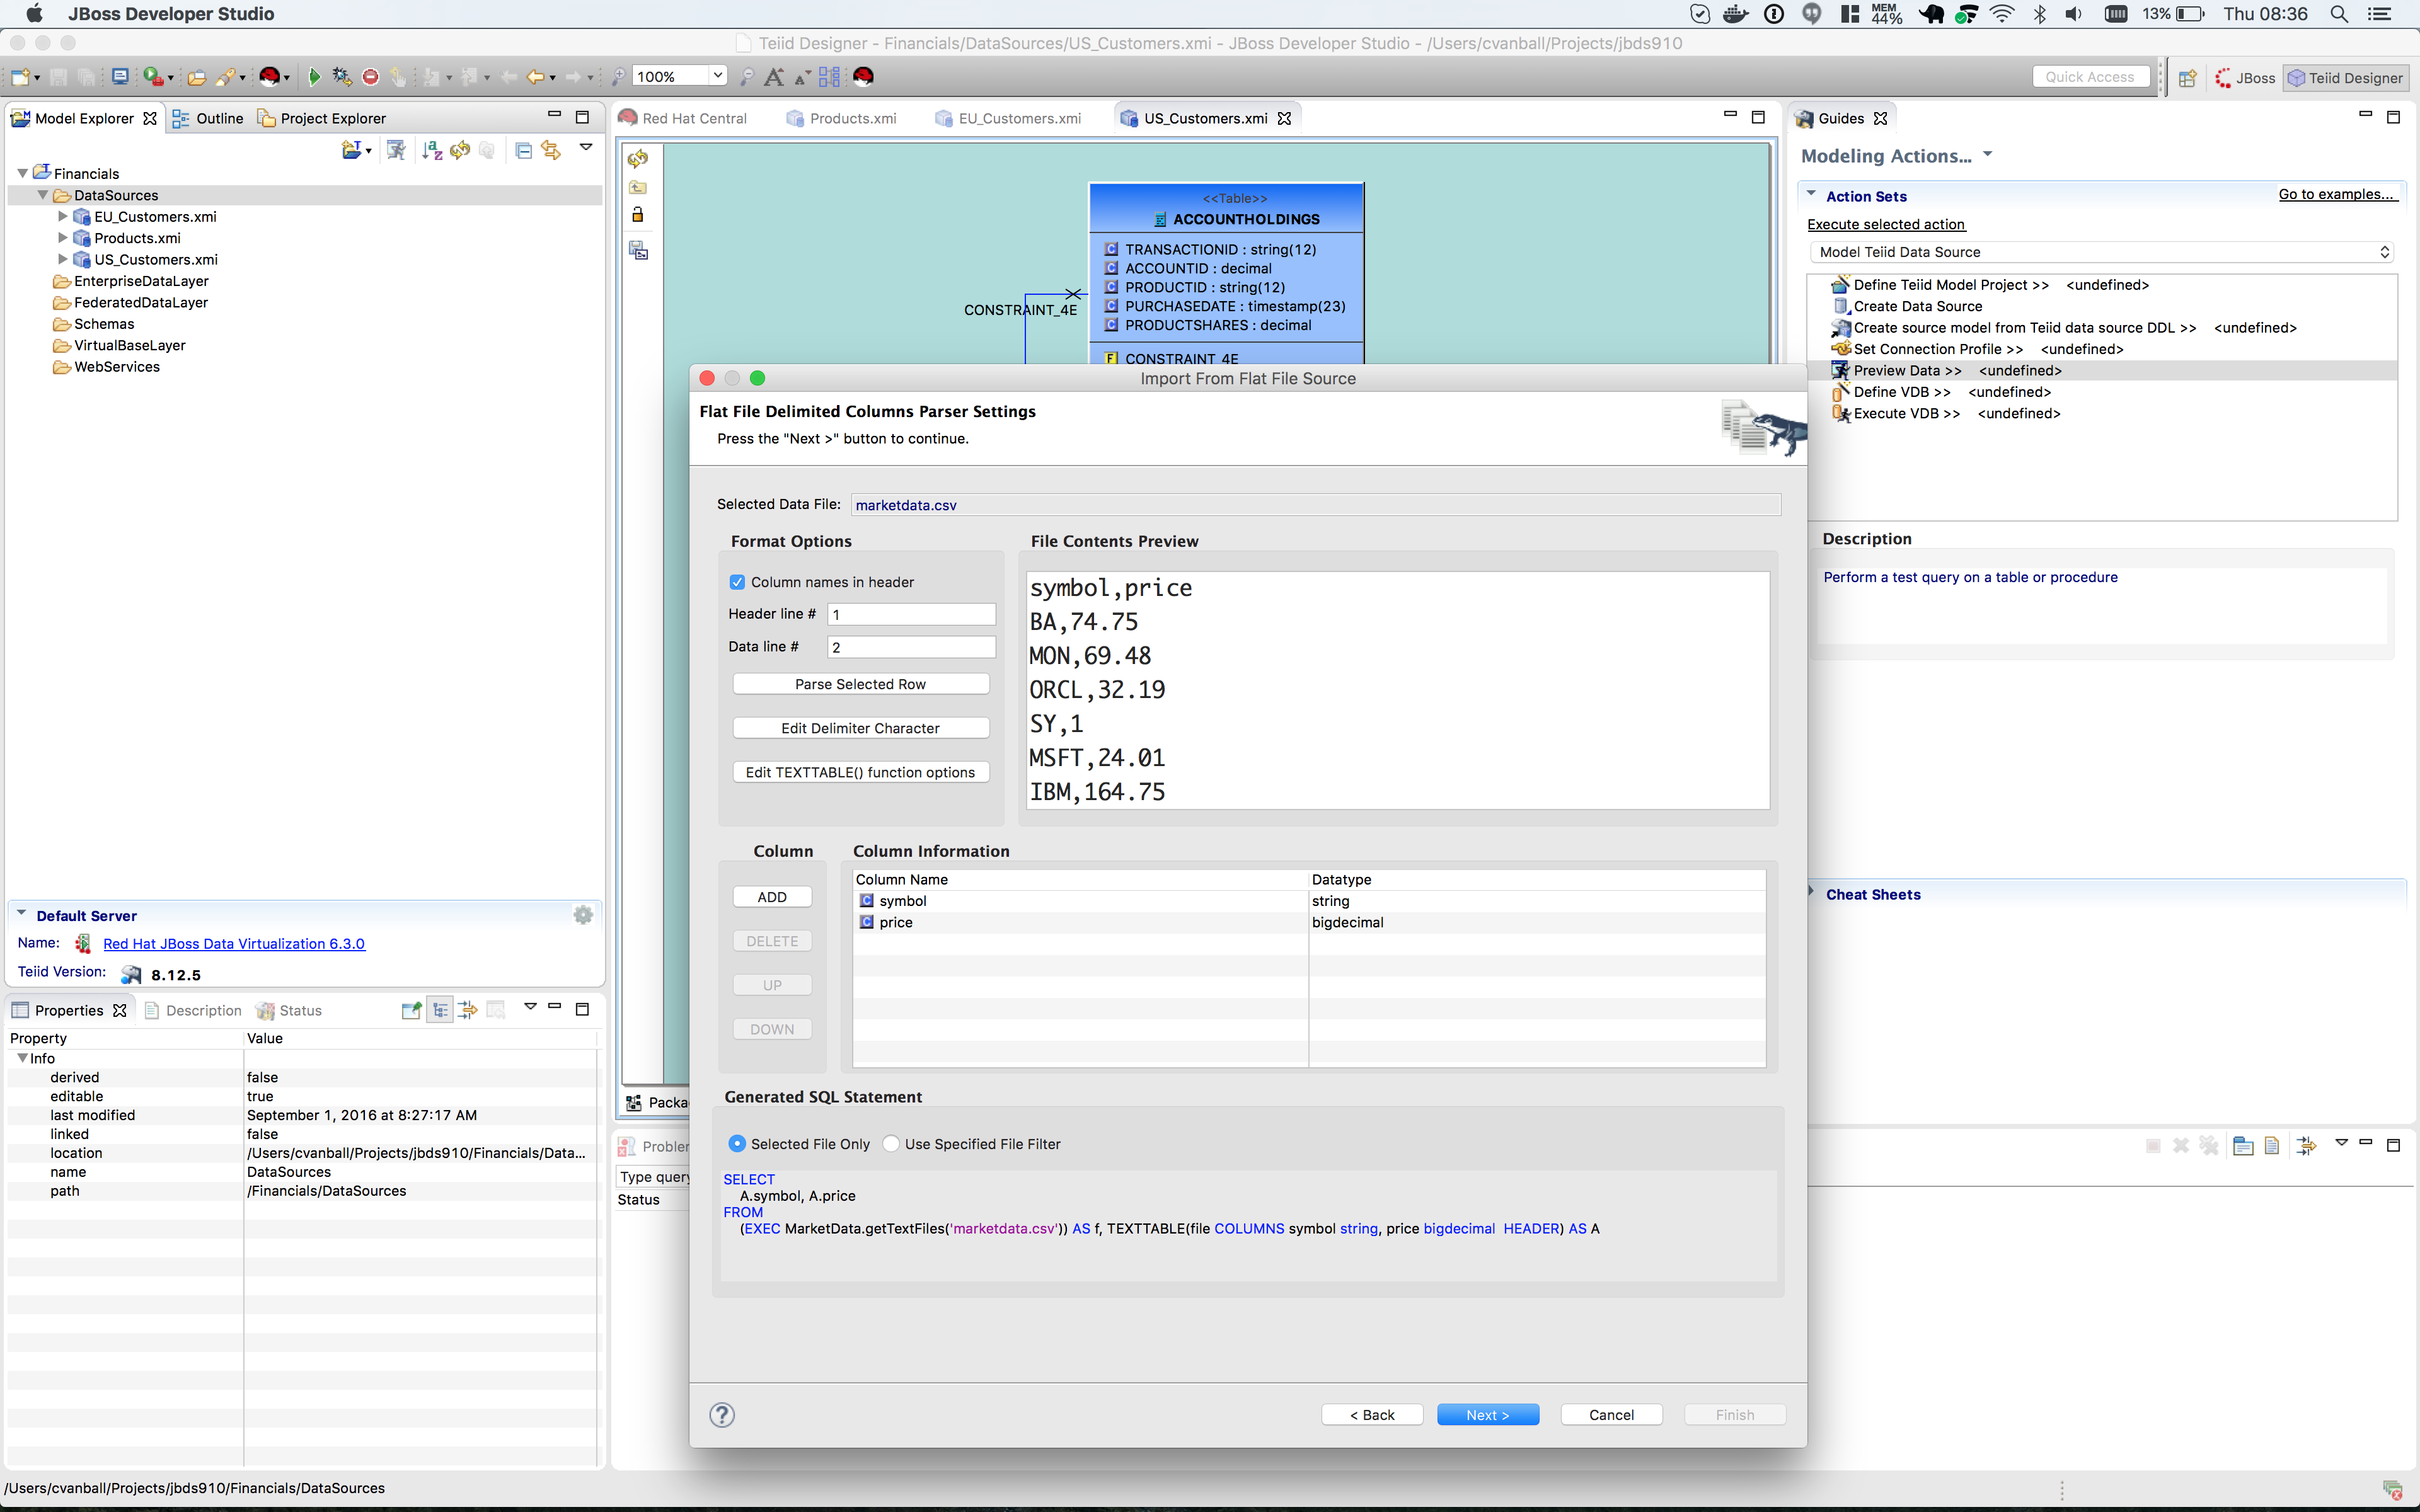
Click the btn:[Next >] button when complete.
The last step is to specify the View Model Definition (see image below). Enter the data from the image below.
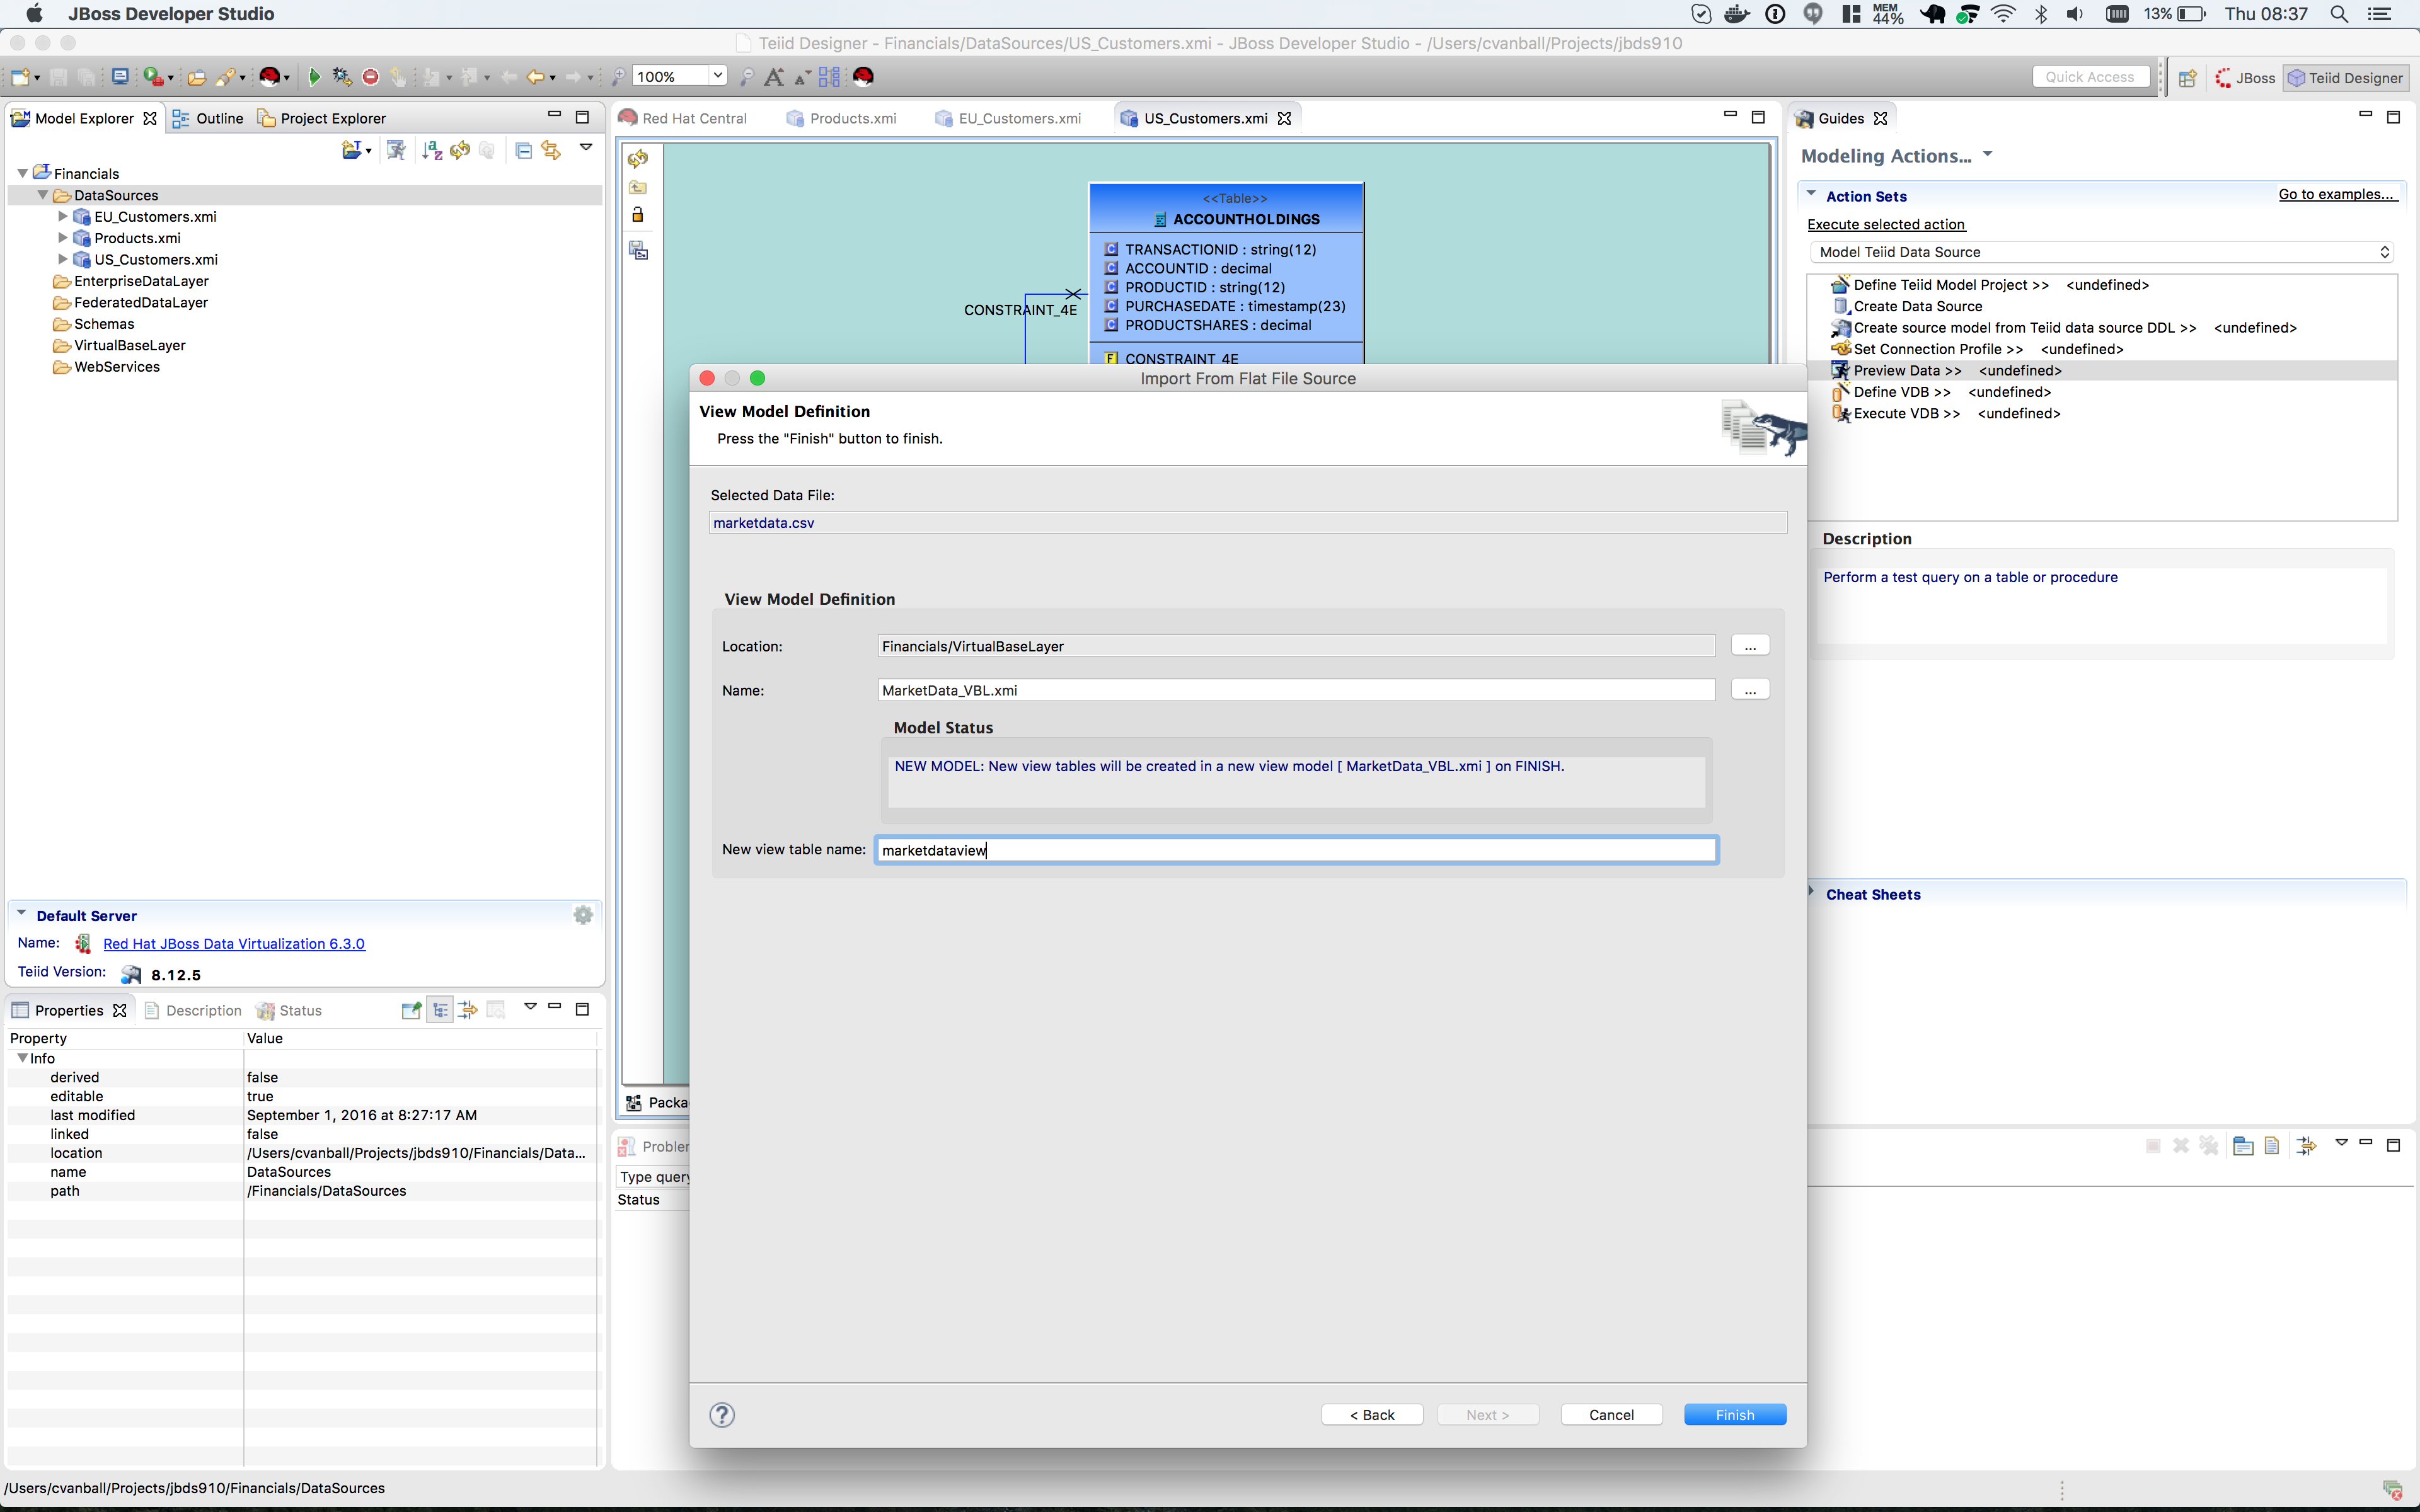
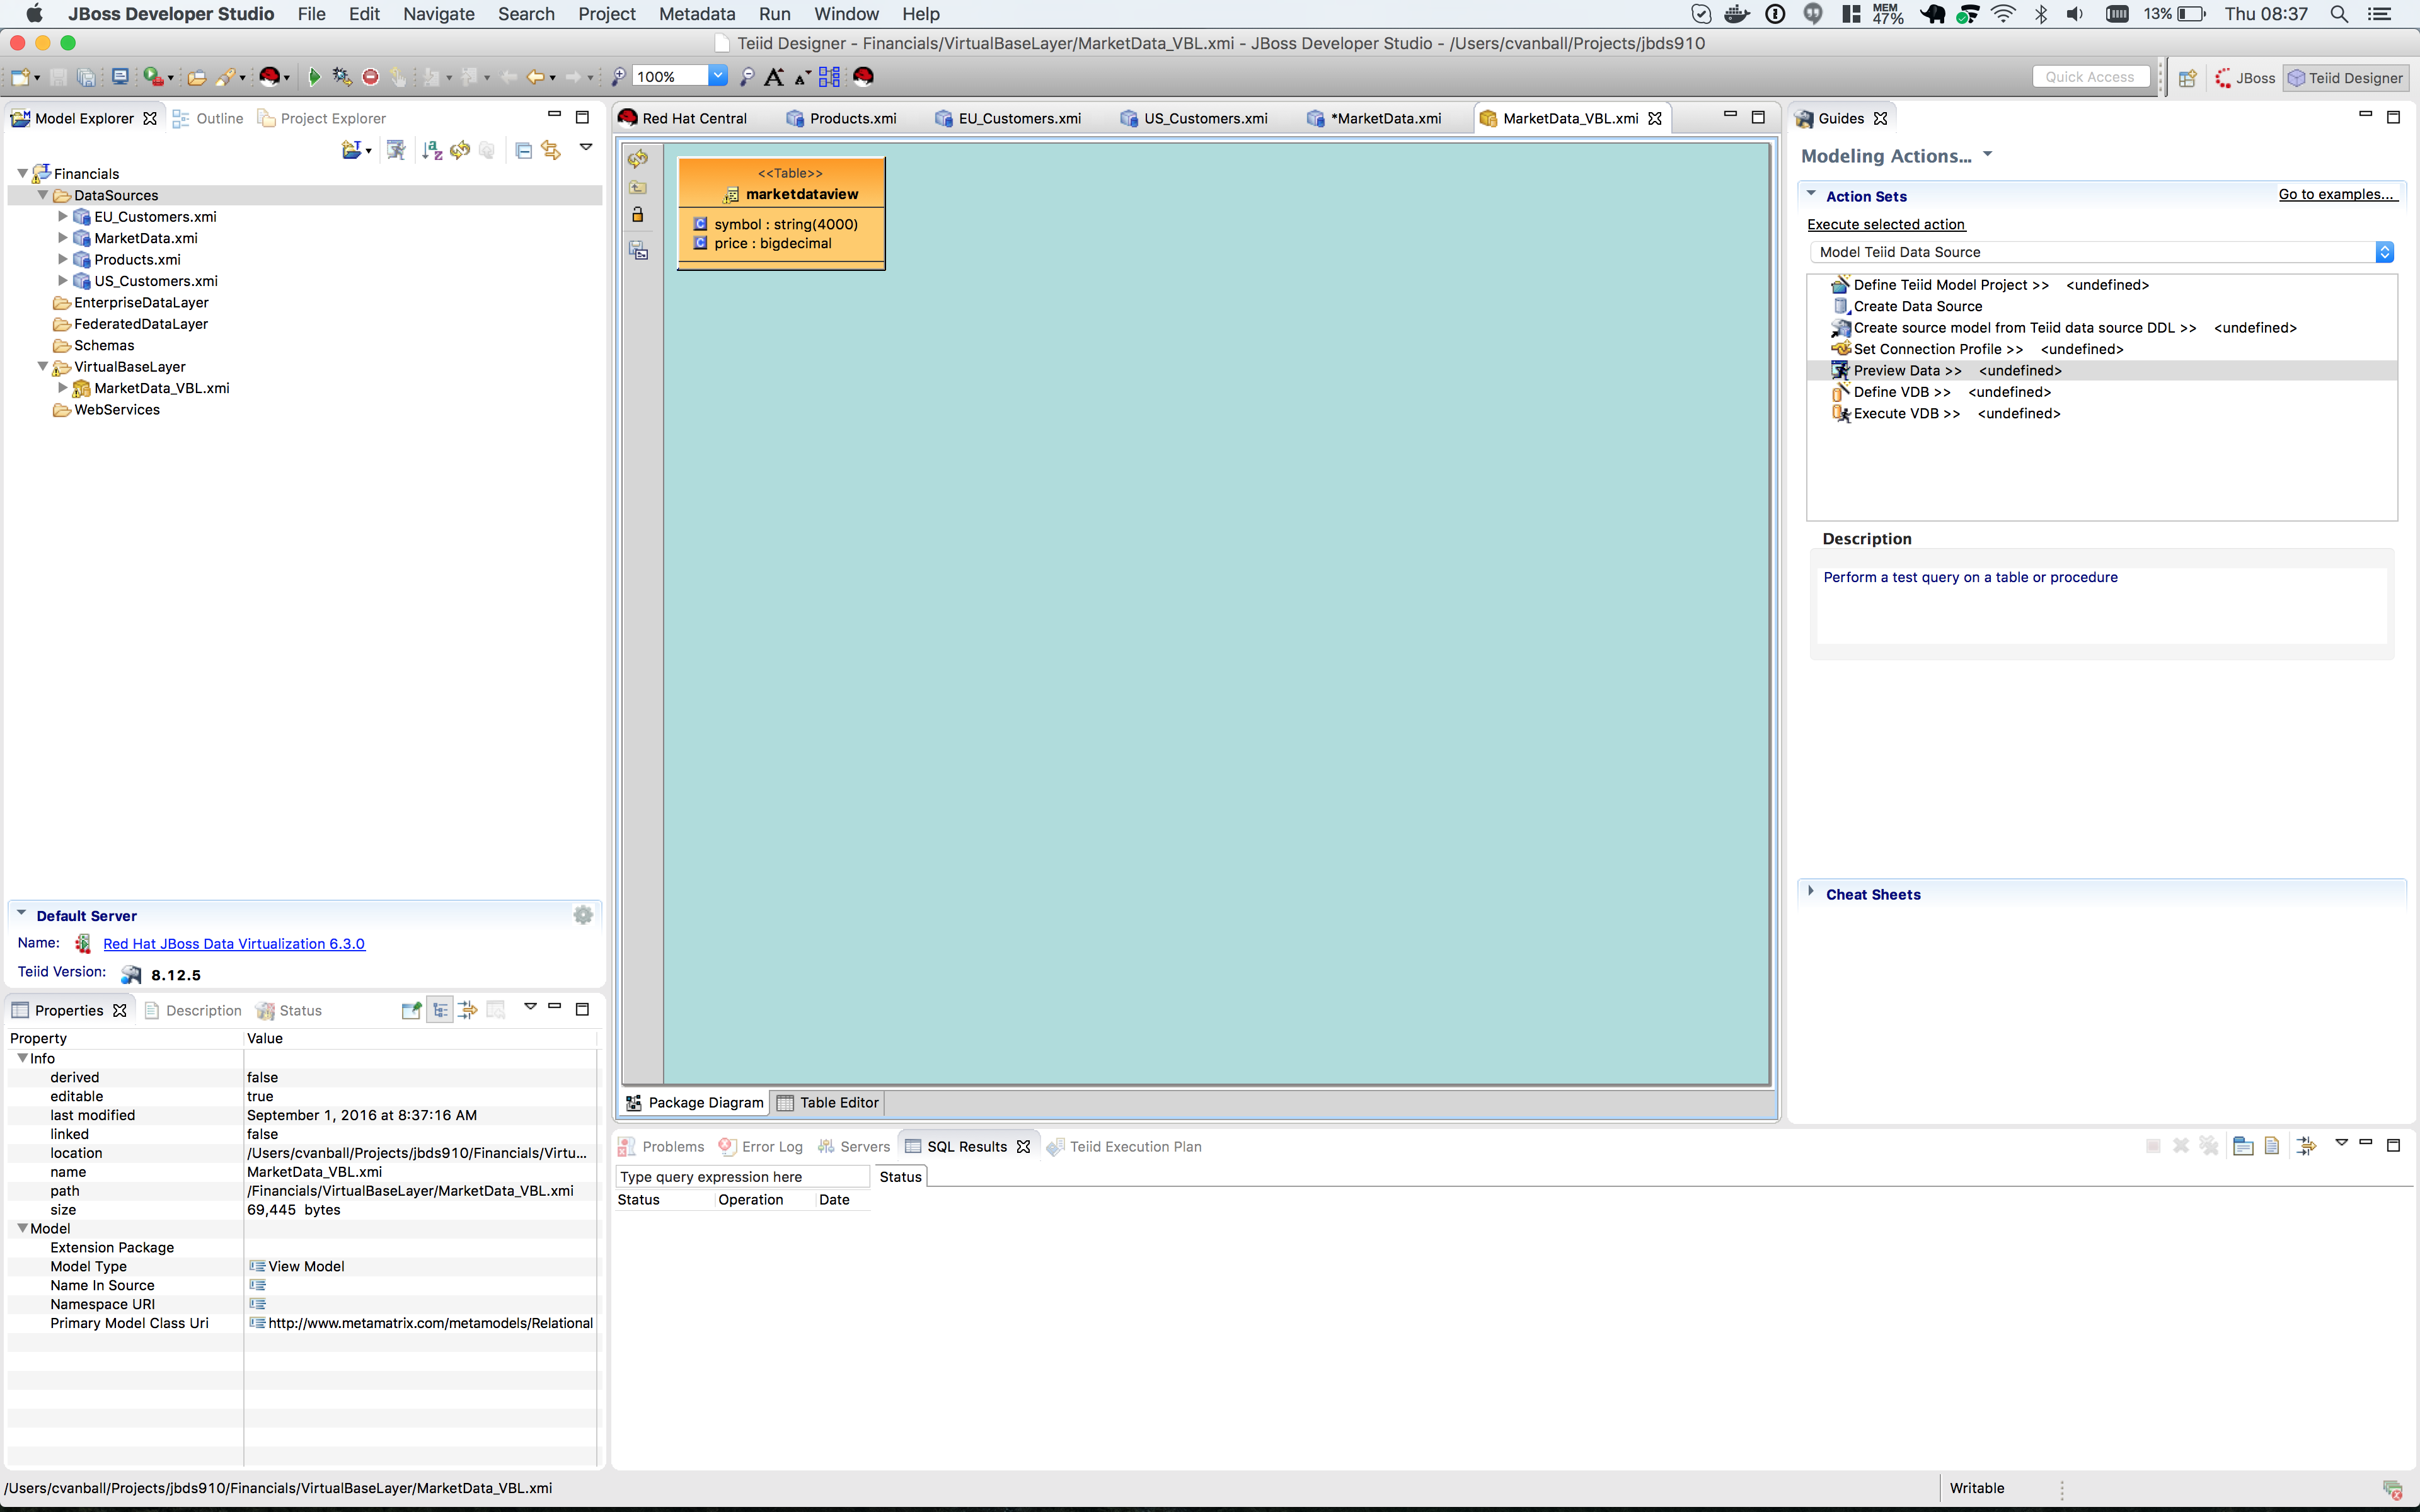
Click on the btn:[Finish] button to import the model. Your JBDS screen should look similar to the image below.
Save All. Congratulations, you have now completed this lab.