Create a Federated Data Layer
Now that we have created our Virtual Base Layer (to isolate us from changes in the sources), defined an enterprise data dictionary to semantically reconcile the various terminologies in our disparate data sources, and created an Enterprise Data Layer that captures those mappings, we are ready to integrate some different data sources. And, since we have the ground work already, it could not be simpler.
Where are we?
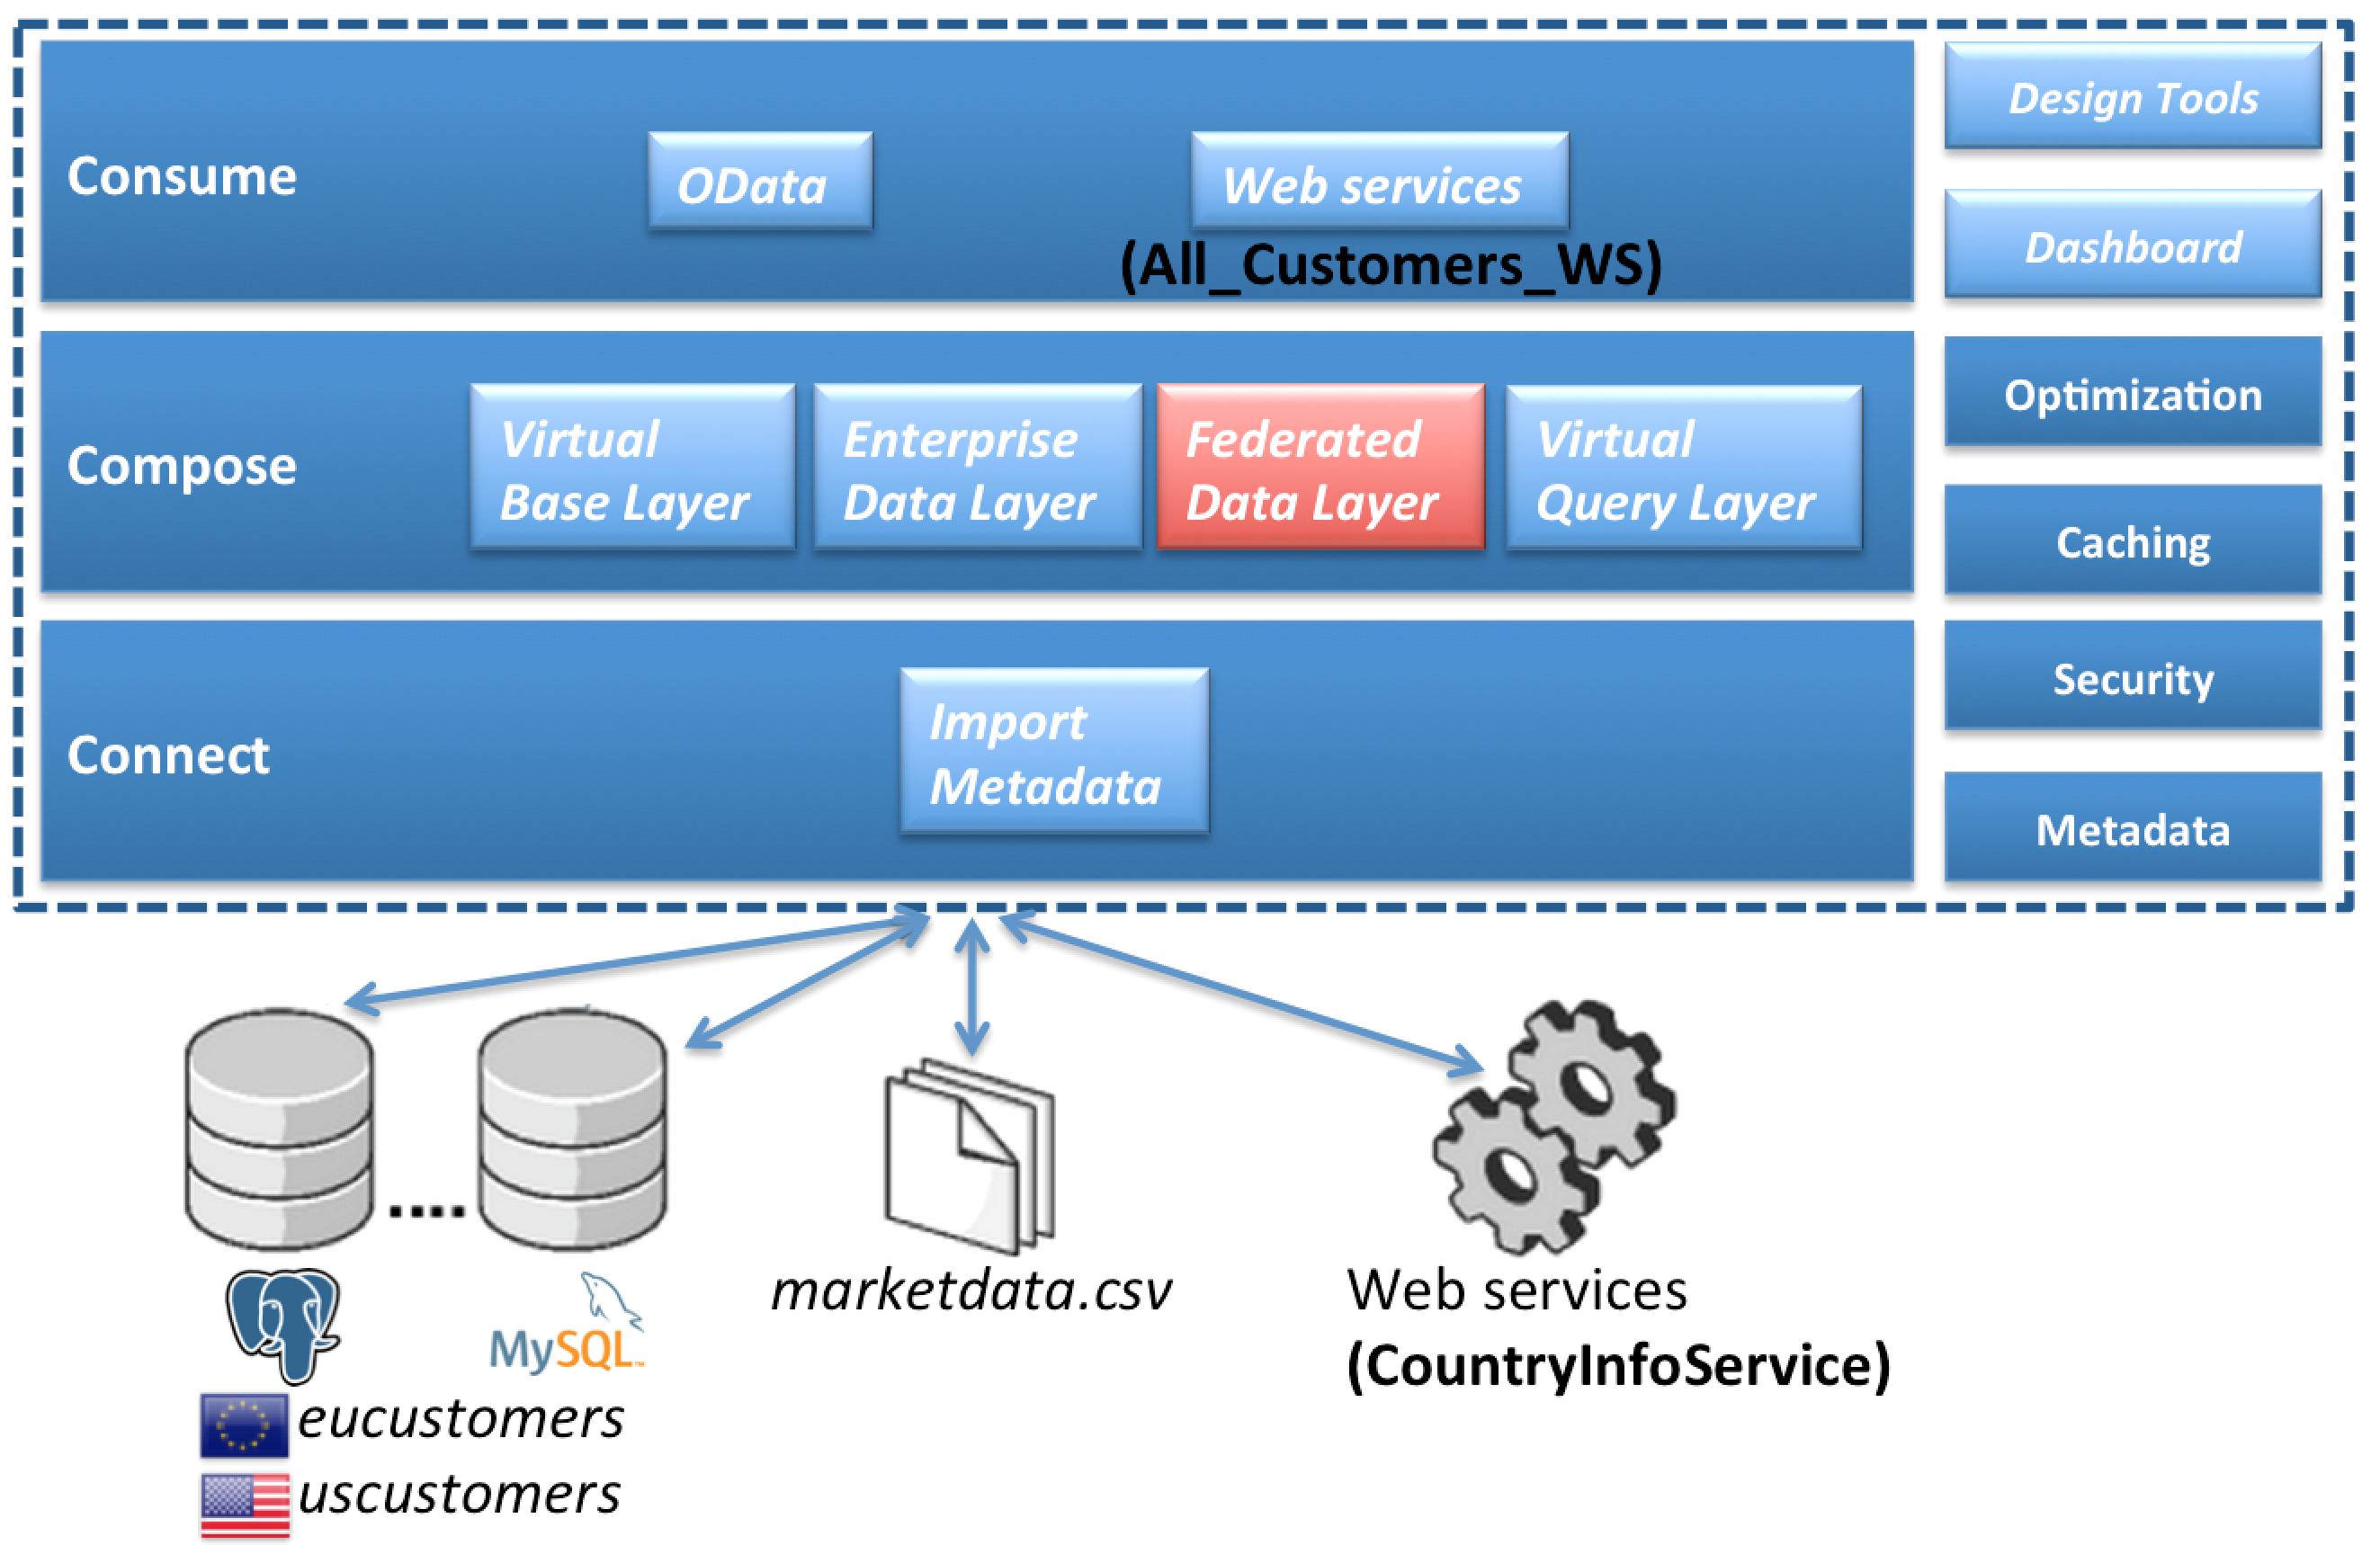
Create a Federated Data Layer
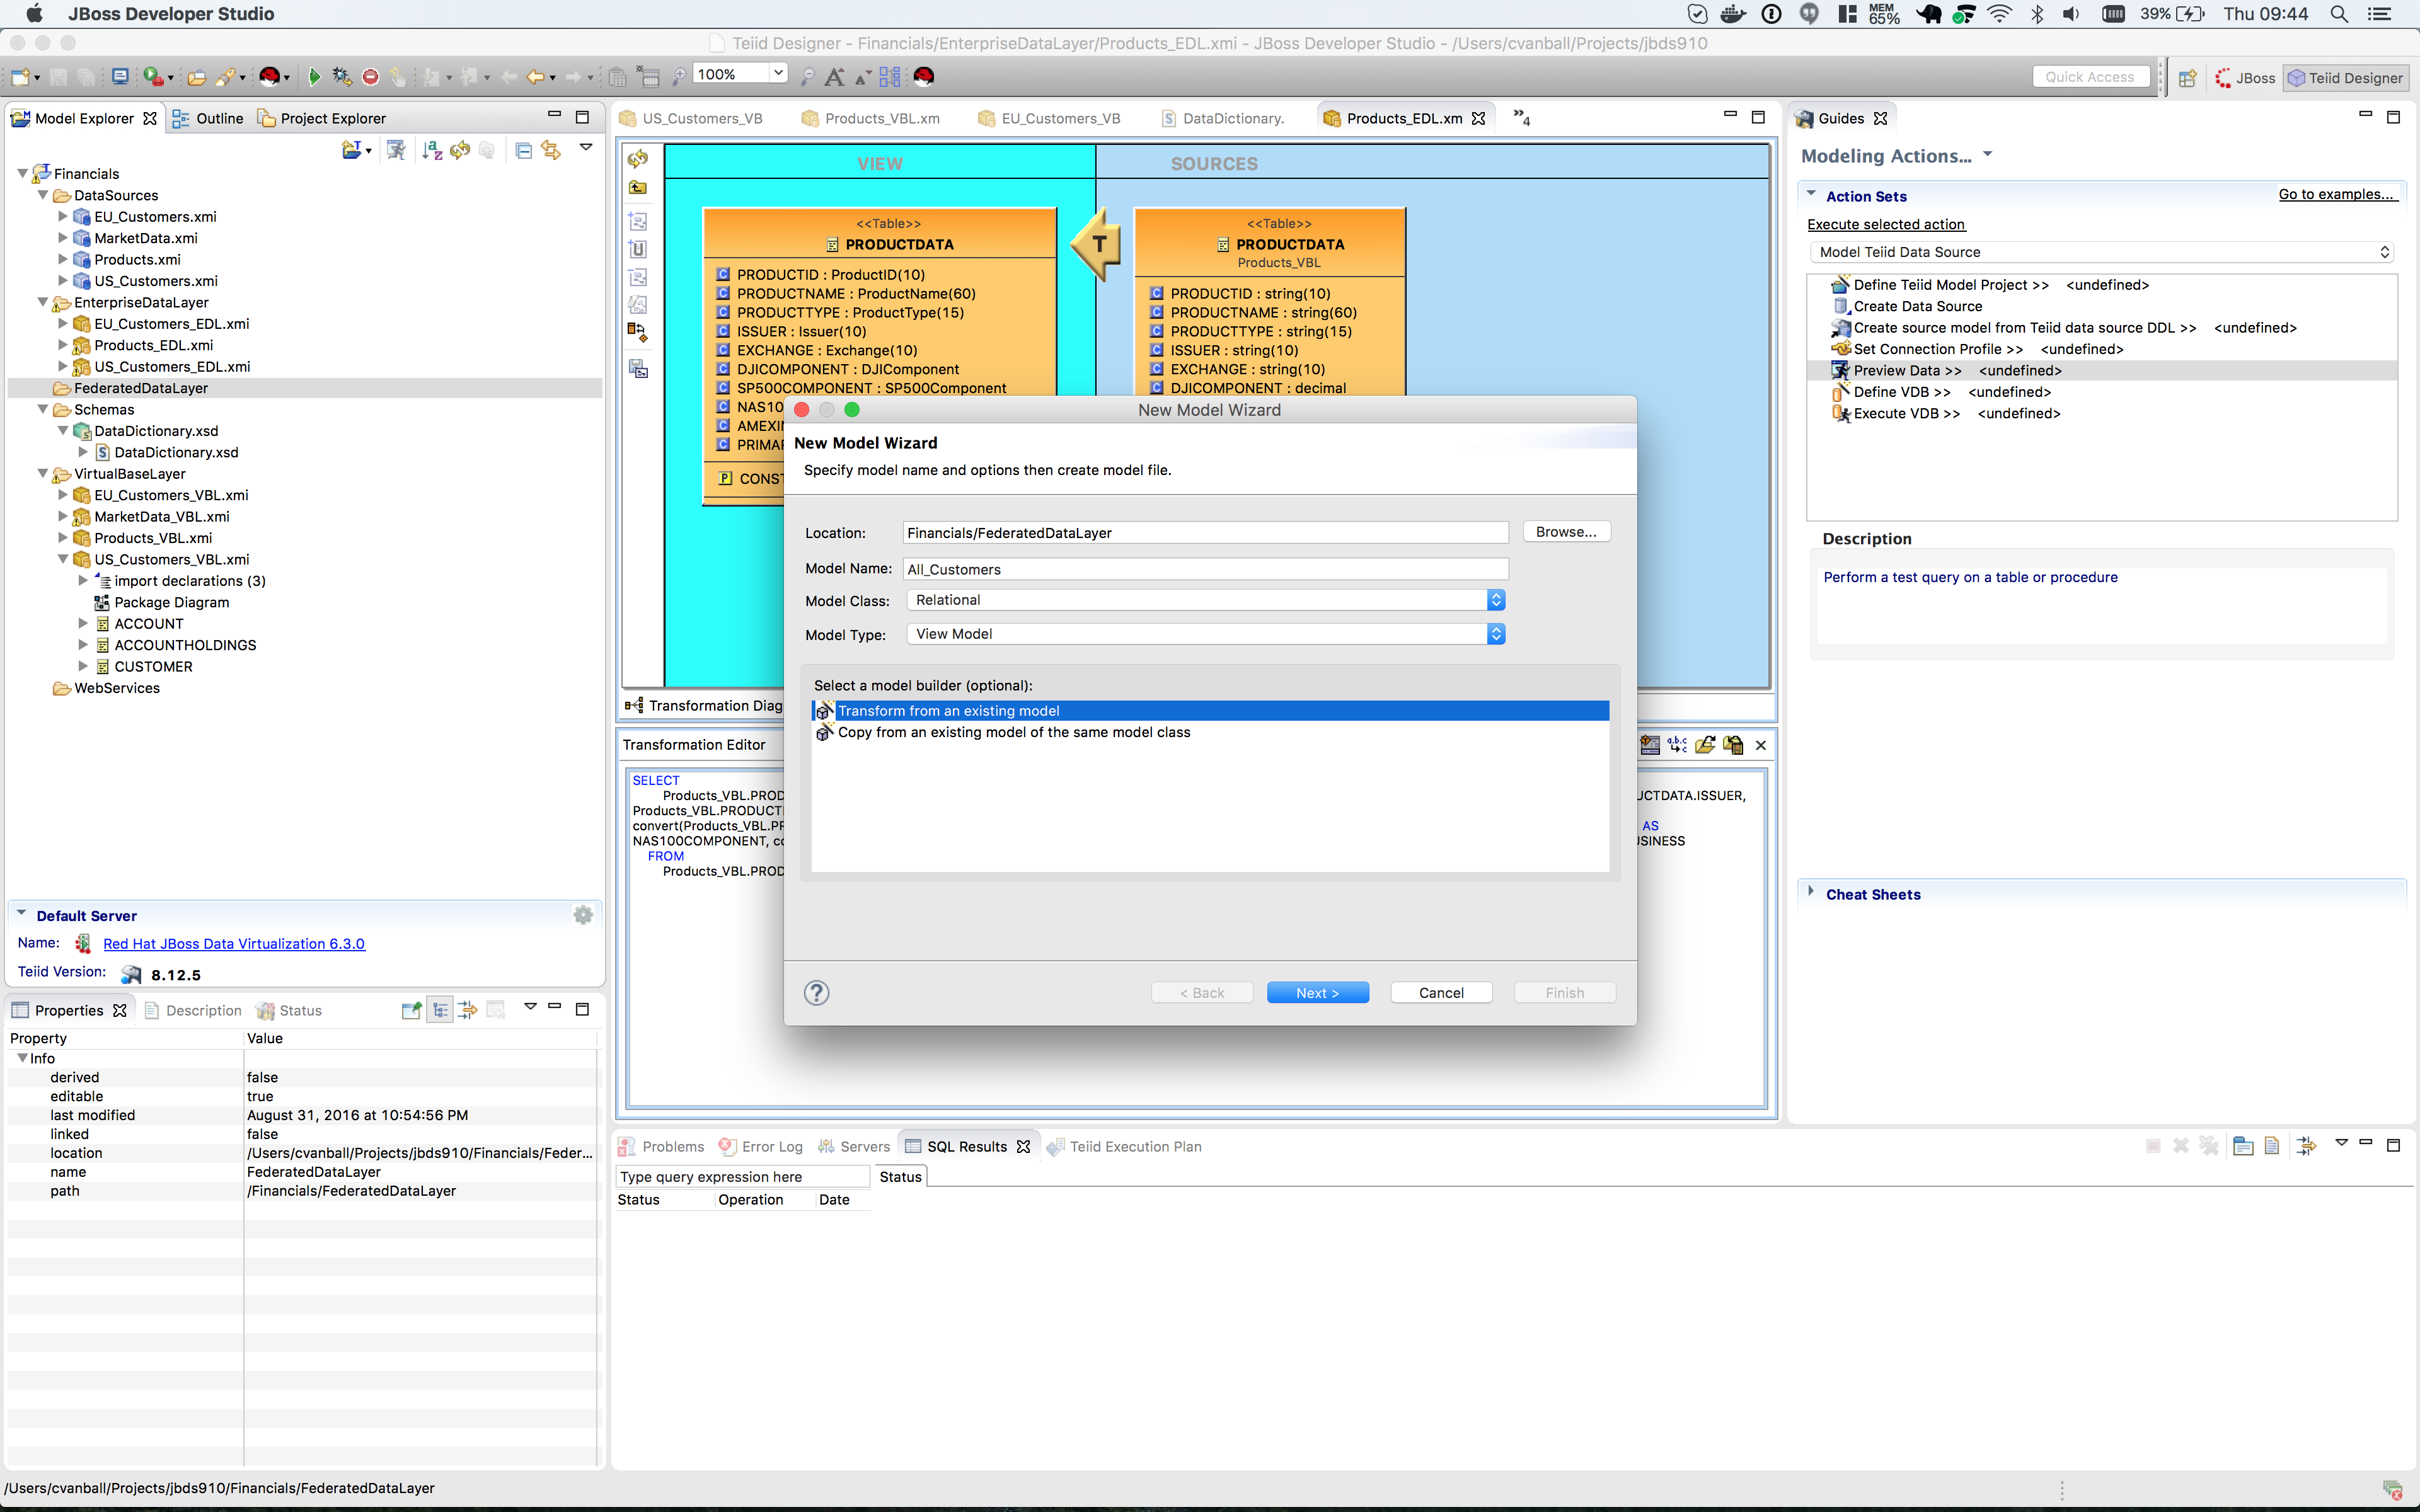
Right-click on the Financials Project and go menu:New[Folder] to create a new folder called “FederatedDataLayer”. Create a new Teiid Metadata Model in this folder called “All_Customers". Create it by transforming it from the EU_Customers_EDL model. Your new model wizard should look like the illustration below.
After clicking the btn:[Next] button, be sure to select the EU_Customers_EDL.xmi model as indicated below.
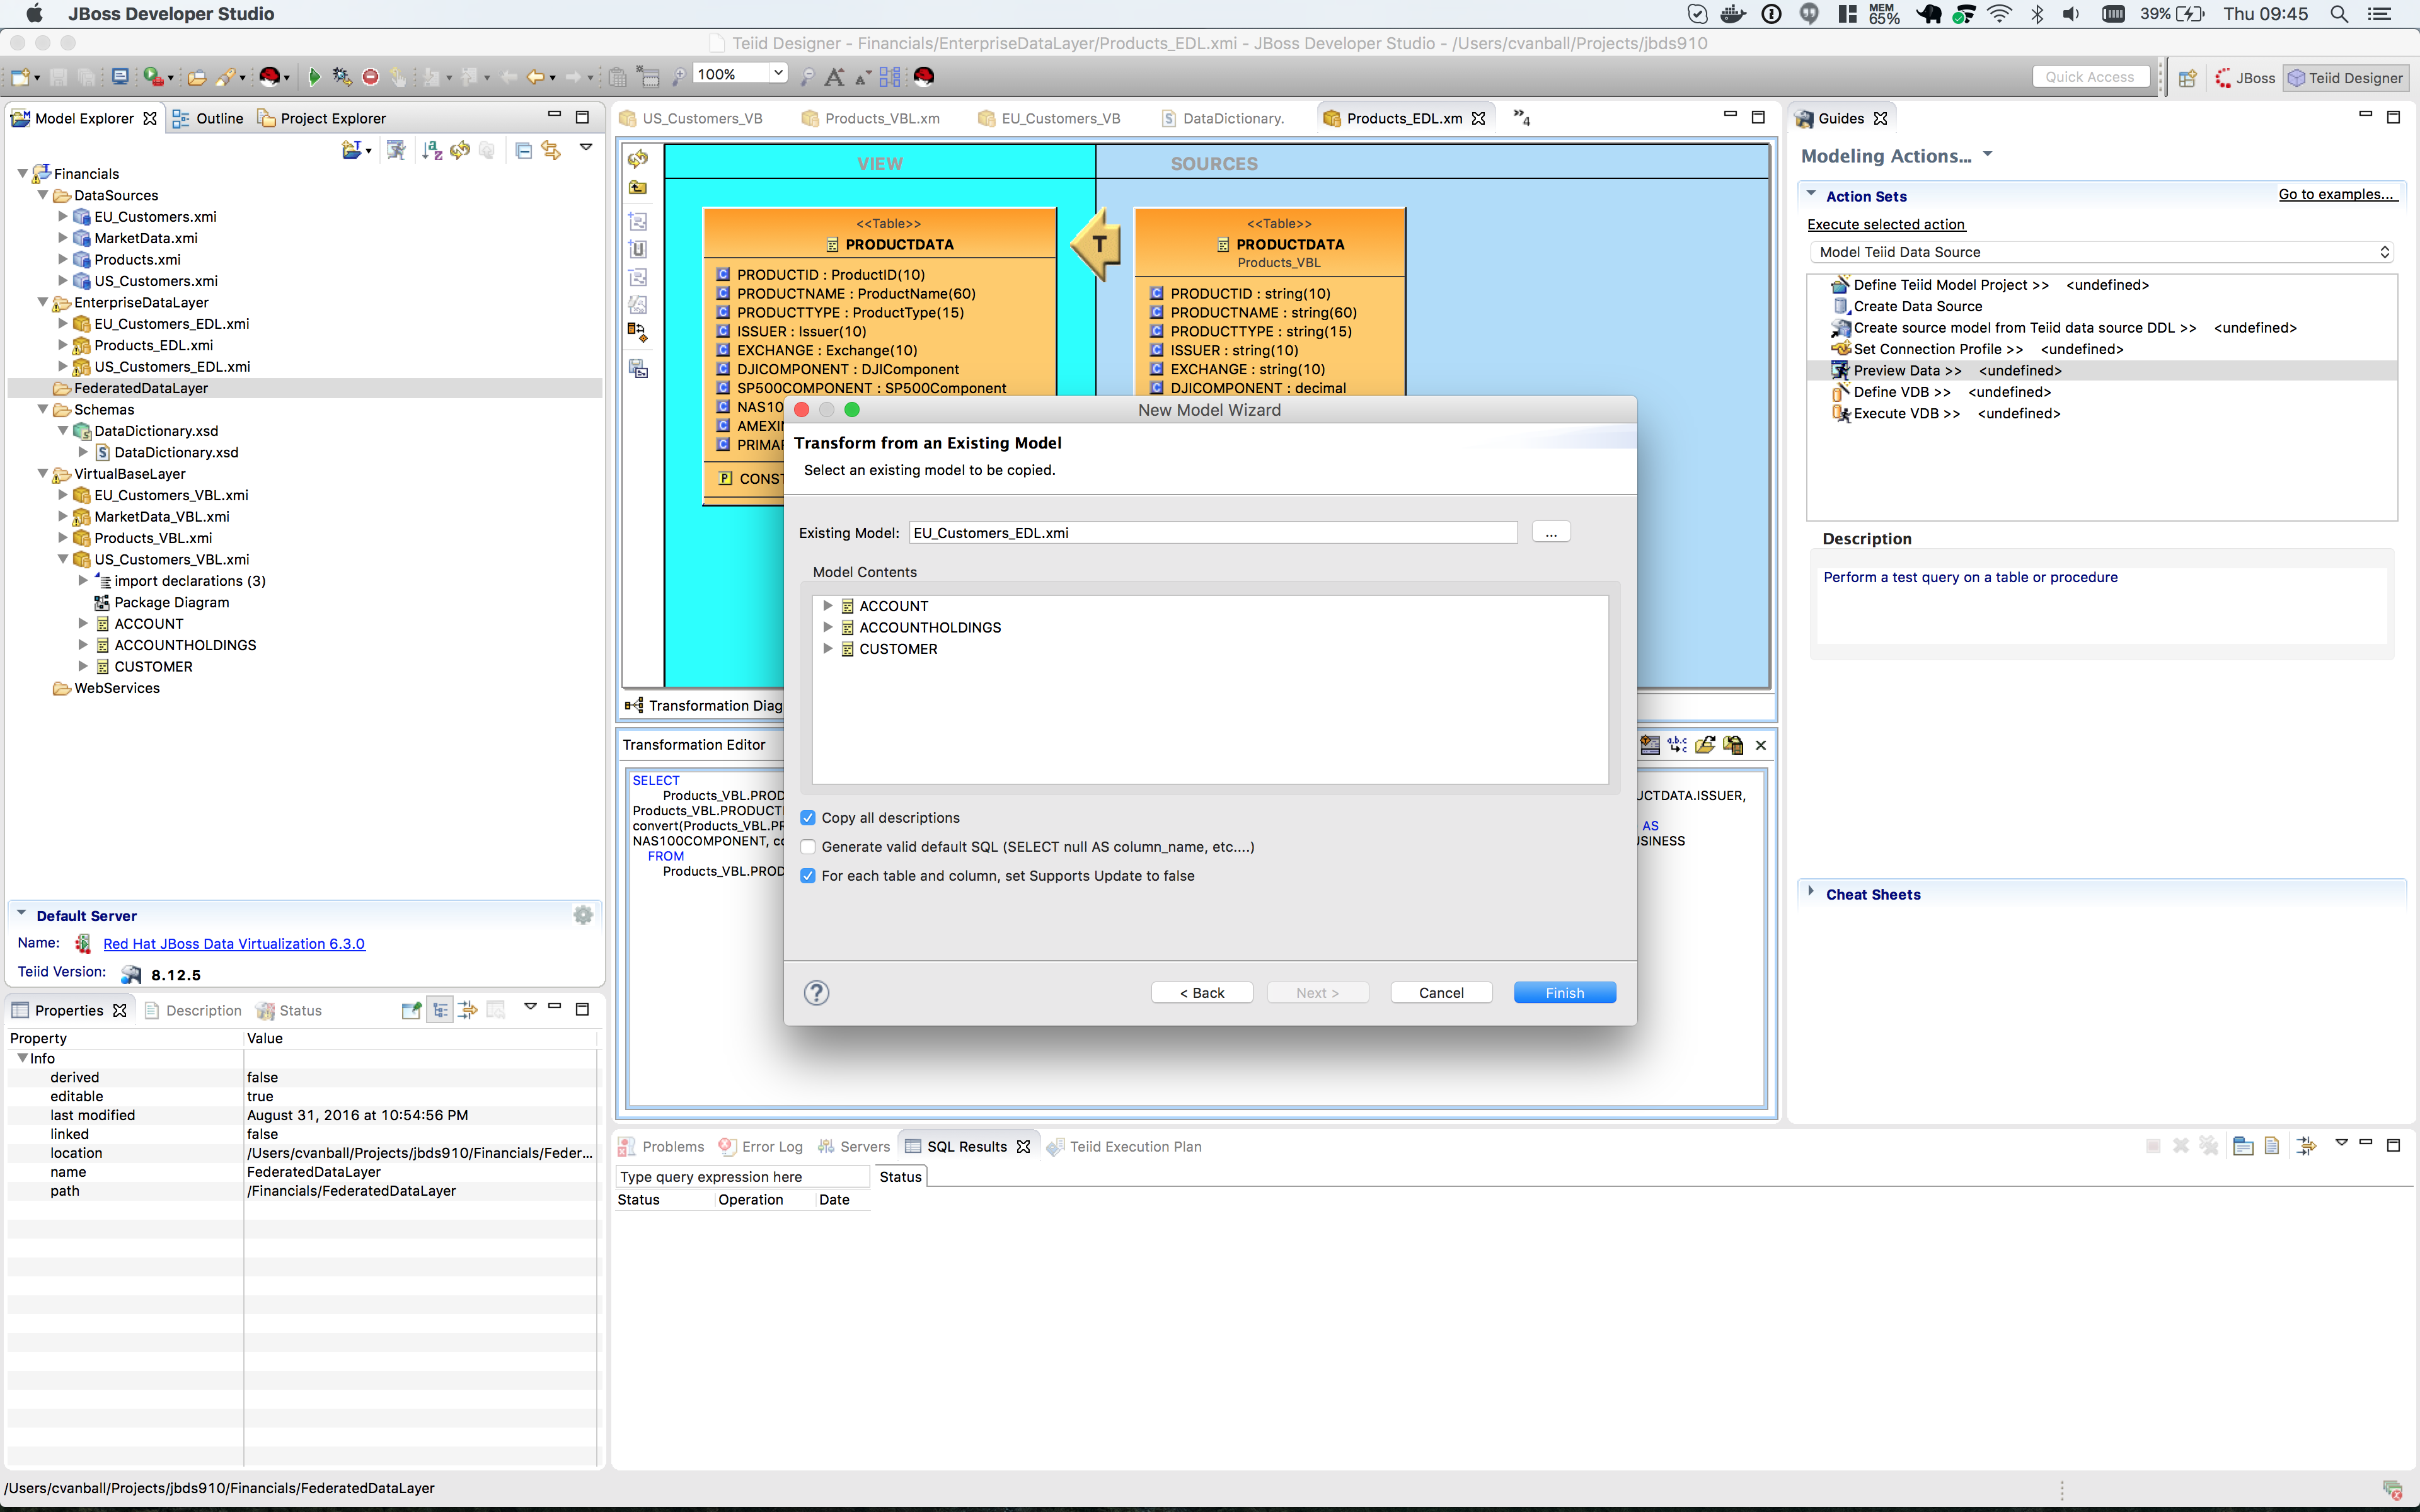
Click btn:[Finish]. Now, open up the Transformation Editor for All_Customers.CUSTOMER. In the Model Explorer on the left, open up the FederatedDataLayer → All_Customers model and highlight the CUSTOMER table as indicated in the illustration below.
Select the CUSTOMER table of the EU_Customers_EDL view model in the Transformation Editor.
|
Note
|
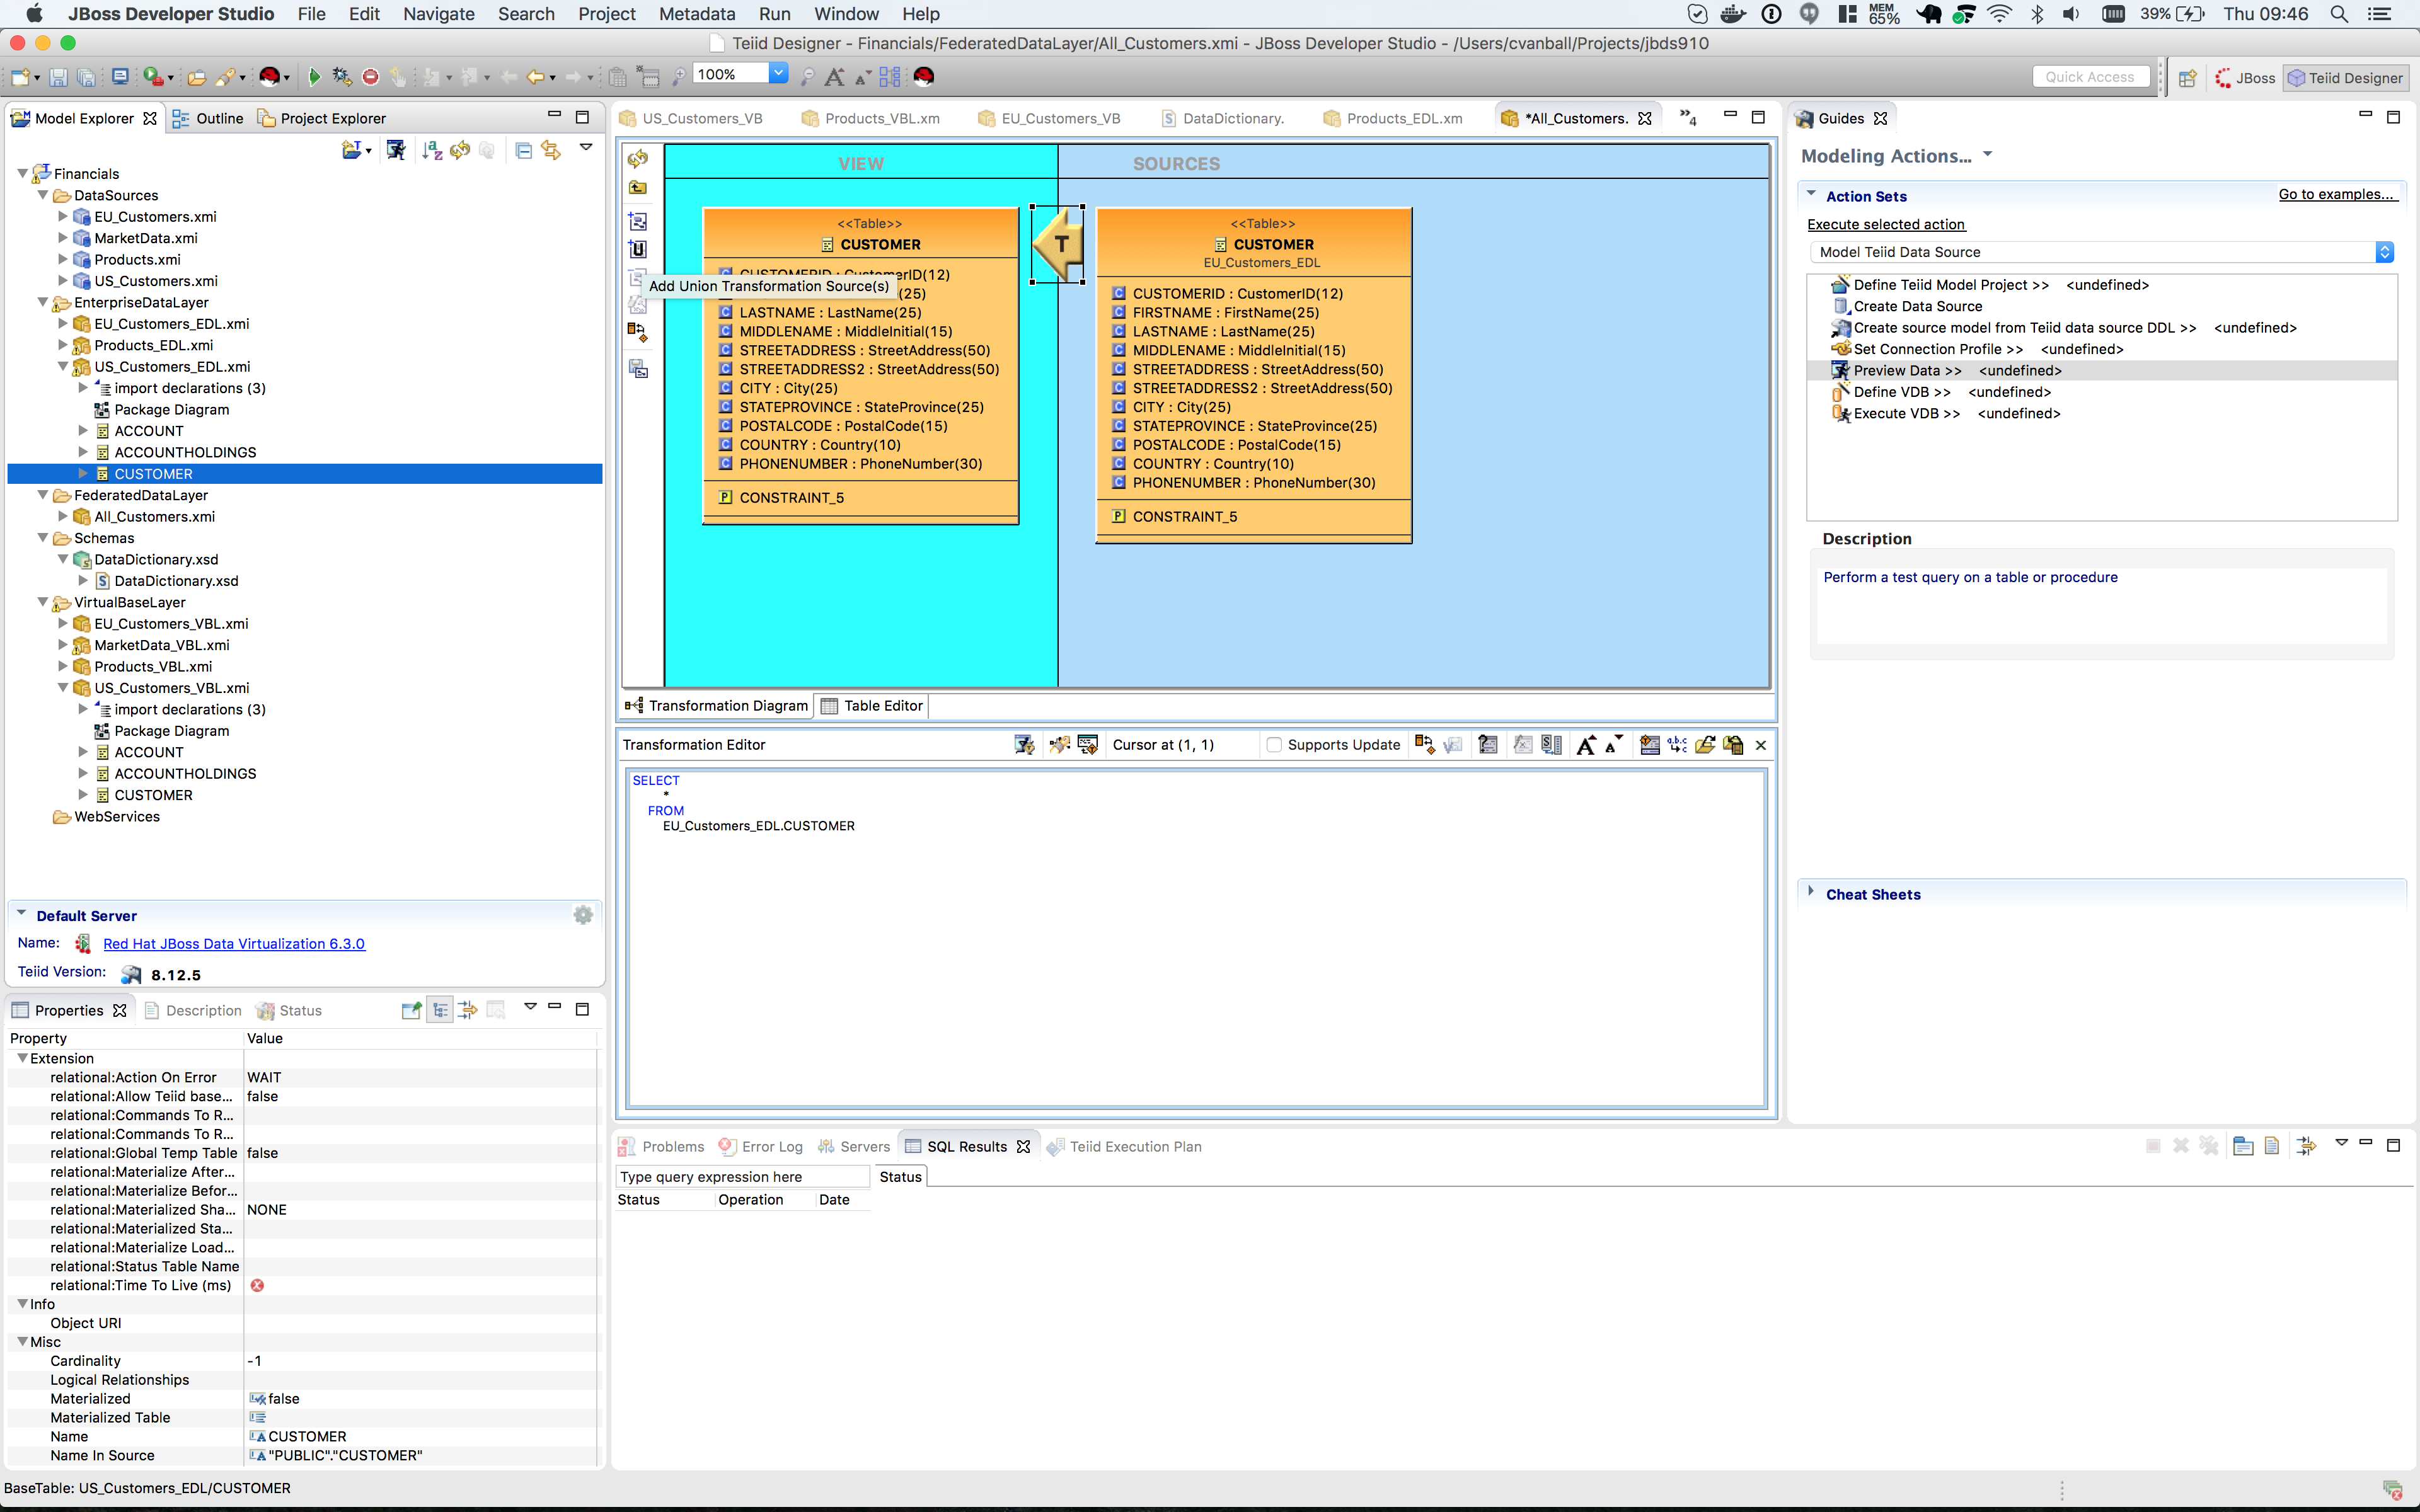
Several new icons have been activated in the middle tool bar. Click on the fourth one down on the middle tool bar. If you hover your mouse over the label it reads "Add Union Transformation Source(s)". It is possible that you may have to click this button twice for the action to occur. This will add the customer table from US_Customers_EDL to the All_Customers model. Additionally, the "T" icon will now have a small "U" to the lower-right indicating that there is a union that is responsible for this transformation. Now, all that is required is to save the model. That is it! You now have a union of two tables from two separate databases. In order to view the result, be sure the CUSTOMER table is highlighted in the Model Explorer under the FederatedDataLayer. This is indicated in the illustration below. |
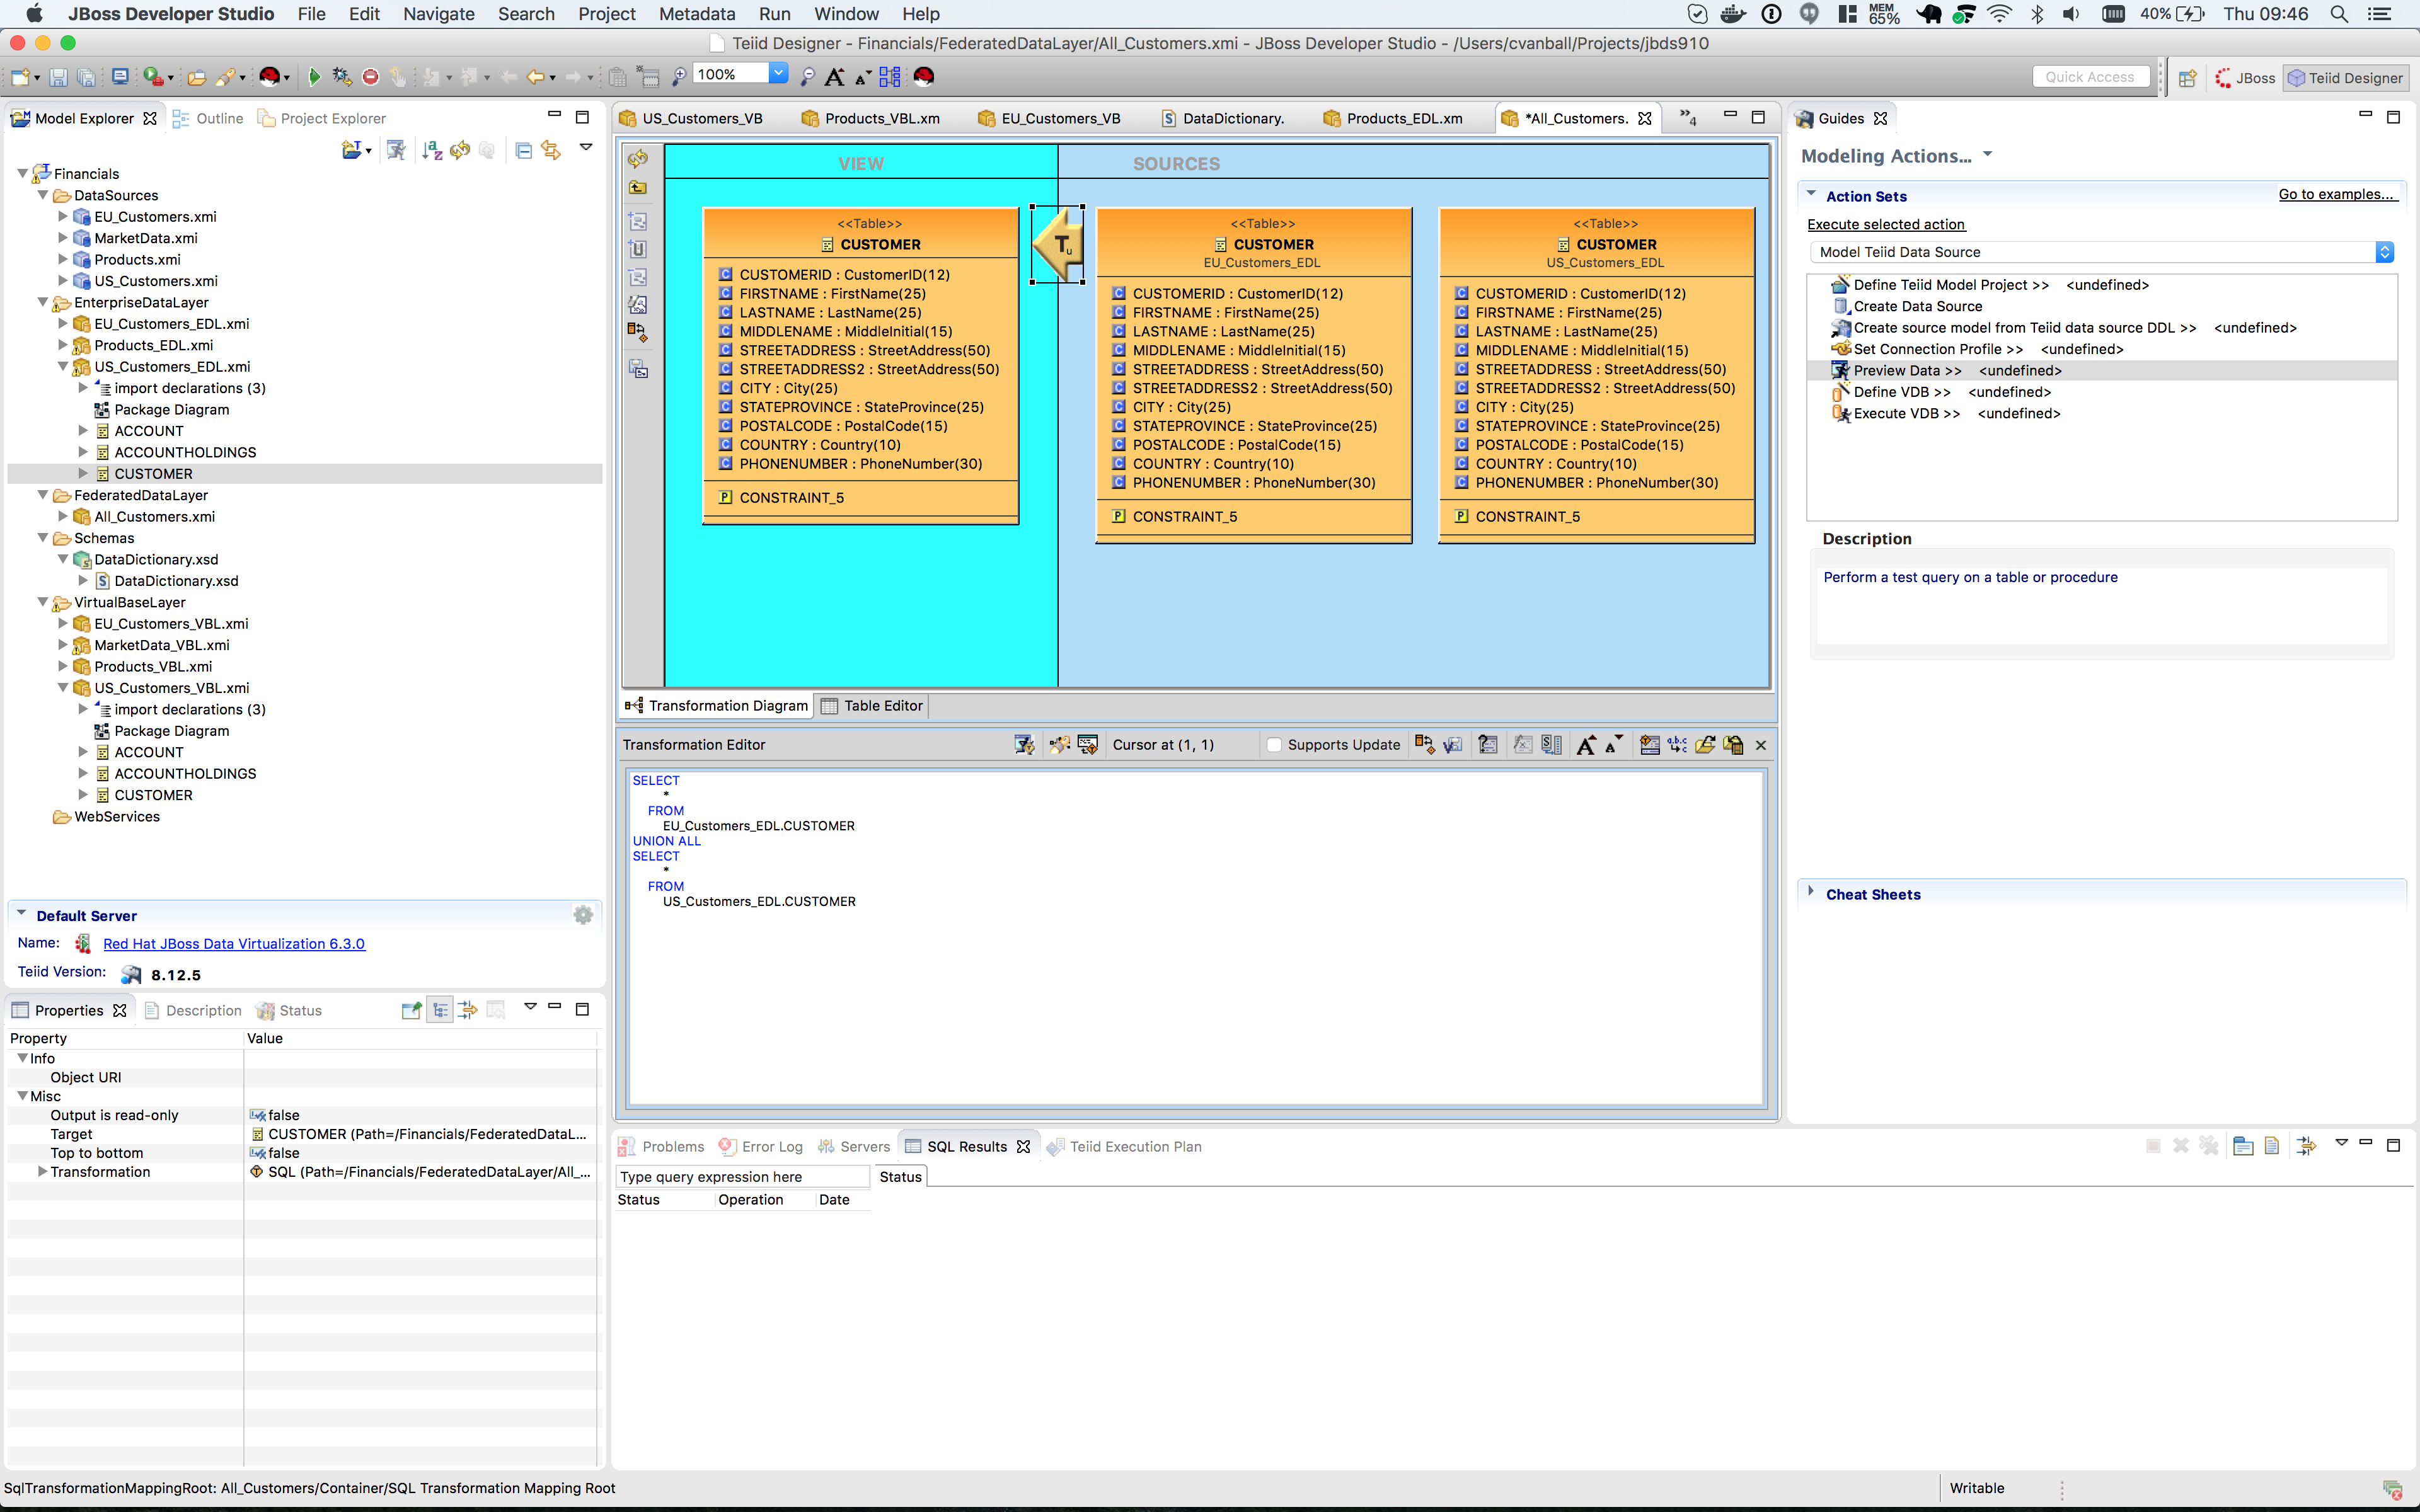
With the All_Customers.CUSTOMER table highlighted in the Model Explorer, the "Running Man" icon is now enabled. This icon is located on the toolbar directly below the Model Explorer tab. Click on this icon to preview the data of the combined EU customer and US customer database tables. If for some reason this does not work, select the Preview Data Action on the right-hand side of JBDS that was utilized in earlier labs to preview the data. Now that the exercise for federating the CUSTOMER table is complete, give it a try for the other two tables, ACCOUNT and ACCOUNTHOLDINGS. Clearly, this is a simple example where we assume that the entries in the uscustomers database and the eucustomers database do not overlap. JDV is capable of very sophisticated modeling and transformations.
Congratulations, you have now completed this lab.