Create an Enterprise Data Layer
This section is for create Enterprise Data Layer
Why Enterprise Data Layer
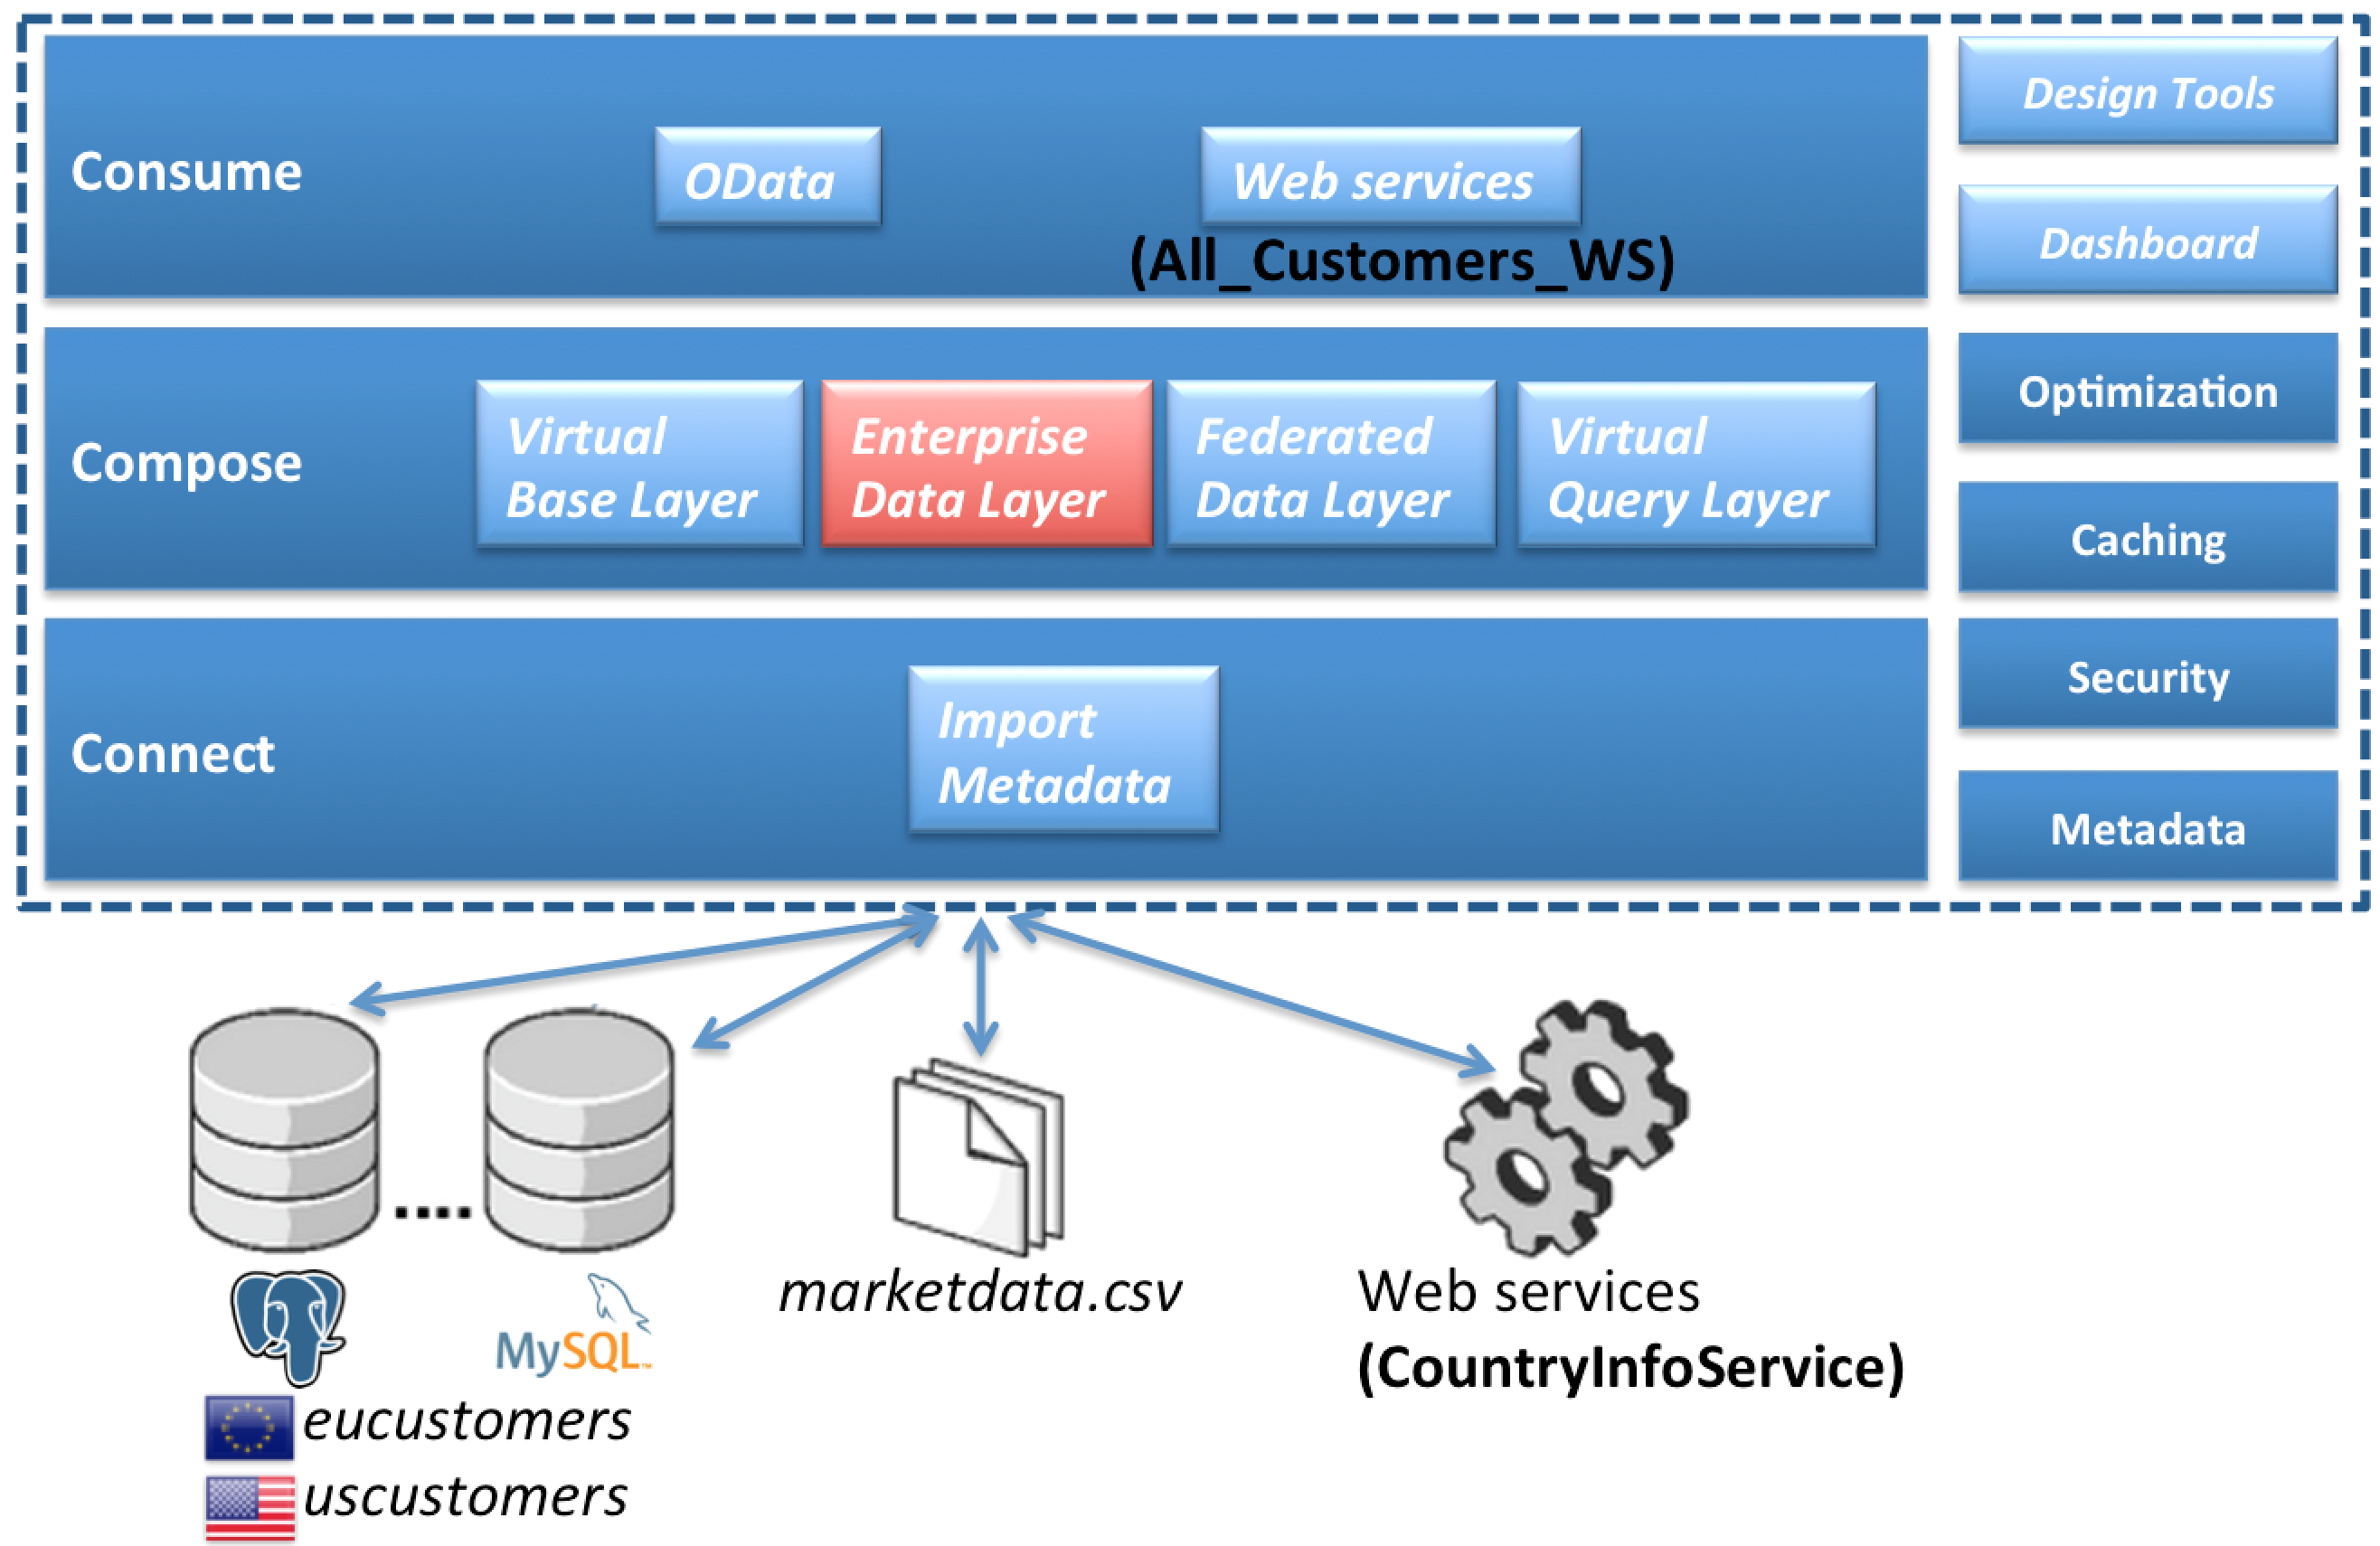
The next layer to build are the models in the EnterpriseDataLayer folder. What these models do is resolve the slight semantic differences between the EU_Customers and US_Customers database tables – for example, the US version includes a field for middle initial only in the customer table where the EU version of the customer table has a corresponding field for middle name. Now, one technique we use here to make resolving the semantic differences a little bit easier here is to convert all of the data types for these tables from the standard SQL datatypes to one of a set of custom datatypes we’ve defined using JBoss Data Virtualization’s data dictionary capabilities. This way we can ensure that we get all data for a particular field into the same datatype. It also gives us a guide to resolving any differences in field names between the two.
|
Note
|
Note that using a domain-specific (or enterprise-wide standard) data dictionary is only a recommendation. There is no hard requirement to define or use a data dictionary but instead do this semantic mediation without one (by manually comparing datatypes and field lengths between the two data sources). Our goal with JBoss Data Virtualization is to not impose any roadblocks for those users that want to get their use cases addressed as rapidly as possible – so we don’t force any requirement on users to define a data dictionary or a taxonomy or anything like that. |
Where are we?
Import the Data Dictionary Schema
An XML schema containing the definitions of a number of datatypes applicable to the Financial domain used by this lab is located in DVWorkshop/dv_docker/demo. The name of the file is DataDictionary.xsd. We want to import the schema into the Schemas folder that was created in an earlier lab.
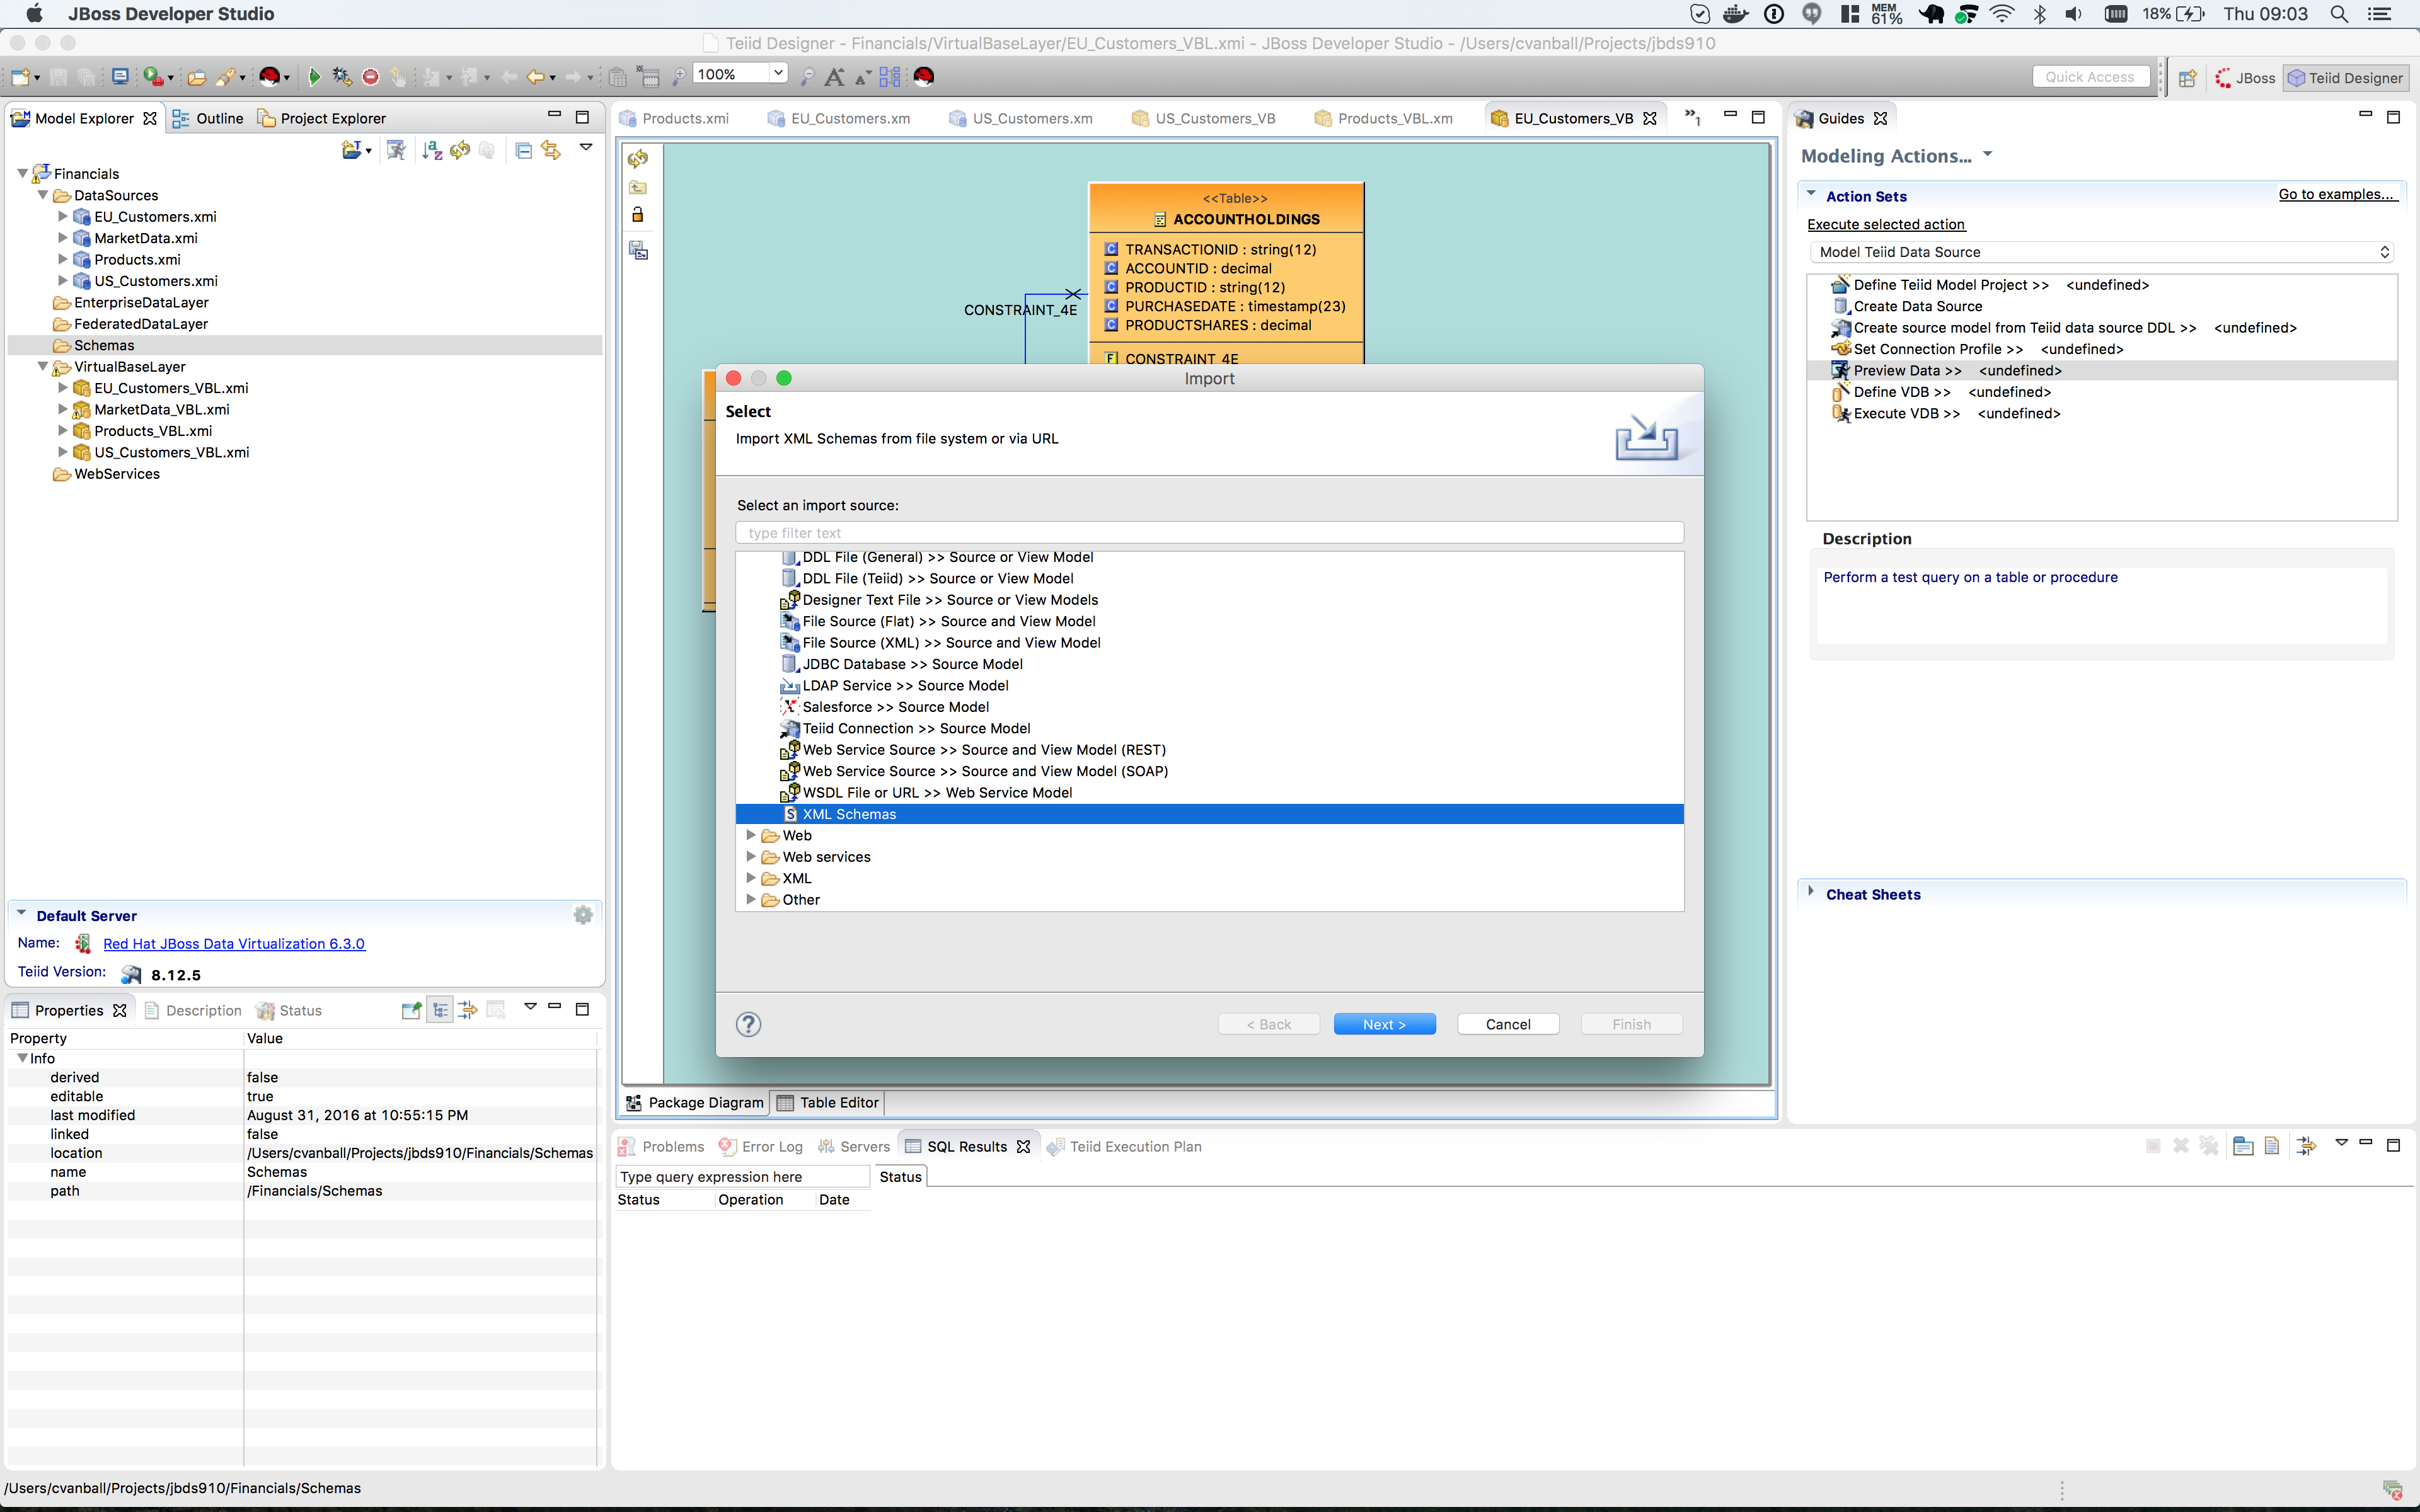
Perform the following steps. Right-click on the Schema folder in the Model Explorer and choose menu:Import[Teiid Designer > XML Schemas].
Then click the btn:[Next >] button.
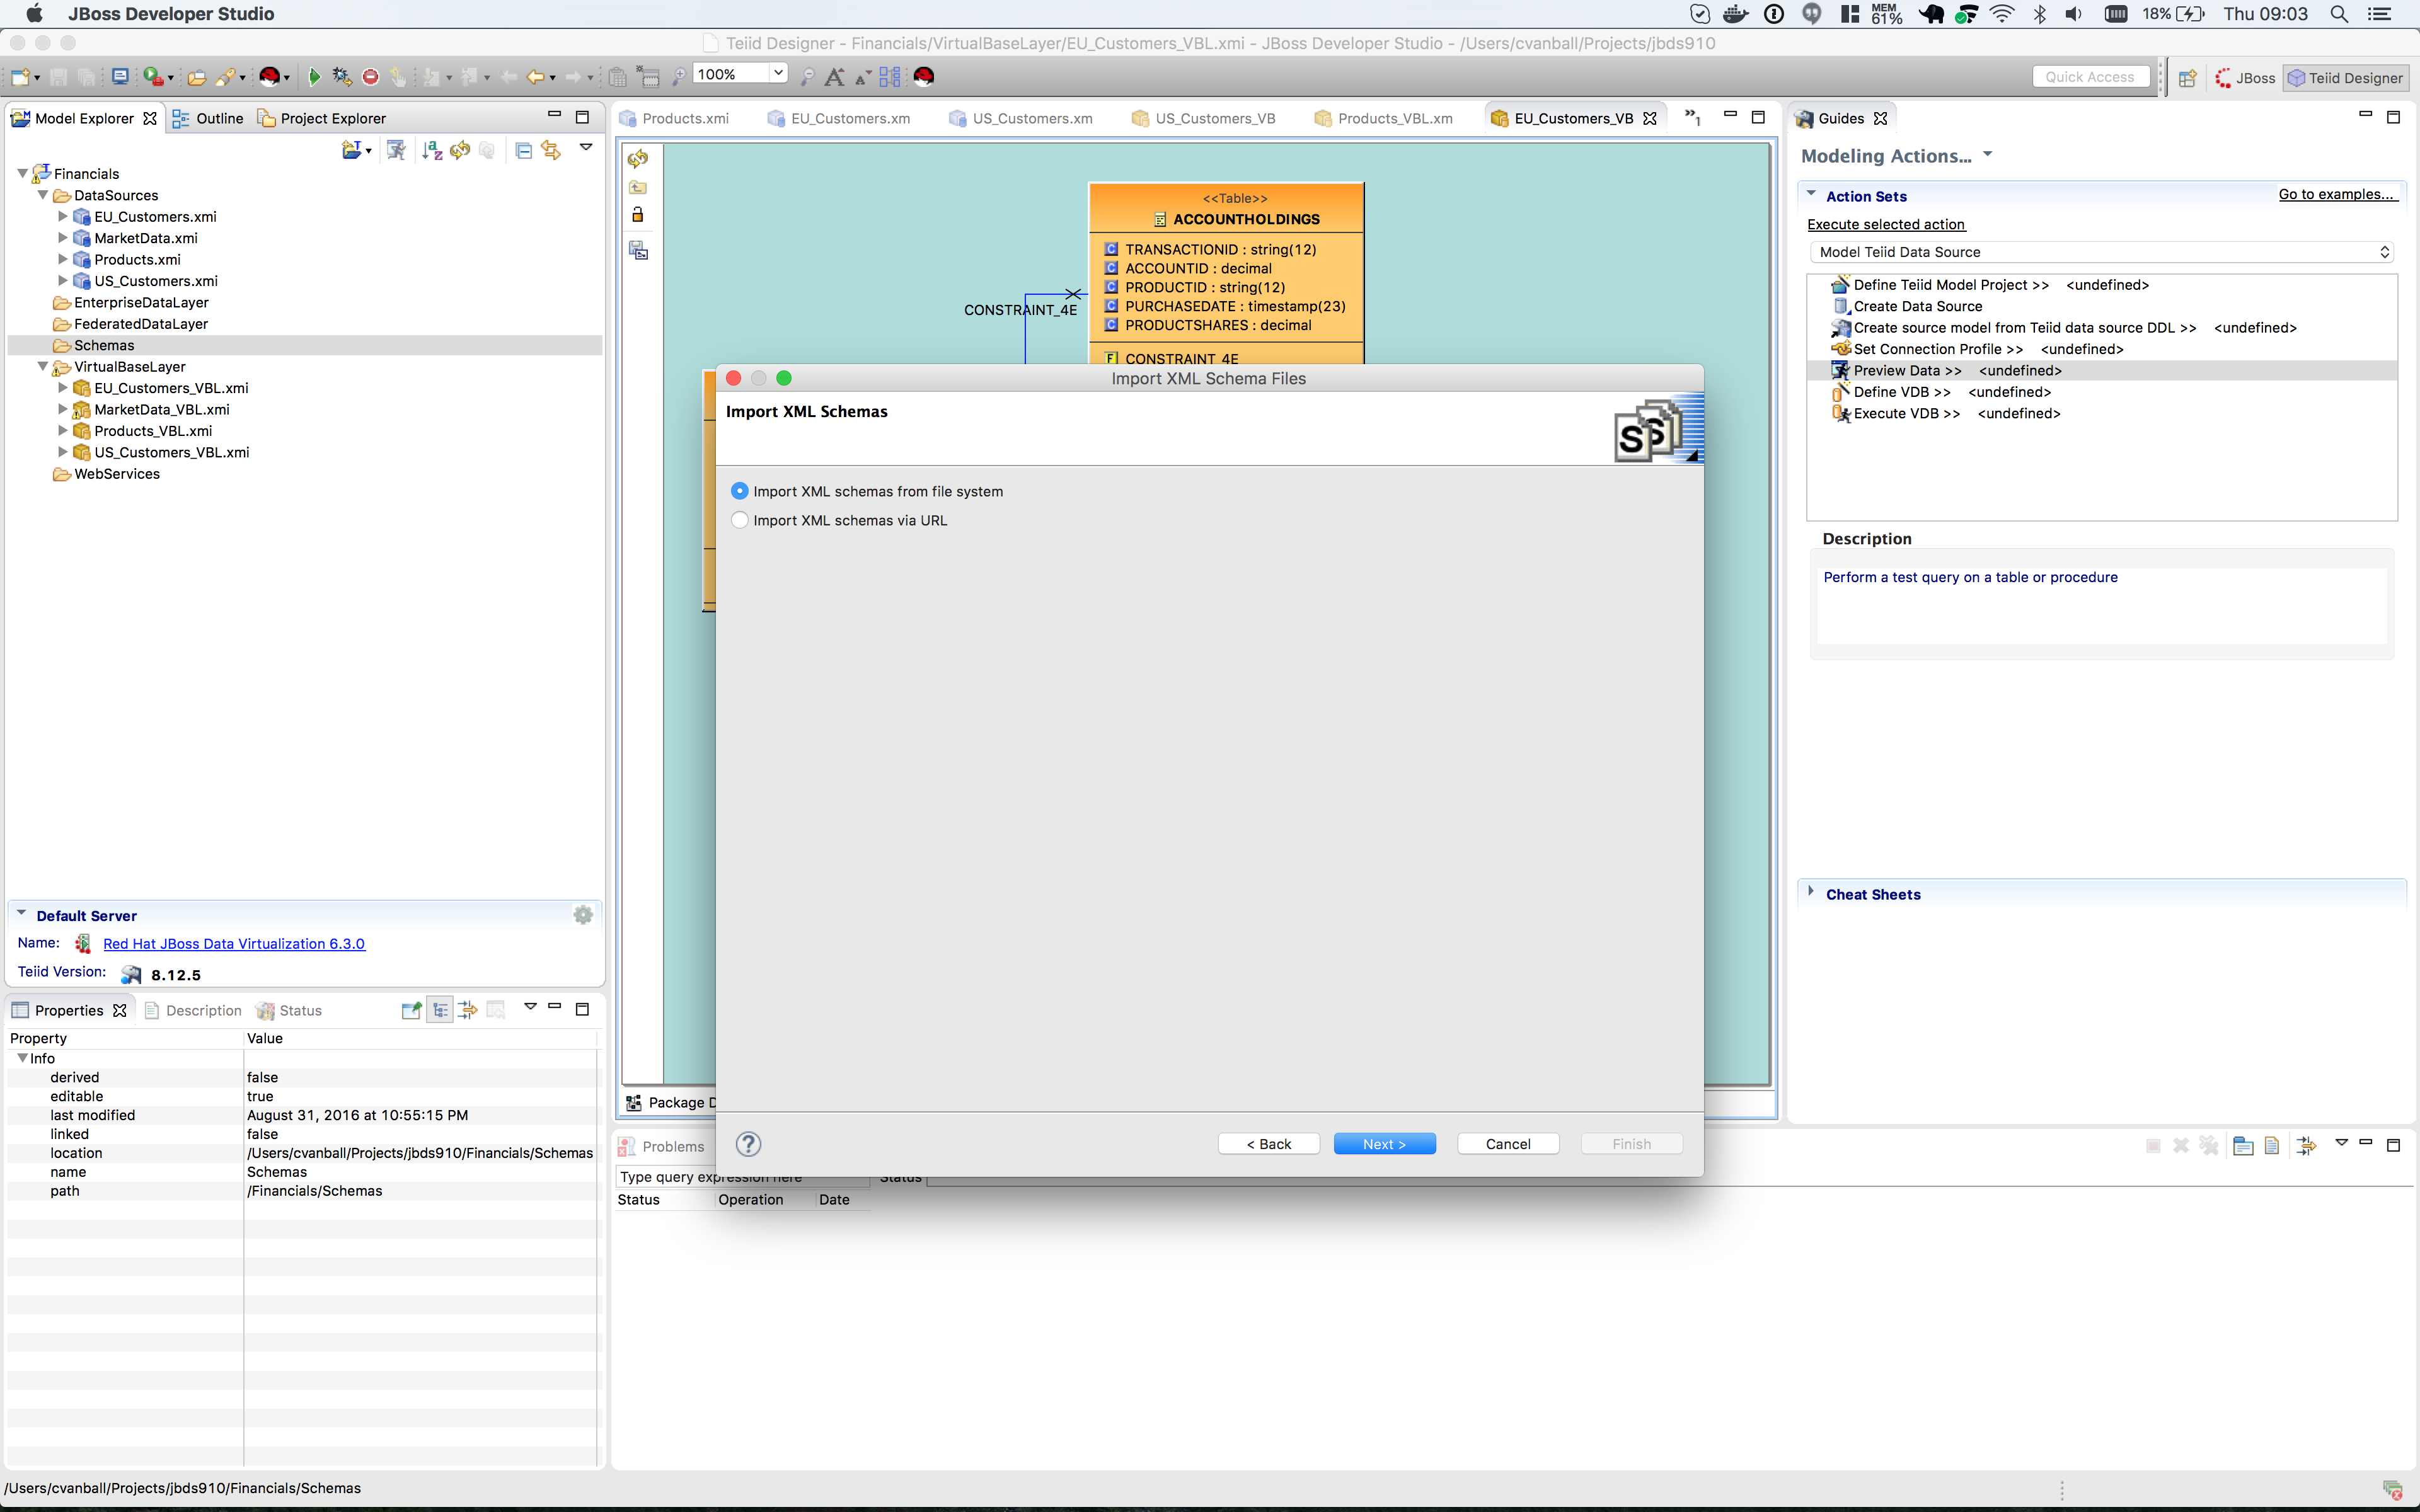
Choose to import the schema from the file system and click btn:[Next >].
Browse to the DVWorkshop/dv_docker/demo directory. Once the directory is opened in the “From Directory” field, you will be able to select the DataDictionary.xsd file.
Then click btn:[Finish].
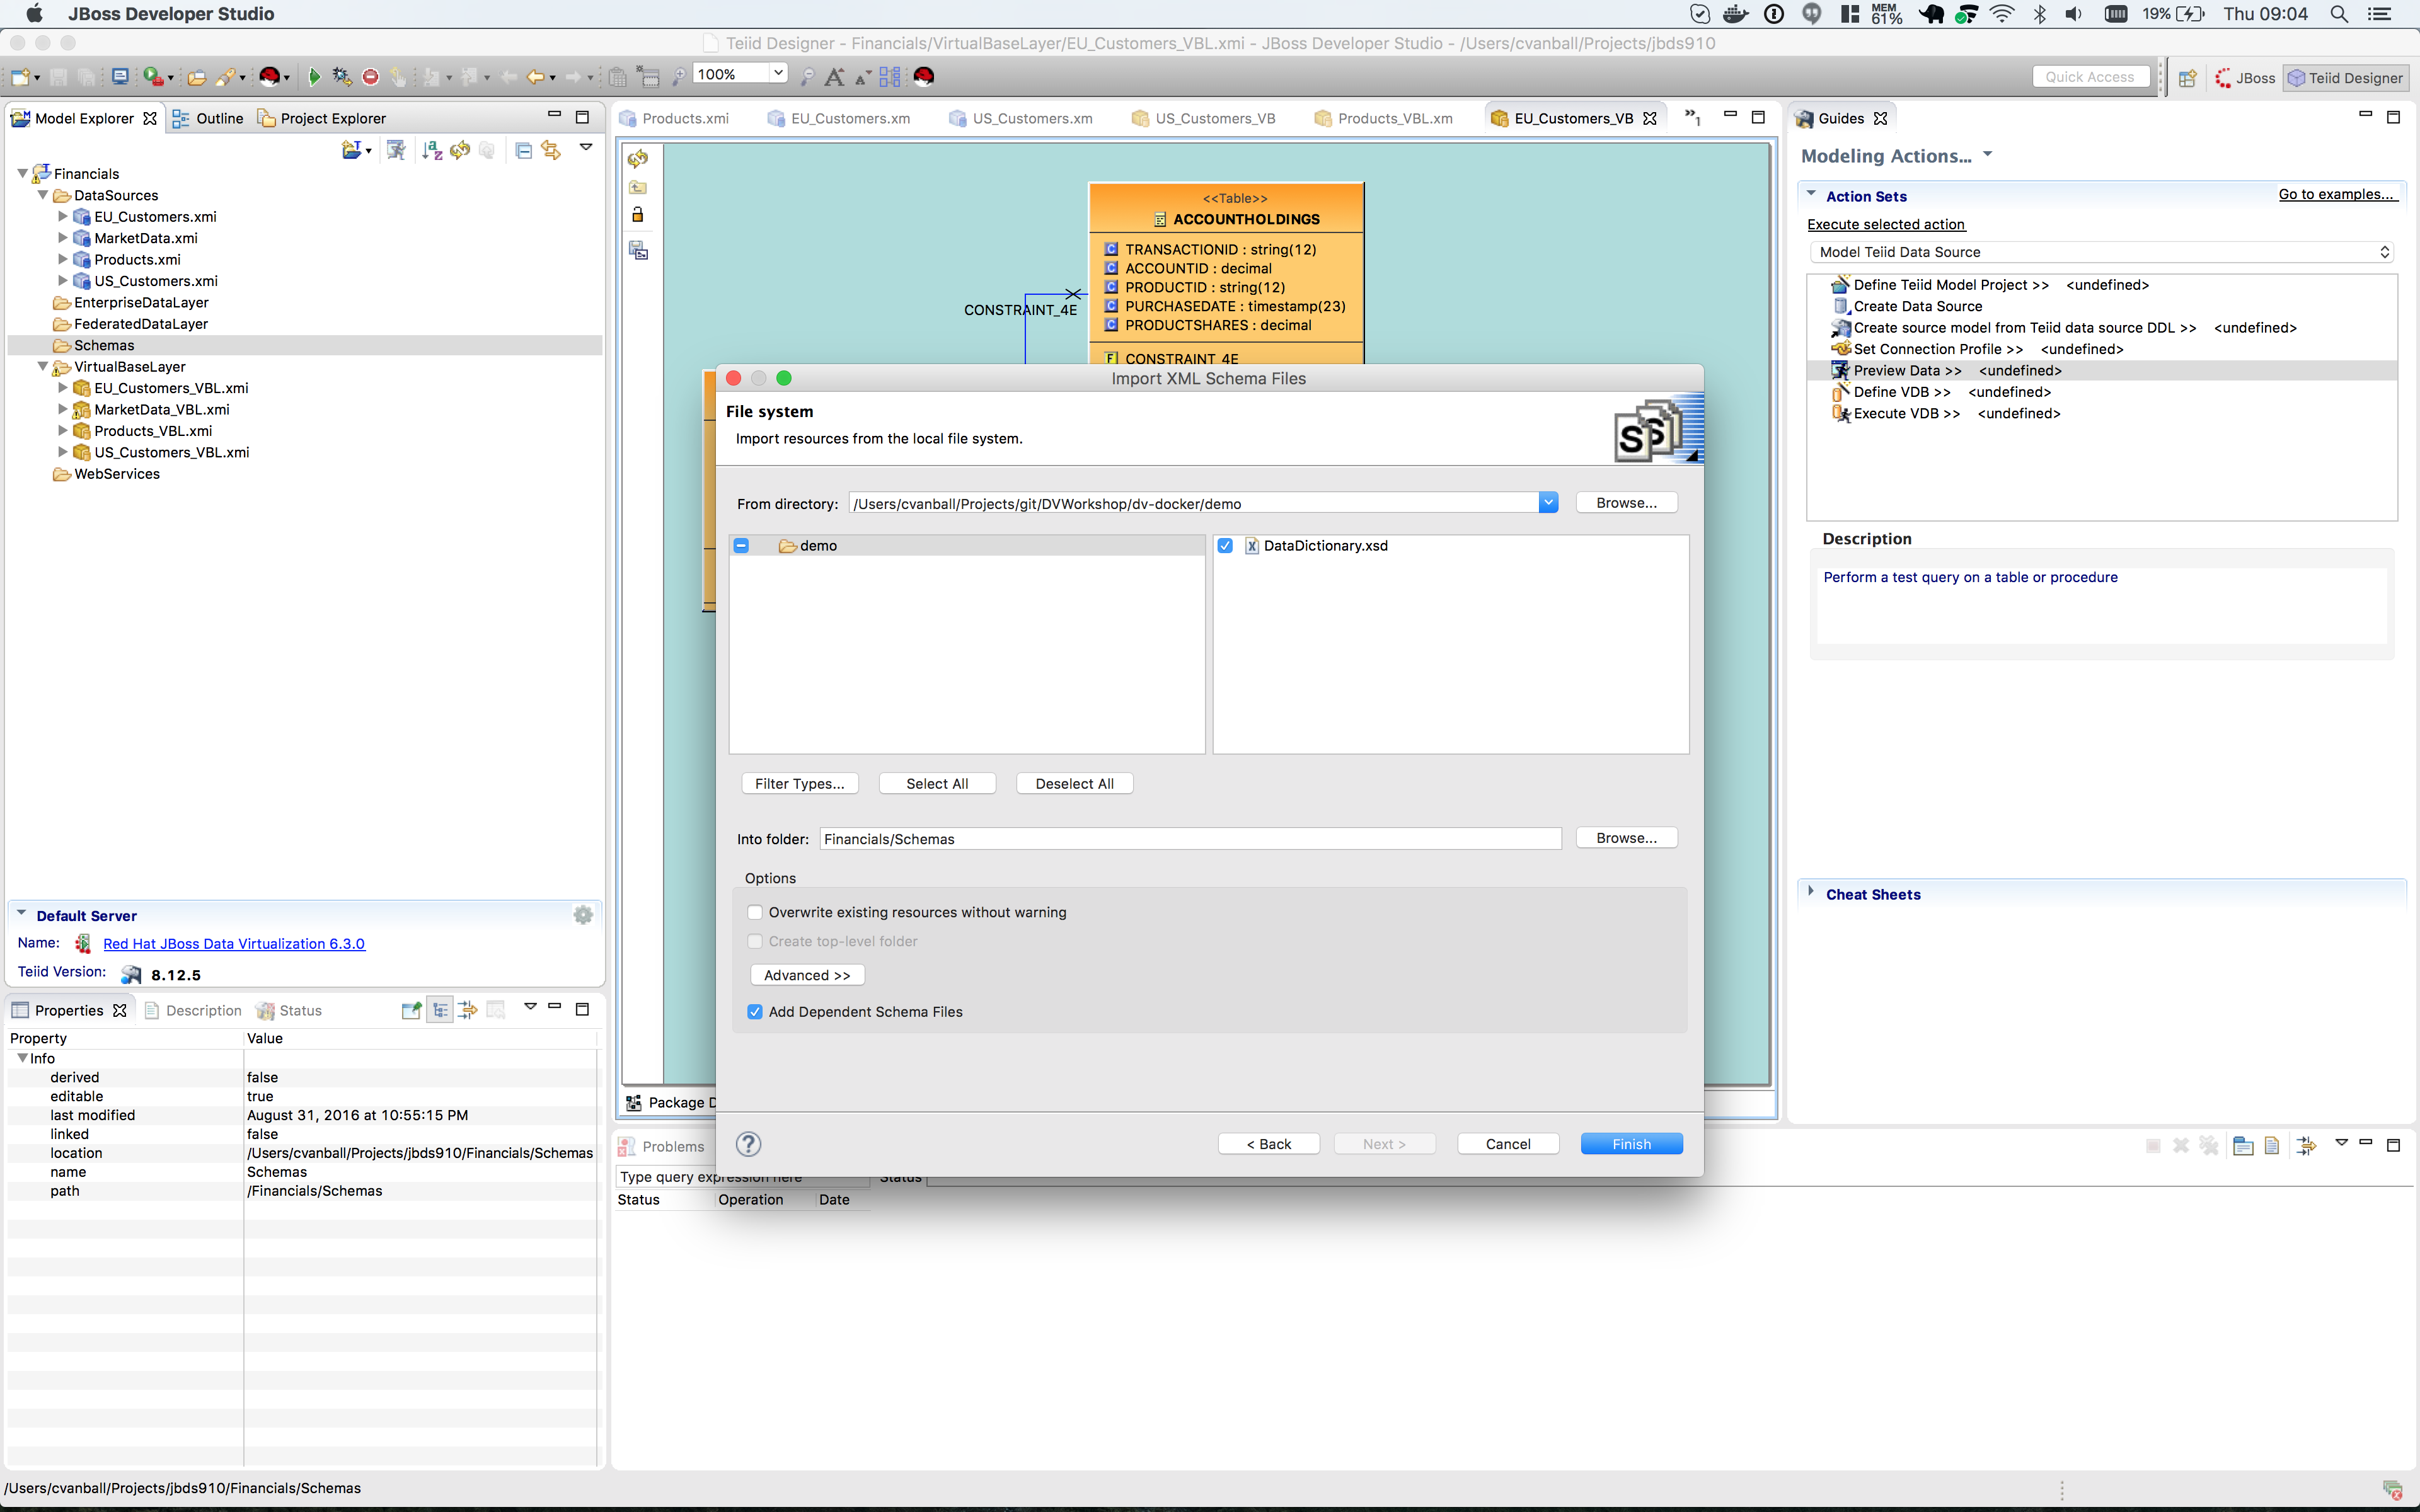
You might get a warning that the Financials/Schemas already exists. Choose Yes to overwrite.
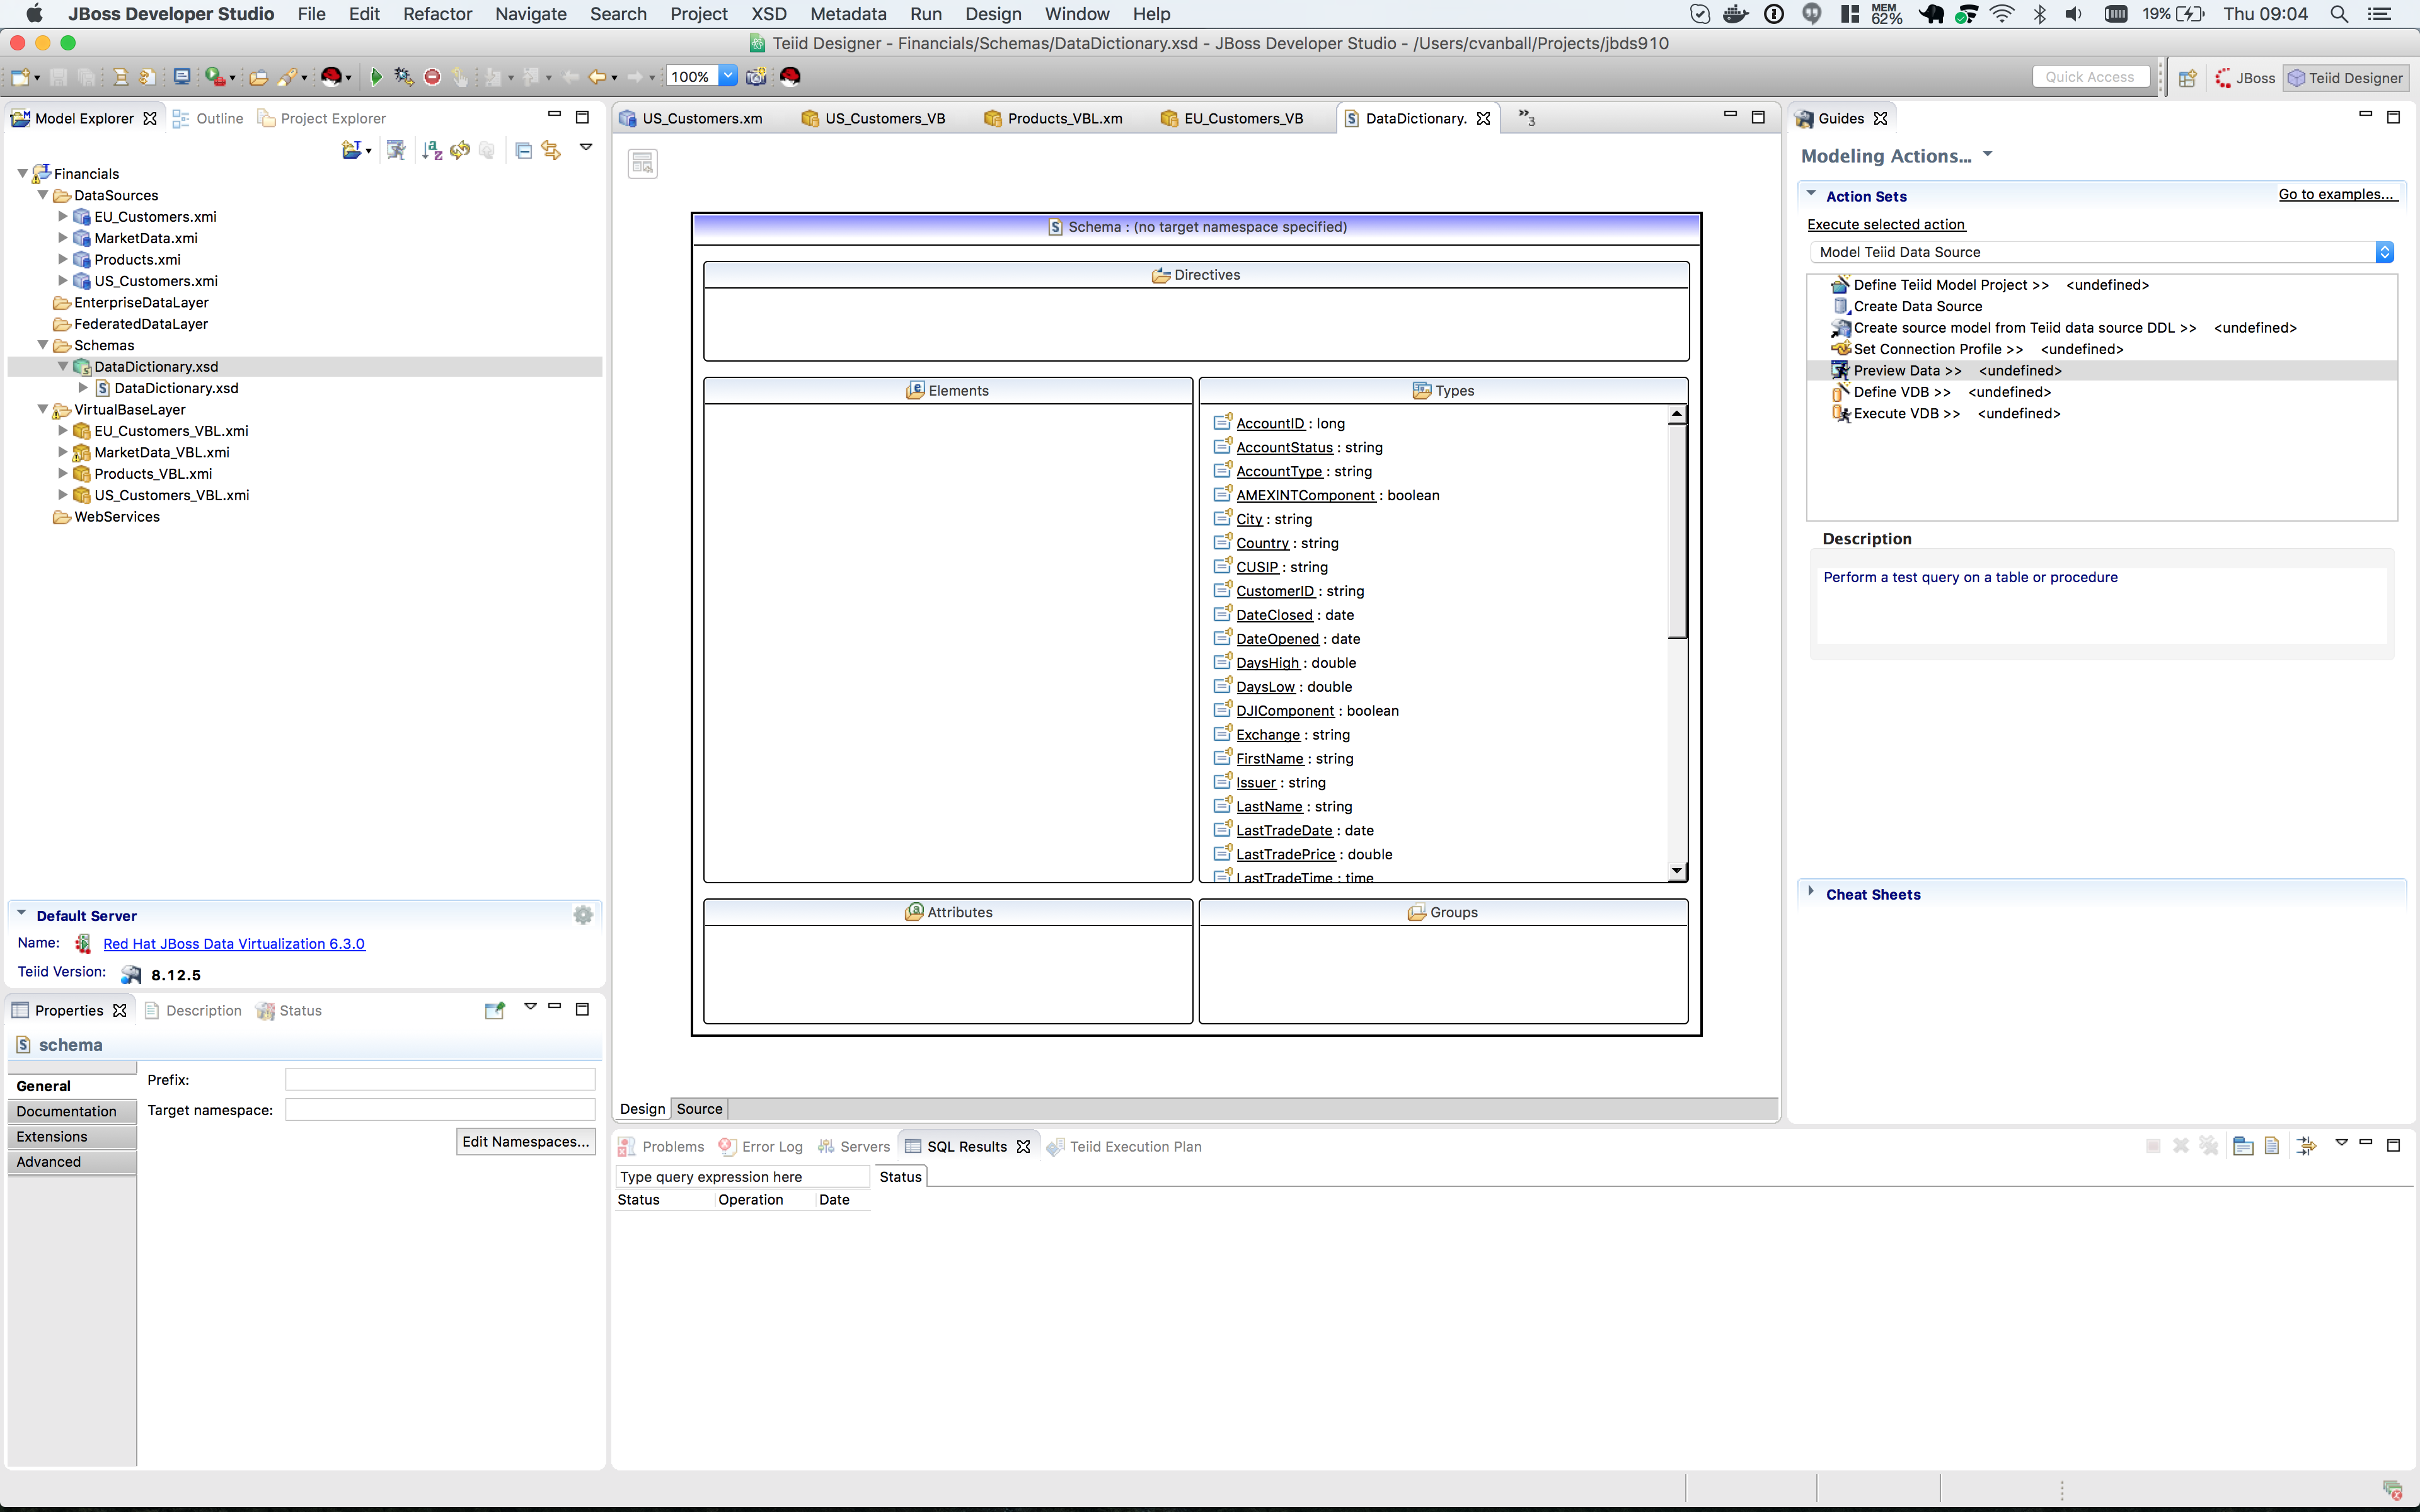
Examine the Data Dictionary
Double-click on the DataDictionary.xsd file you just imported to open the XML Schema viewer. This is a very basic viewer that allows you to see the design model, the source (note the tabs at the bottom), and choose any of the data types to view it’s properties (in the Properties tab to the bottom-left). The schema can be edited/created here, but most customers use XML-specific tooling to create these files.
Create the EU_Customers_EDL Enterprise Data Layer
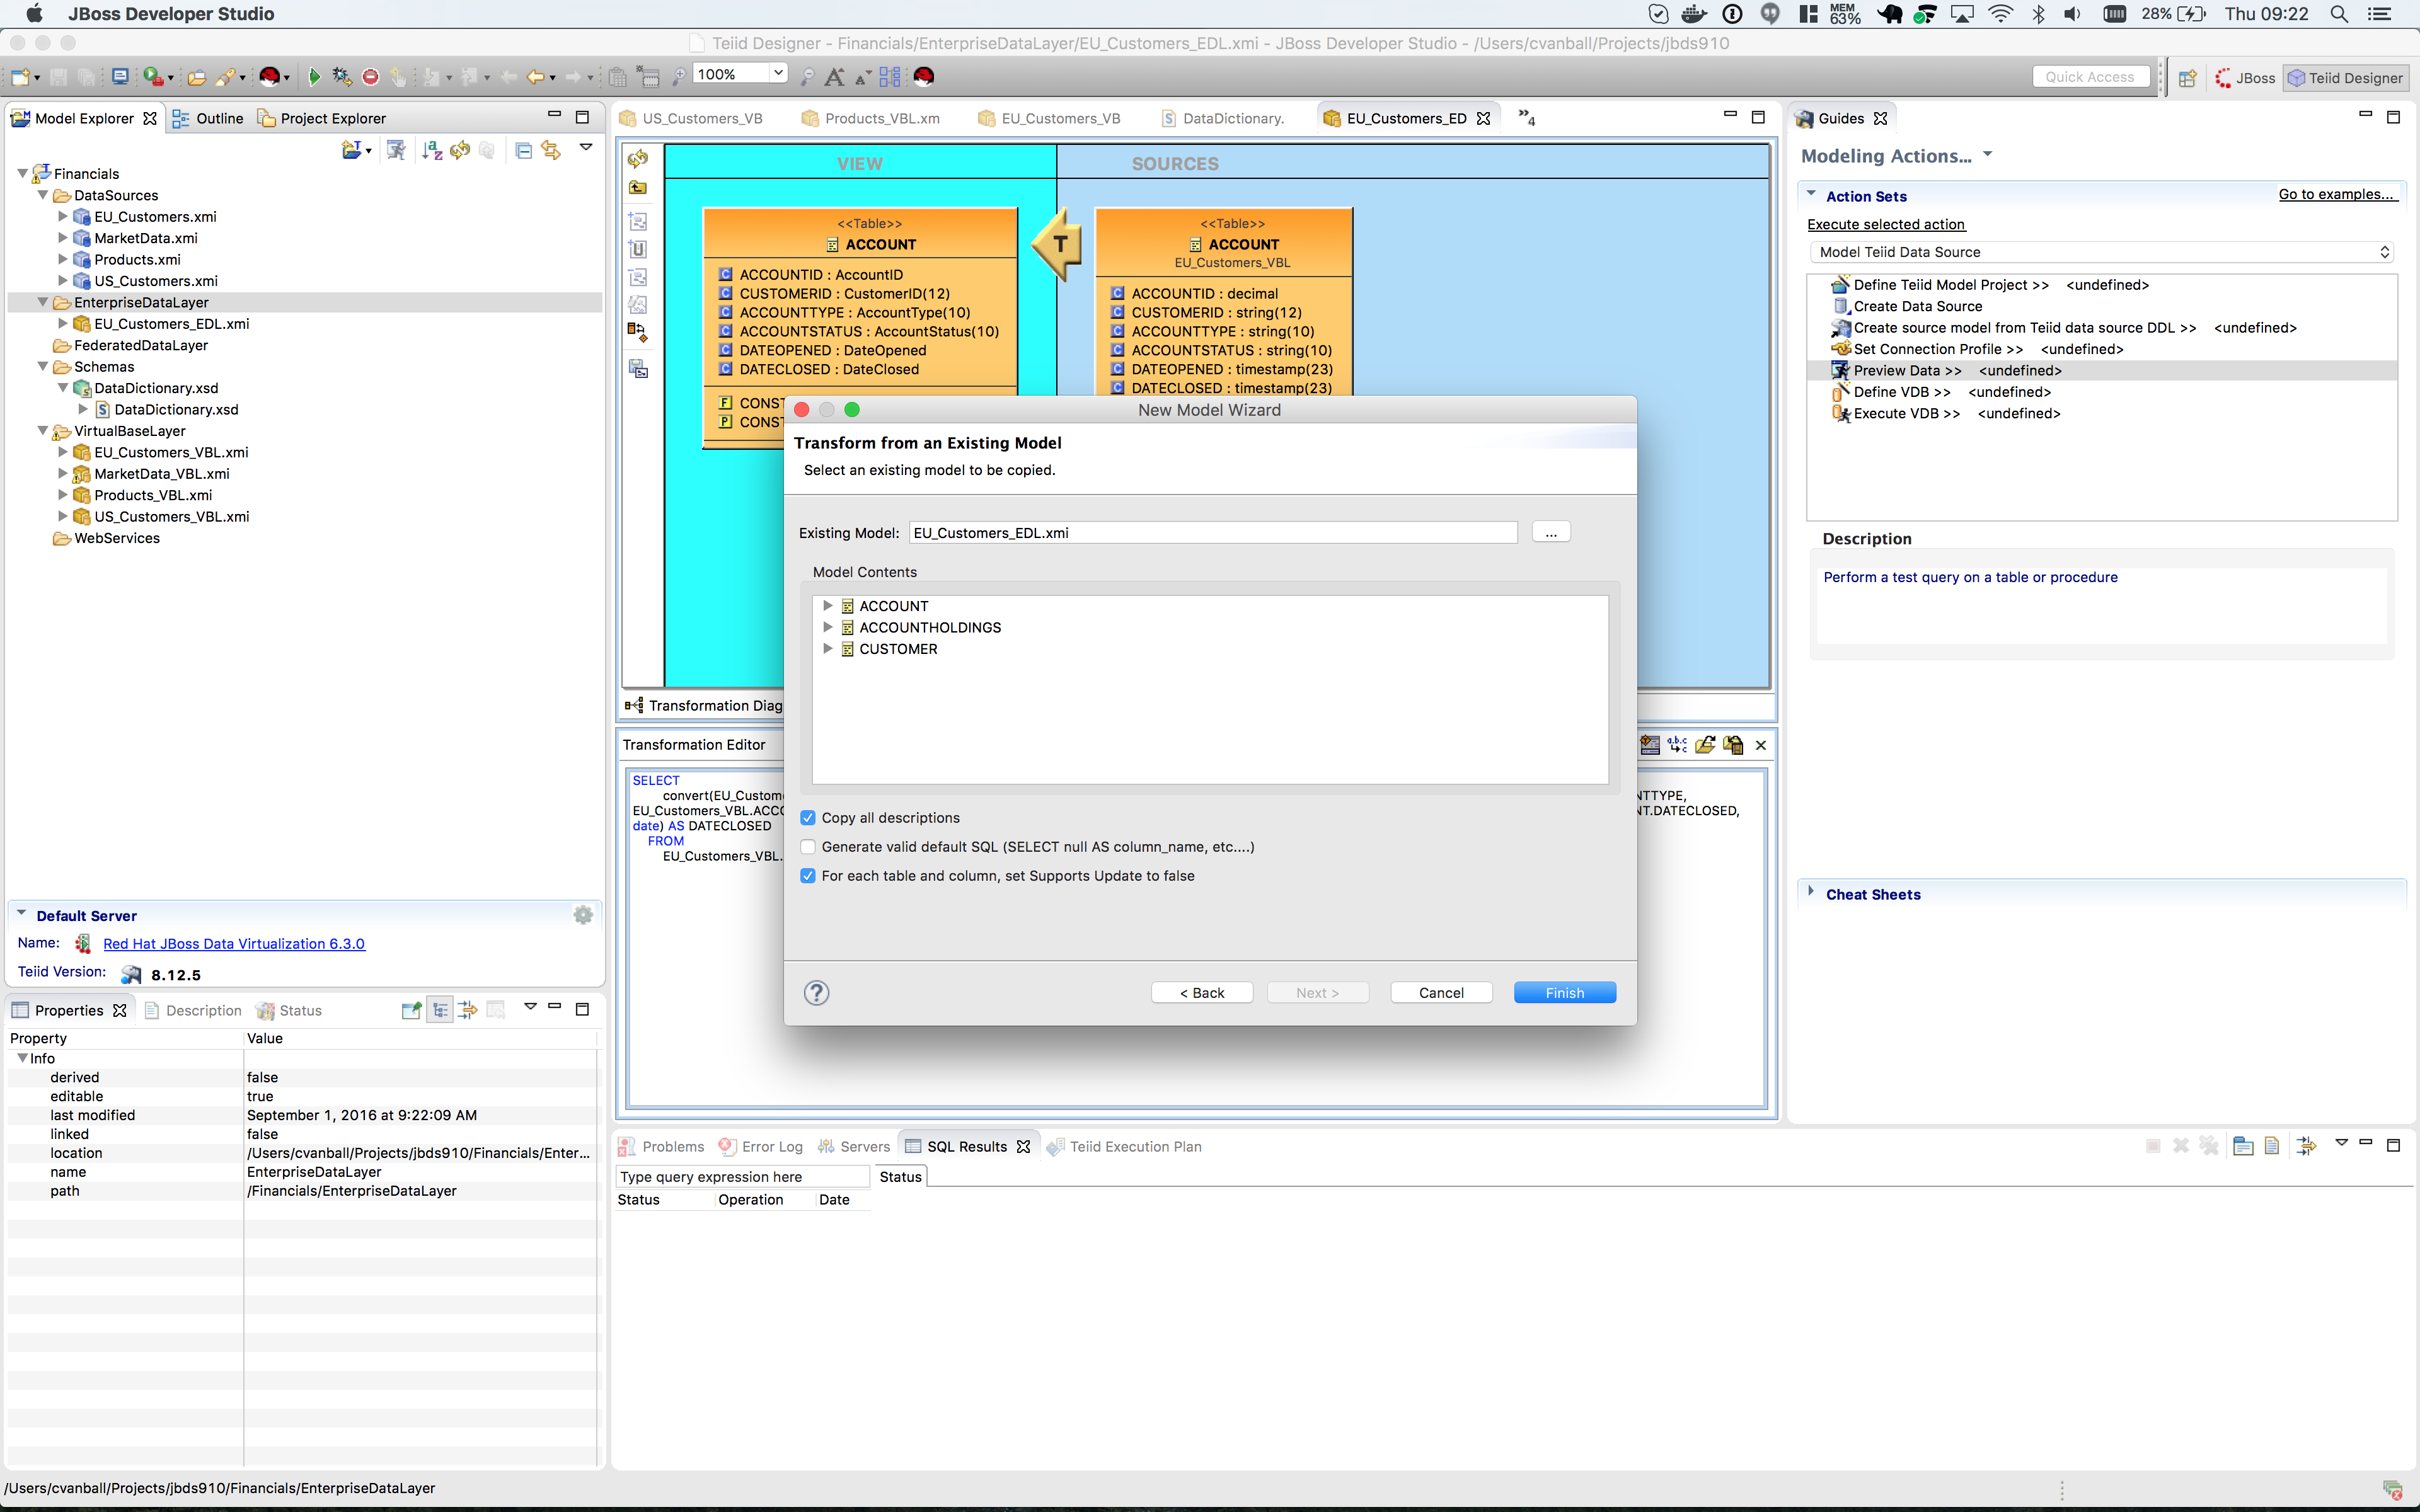
Create a new virtual metadata model called EU_Customers_EDL in the EnterpriseDataLayer folder.
Right-click on the folder EnterpriseDataLayer and select menu:New[Teiid Metadata Model] to bring up the New Model Wizard and make the following selections as indicated in the illustration below.
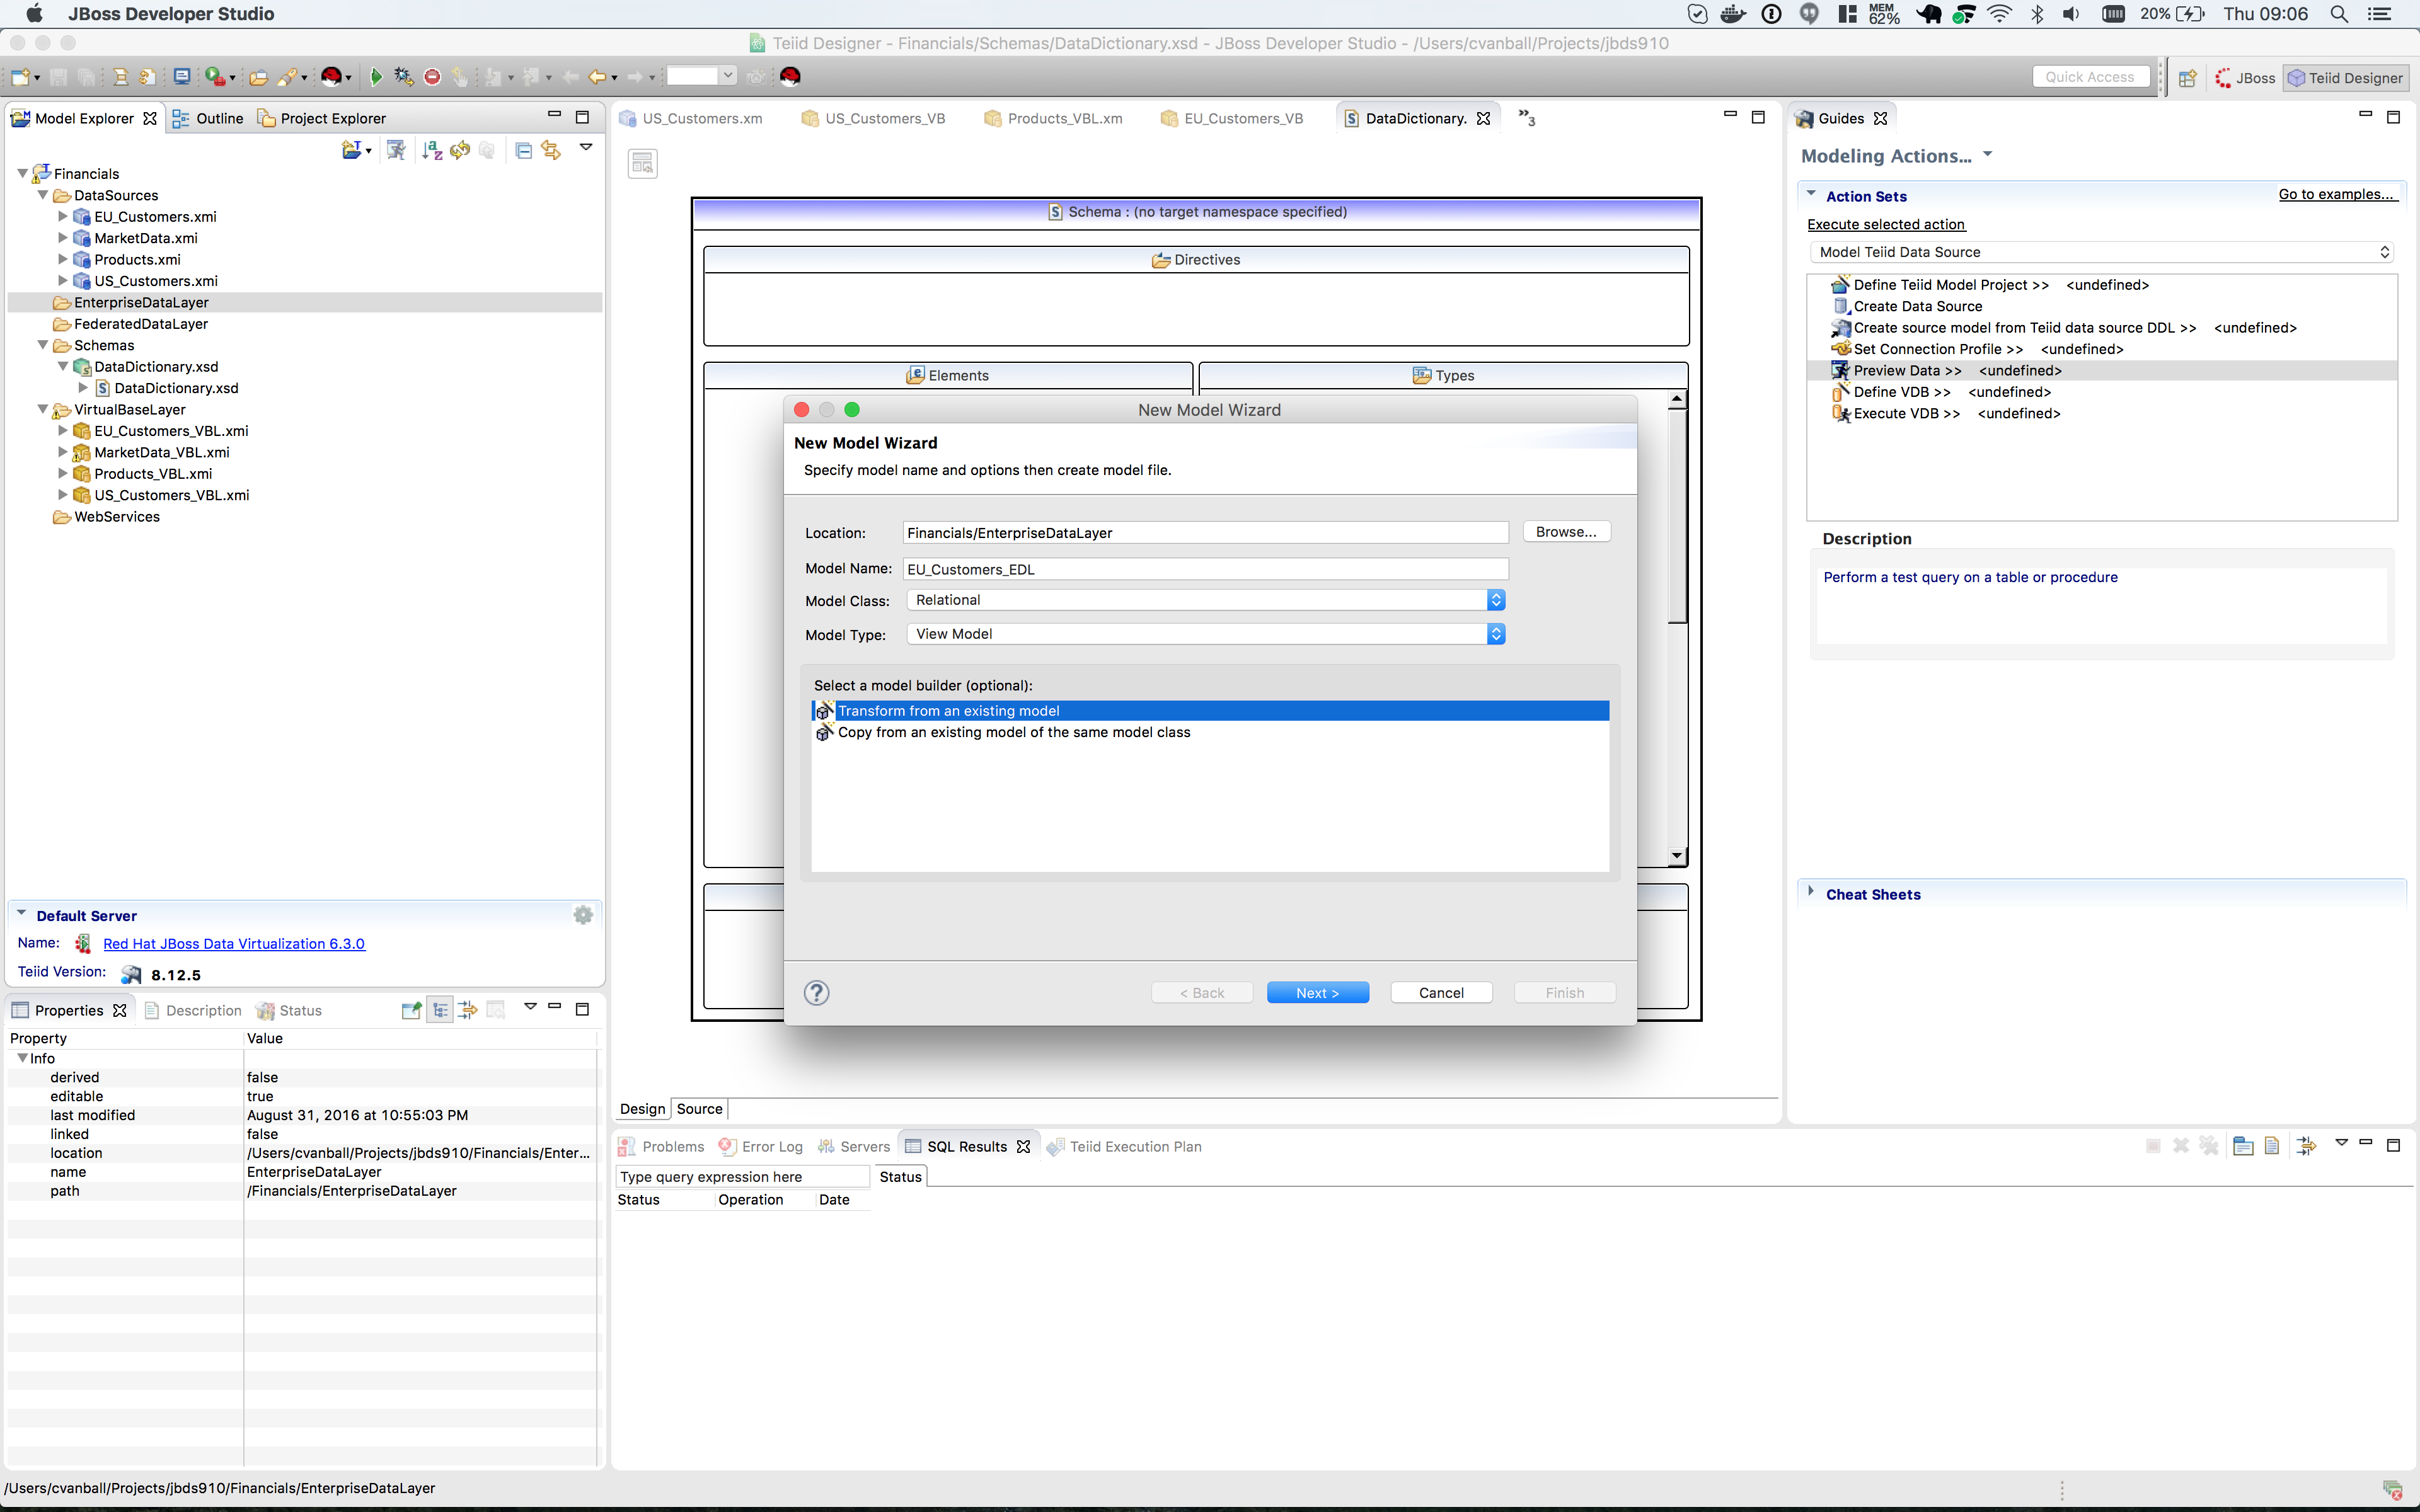
Click btn:[Next >] to go the next step of the New Model Wizard.
This time, use the EU_Customers_VBL.xmi as the model as the basis for the EU_Customers_EDL model and click btn:[OK] and then btn:[Finish].
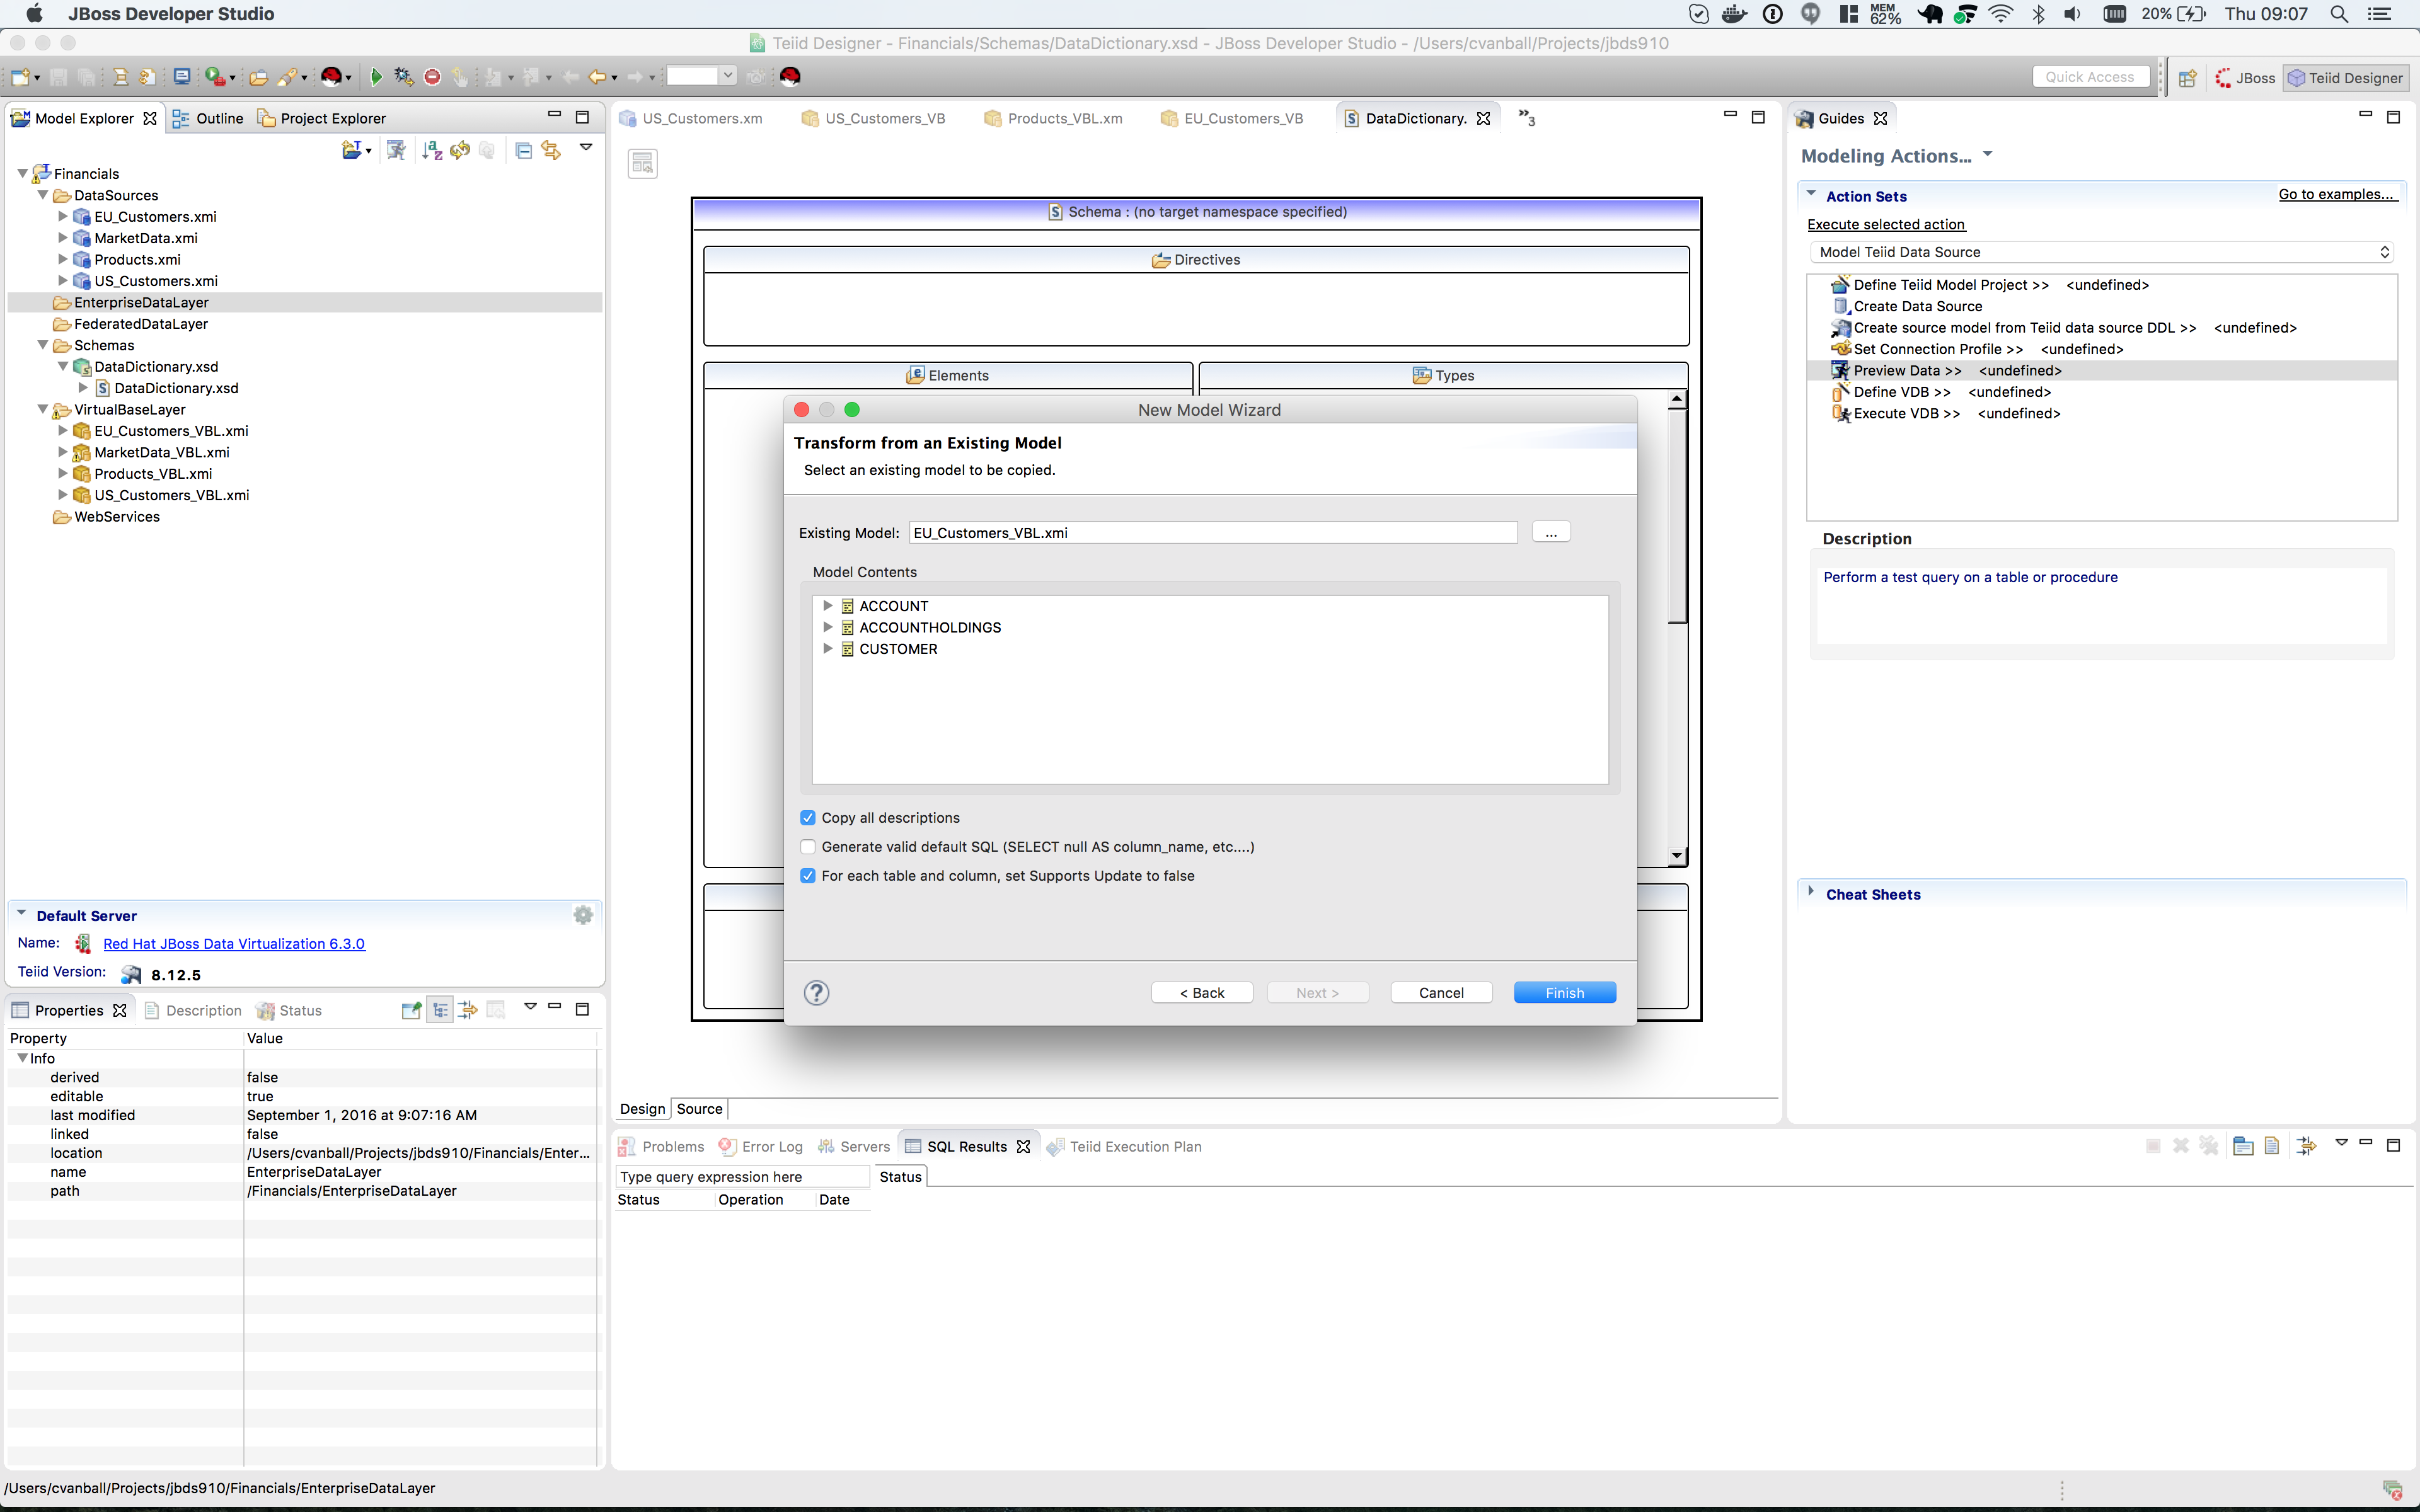
We are going to use the database schema of the eucustomers database as the standard upon which to base our enterprise model. Therefore we won’t be changing any of the table names or column names, but we will be modifying the transformation to incorporate our Data Dictionary.
When we get to the transformations for the US_Customers_EDL and EU_Customers_EDL models we will see that more changes will be necessary to make them semantically align with our enterprise model.
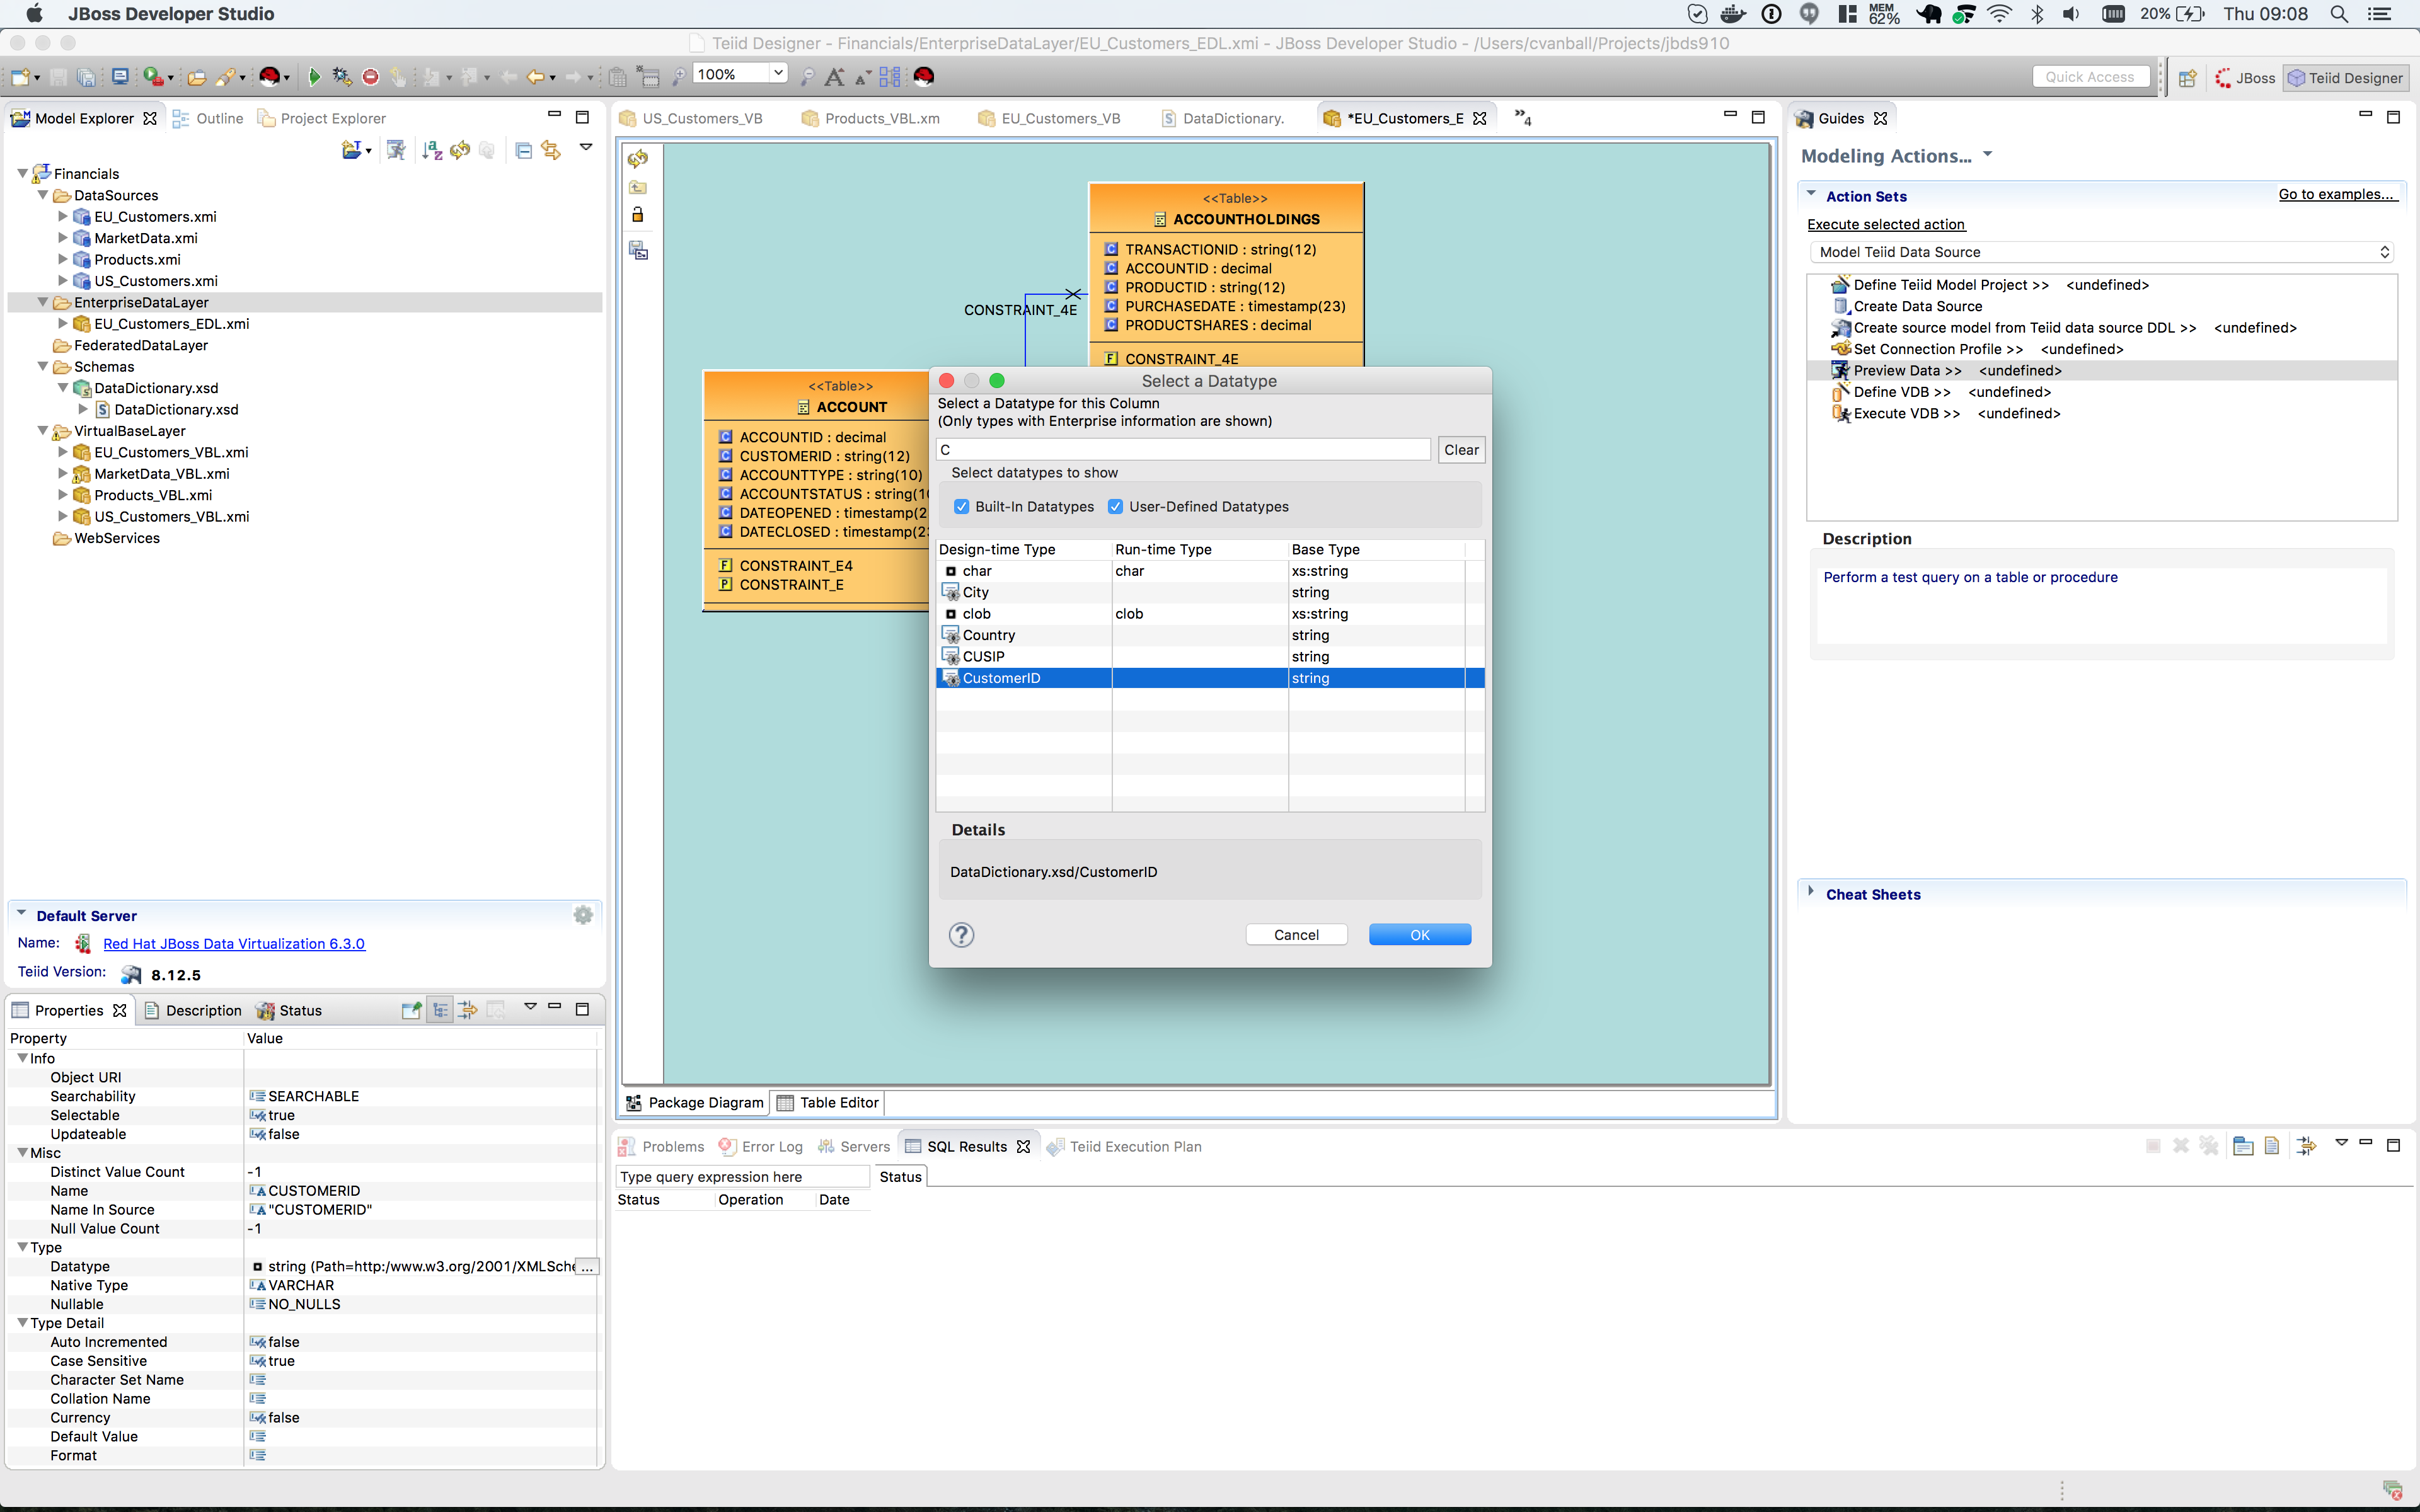
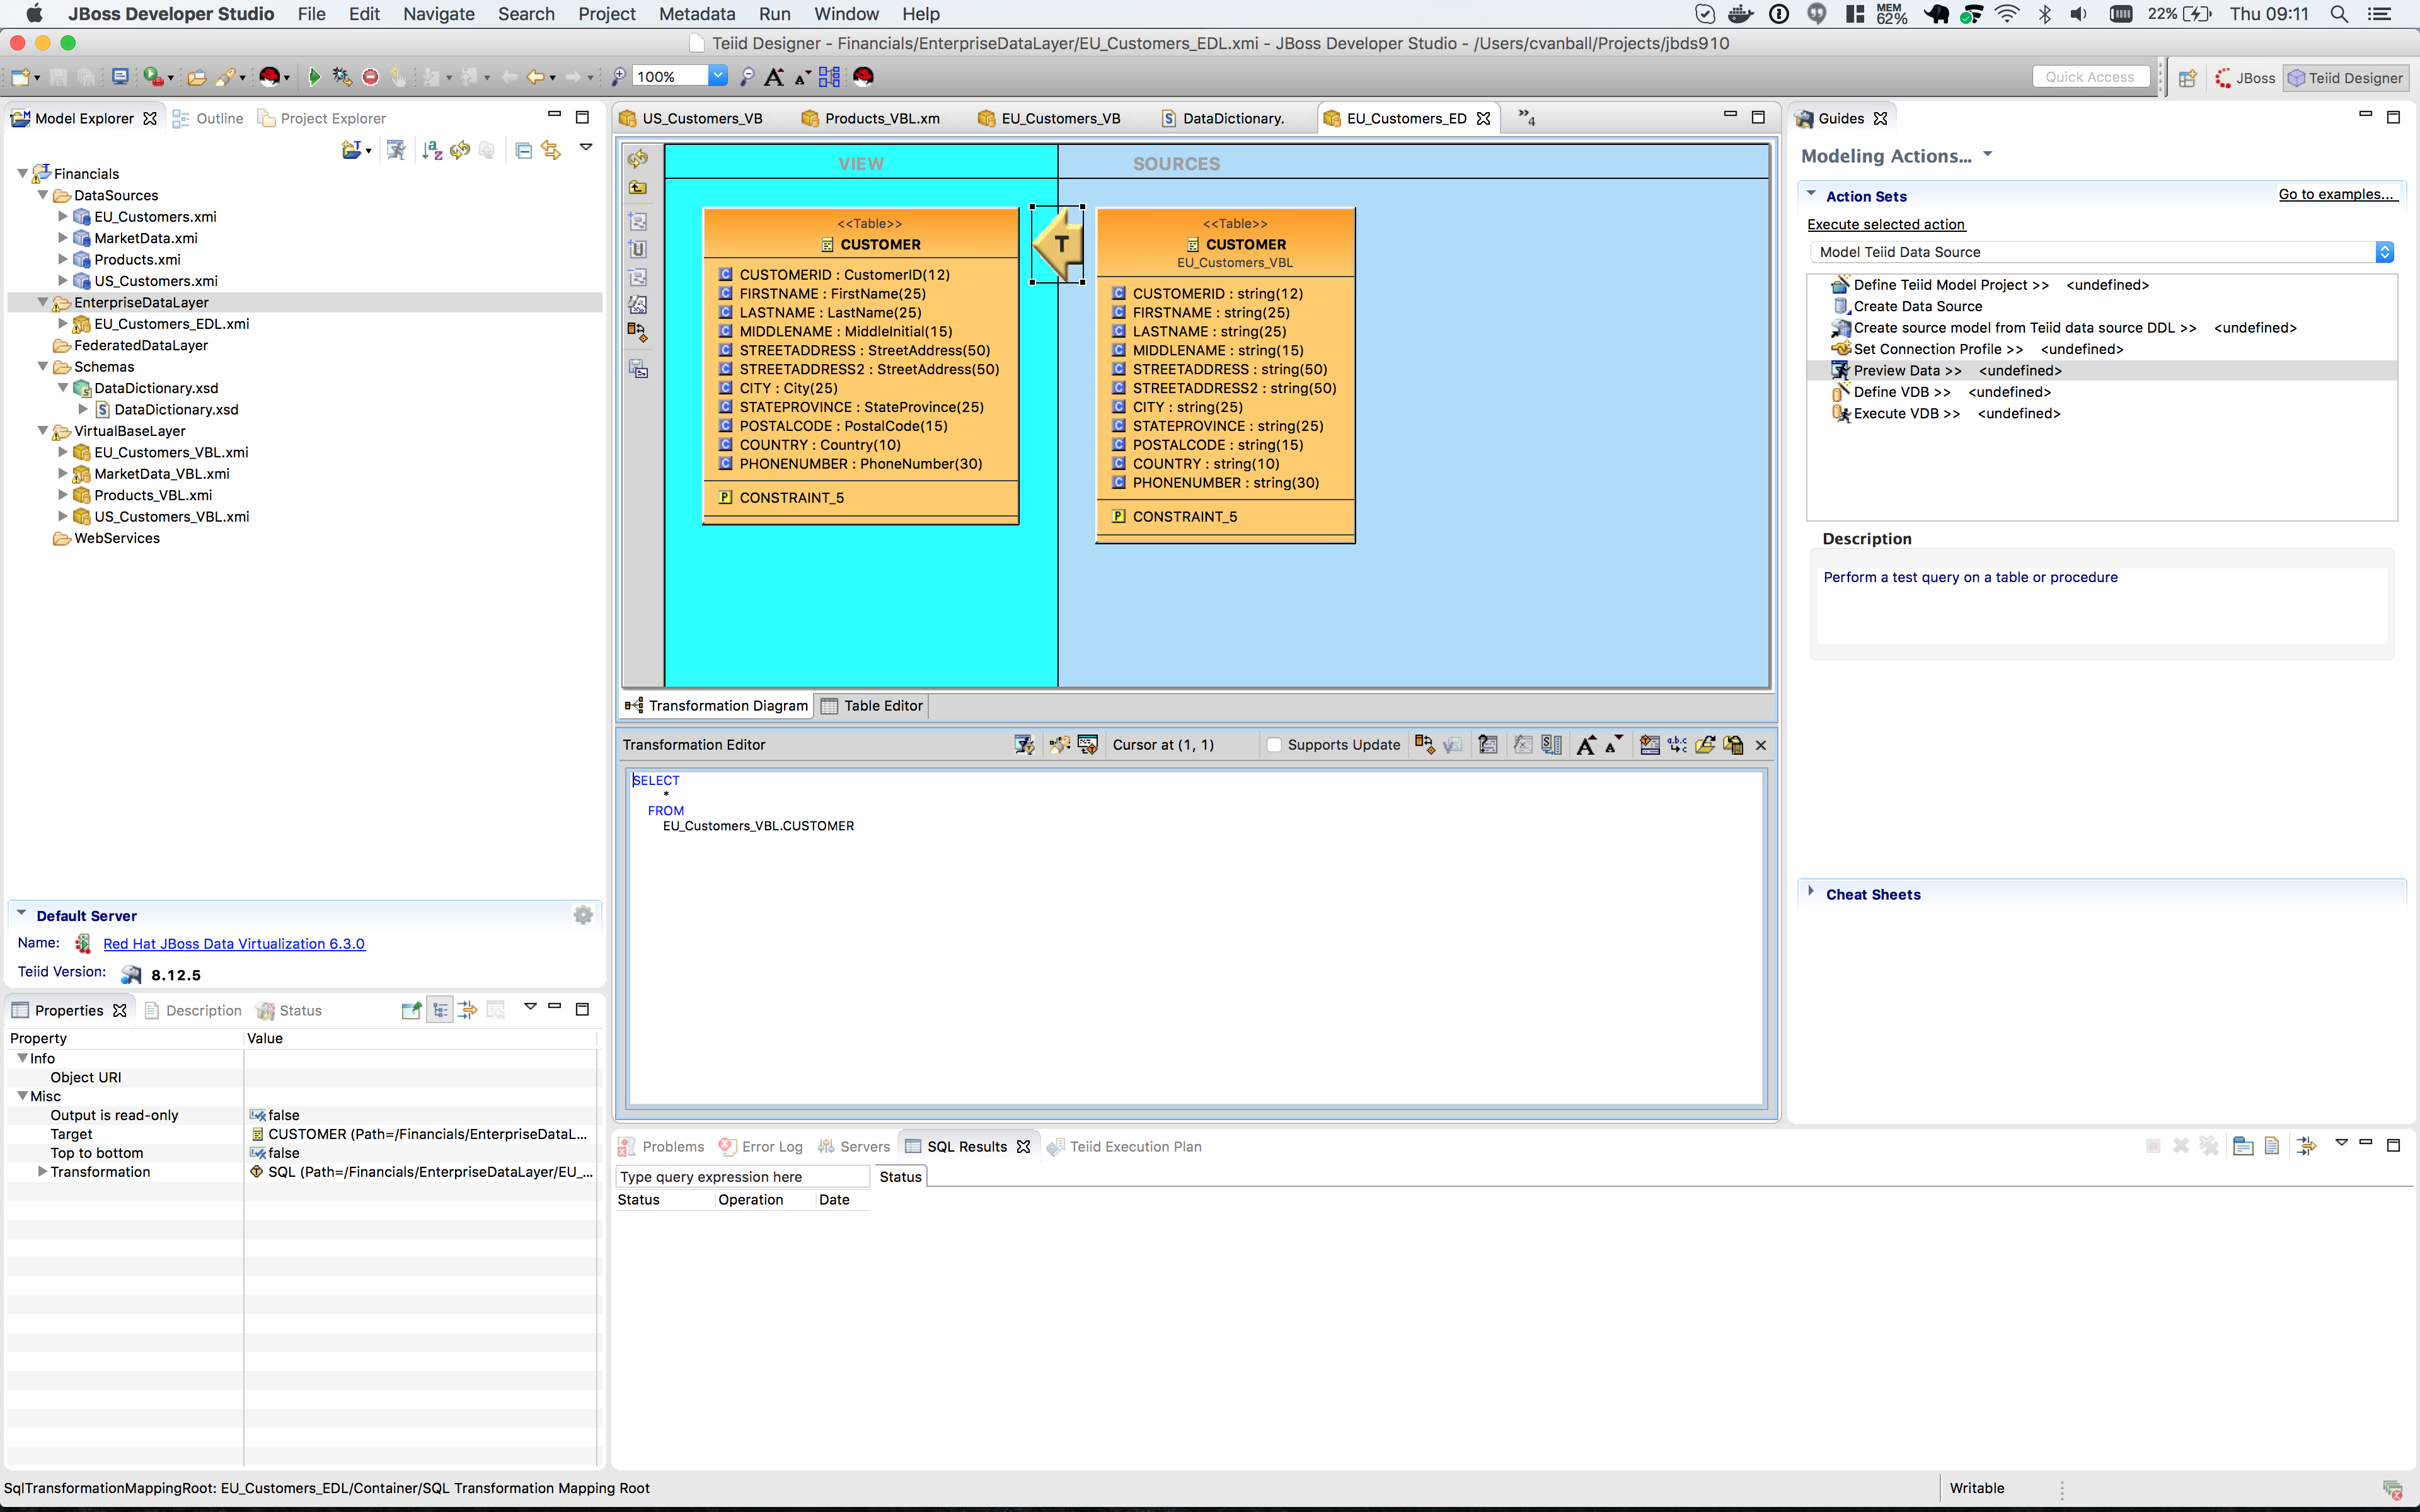
Open the transformation Editor for the customer table of EU_Customers_EDL by double-clicking on it. Select CustomerID and note that there is a Datatype field in the Properties Panel on the lower left.
Click on the value field to the right of datatype in the Properties Panel in the lower left-hand side of JBDS. When clicking in this field in the Properties Panel, the Select a Datatype Wizard is presented. The User-Defined Types were populated when we imported the DataDictionary.xsd schema. Browse through the datatypes, check and un-check the boxes to see which types are built-in and which are user-defined.
In the Select a Datatype window choose CustomerID user-defined type for the CustomerID column and click btn:[OK].
You can begin typing the name of the datatype in the top window to filter the selection types displayed.
Go through this exercise with every column in the Customer table choosing the appropriate datatype for each. Be sure to save your work. At the completion of the exercise, your Customer table should look like the one below.
Perform the same process for the other tables (ACCOUNT, ACCOUNTHOLDINGS) in the EU_Customers_EDL model.
A way to "go back" to the parent model is to right-click on the teal background surrounding the View model and select "Show Parent Diagram". Alternatively, you can select the table you want to work with by double-clicking on it in the Model Explorer tree-view.
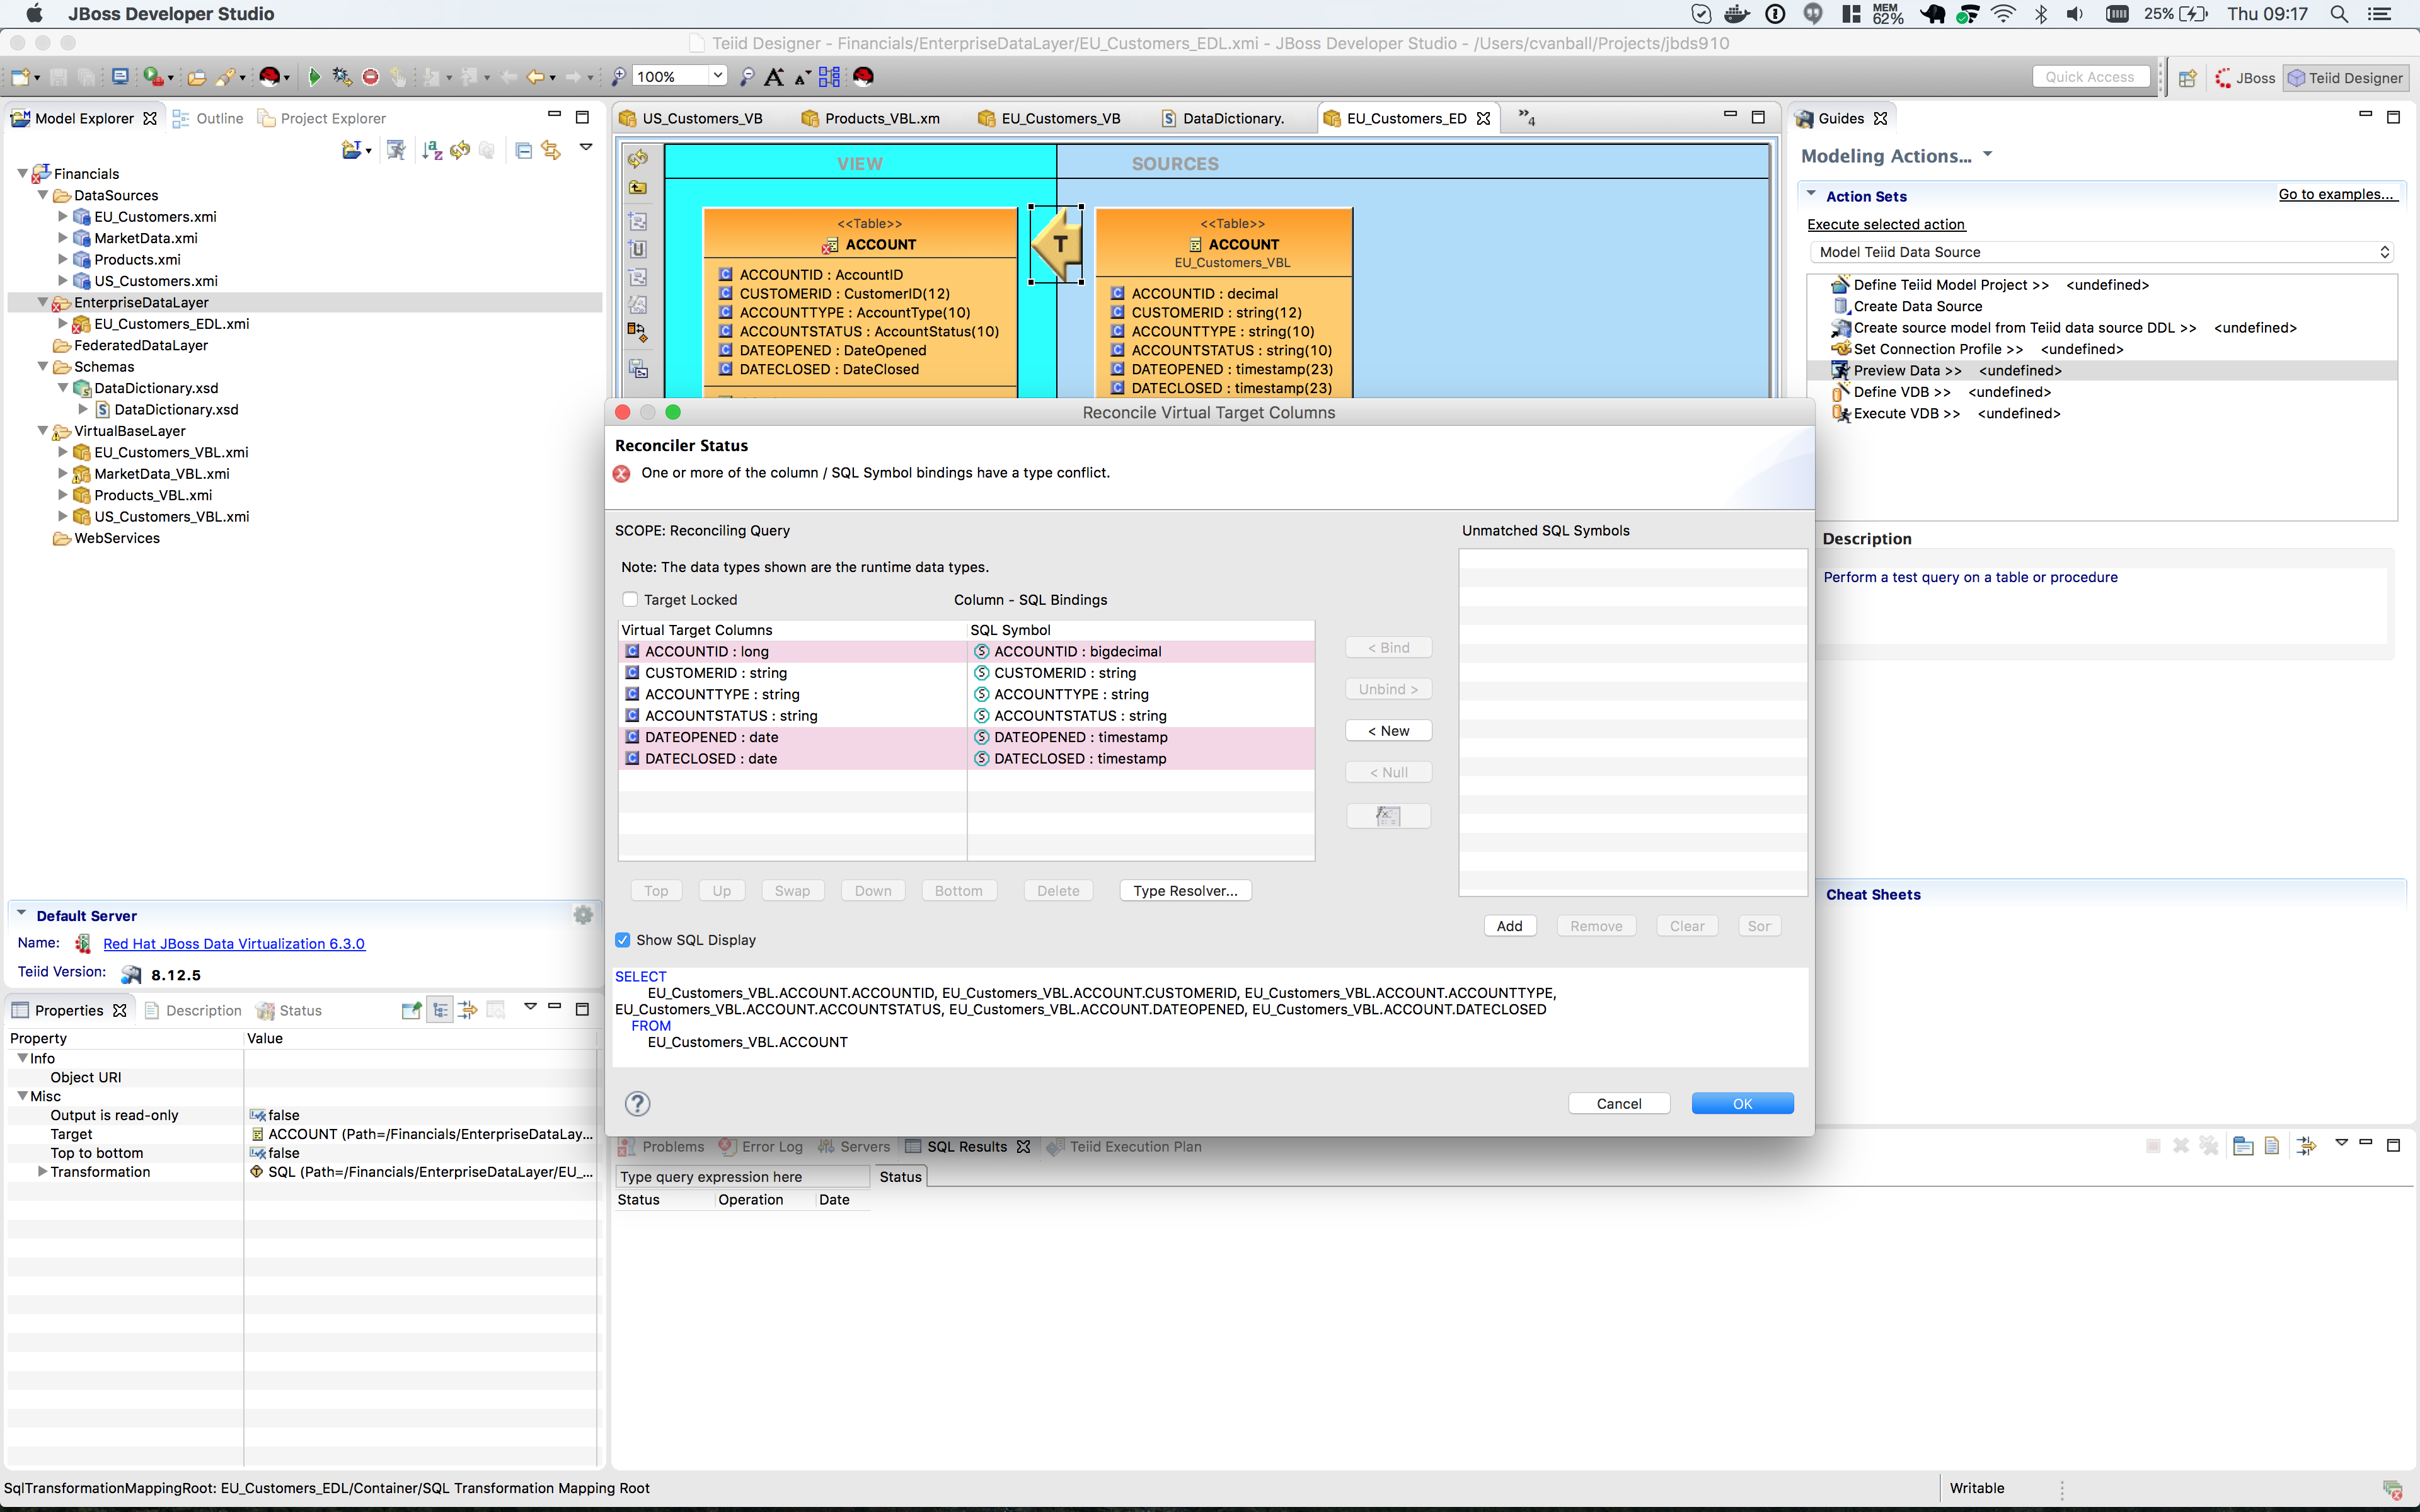
Note however when you save your changes the following warnings appear in the Transformation Editor: The SELECT transformation is valid, but NOT fully reconciled: The transformation output types do not match the target attribute types.
This is because some of the enterprise datatypes we have chosen do not match the underlying format of the source data (AccountID, for example we are defining as a long, but it is a bigdecimal in the source). To address these type mismatches we will open the Reconciler. This is done by clicking on the small icon just to the right of "Supports Update" in the Transformation Editor.
Clicking on the Reconciler for viewmodel ACCOUNT brings up the following figure.
|
Note
|
The highlighted fields indicate some problems. We can address all of these in one go by clicking on the btn:[Type Resolver…] button. That will bring up the following wizard. |
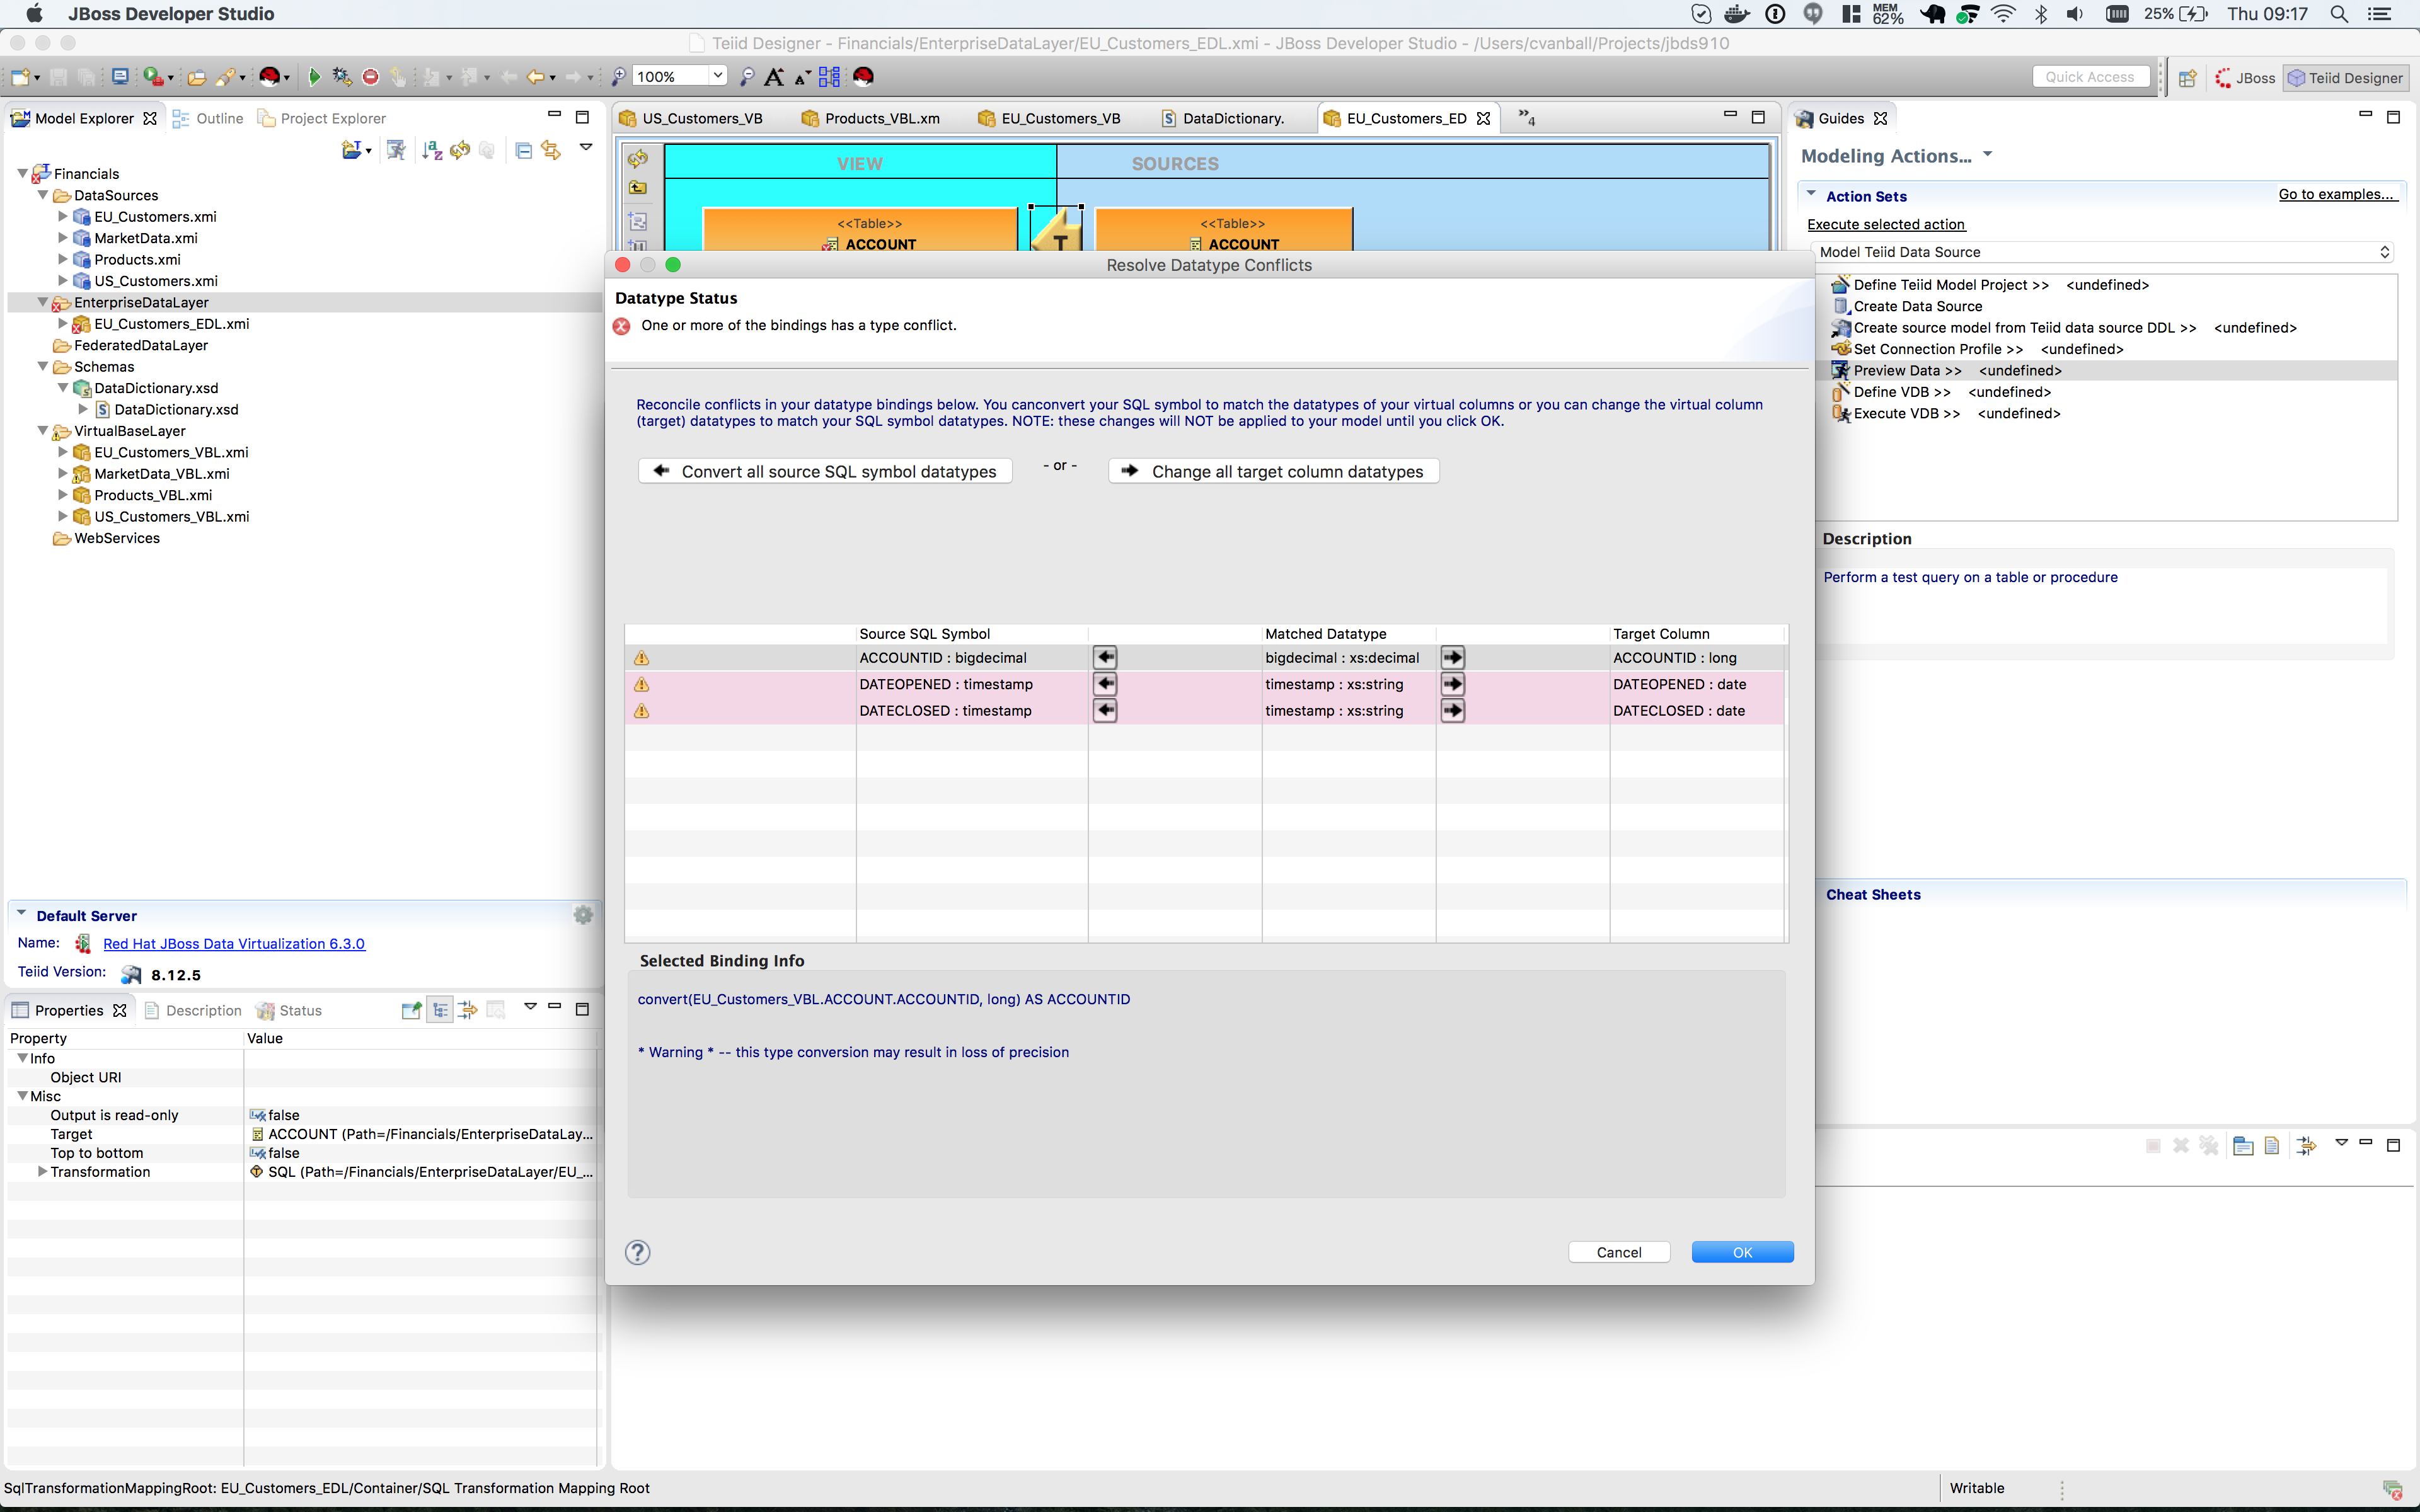
Select each mapping at the top and see that the proposed transformation at the bottom changes. This is under the SQL Symbol panel; we want to convert to the datatype that is assigned to the enterprise datatype. (The Virtual Target Attribute section of the wizard above lets you modify that datatype; we don’t want to do that here.)
Note that there are three different type mappings being handled here: bigdecimal to long, timestamp to date, and bigdecimal to float. We are not worried about precision in this case, so we can simply press the btn:[Convert all source SQL symbol datatypes], followed by clicking btn:[OK]. This will return you to the Reconciler.
|
Note
|
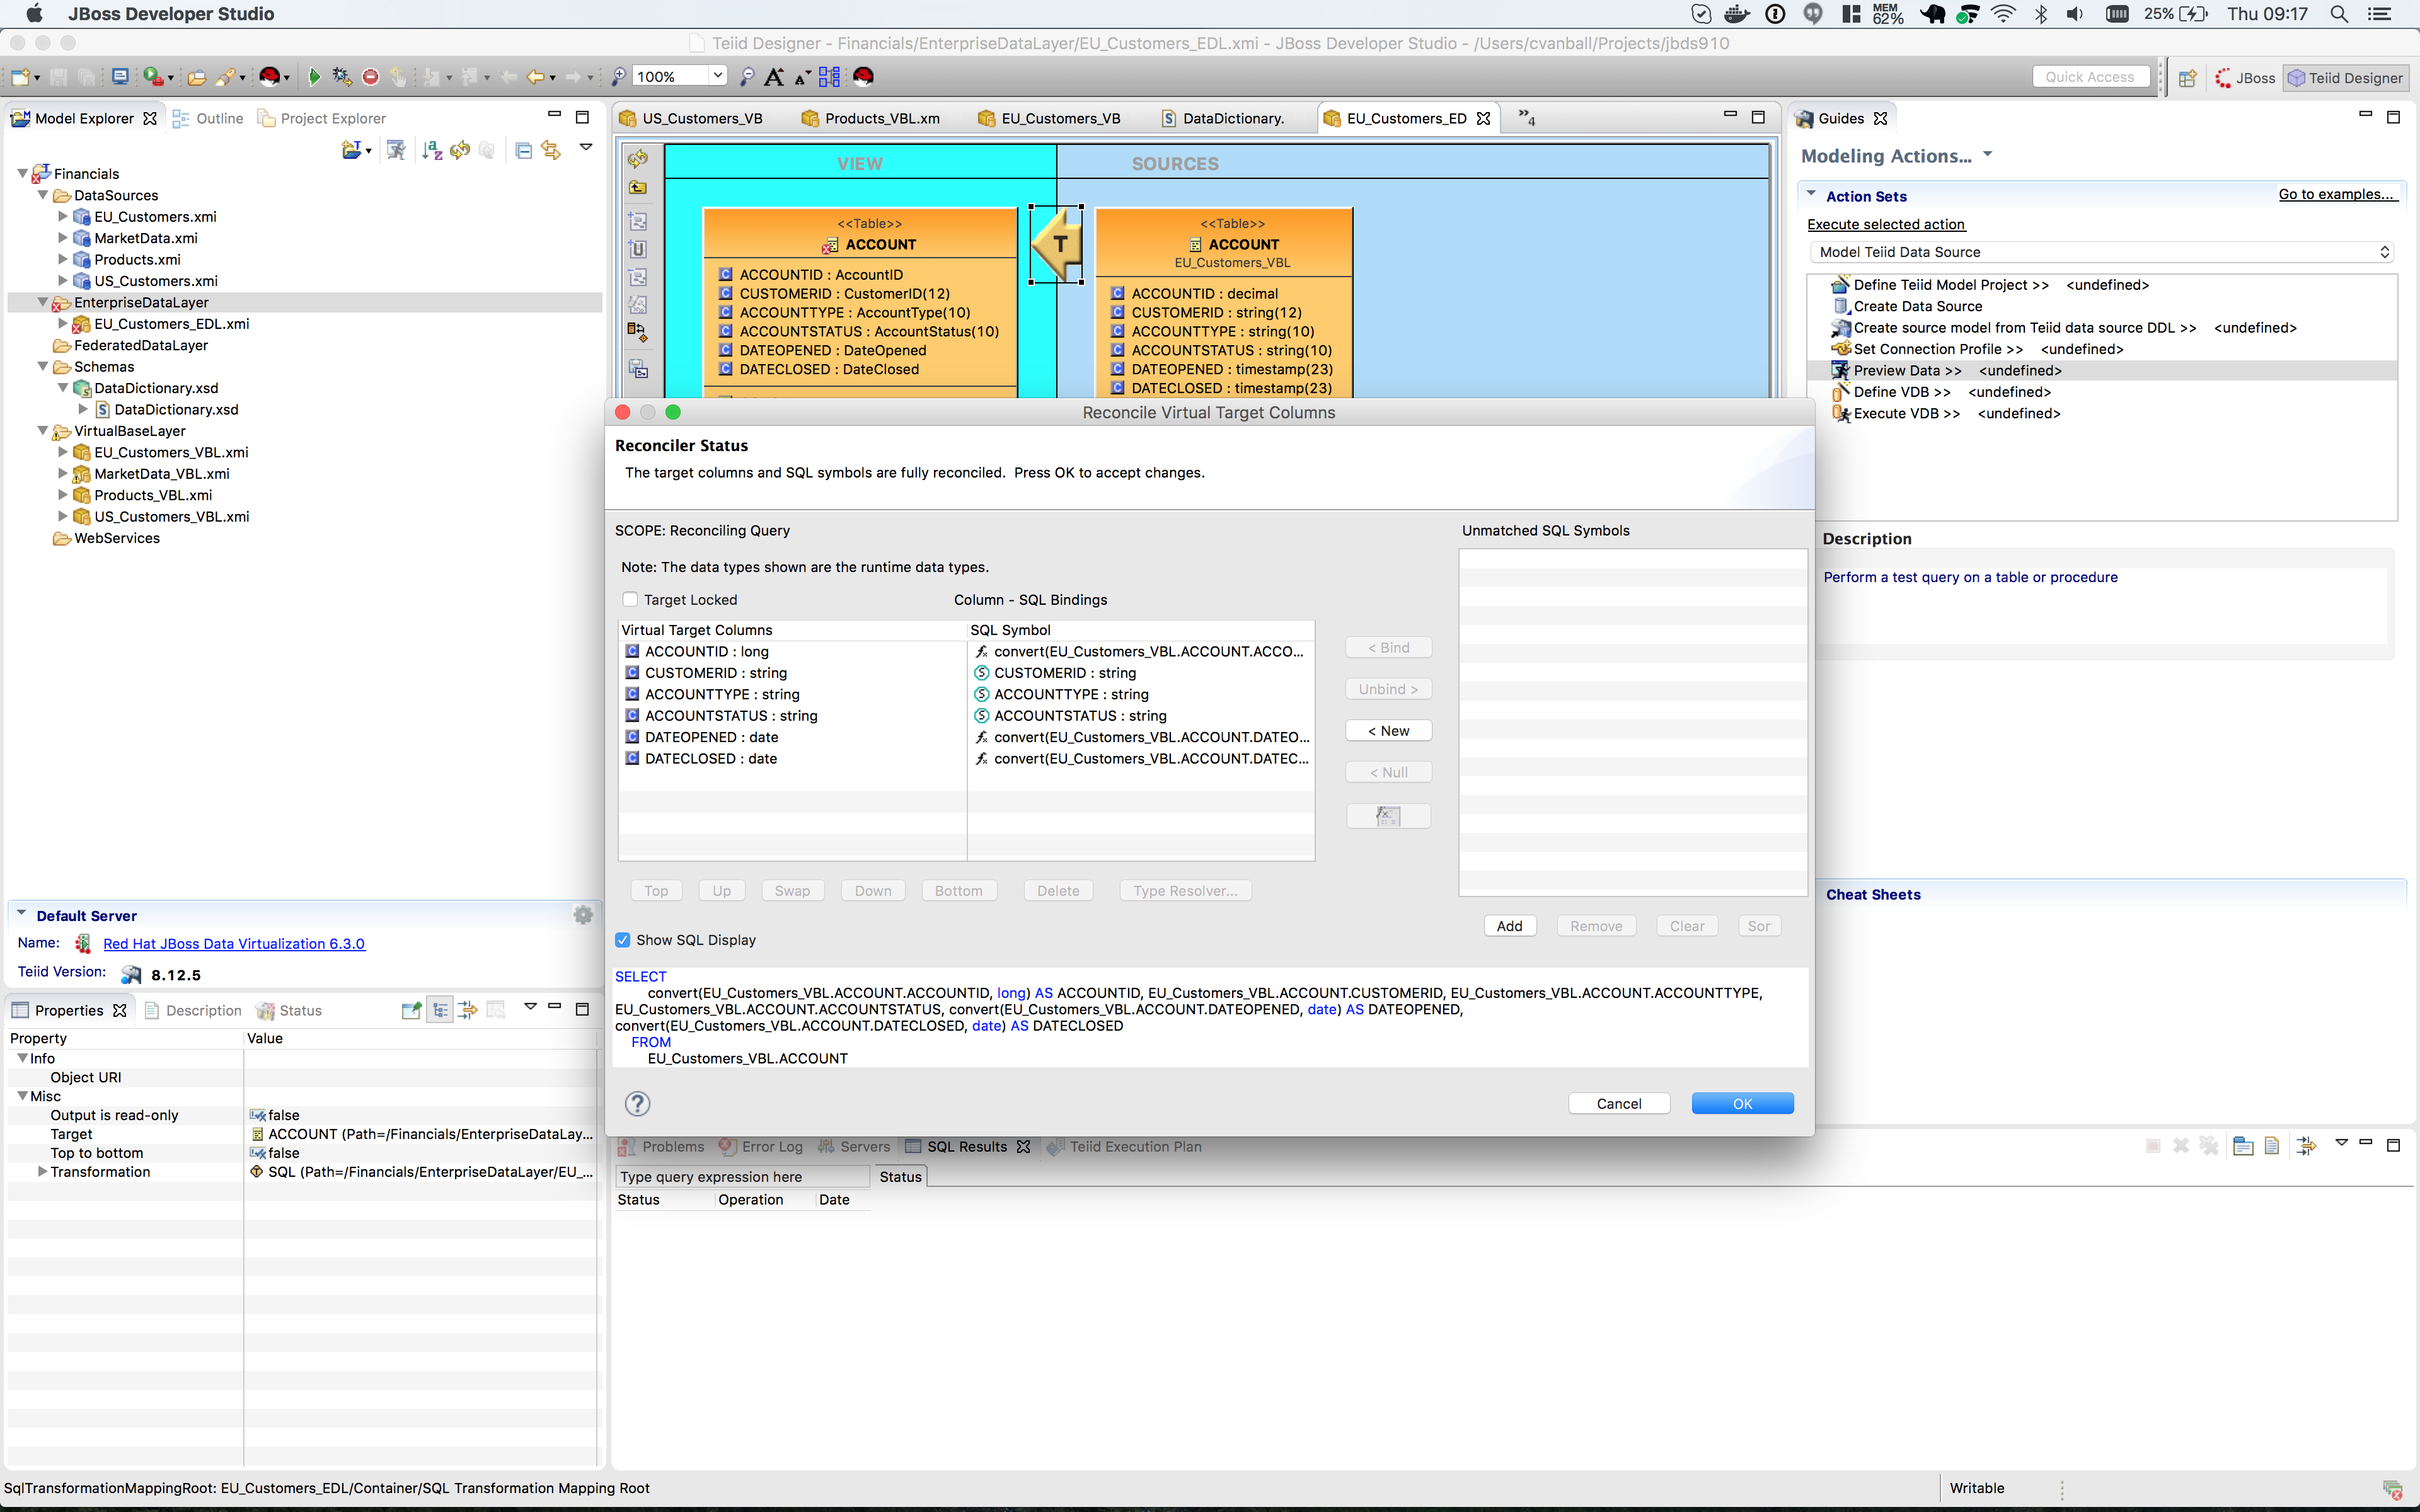
The SQL has been re-written in the transformation to handle all the type conversions. Click btn:[OK] on the Reconciler to finish the process and to return to the Transformation editor. |
Now go back and perform the same steps with the ACCOUNTHOLDINGS table. If we were worried about precision, we could take any number of steps to refine/modify the transformation including coding it by hand in the Transformation Editor, using one of the large set of out-of-the-box functions provided with the product, or by creating our own User-Defined function.
When you are finished with the ACCOUNTHOLDINGS table, it will look like the following.

Create the US_Customers_EDL Enterprise Data Layer
Now that we have finished with building the first enterprise data service layer in our model, we can take a short-cut to creating the same type of model for the US_Customers_VBL model. We are going to use the EU_Customers_EDL model as a template for creating the US_Customers_EDL model, and then replace the sources of the transformations for each of the tables with the correct ones. Here is how to do it: Right-click on the EnterpriseDataLayer folder and select menu:New[Teiid Metadata Model]. Fill in the wizard with the following fields (below) and click btn:[Next].

In the “New Model Wizard” window choose the EU_Customers_EDL.xmi model in the EnterpriseDataLayer folder and click btn:[OK] followed by btn:[Next >] and btn:[Finish]. Your selection should be as indicated below.
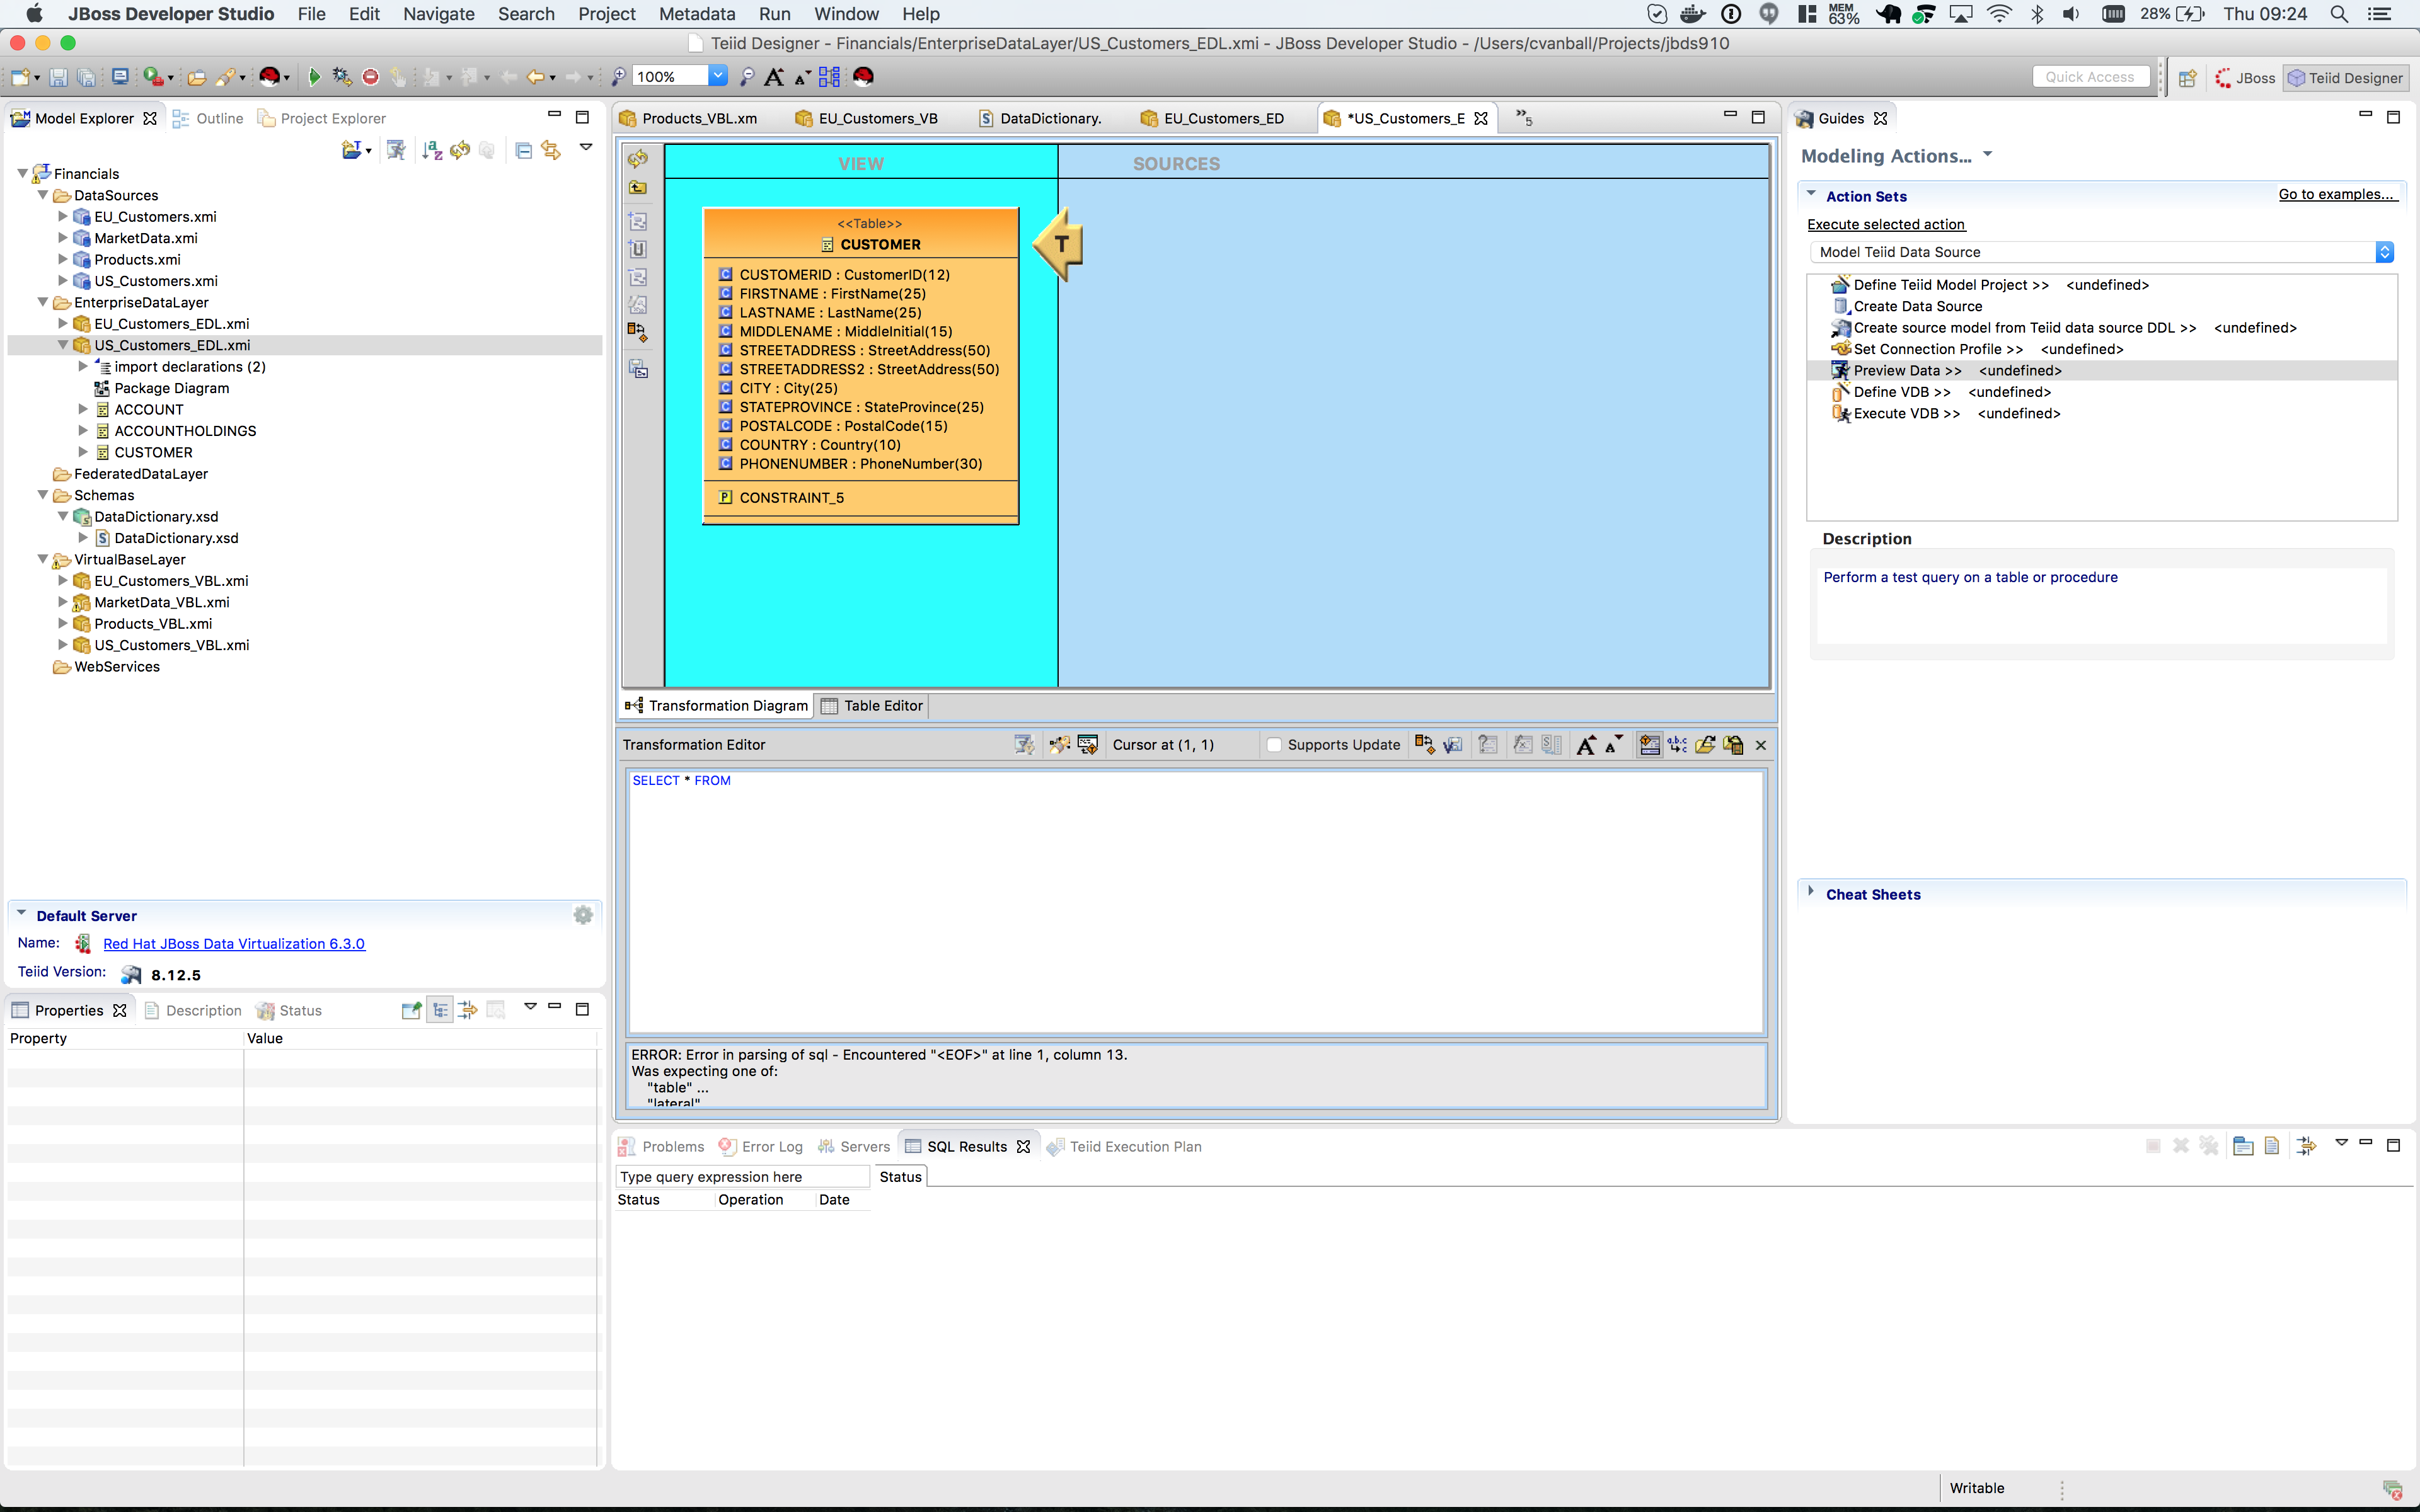
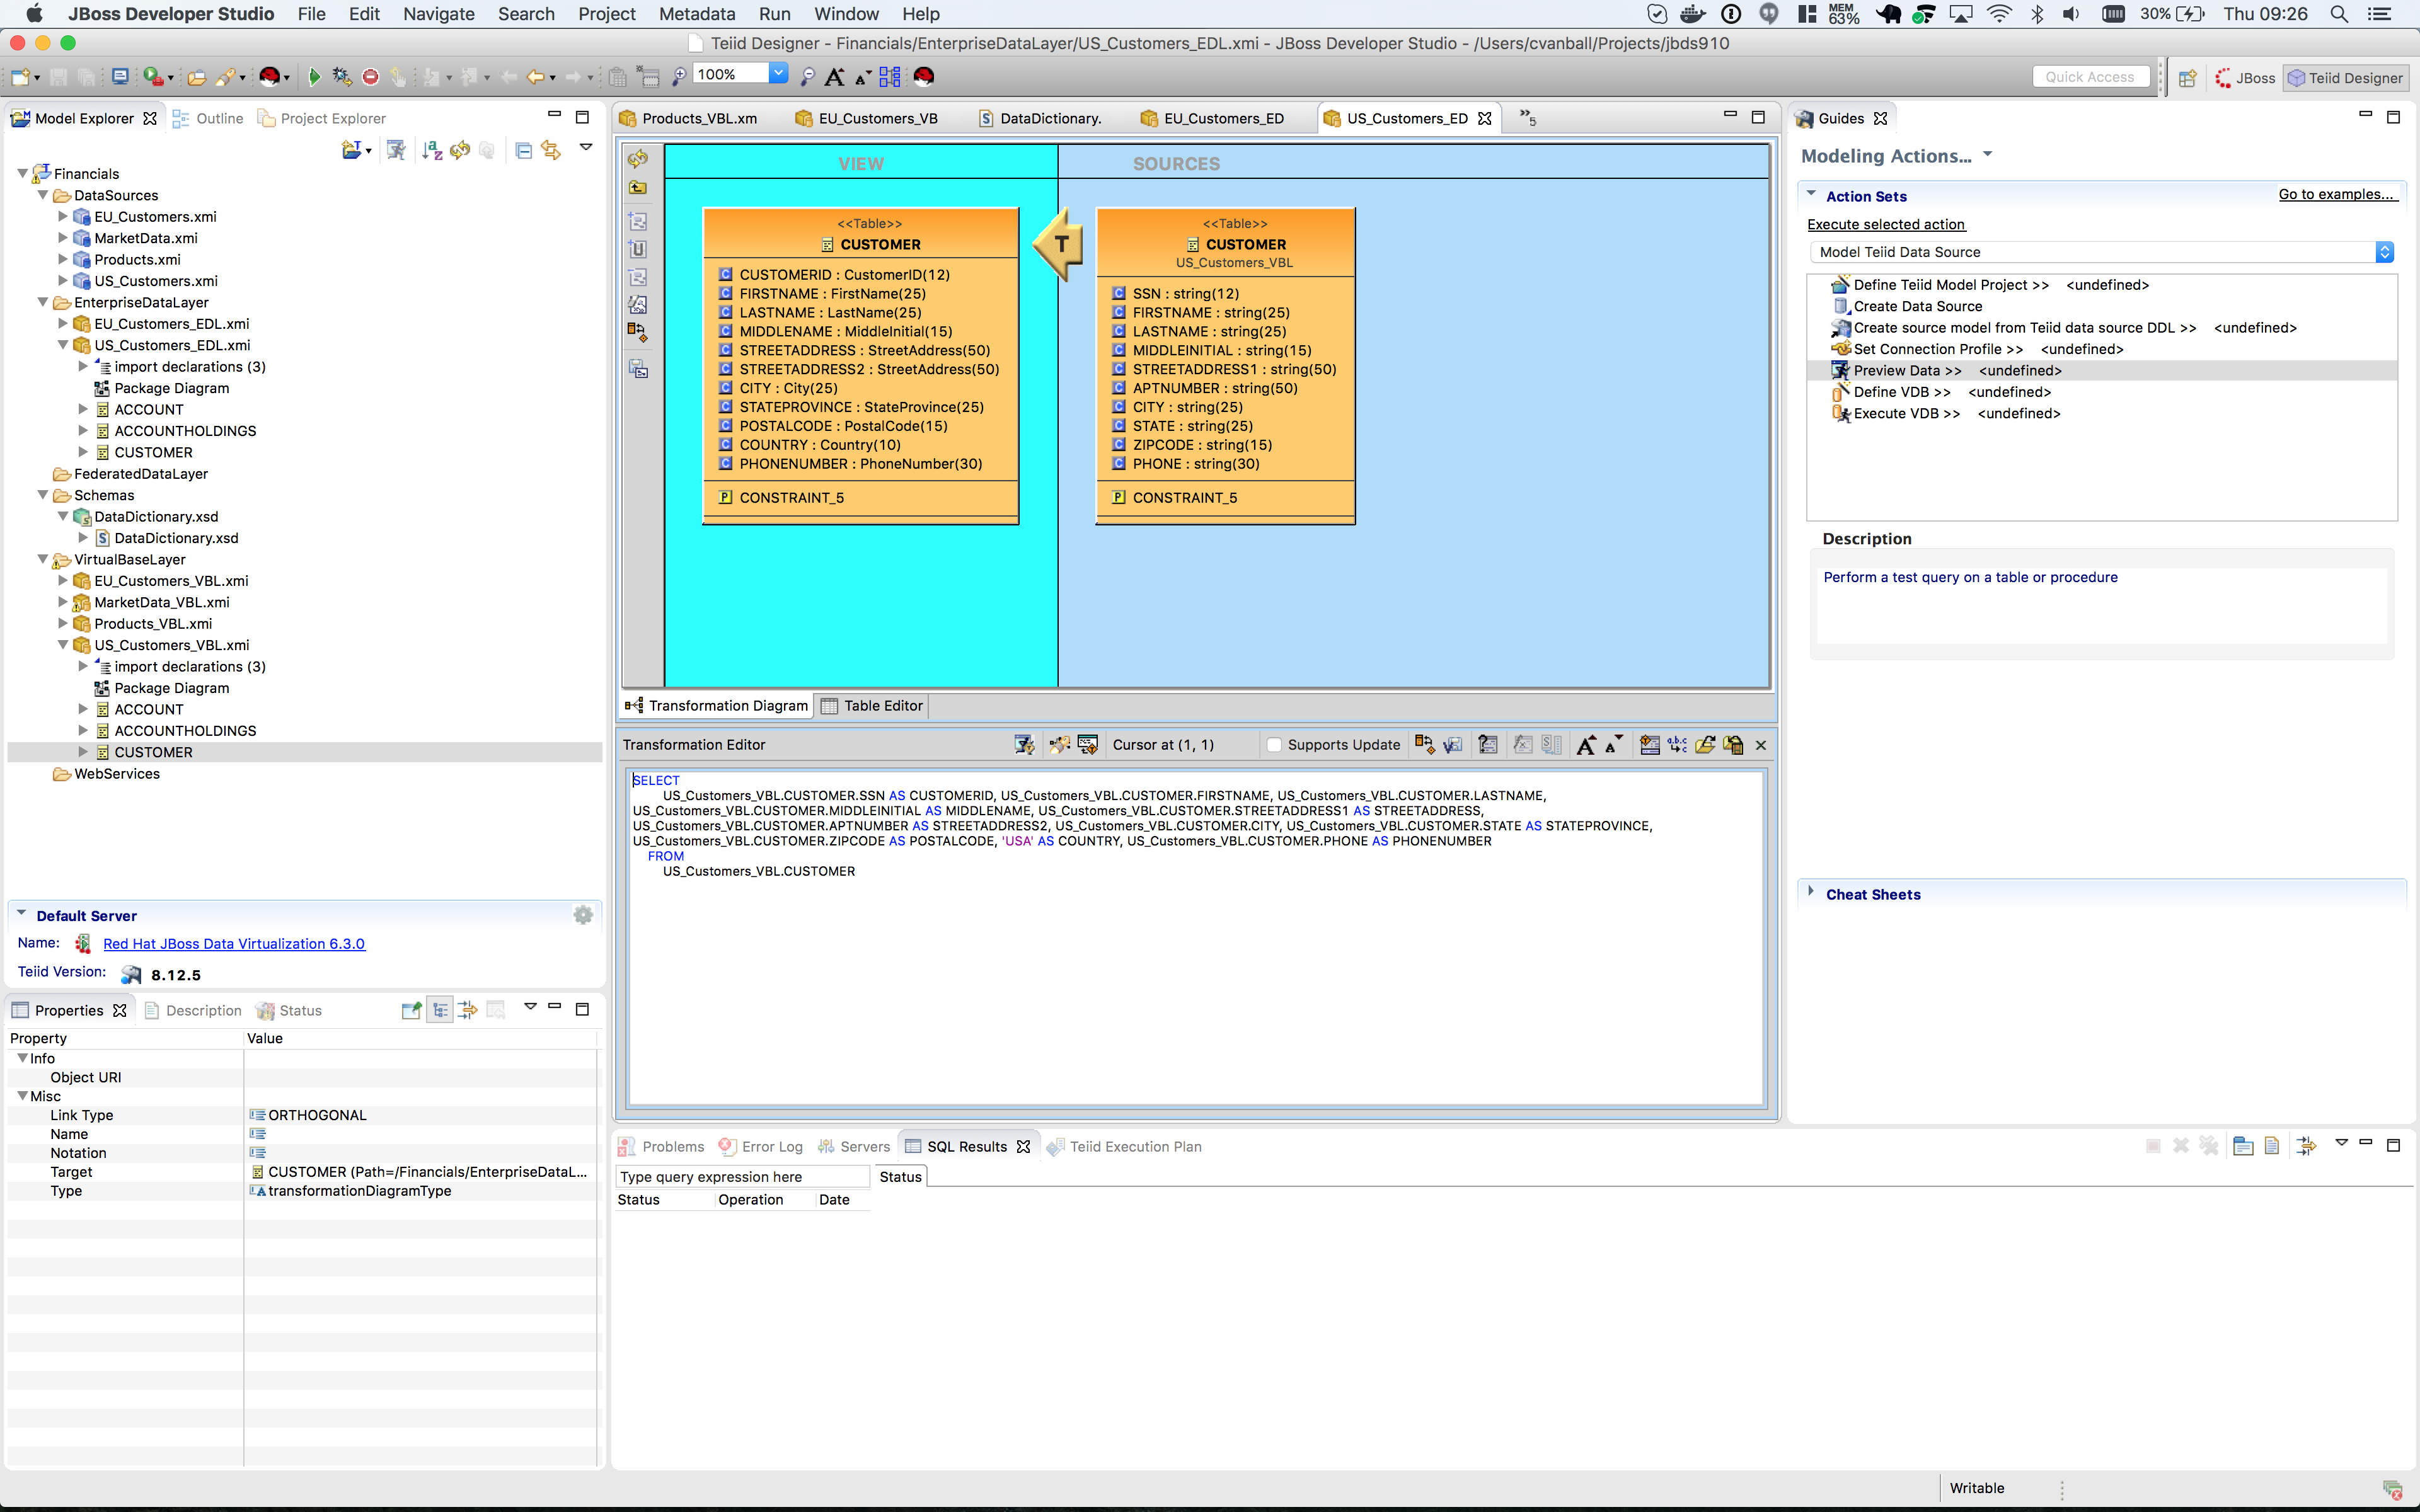
Open the Transformation Editor on US_Customers_EDL.CUSTOMER. See figure below.
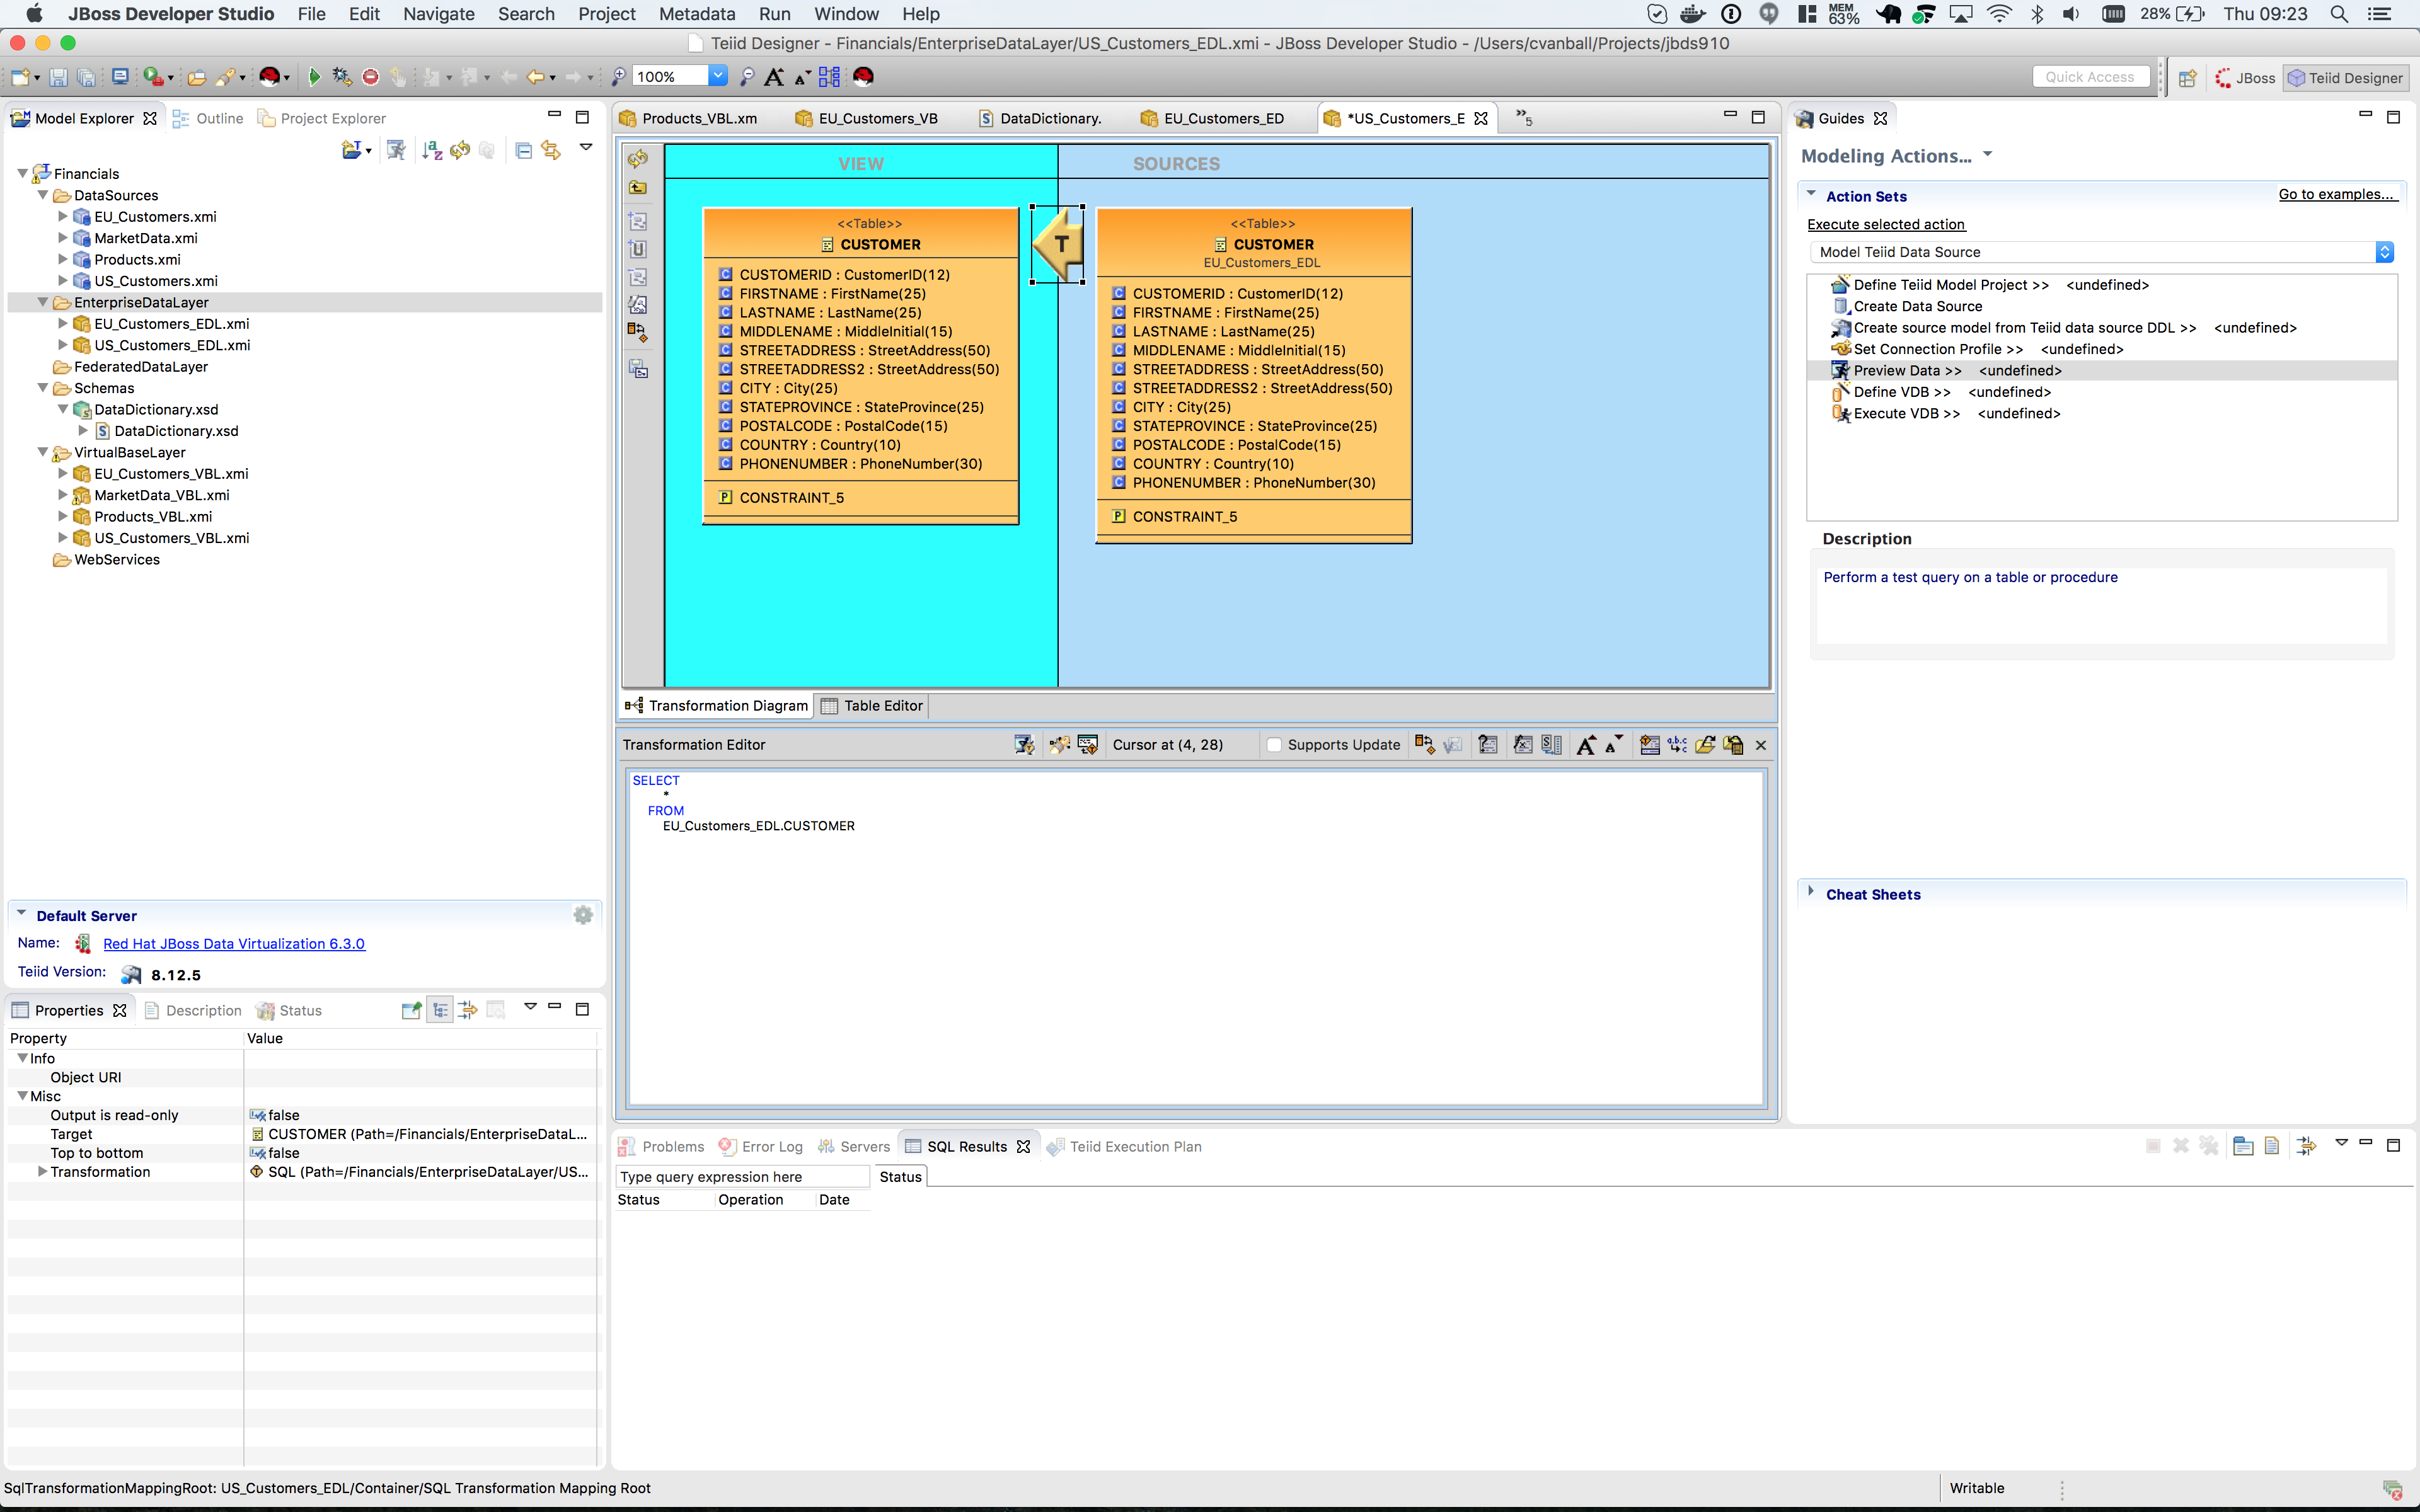
Note that the Source of the transformation is the EU_Customers_EDL.CUSTOMER table. We want to replace that with the US_Customers_VBL.CUSTOMER table. Right-click on the Source table and select menu:Remove Transformation Source(s)[].
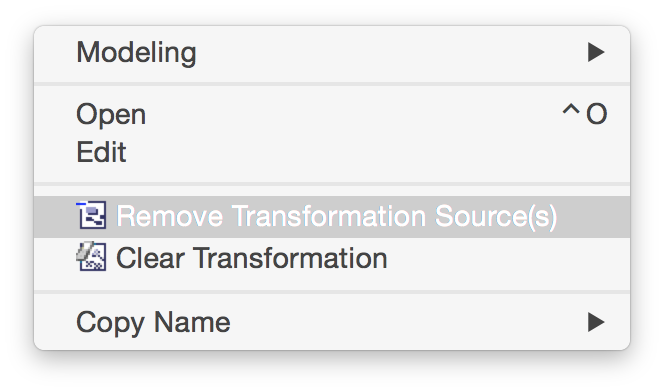
The following pop-up window will be presented.
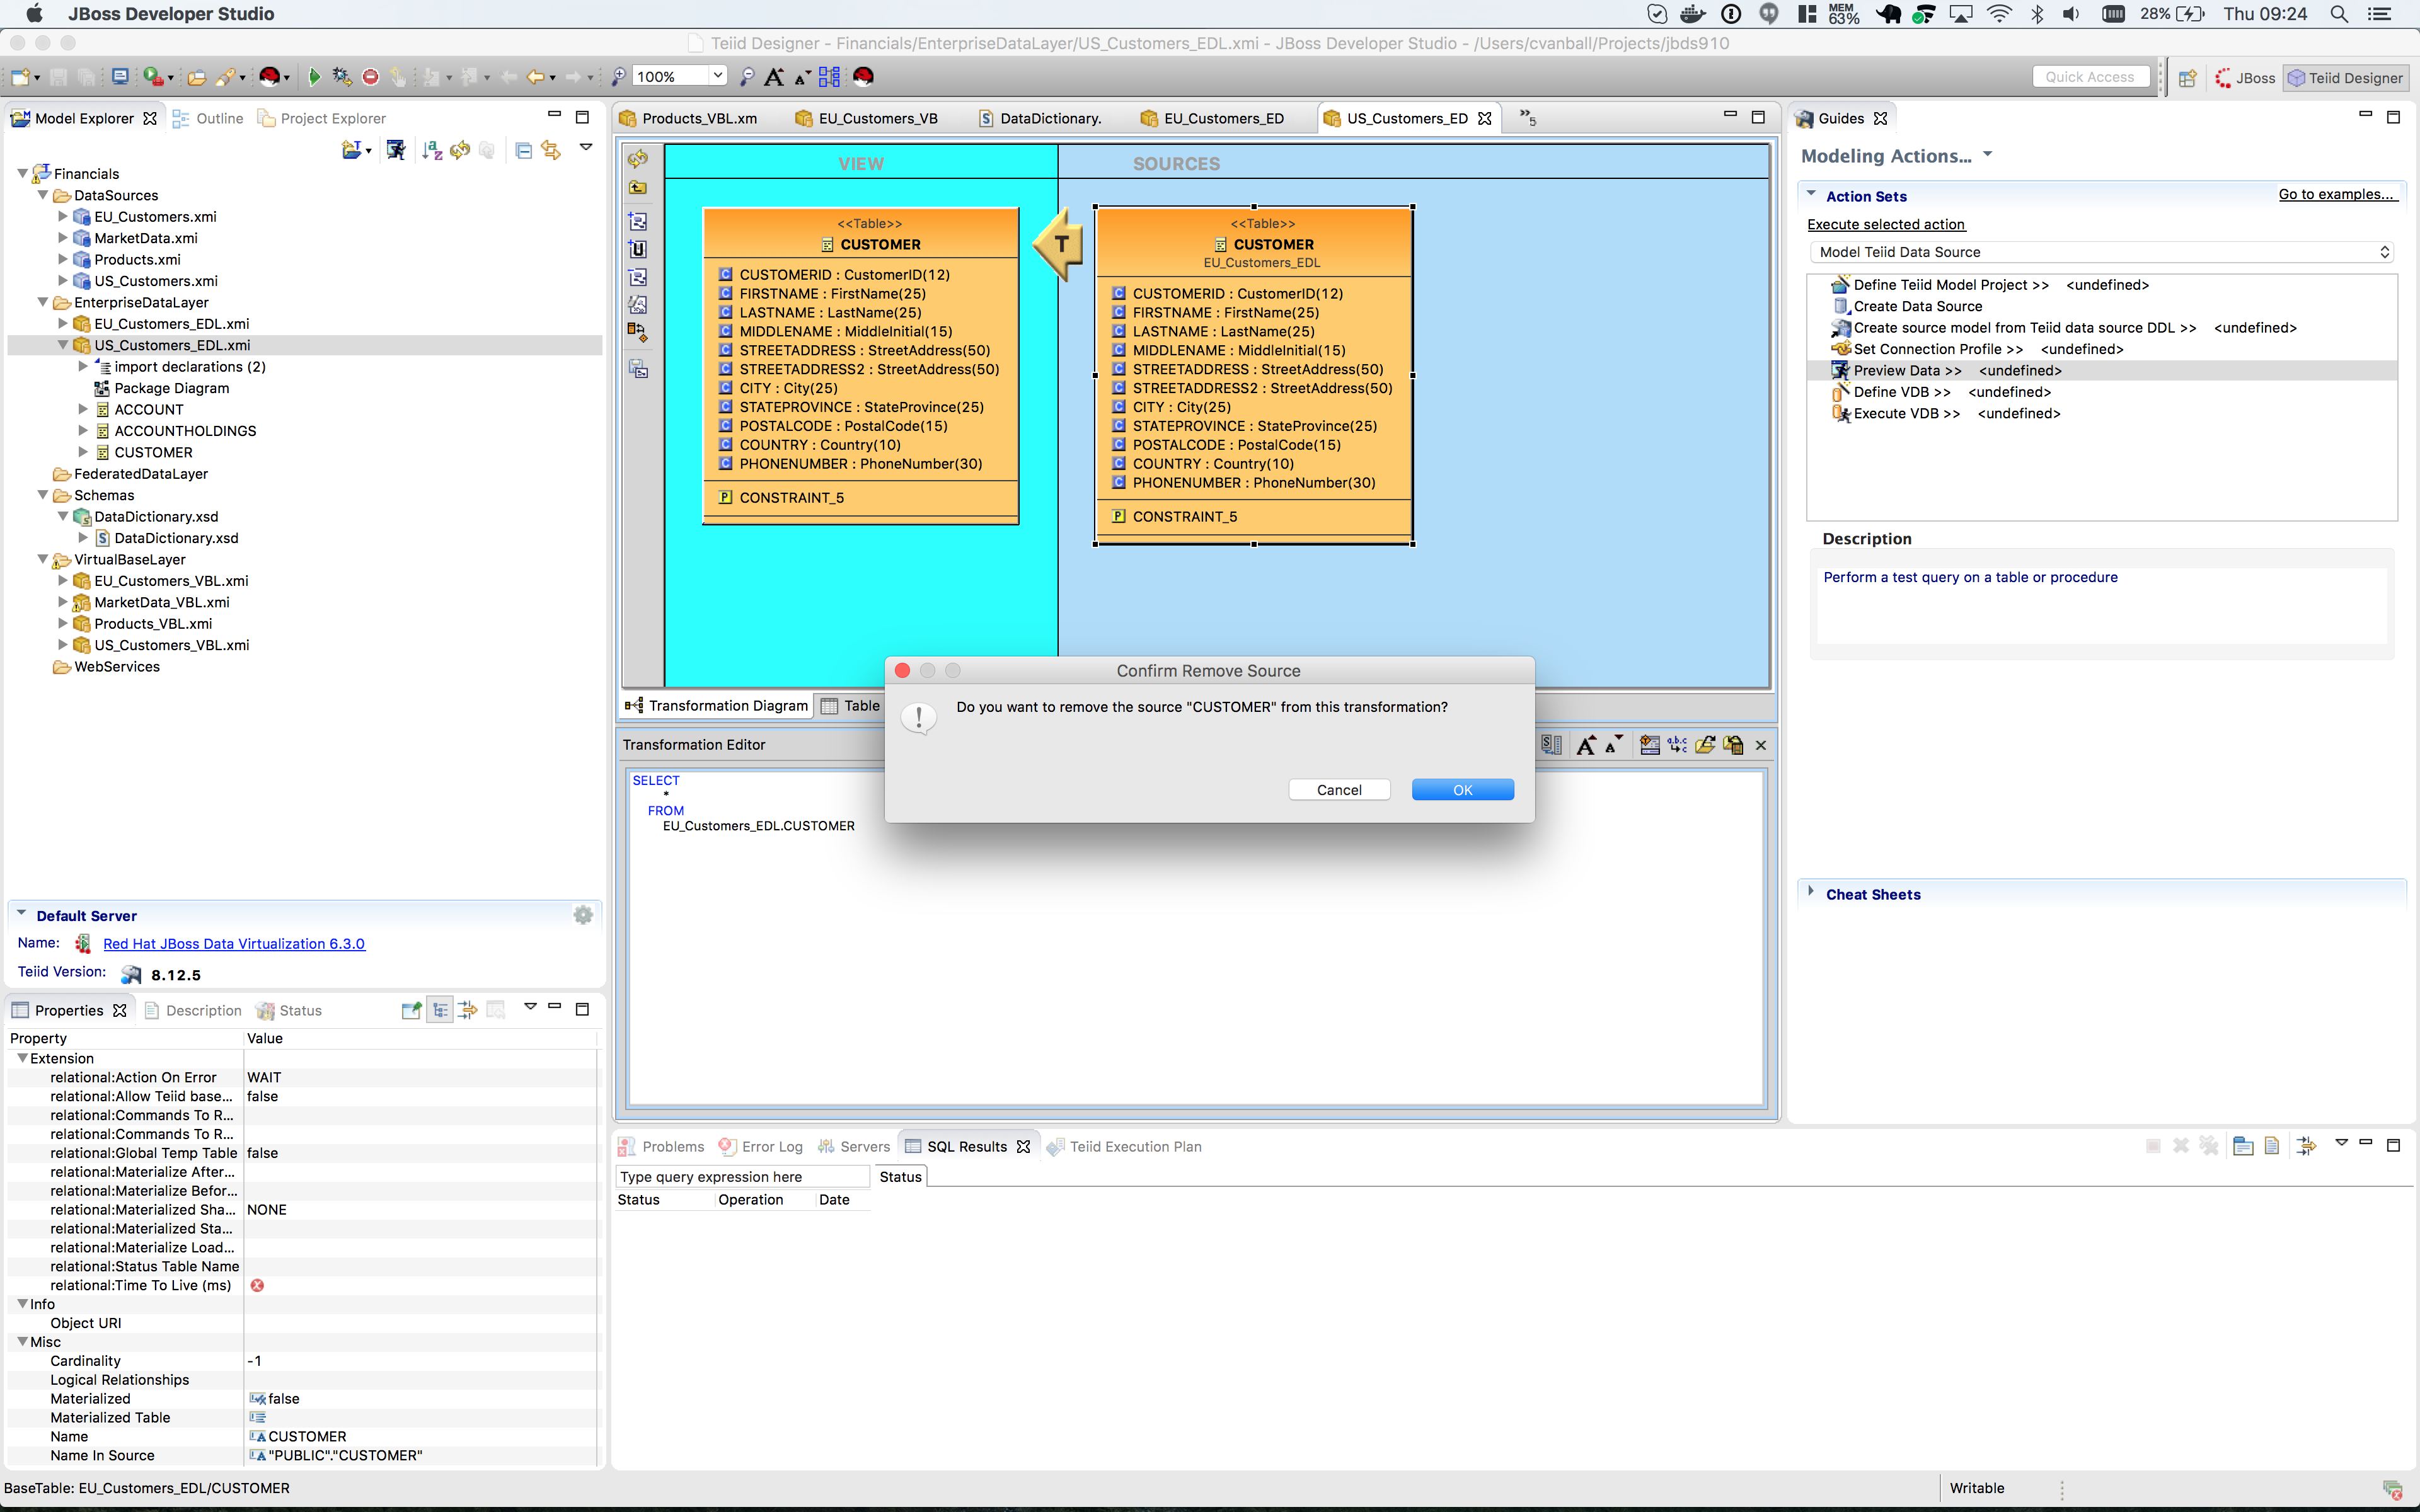
Click btn:[OK]. The following illustration indicates what your view in Teiid Designer should now resemble.
Select the VirtualBaseLayer → US_Customers_VBL → CUSTOMER table and drag & drop the table in the Sources swim lane of the US_Customers_EDL window. This is highlighted in the illustration below.
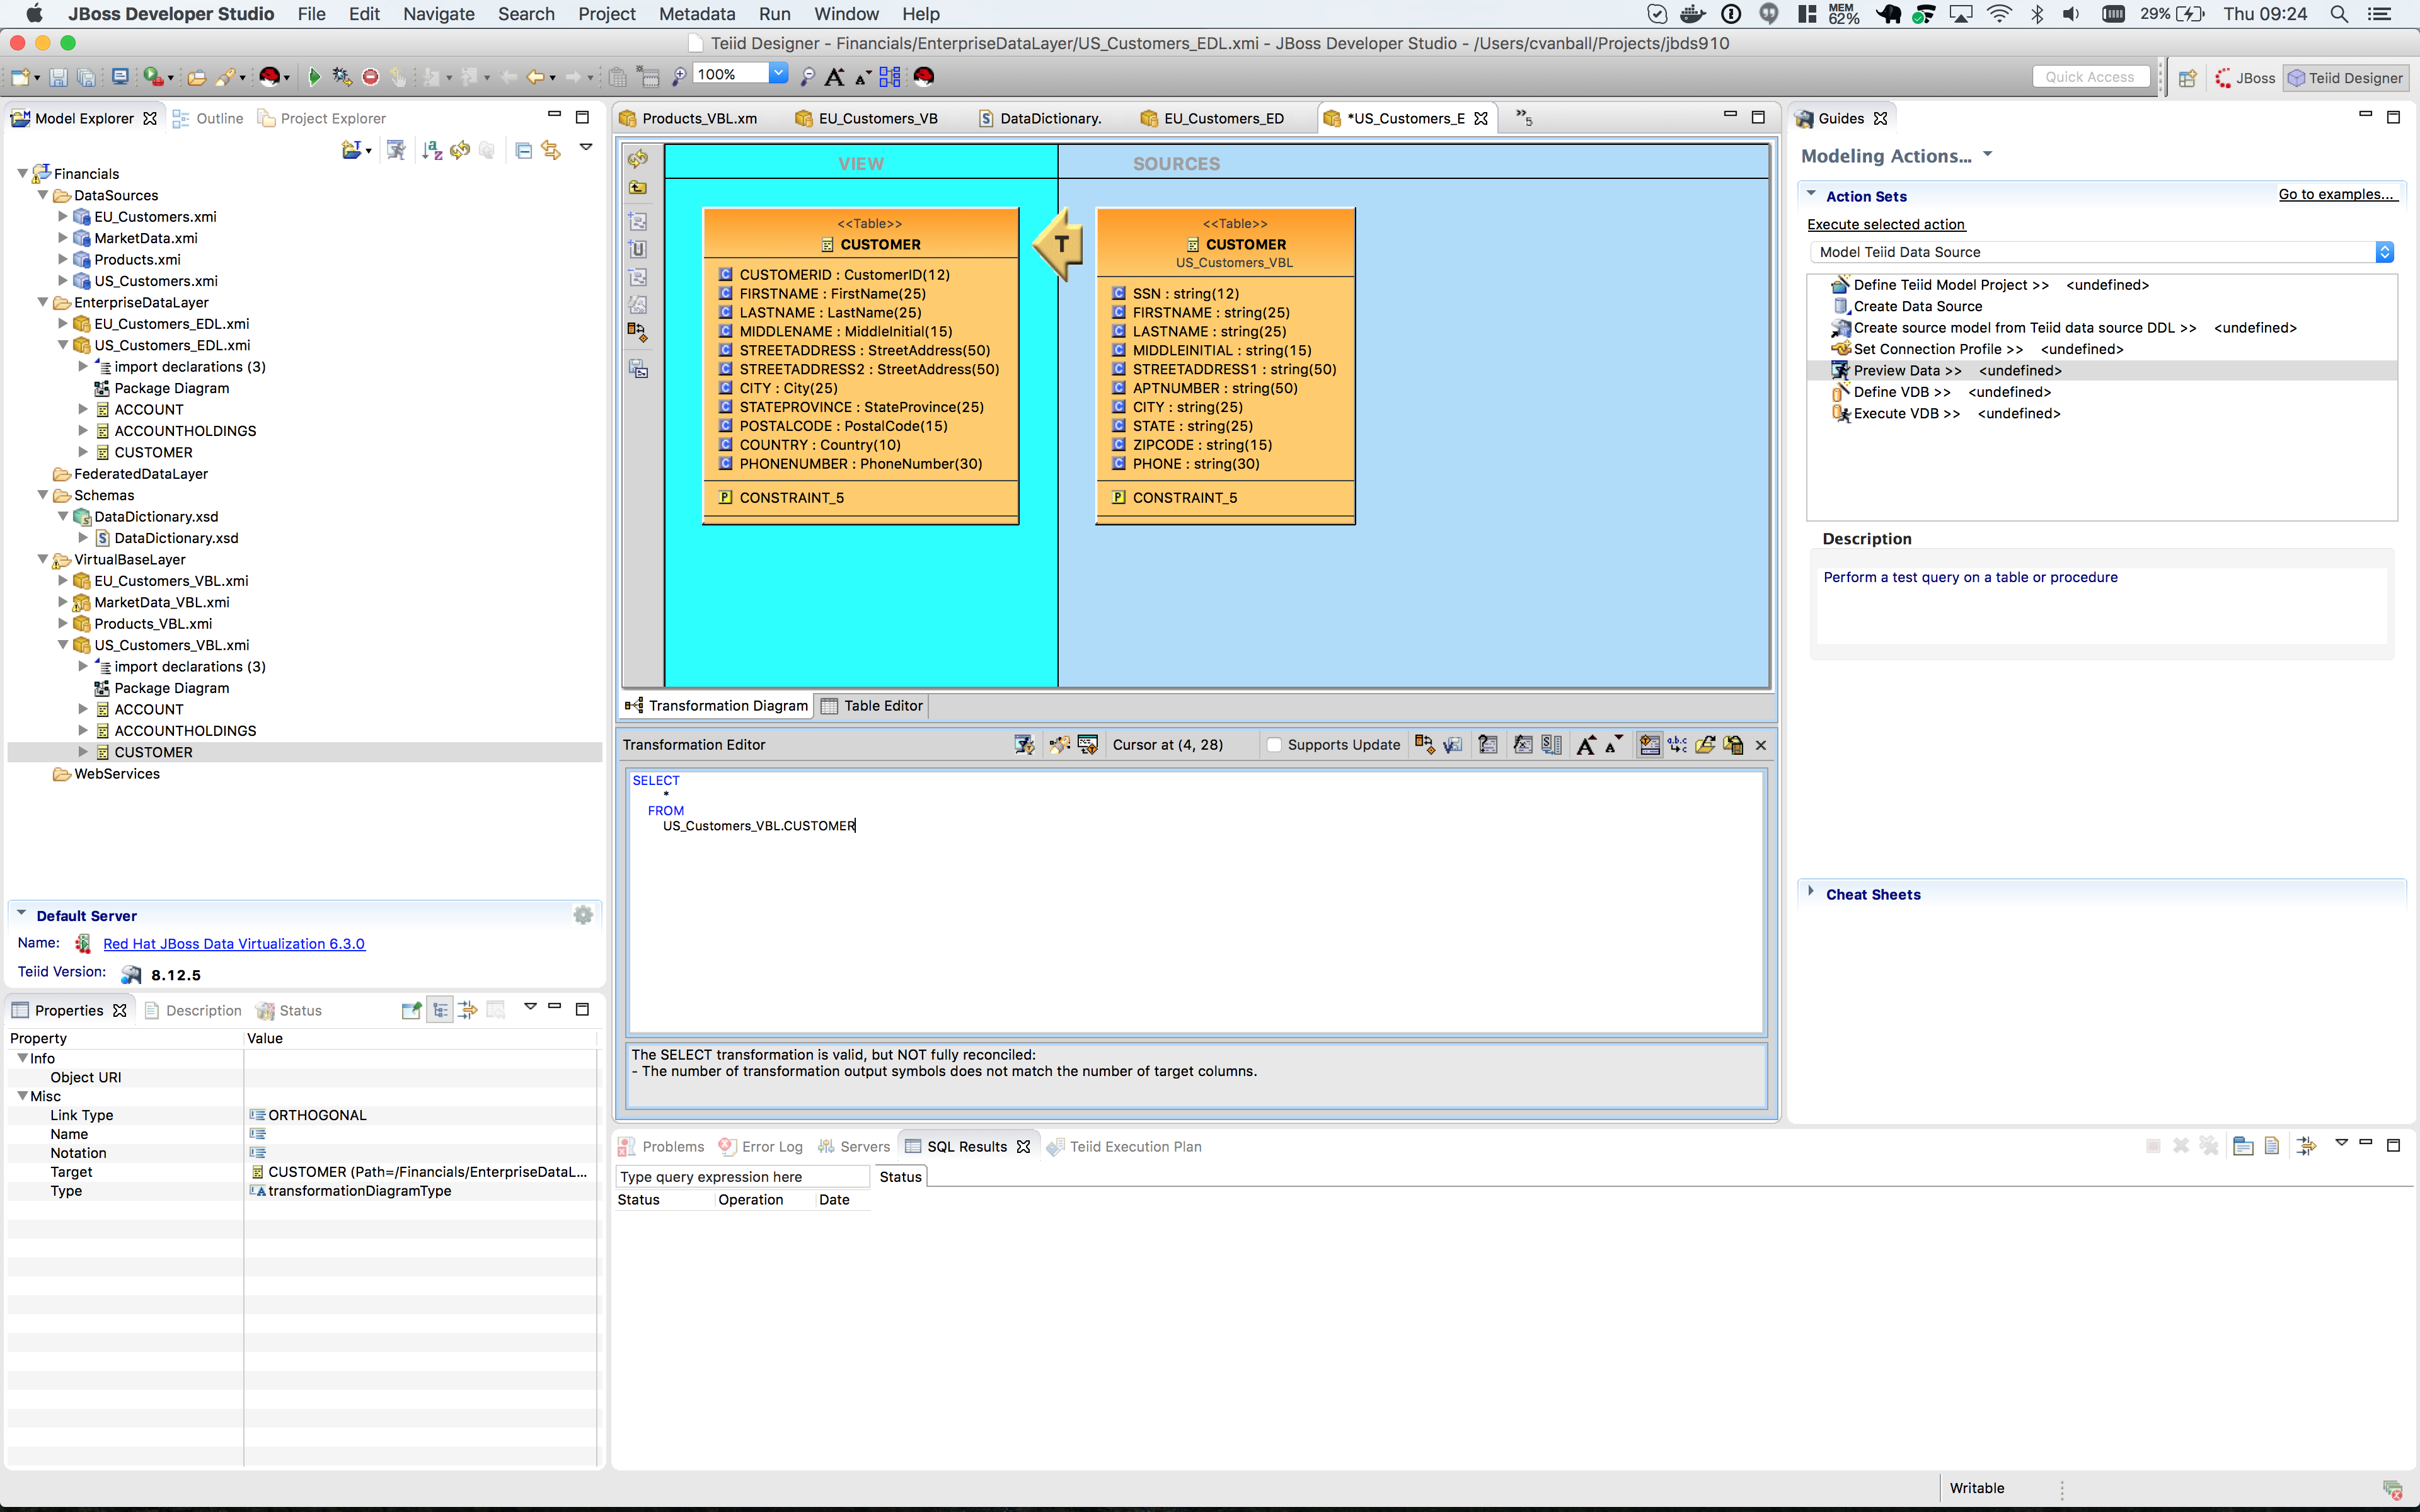
There will be an error on our current model, US_Customers_EDL. At this point, we need to add a source model. Simply drag the highlighted CUSTOMER table indicated in the previous illustration to the sources column on the right-hand side. This will add this table from our VirtualBaseLayer to our US_Customers_EDL model.
As is indicated on the model, the transformation is valid but is not fully reconciled. Click on the reconciler to bring up the wizard. As you can see from the reconciler, we have a bit of work to do.
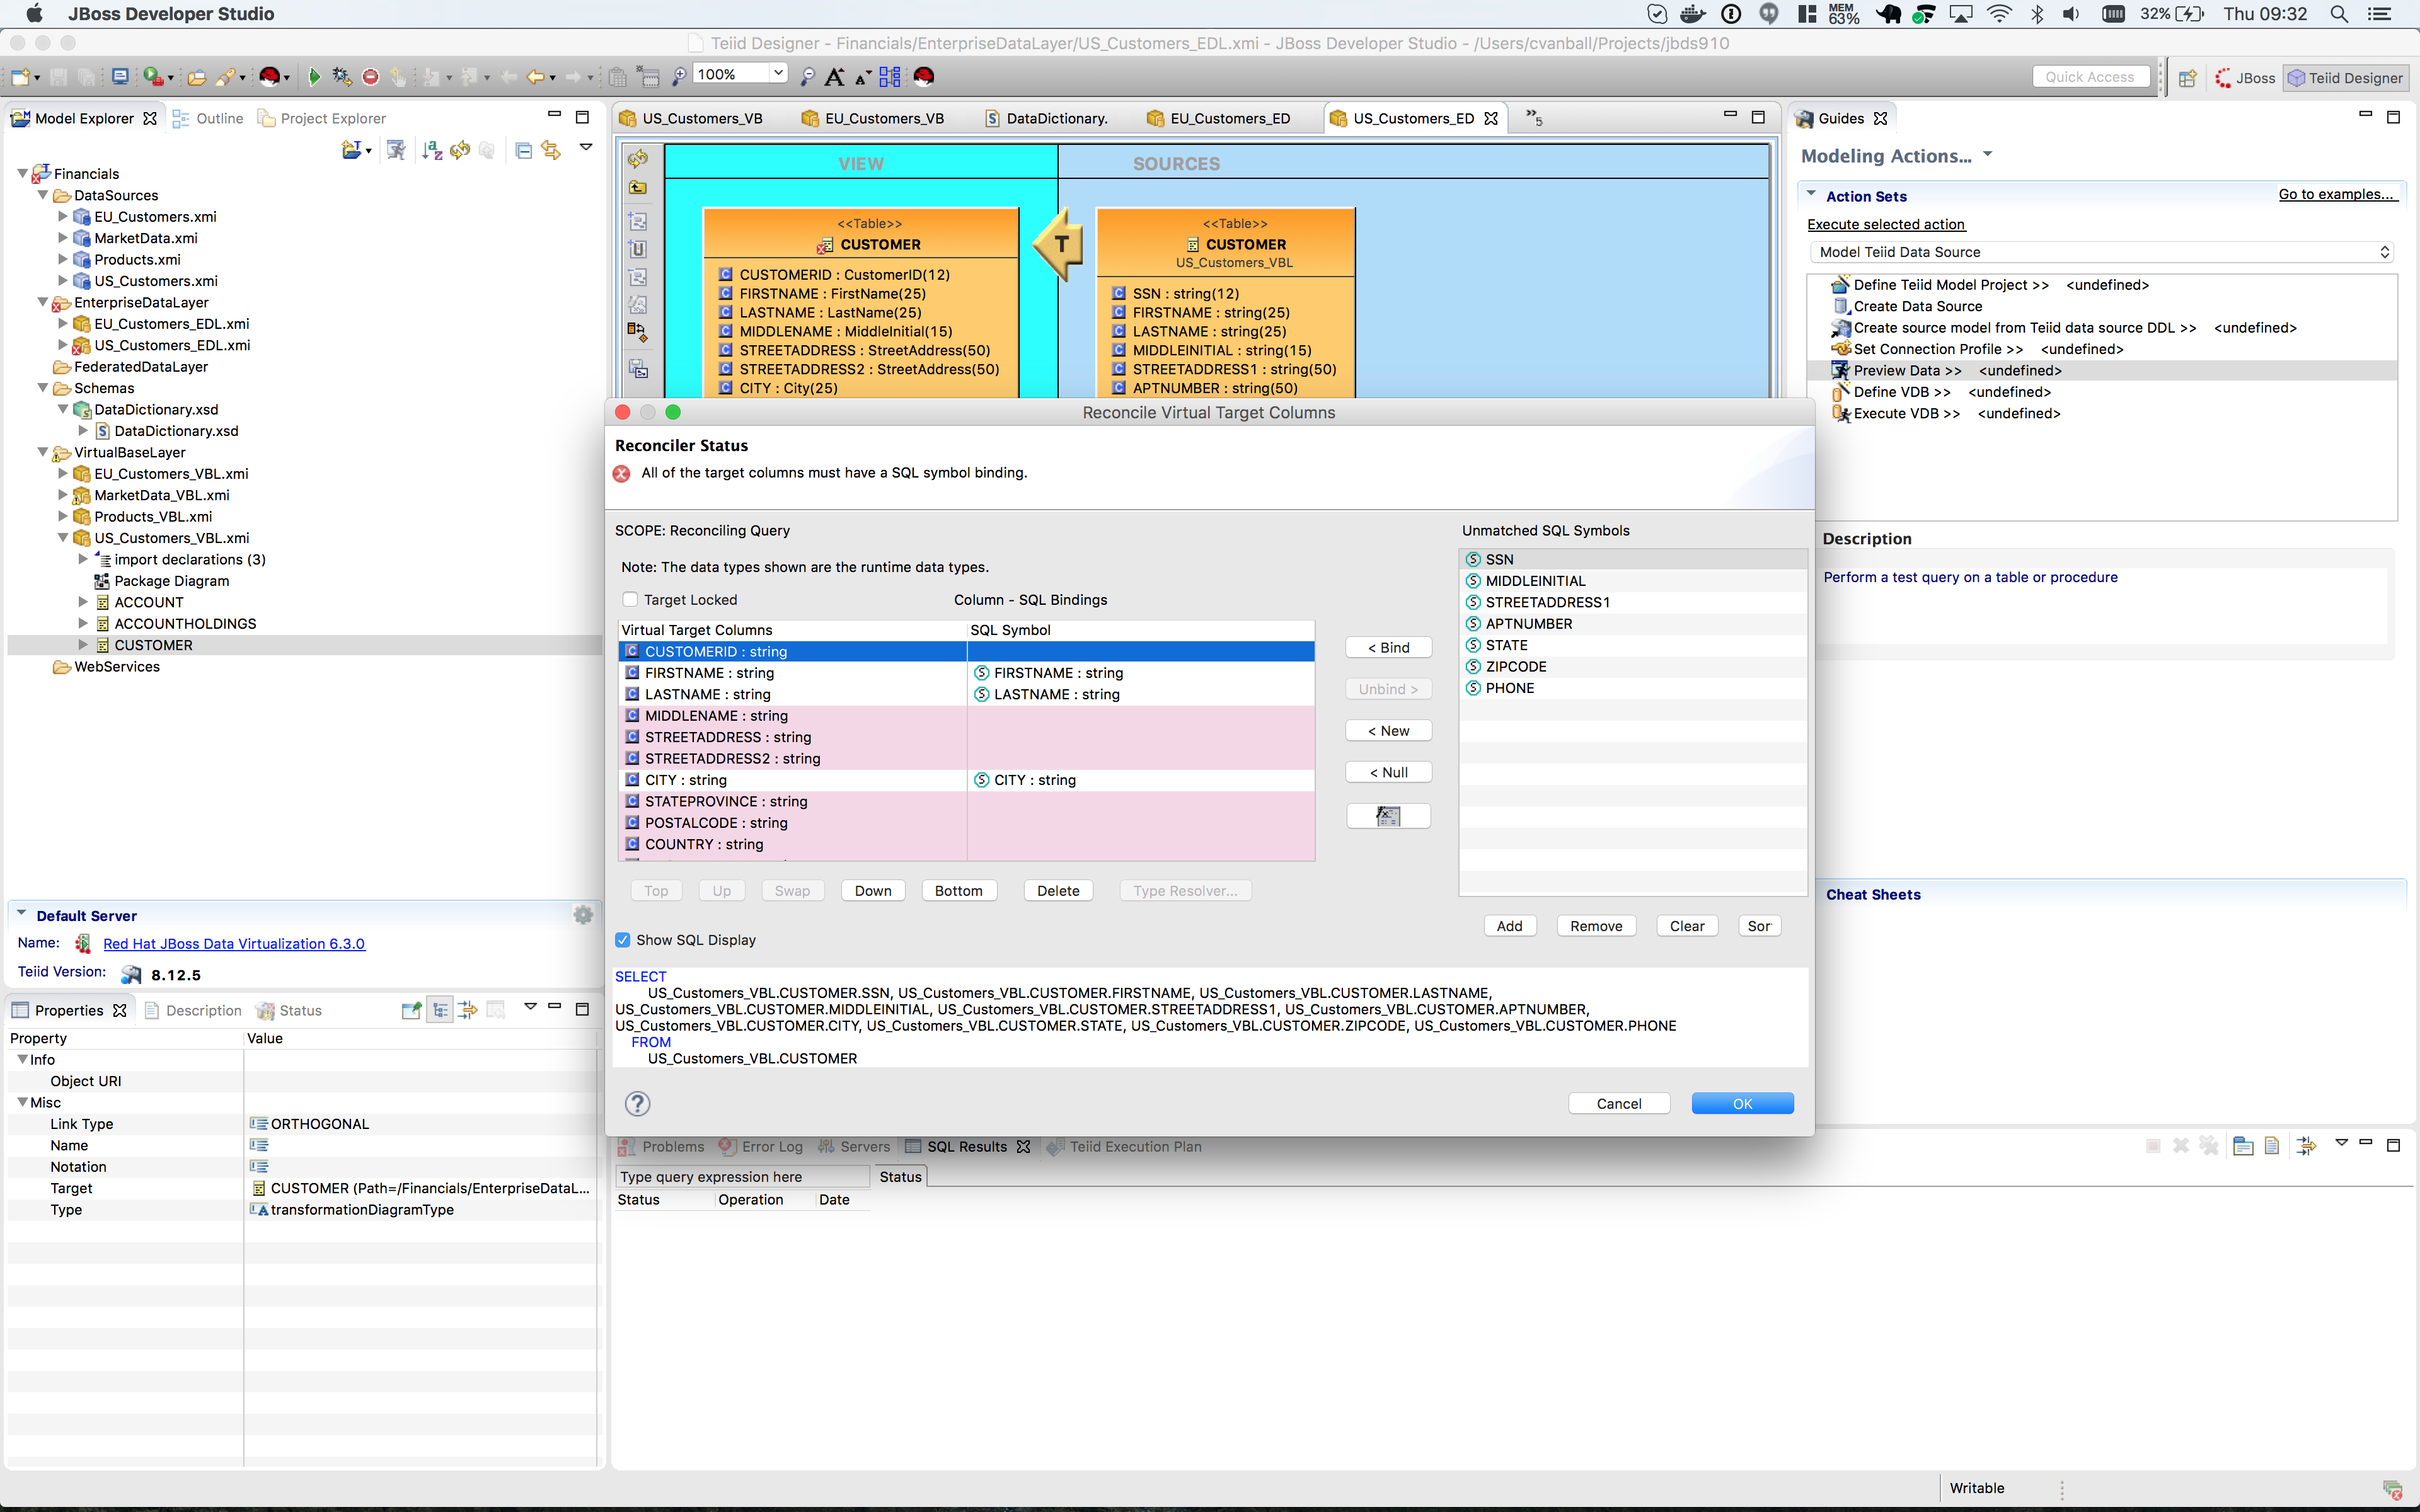
There are two things that we need to do in order to fix this transformation.
-
Assign (Bind) variables that do not automatically match. By selecting the source on the left and the target on the right, we can then bind each of the following:
-
SSN to customerid
-
MIDDLEINITIAL to MIDDLENAME
-
STREETADDRESS1 to STREETADDRESS
-
APTNUMBER to STREETADDRESS2
-
STATE to STATEPROVINCE
-
ZIPCODE to POSTALCODE
-
PHONE to PHONENUMBER (be sure to assign this on the left too and not map it to country!)
-
When we are finished, we have one more step.
-
Create a (simple) function to assign a value to COUNTRY as it does not exist in the source. To do this we will open up the Expression Builder by clicking on the "f(x)" button. This is right under the "< Null" button in the middle area of the wizard. Since all that is needed is a simple (static) assignment, the Expression Builder comes up with the following screen.
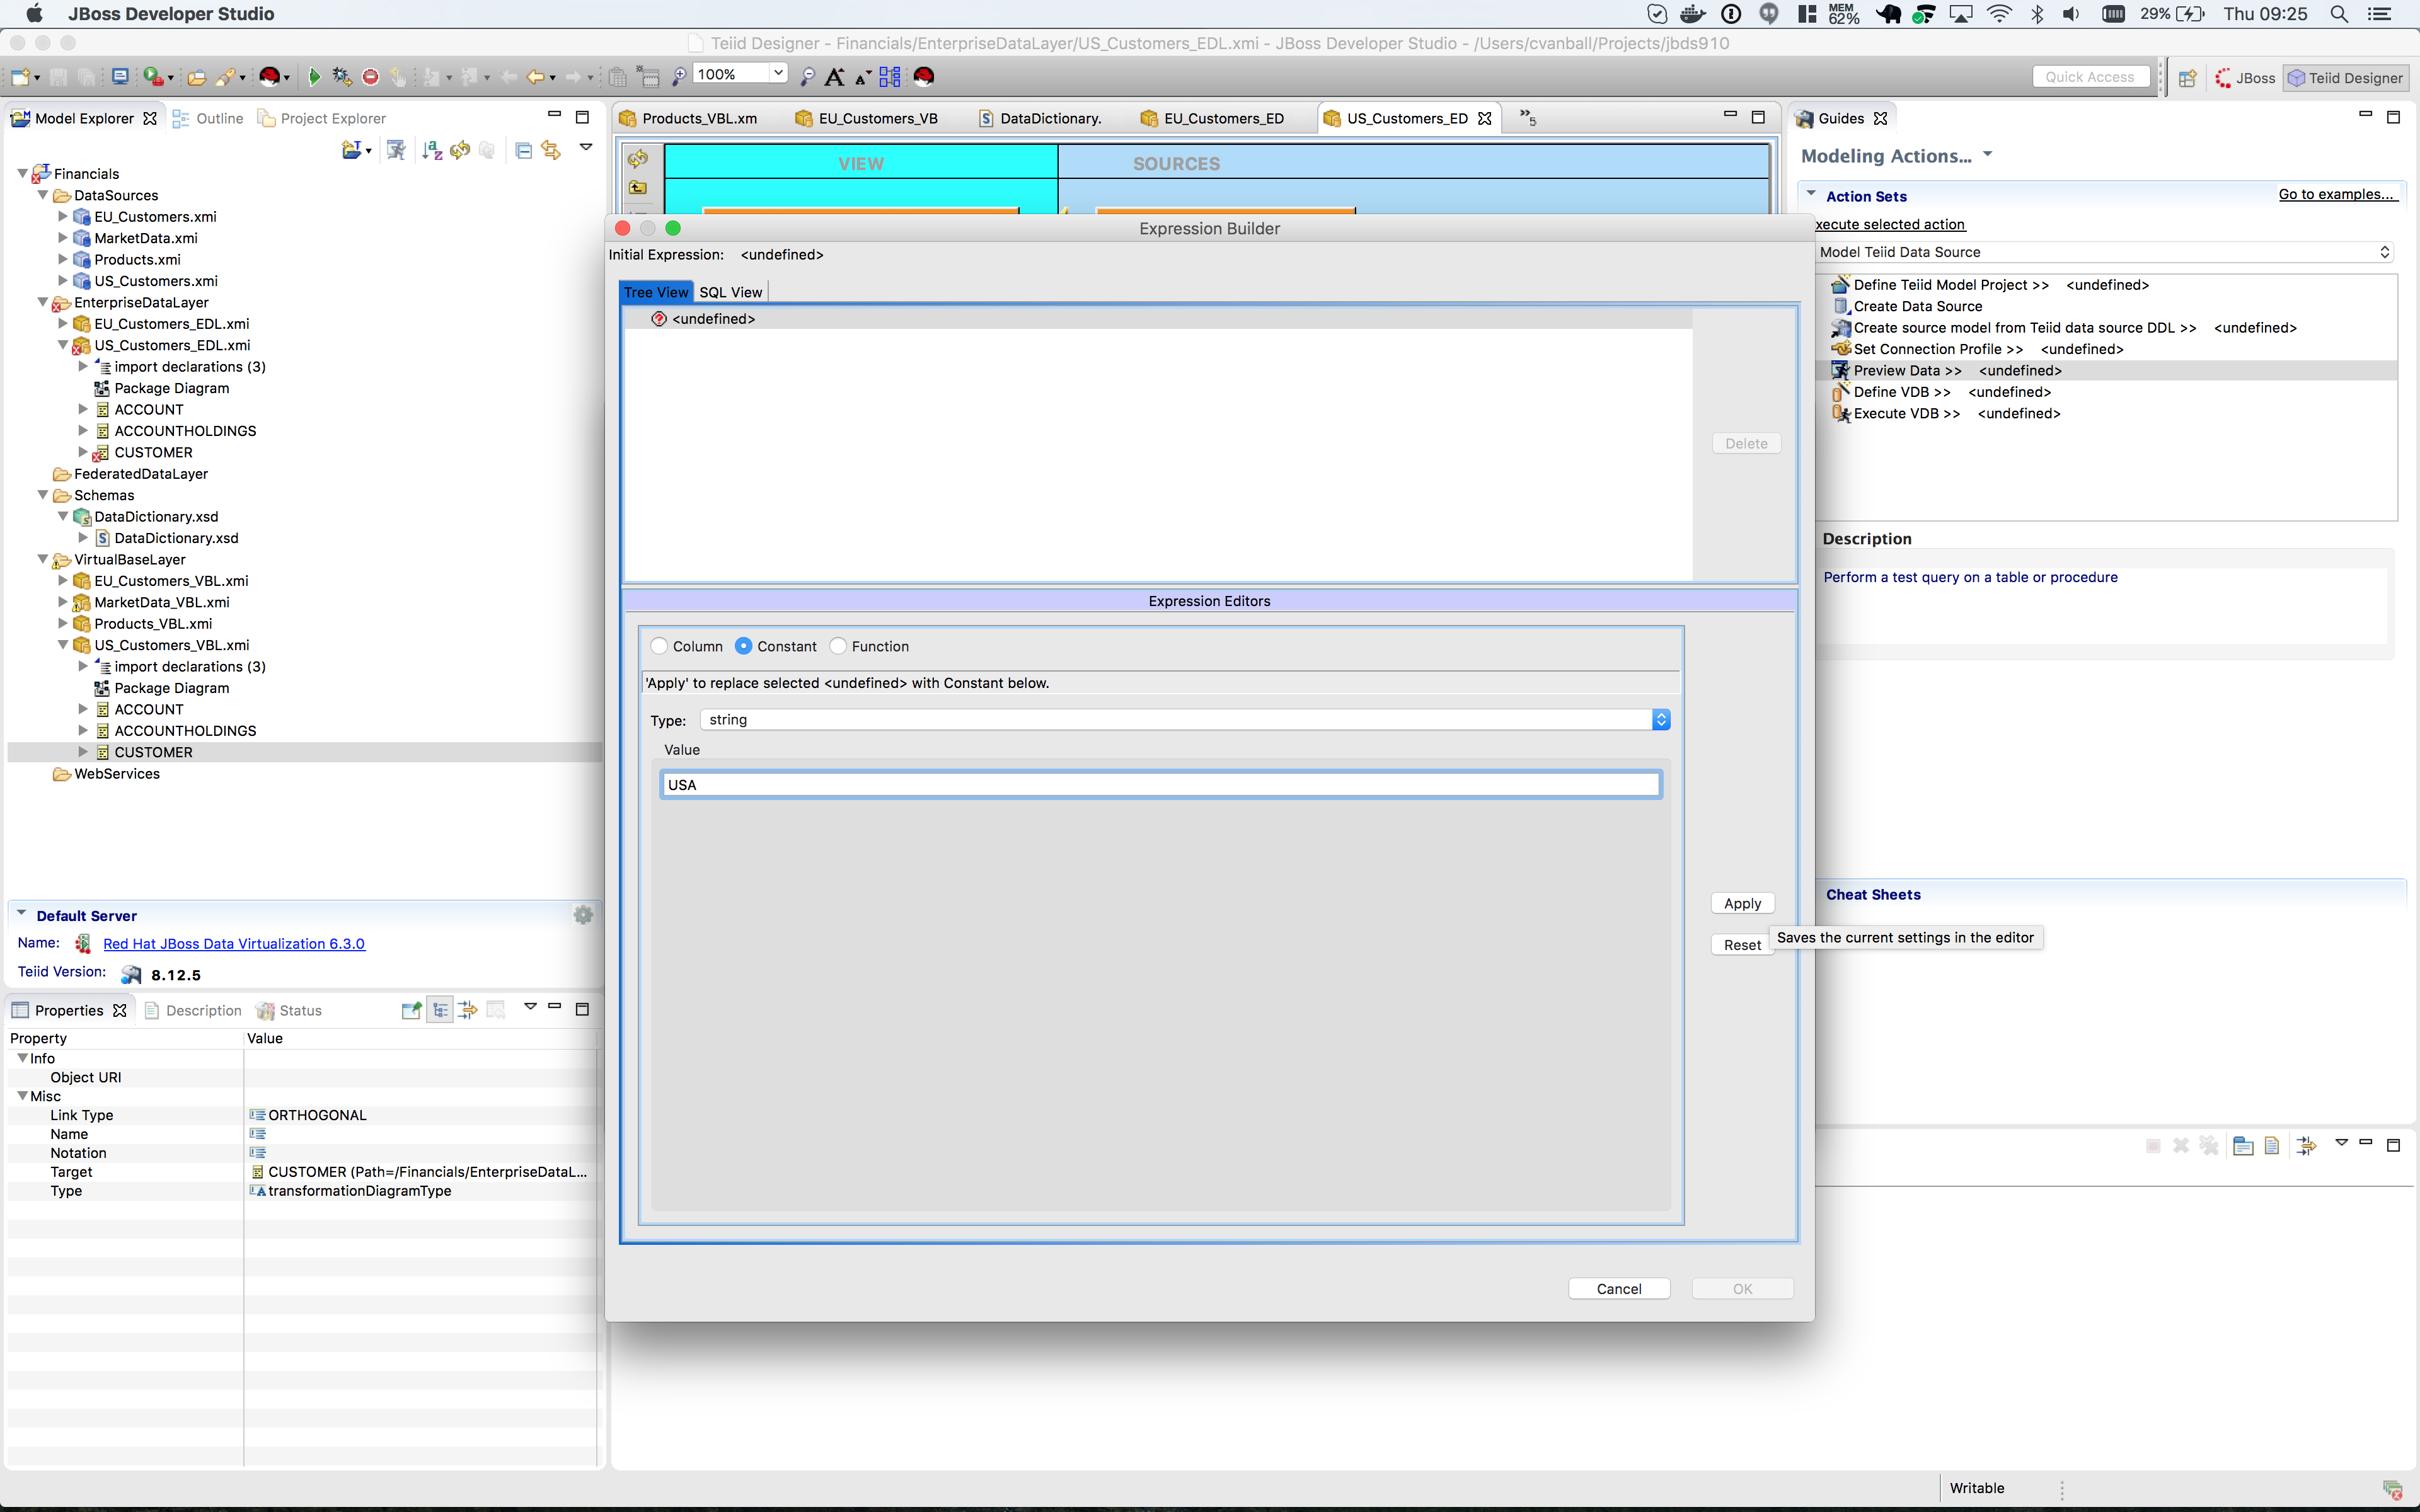
All we need to do is type "USA" into the Value field, click btn:[Apply], then btn:[OK]. However, while you are in the Expression Builder, you may want to select the Function radio button to check out the many out-of-the-box functions and operations that ship with JBoss Data Virtualization. When you are finished, be sure to set it back to Constant and complete the instructions as outlined above.
When the Expression Builder exits back into the Reconciler, you will notice that the function ('USA' AS COUNTRY) has been properly assigned.
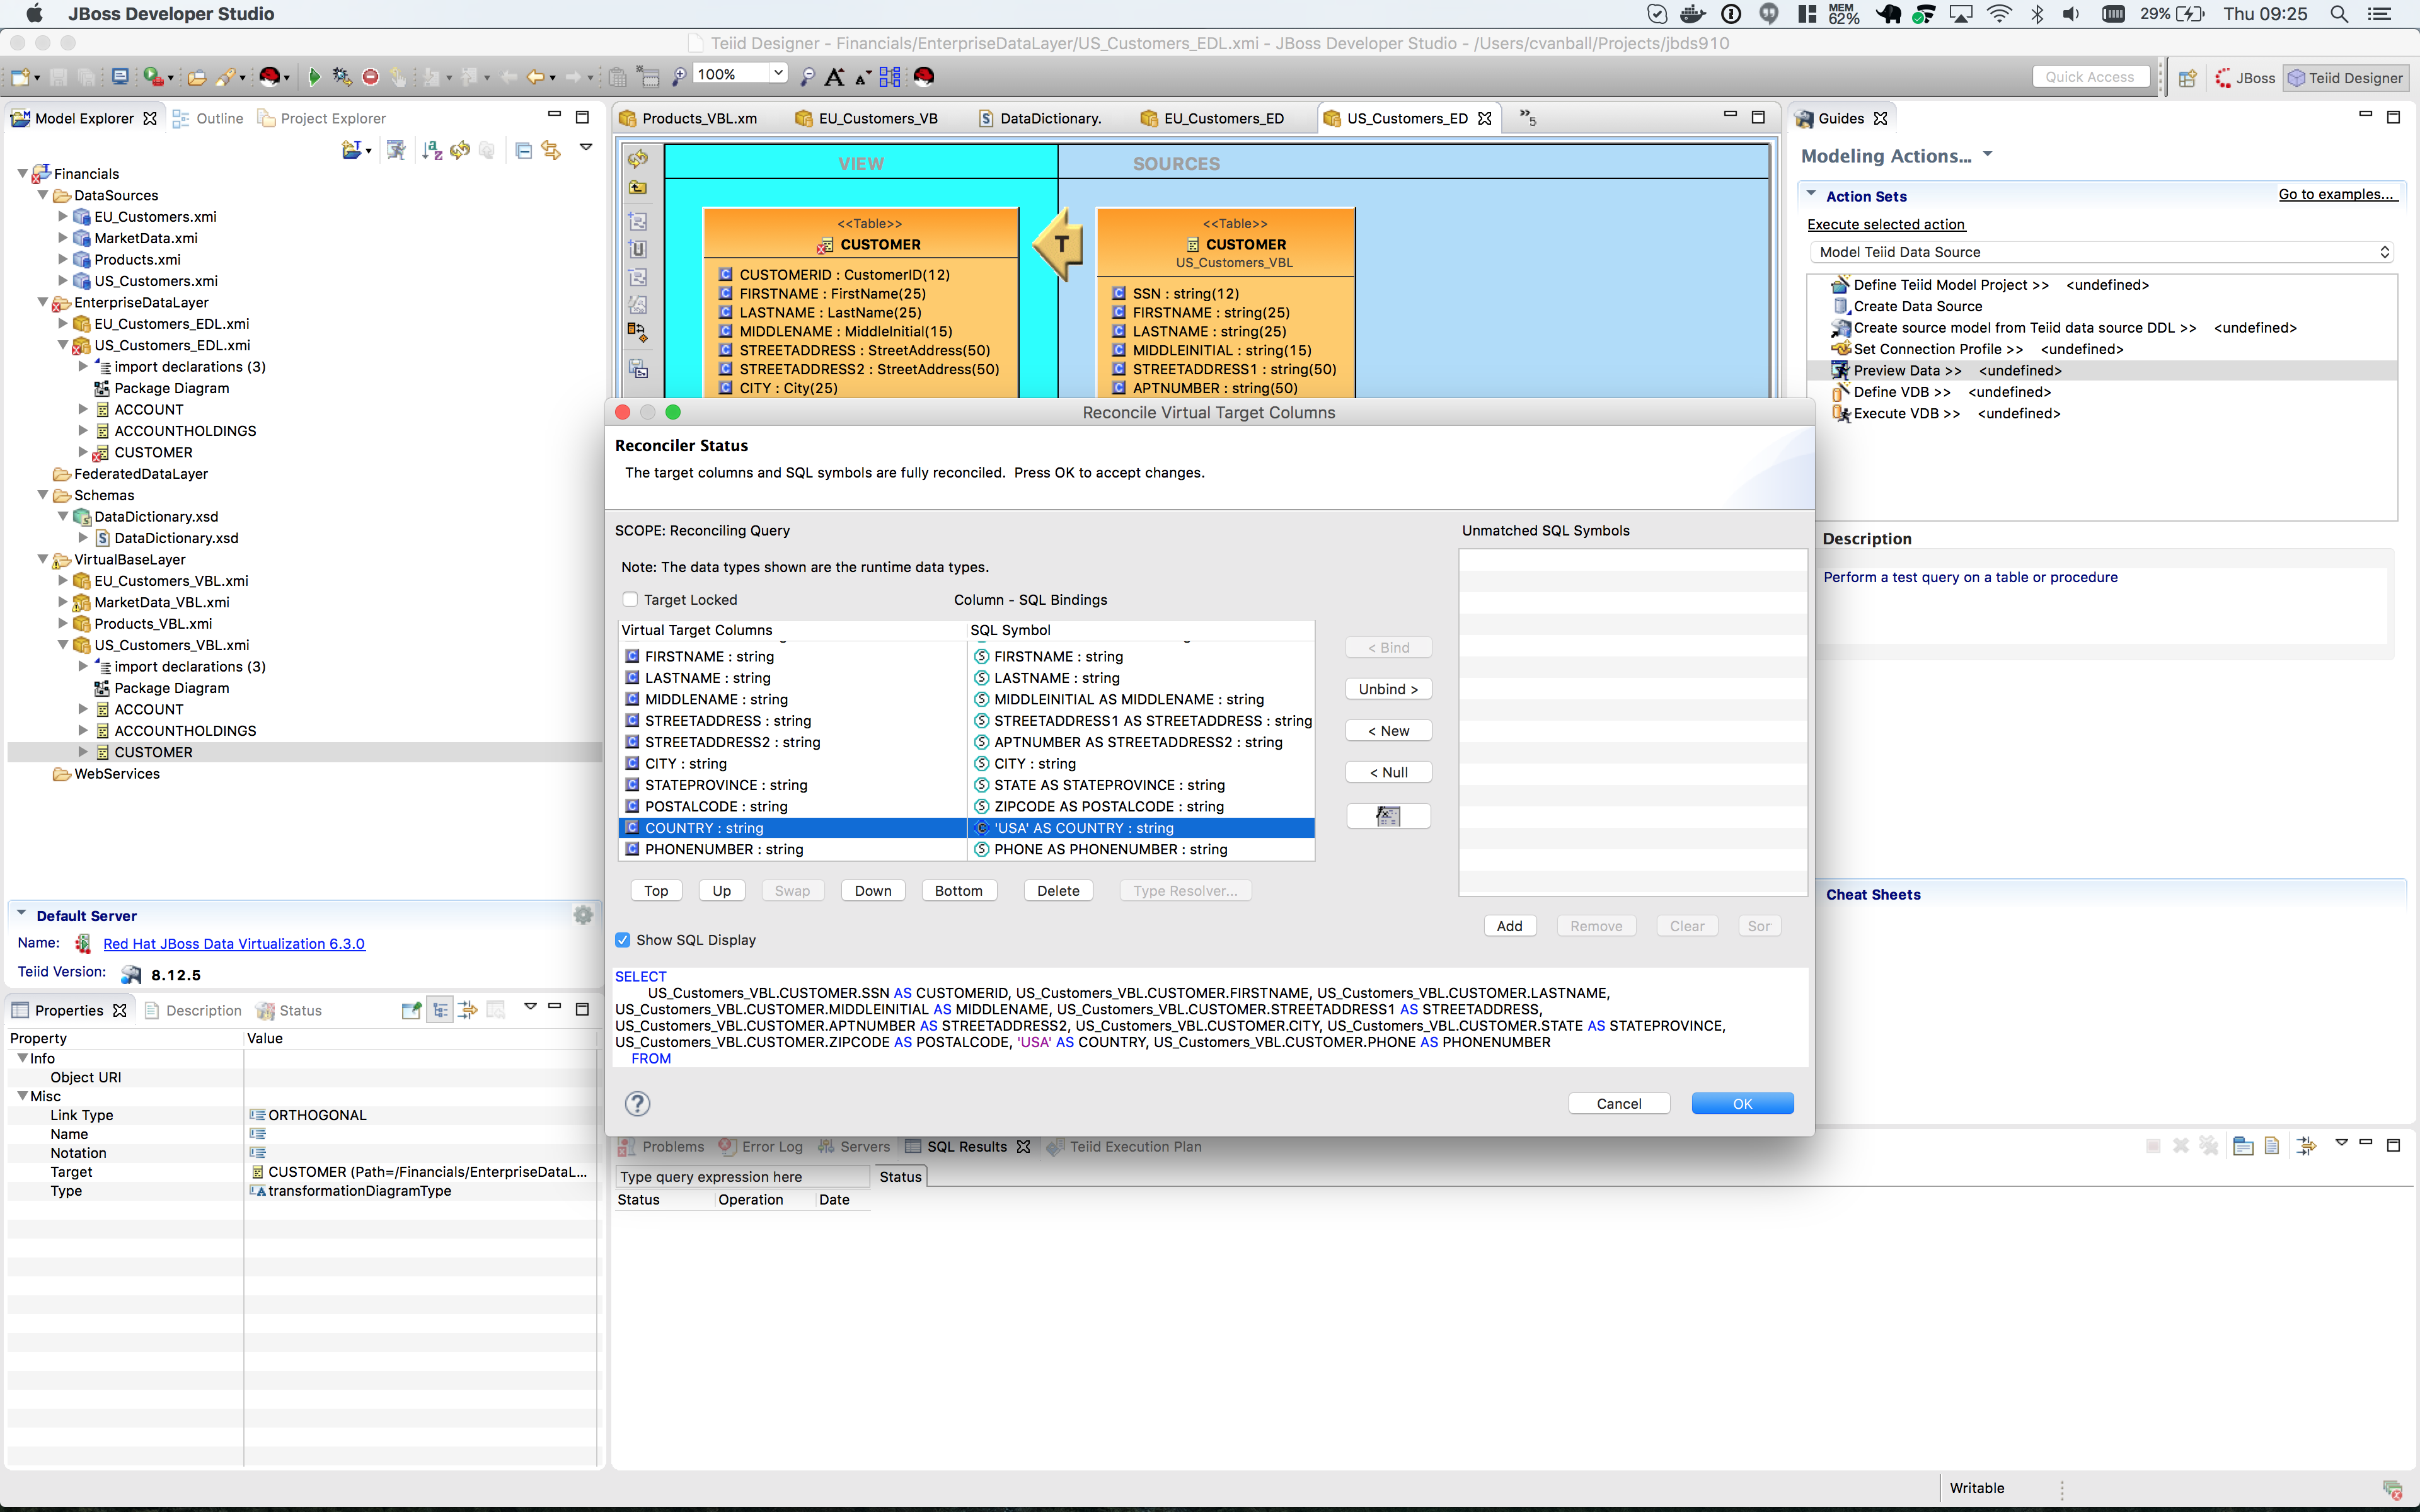
Click btn:[OK] in the Reconciler and save your changes.
Now perform the same process with the other two tables (ACCOUNT and ACCOUNT_HOLDINGS). Delete the EU_Customers_EDL.ACCOUNT, EU_Customers_EDL.ACCOUNTHOLDINGS source and drag & drop the appropriate US_Customers_VBL.ACCOUNT, US_Customers_VBL.ACCOUNTHOLDINGS source model and perform any necessary reconciliations. Again, you can go through the required steps to Preview data that was outlined in an earlier lab. The Data Dictionary has also enterprise data types defined for Product data. Create a Products_EDL model in the EnterpriseDataLayer folder, source it from the Products_VBL model, and correct the datatypes in the Products_EDL model. Finally, reconcile any datatype conversion issues.
Congratulations, you have now completed this lab.