Consuming Web Services as Data Sources
In this lab you will be using the Teiid Designer to consume Web Services. This lab is not a guide on Web Services, on how or when to use or create Web Services, but an instructional approach for some of the capabilities of Teiid Designer to consume Web Services as a datasource. In this lab you will create the CountryInfoService.xmi and CountryInfoServiceView.xmi models. These will be created from the existing WSDL available from the following URL:
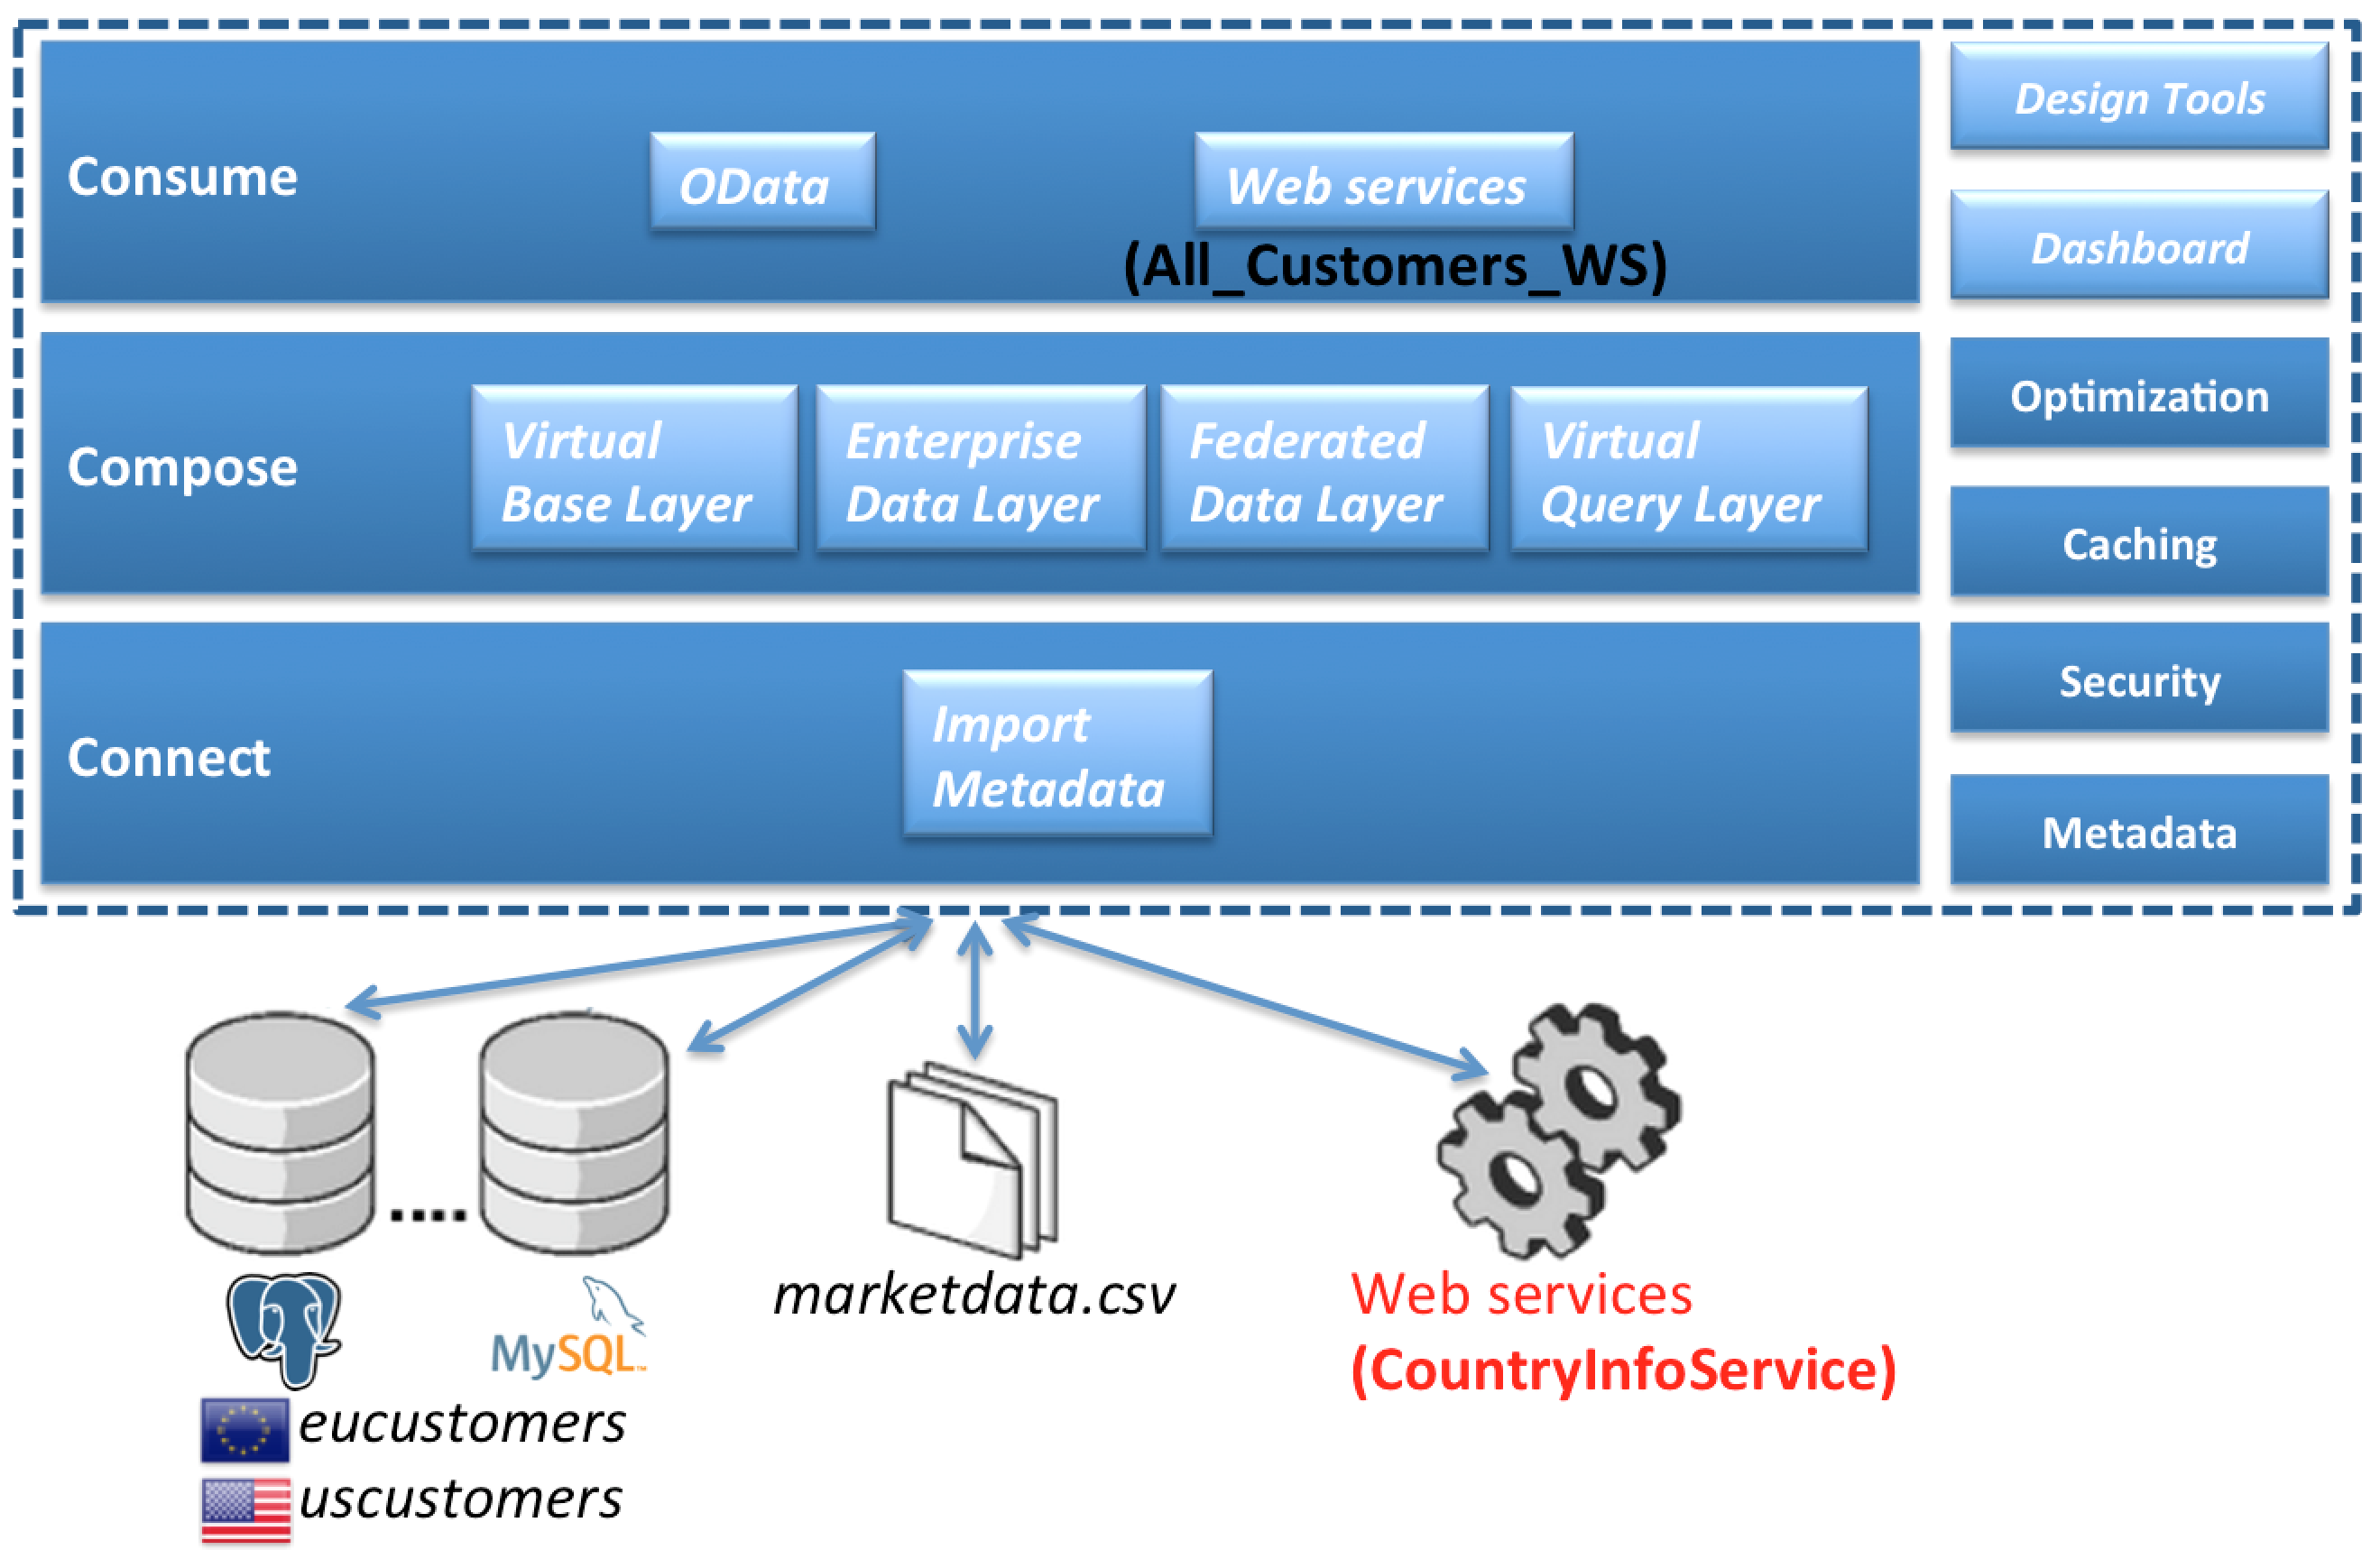
Where are we?
Create relational model from SOAP web service
Using the importer for the creation of query-able relational procedures that represent your desired request and response web service structure defined through your SOAP web service definition.
Right-click on the DataSources folder and select Import… from the right-hand menu. The Import dialog box is opened.
Select Web Service Source >> Source and View Model (SOAP) located under the Teiid Designer folder from the import source list that is displayed in the Import dialog box. Click the btn:[Next >] button to continue. The Create Relational Model from Web Service Dialog box opens.
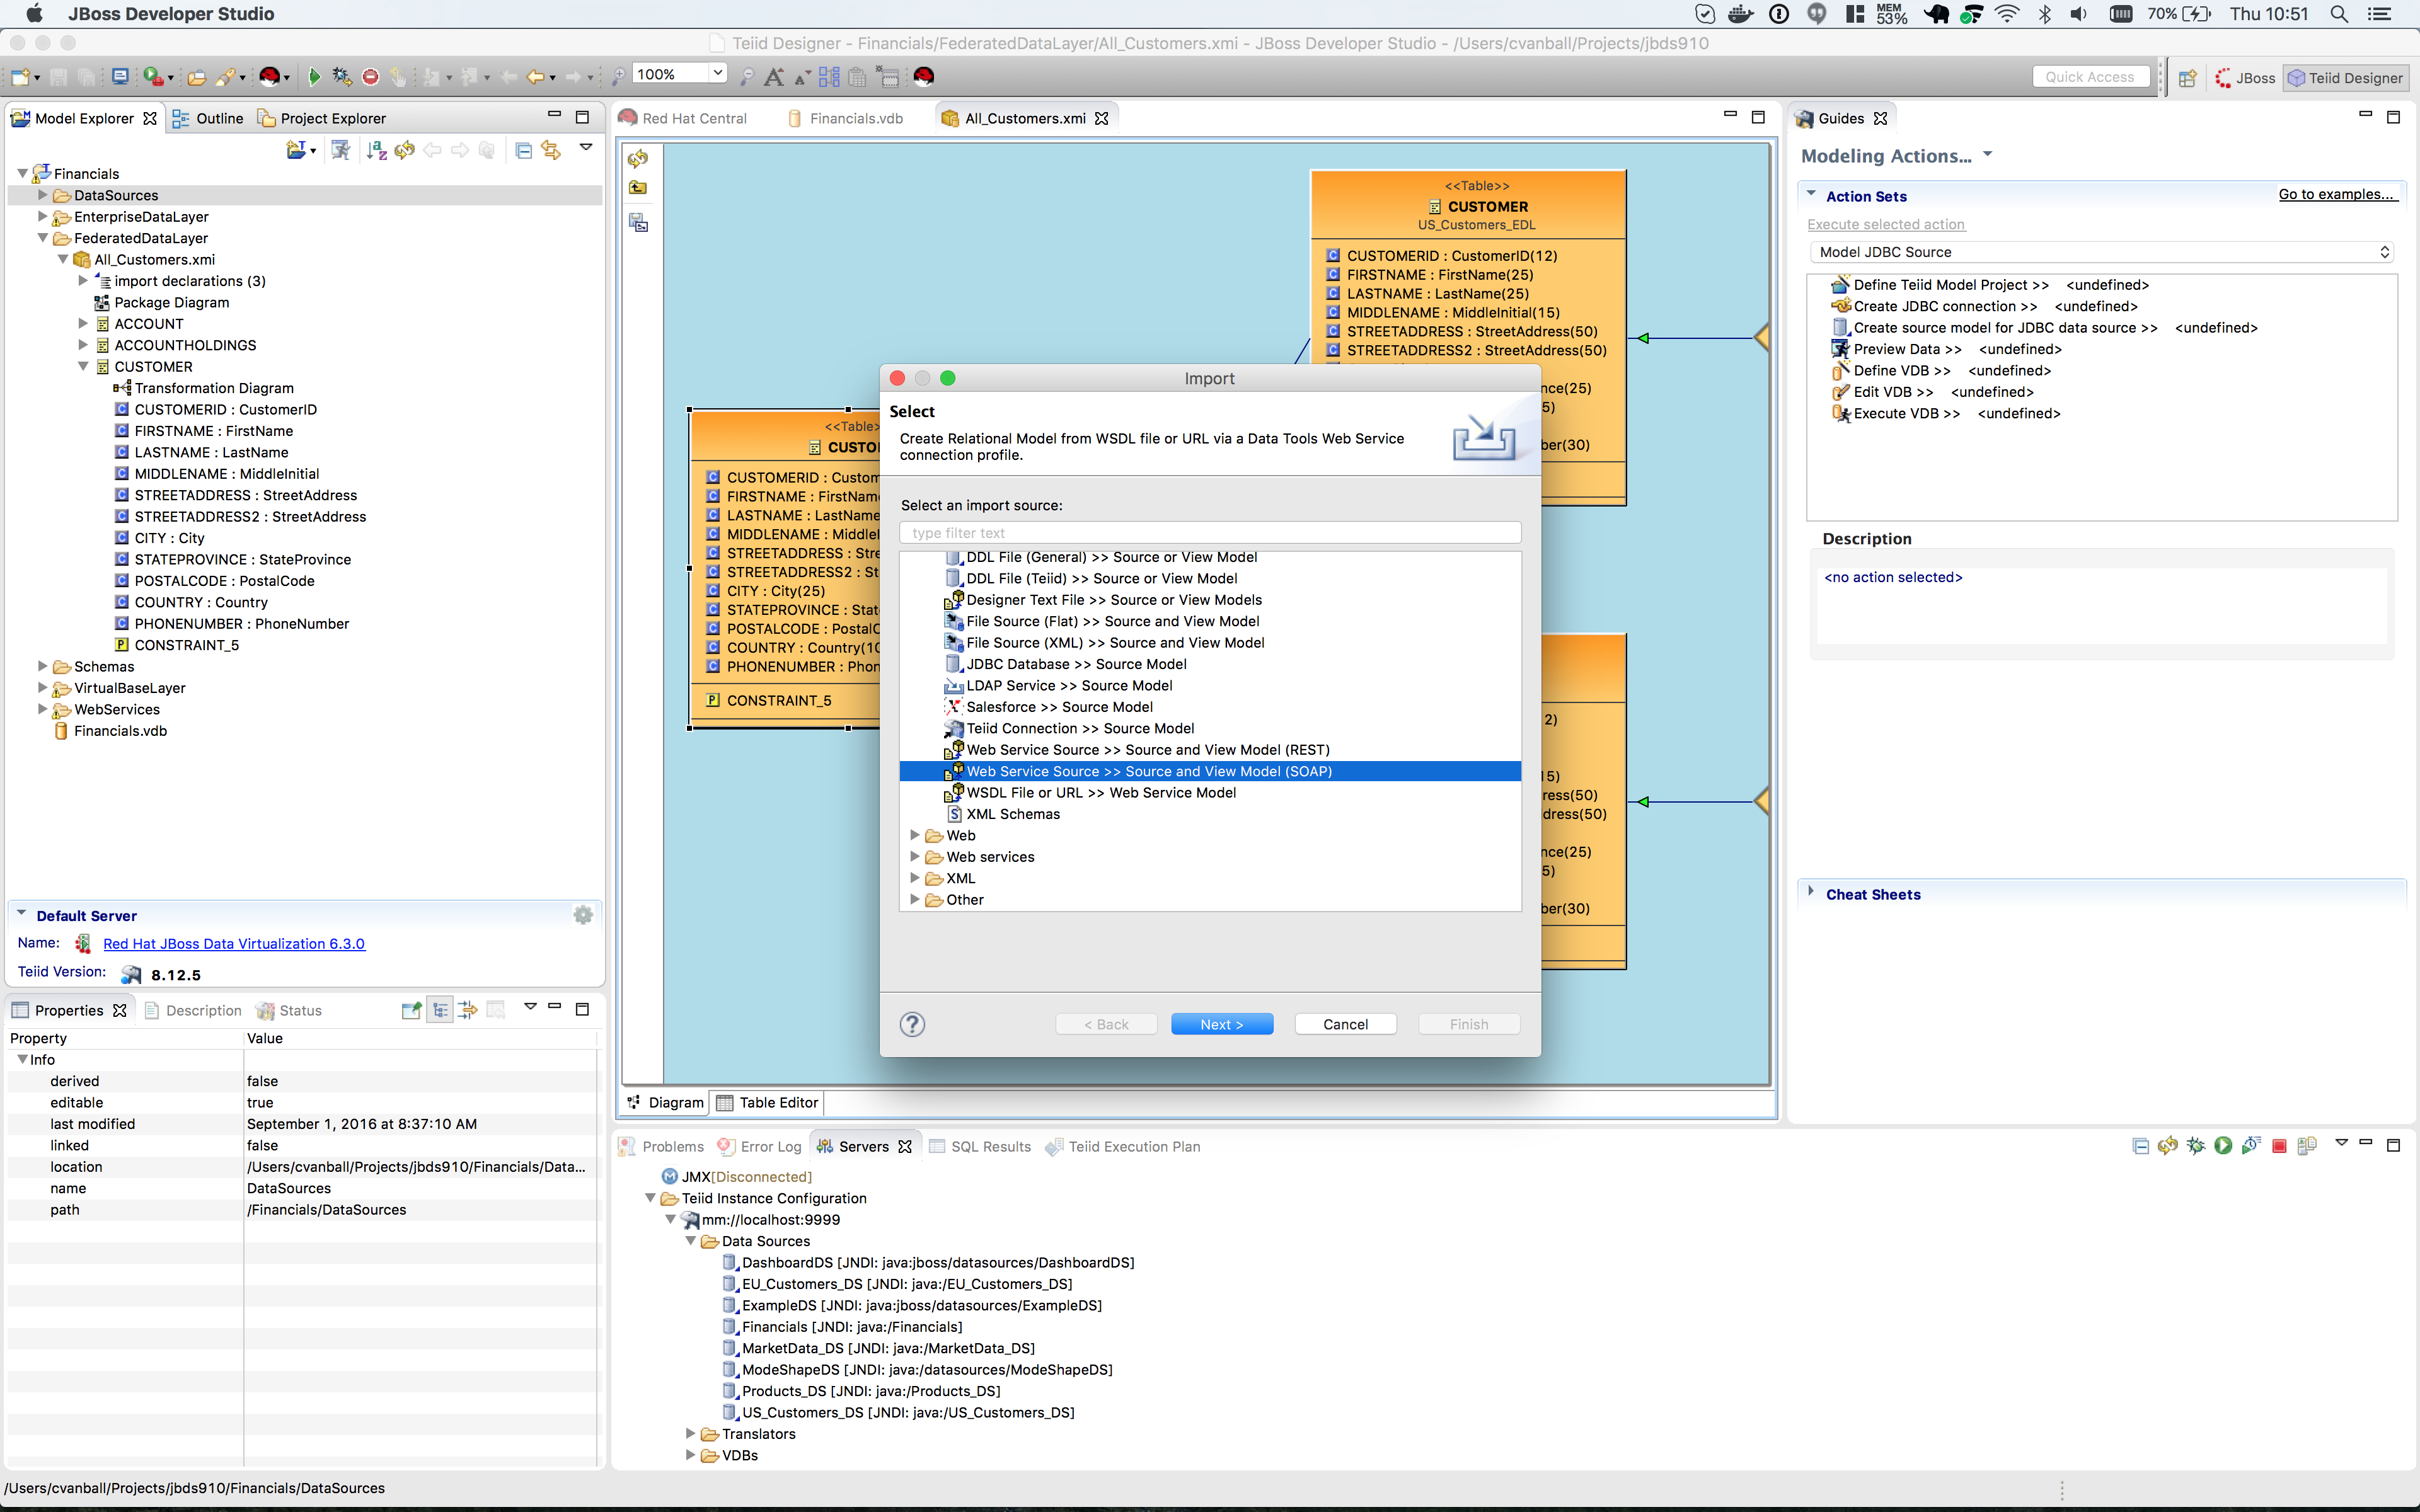
Since there are no Web Service Profiles configured one need to create a new one.
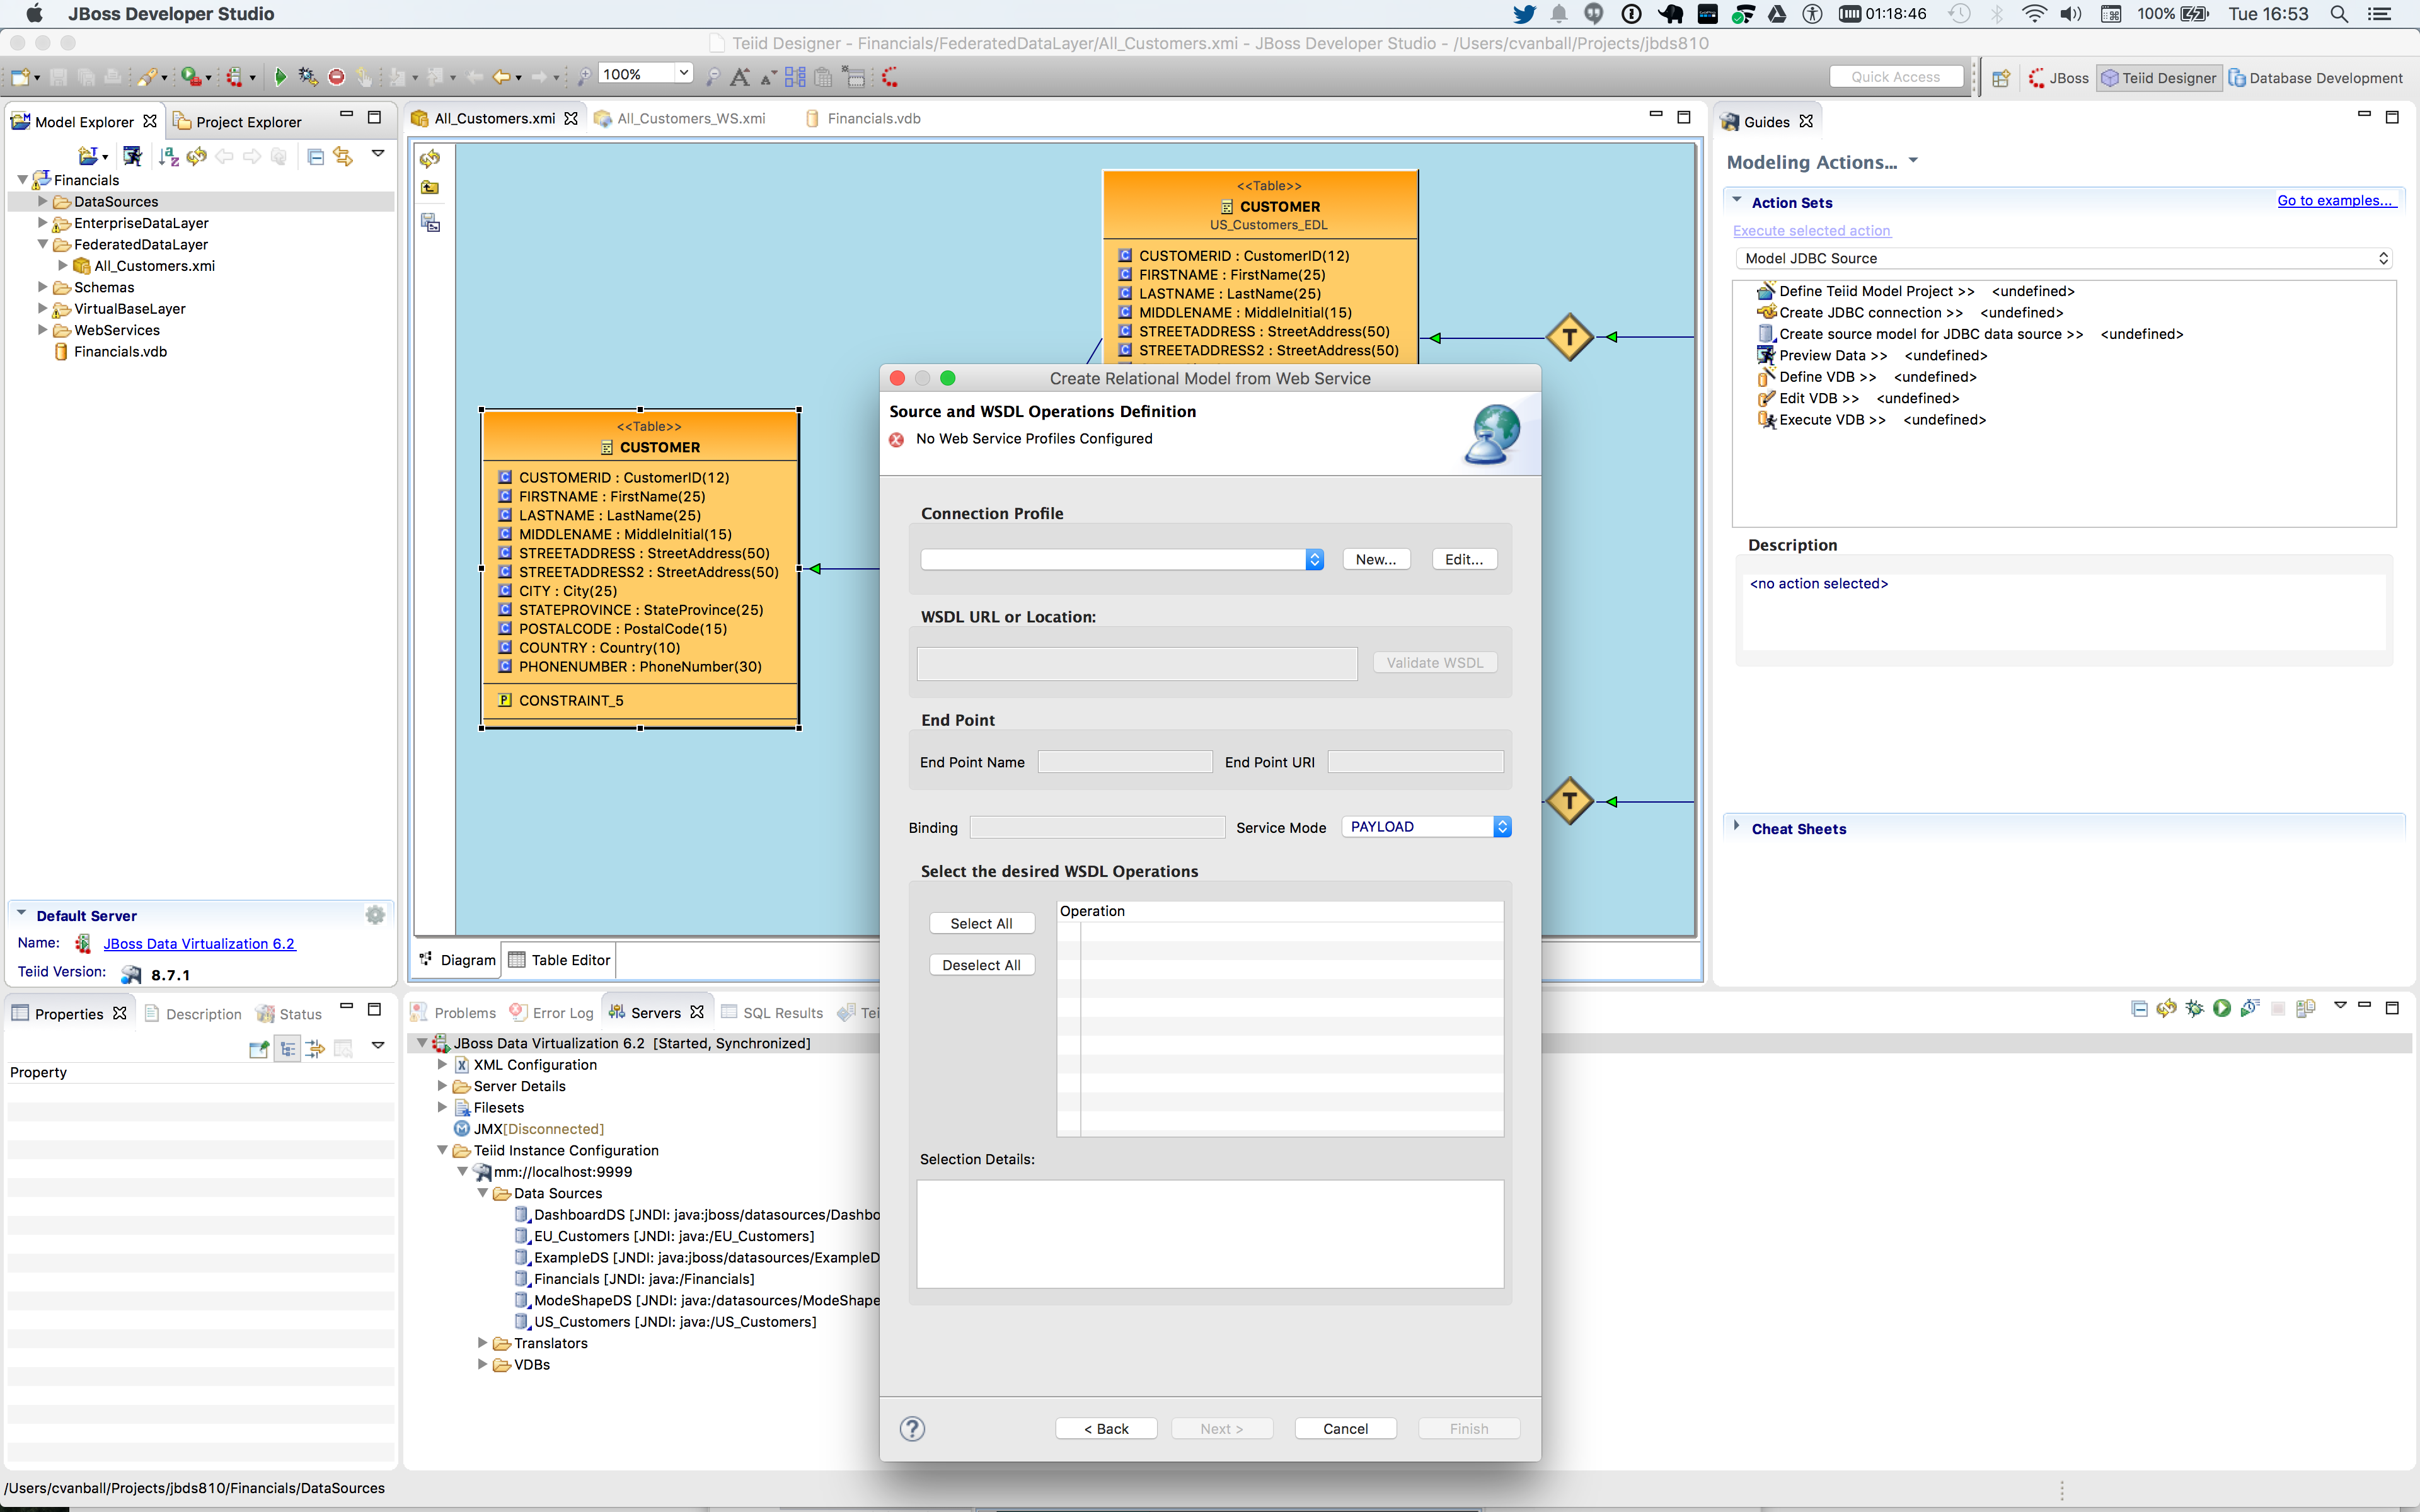
Click on the btn:[New…] button to create a new Connection Profile. The New Connection Profile dialog opens.

Type CountryInfo in the Name field and click the btn:[Next >] button. The New Connection Profile dialog box opens.

The WSDL that you will connect to is a URL. Click on the btn:[URL…] button to enter a URL. The WSDL URL dialog box opens.

In the WSDL URL field enter in the following URL:
The WSDL has no security so leave the Security Type to default of None. Click the btn:[OK] button. When you click the btn:[OK] button the software will validate the URL.
|
Note
|
You will need an internet connection for this to validate correctly. |

Click on the btn:[Test Connection] button to test the URL.

Click on the btn:[Next >] button.

Click on the btn:[Next >] button.

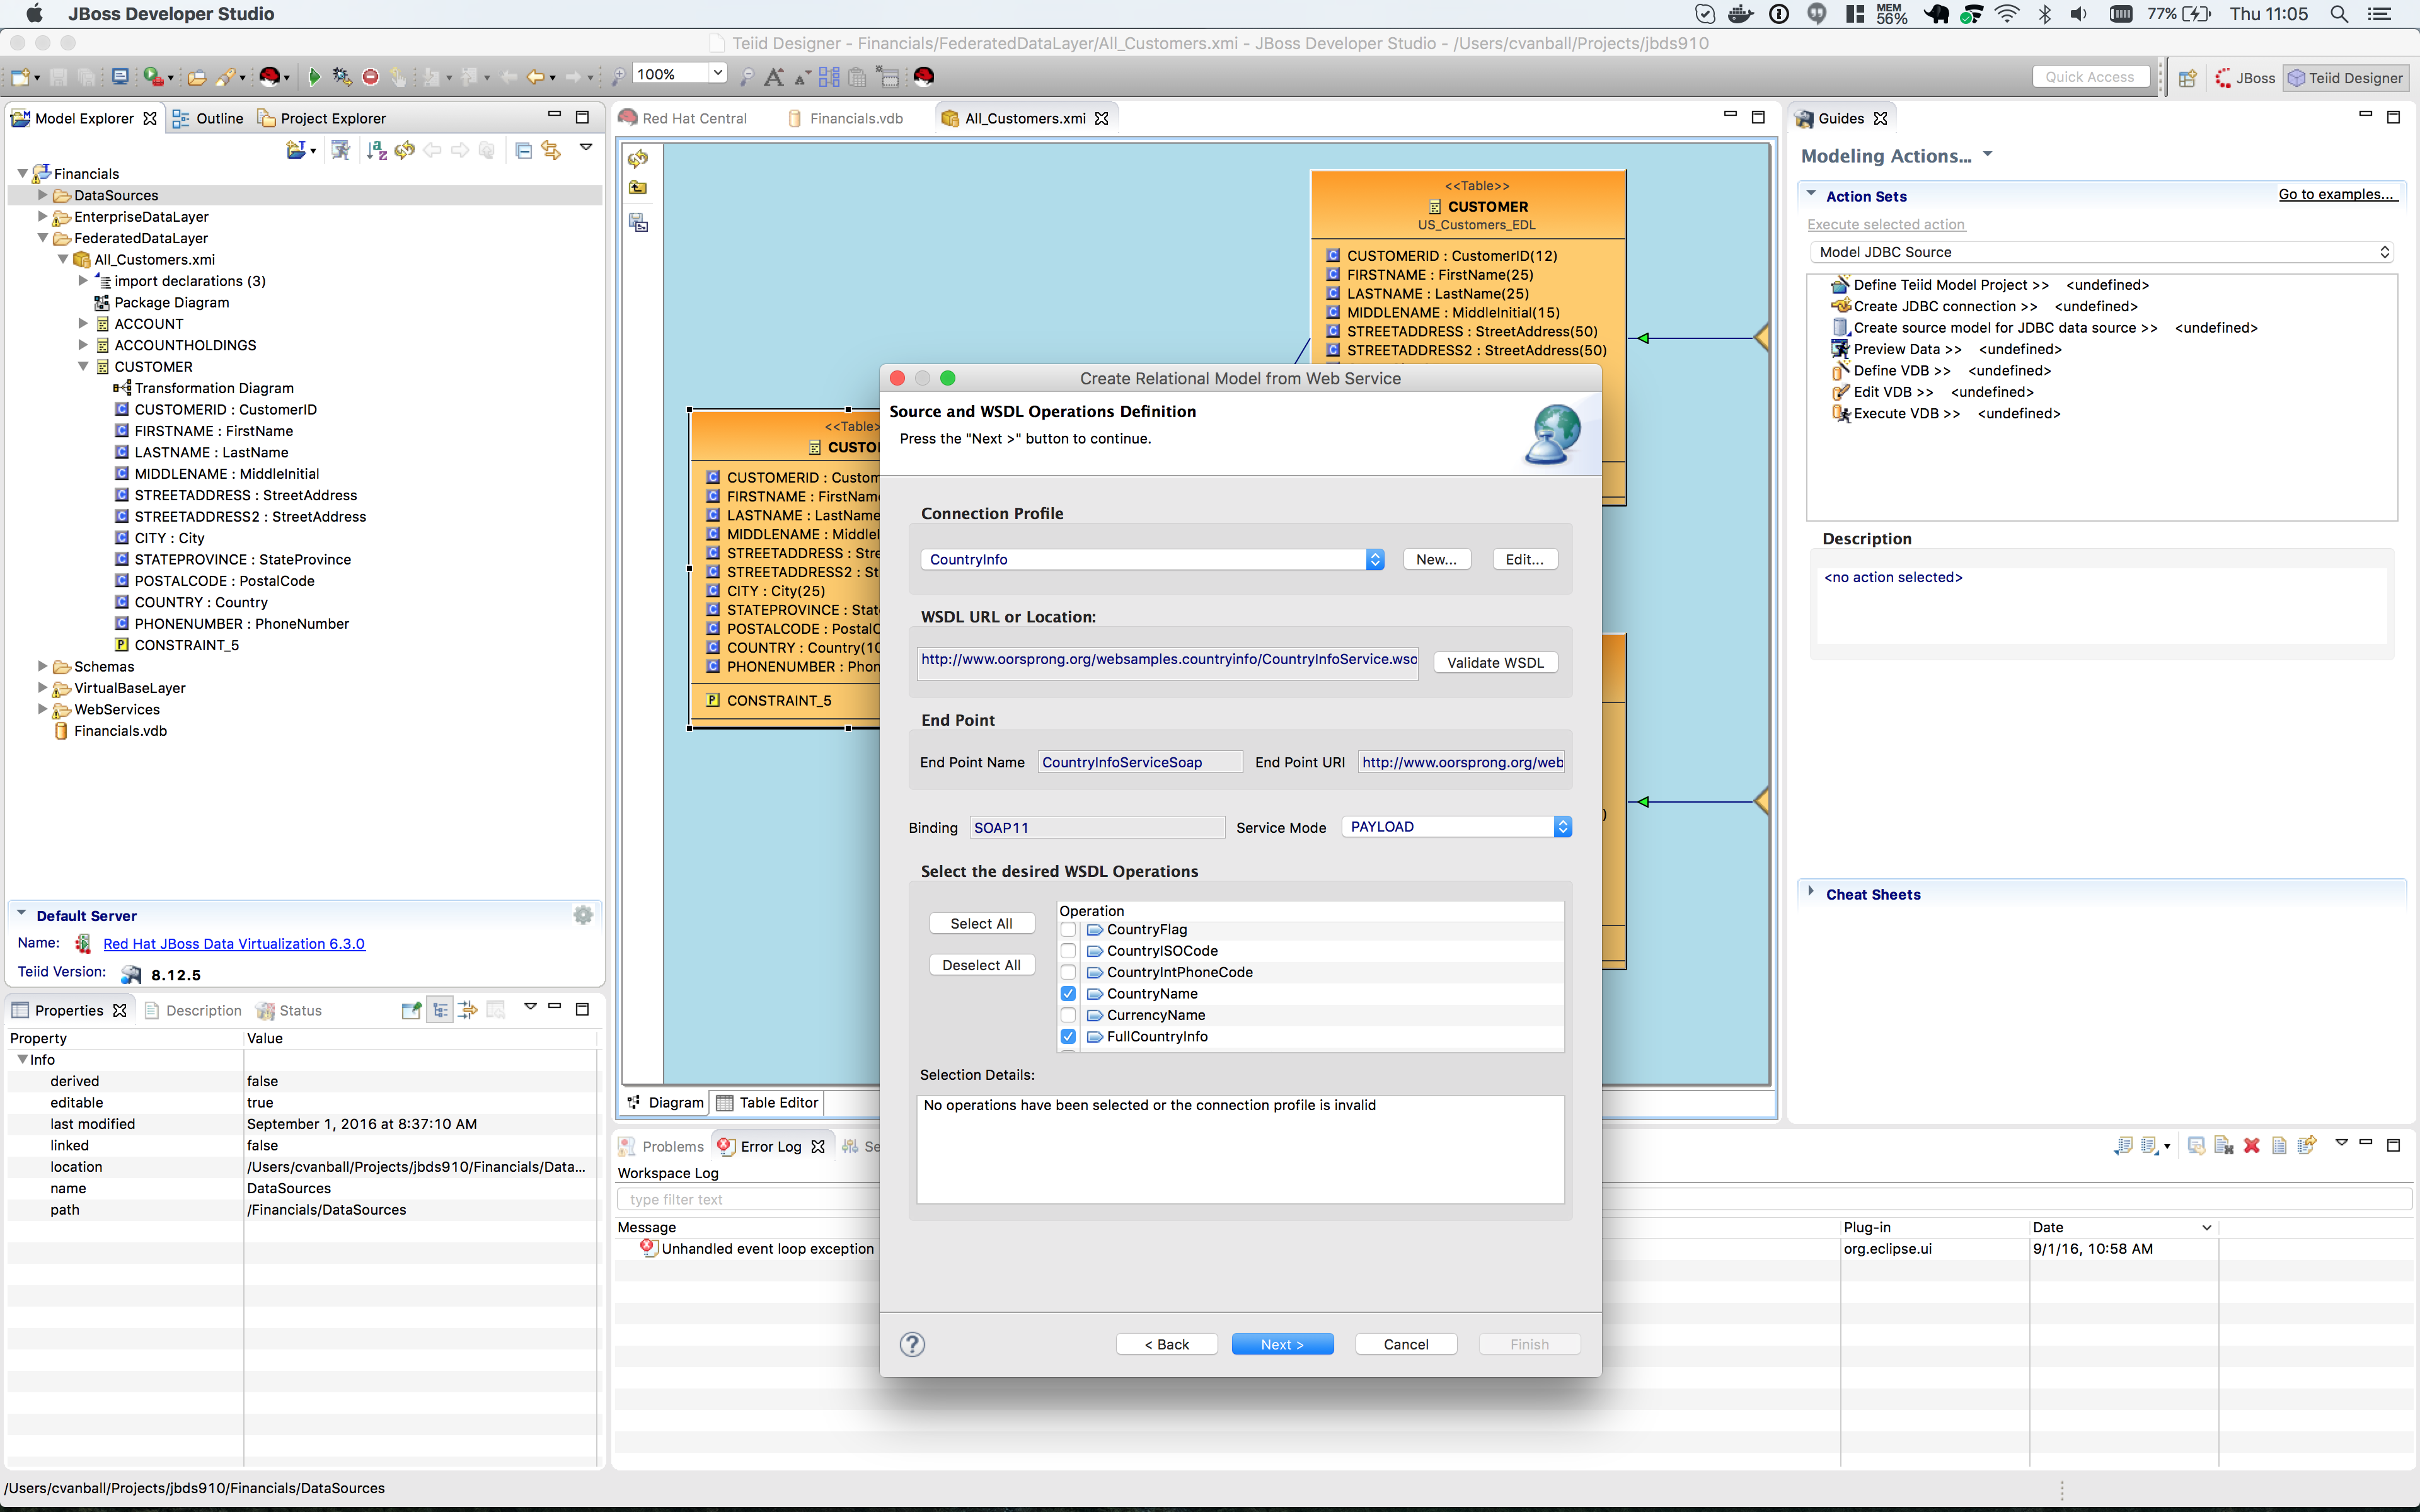
The Summary window will appear. Click btn:[Finish] to go the Source and WSDL Operations Definition.
The connection to the WSDL will return the WSDL Operations that are available. This first page involves defining your WSDL source connection profile. Select port (if multiple available), service mode (PAYLOAD vs MESSAGE) and check the operations you wish to use to generate your queryable relational procedures. Click on the btn:[Deselect All] button to deselect all of the WSDL Operations. Click on the Operations: CountryName and the FullCountryInfo, to select.
Click on the btn:[Next >] button.
The Create Relational Model from Web Service dialog is displayed. This page allows you to define the source and target models where the generated procedures will be defined in. Notice that the Name fields for the Source and View model are populated. Based on initial workspace selection, the location for these models may be preset but changeable and the source and view model names will be generated based on the service name. Select the browse button btn:[…] to select locations and existing models in your workspace.
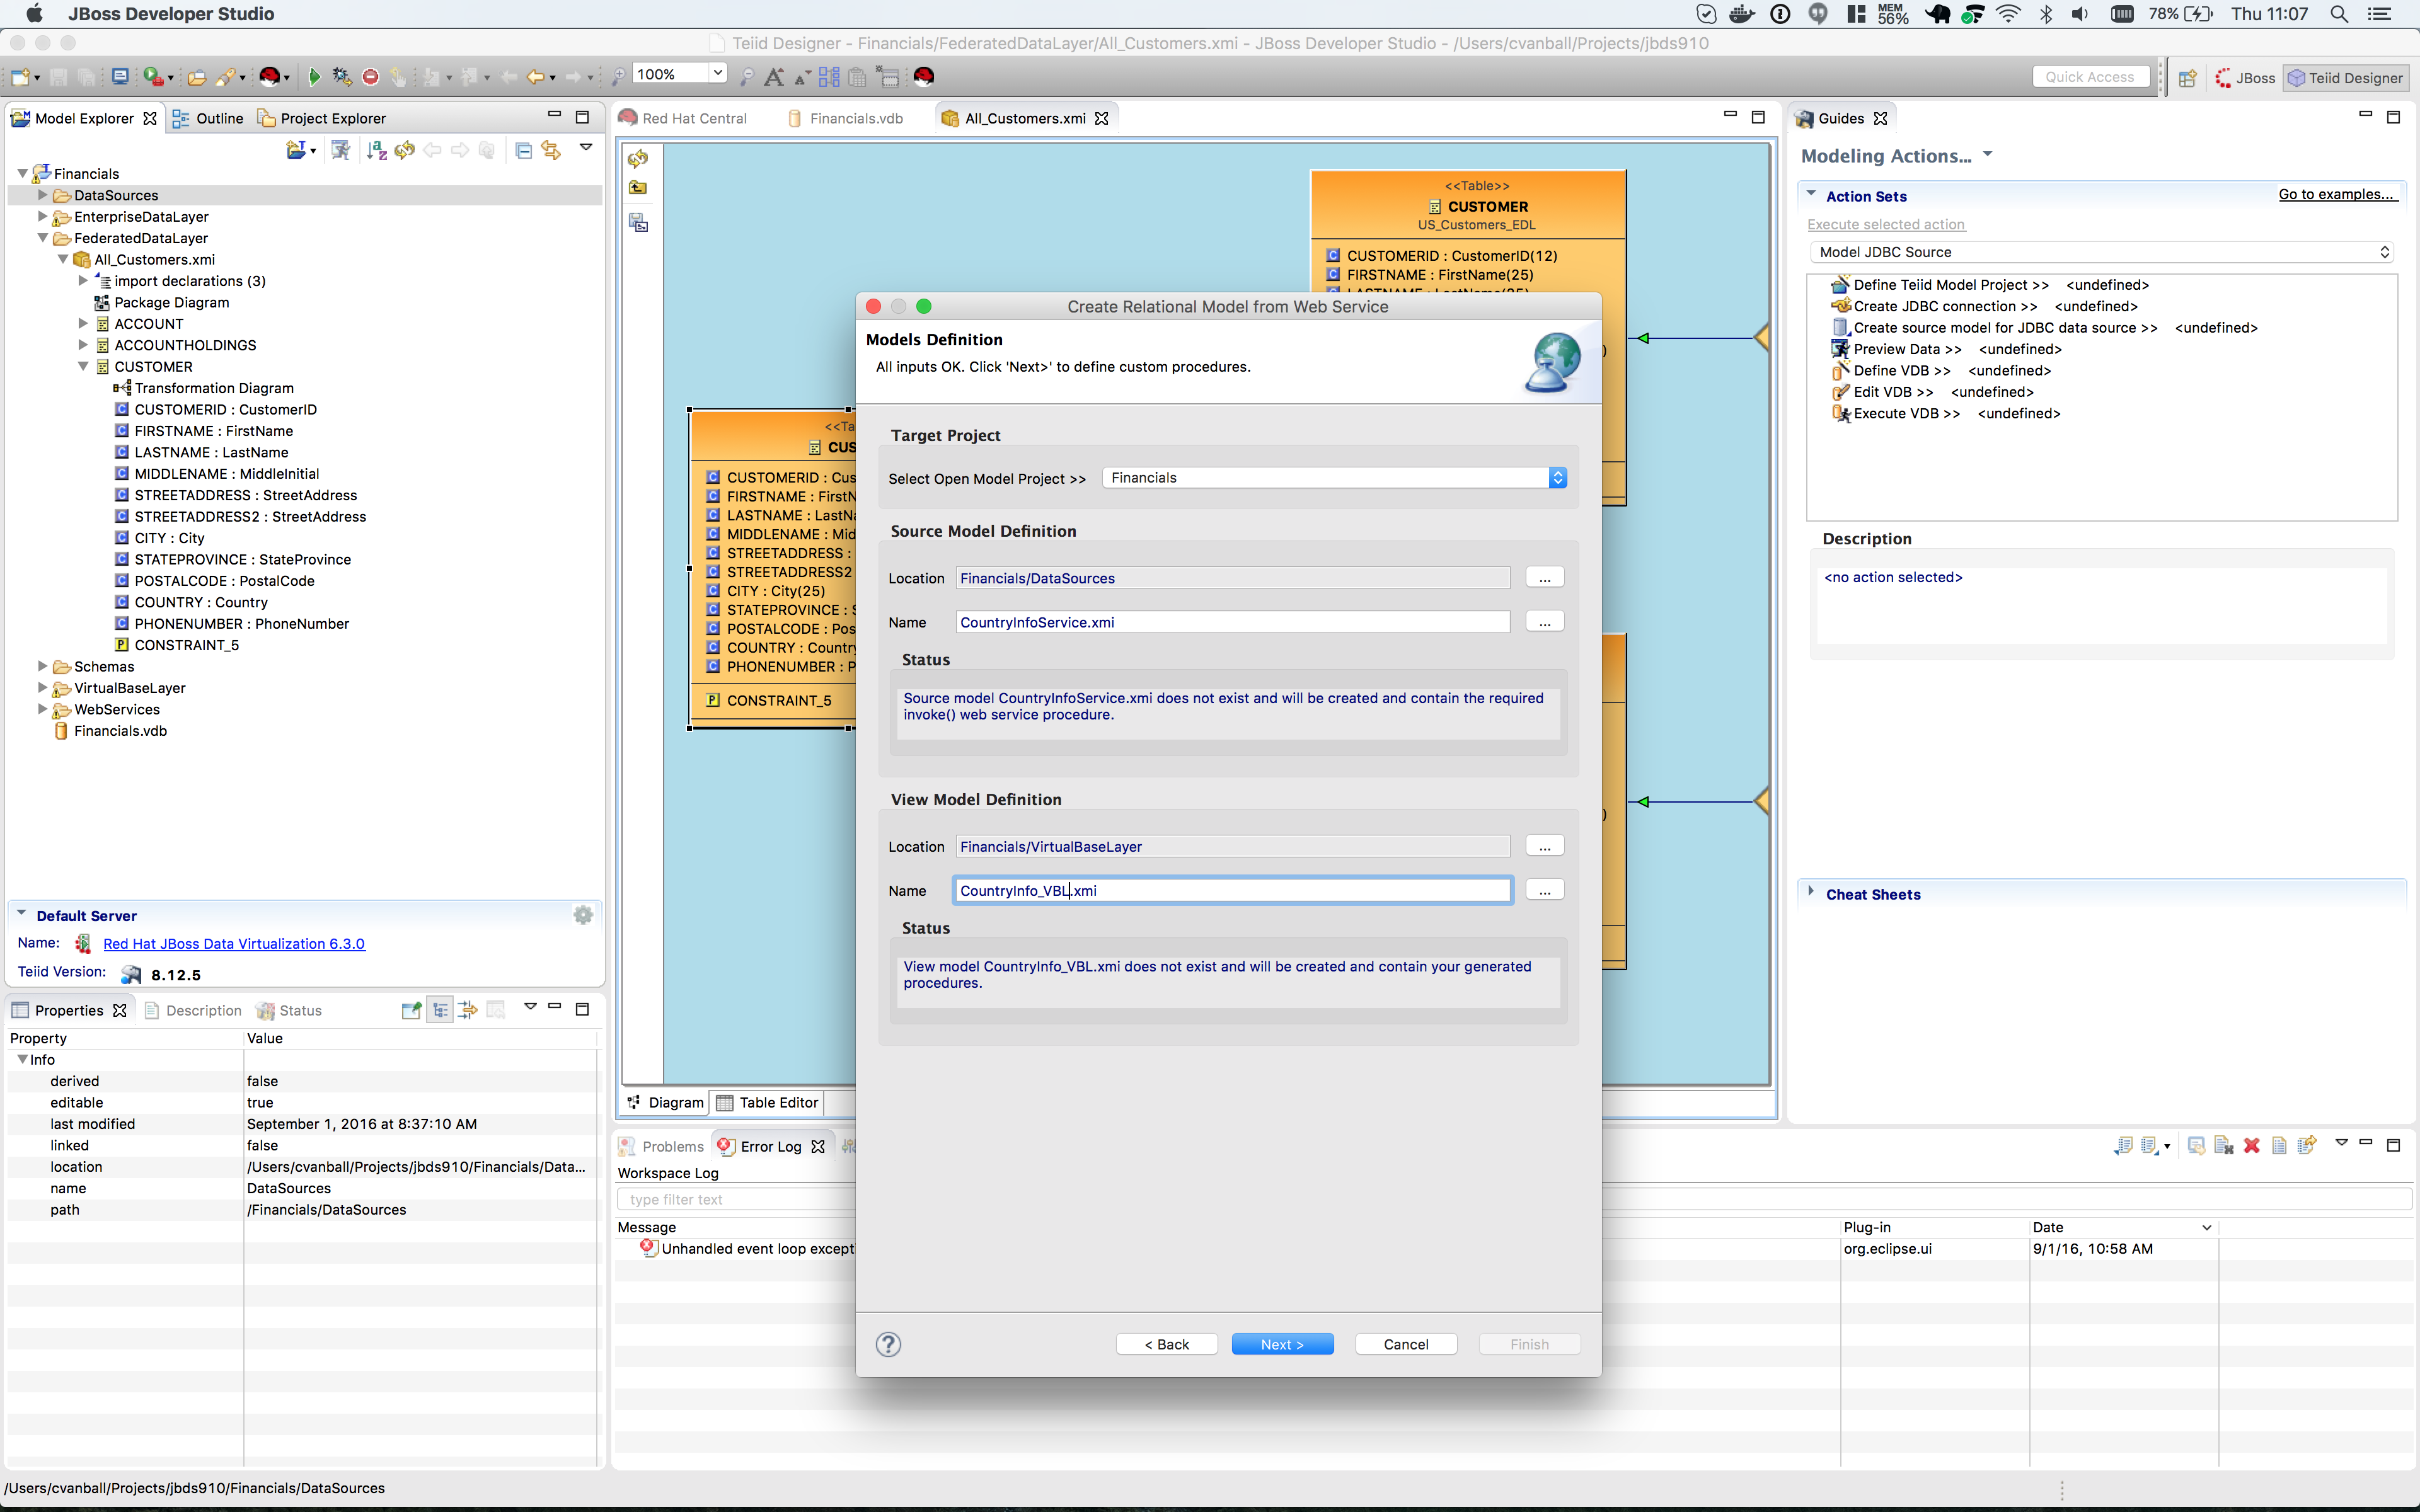
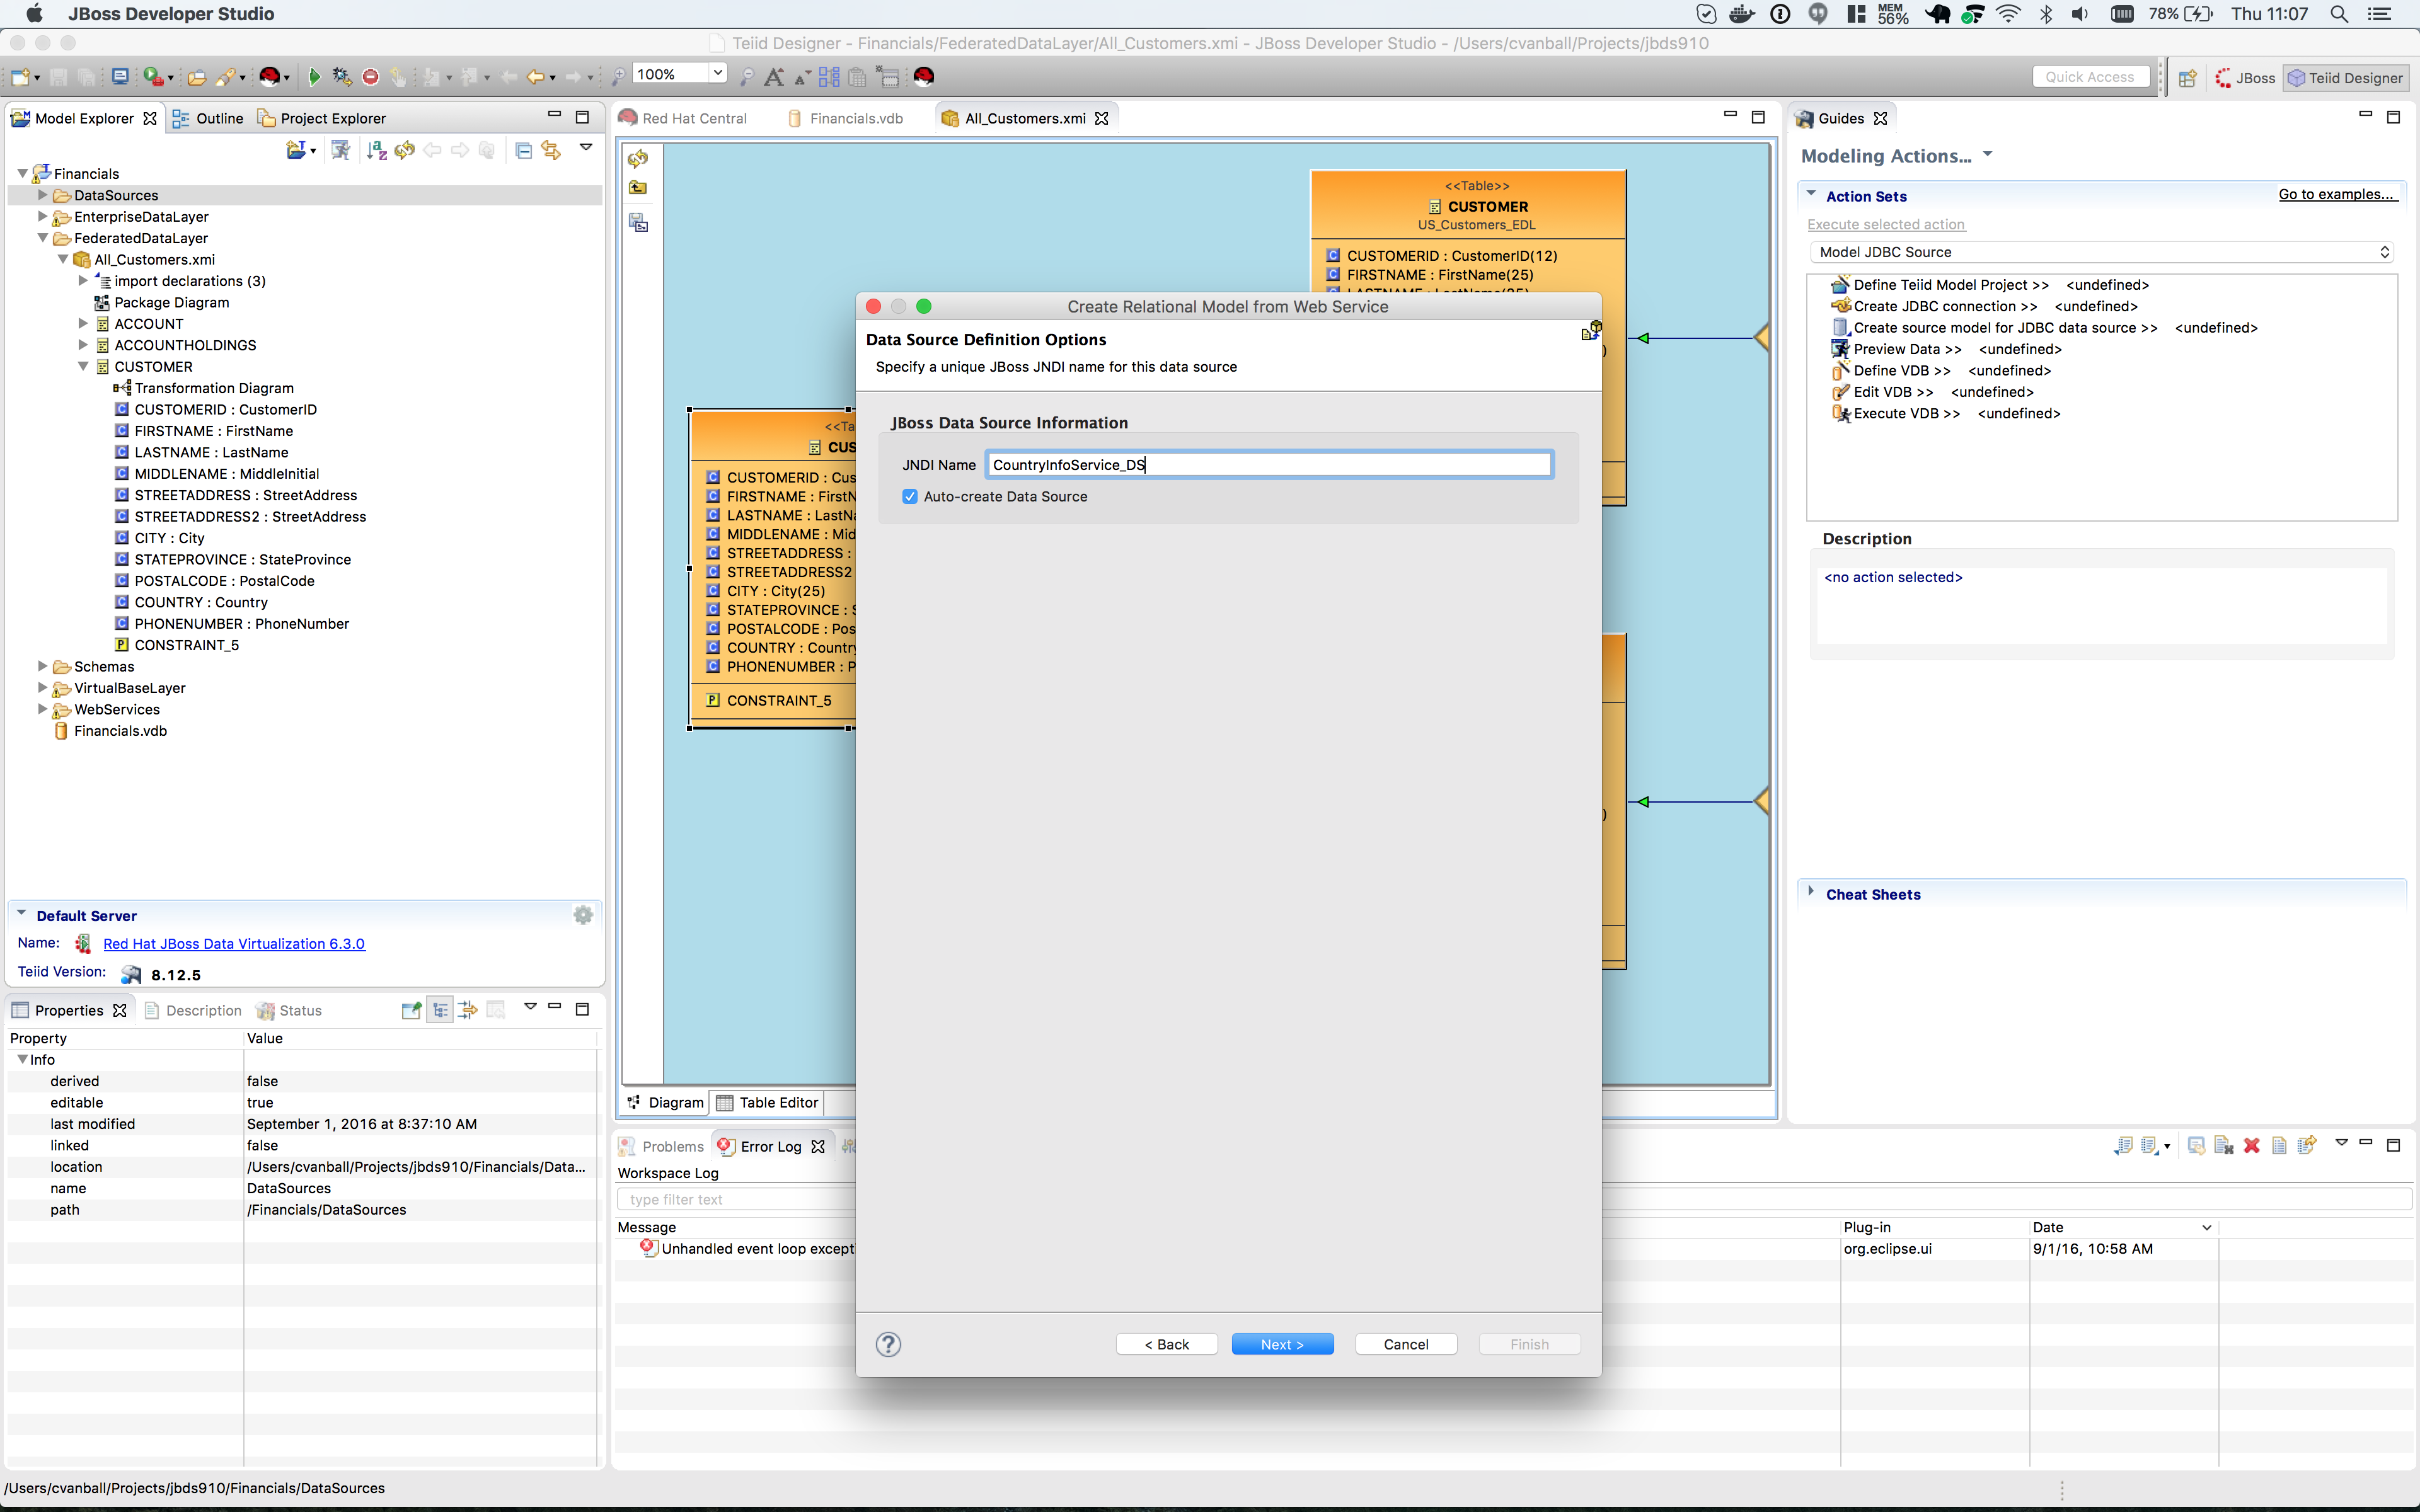
Select the DataSources folder for the generated source model and VirtualBaseLayer folder for the generated view model and rename the view model to CountryInfo_VBL. Click the btn:[Next >] button and the Data Source Defintion Options dialog window pops up. Change the JNDI Name CountryInfoService_DS and click the btn:[Next >] button.
The Operations Type Selection dialog appears, see below.

Choose User-specified Procedures and click the btn:[Next >] button.
In the next few steps add in the Element Info for both the CountryInfo and FullCountryInfo operations. Use the Operations combo selector at the top to switch between the operations. In the Request tab, select and double-click the schema elements you wish to set as input parameters for your request. These will be added to the Element Info panel and the resulting generated SQL statement will be updated to reflect the new element. If the selected service mode for this procedure is set to MESSAGE, the HEADER tab will be enabled and allow you to define the SOAP header variables utilizing the same schema tree. Select the Operation from the Operations pull-down (CountryInfo and FullCountryInfo). Add in the Schema Contents element by selecting the element in the left-hand side and clicking the Add button on the right-hand side. Repeat these actions for both the Request and Response tabs. See image below for further clarification.


|
Note
|
This wizard generates both request and response procedures that are used in the query-able wrapped procedure. If you wish to generate Designer’s legacy create and extract procedures choose the Legacy Procedures option in the lower section and click btn:[Finish]. |
Click on the btn:[Finish] button. A status screen is displayed while the models are being created. The models will appear in the Model Explorer and will be open in the right-hand pane.
Click the btn:[Save All] button to save your models.
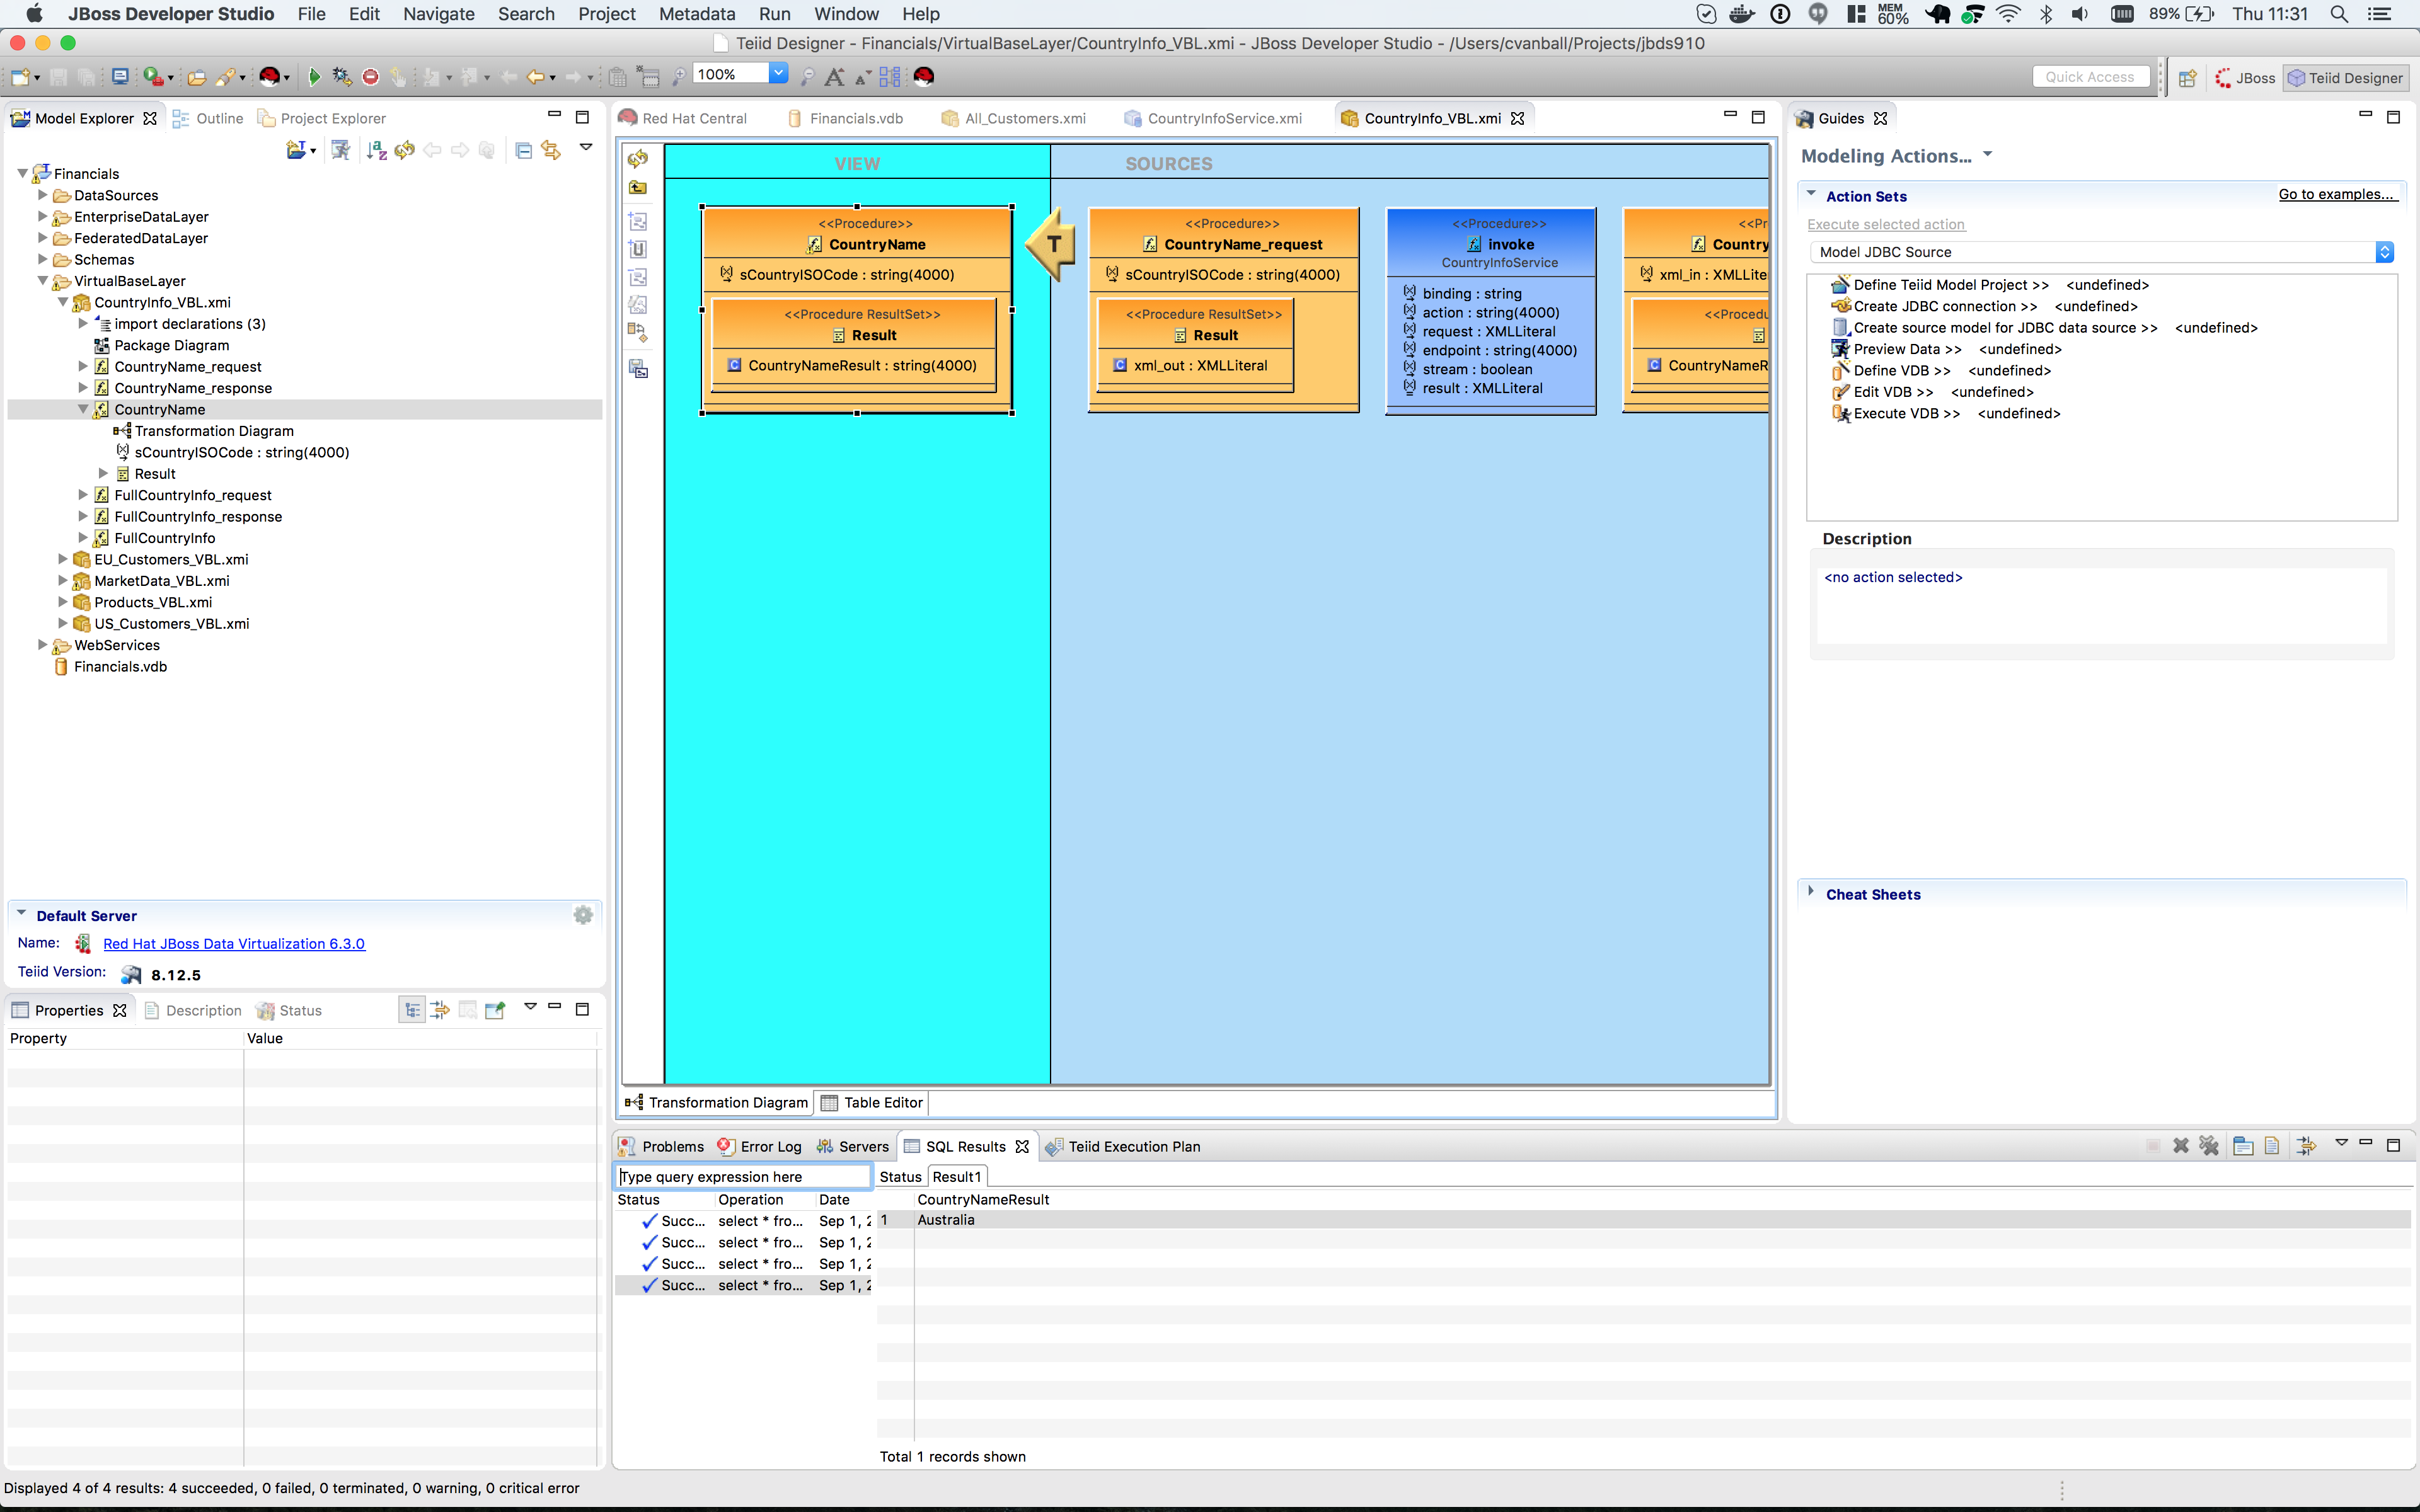
Double-click on the CountryName procedure to open the transformation view for the procedure.

Click on the btn:[Preview Data] button to preview the data.
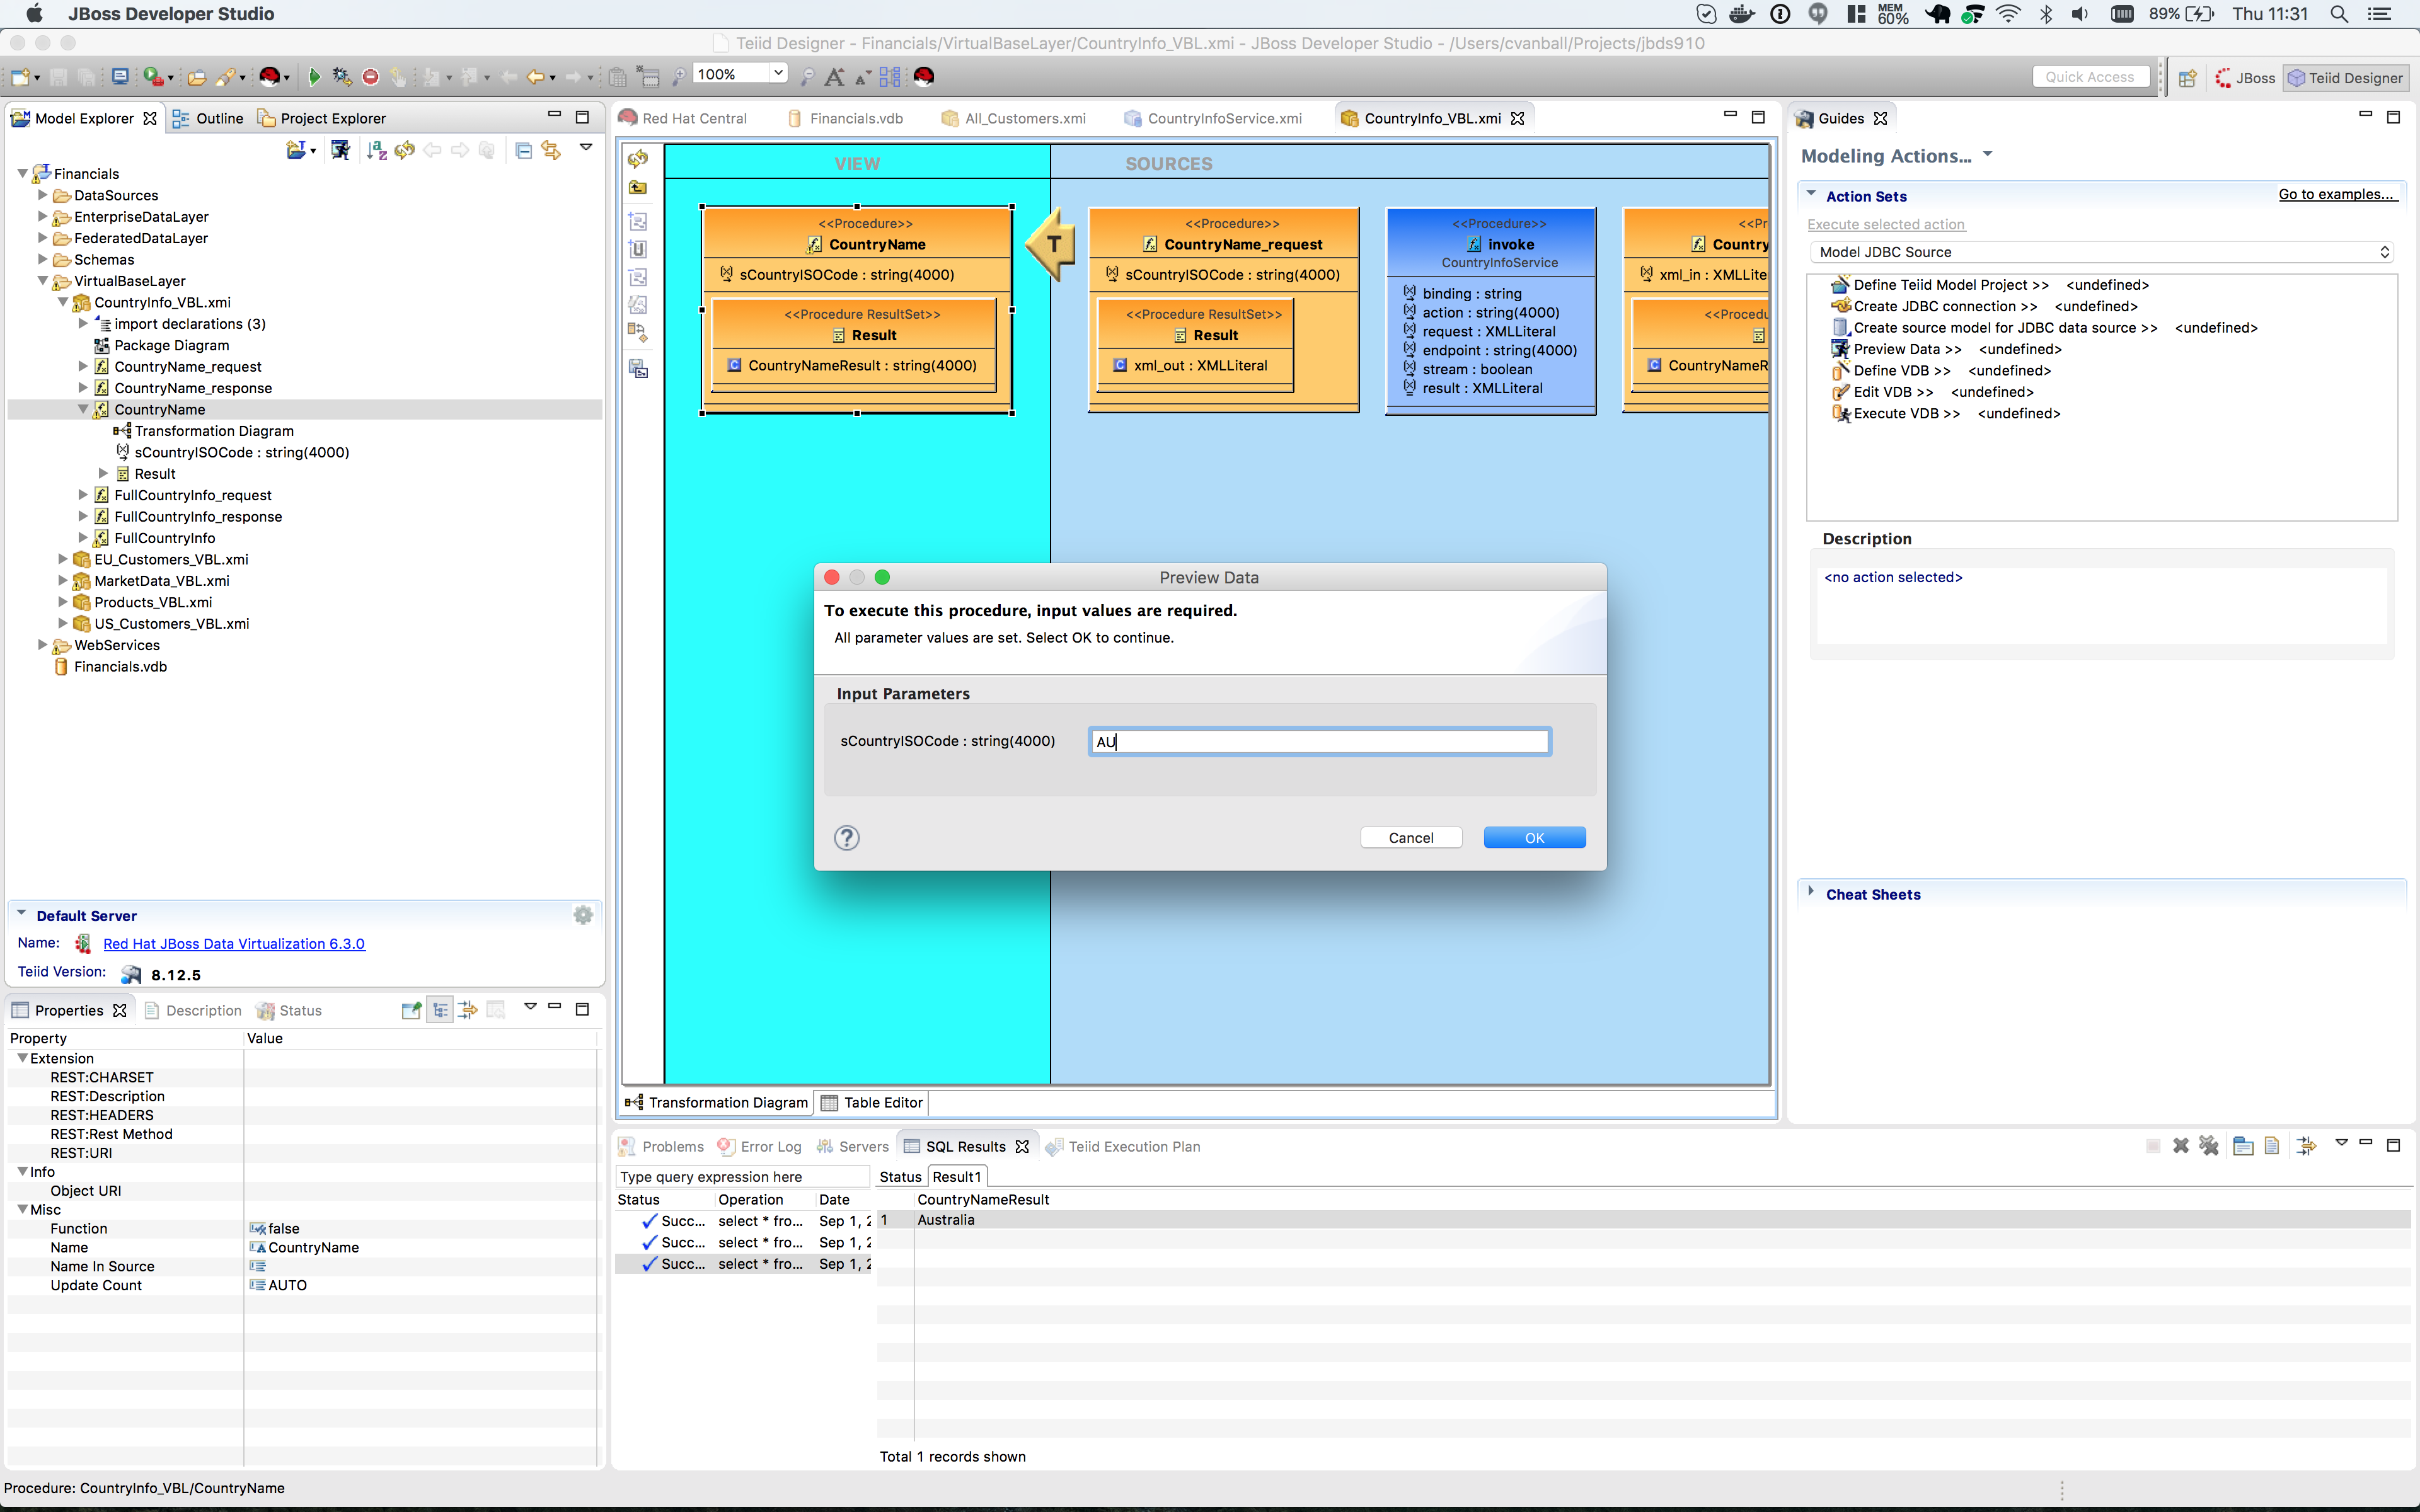
Enter in a country code, such as AU for Australia, to retrieve the data. The Custom Preview Data dialog appears to customize the SQL Query if necessary.
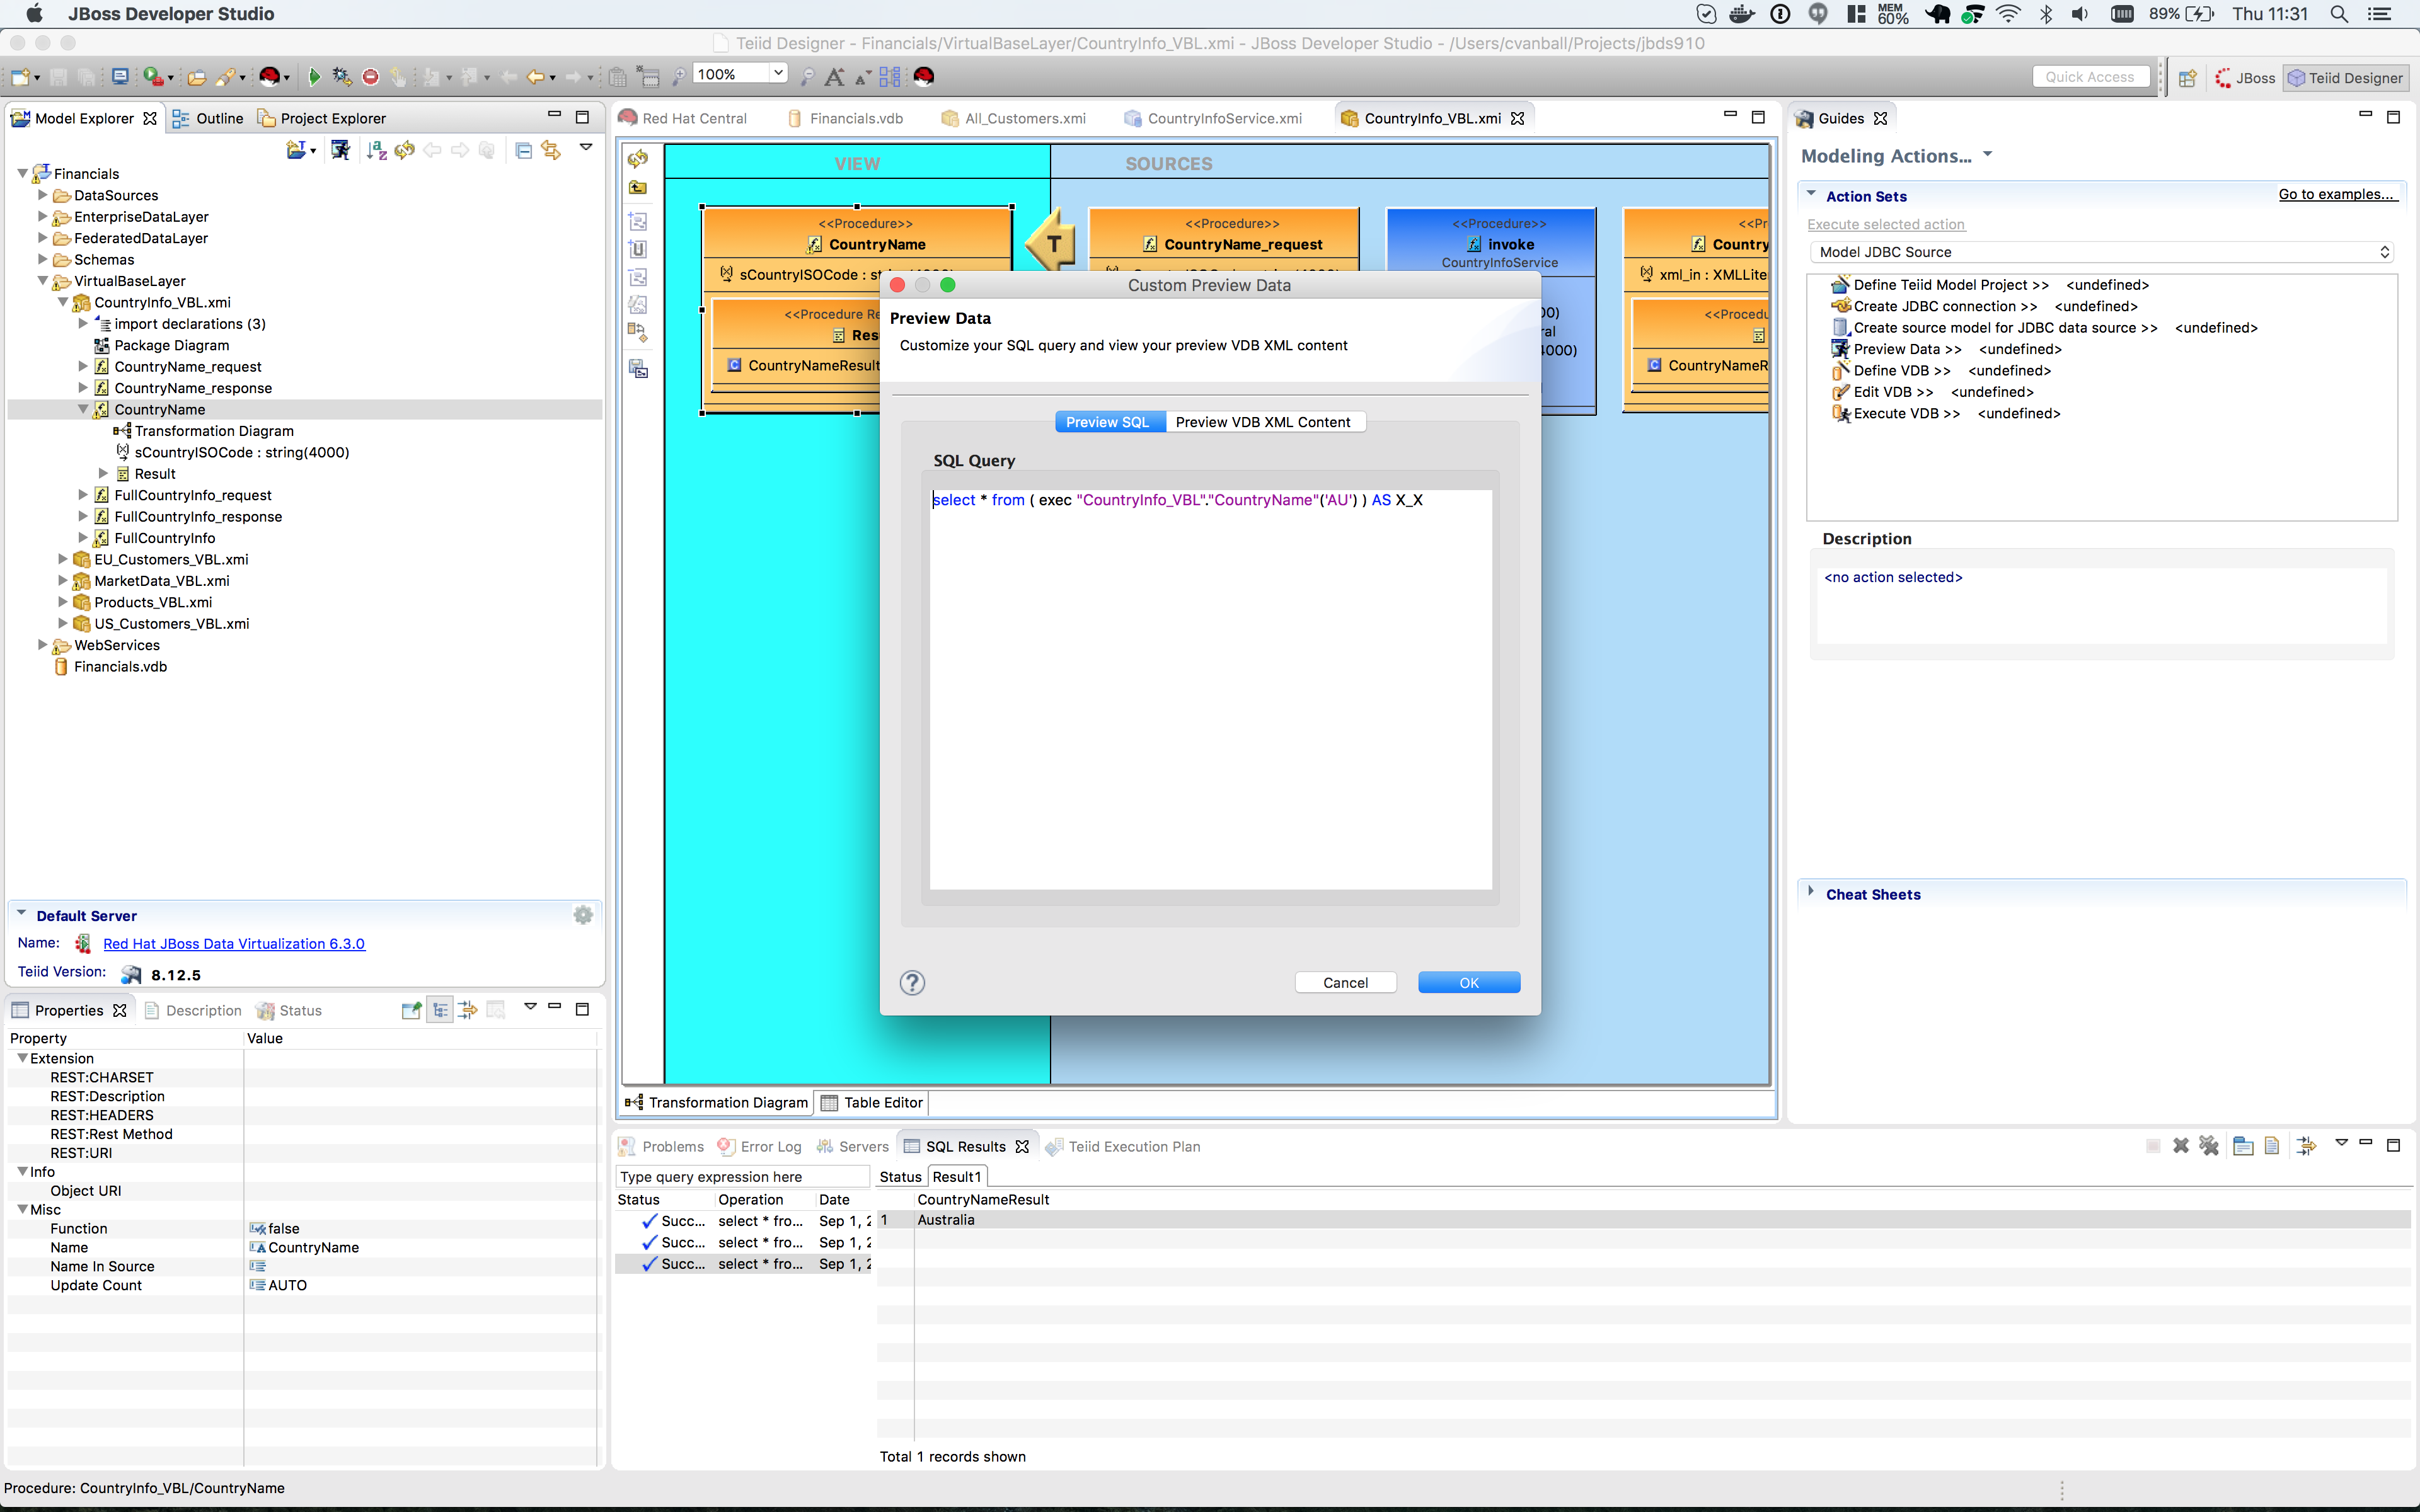
Click the btn:[OK] button. View the SQL Status and Result1 tab to see the results returned from the procedure.
Try returning other ISO country codes such as CA, BM, BR, etc. The ISO country codes can be found at the following URL:
Save and close the models.
Create relational model from REST service
Using the importer for the creation of query-able relational procedures that represent your desired request and response web service structure defined through your REST web service definition. You can use an online Weather REST service to get the temperature of a particular city in the world.
The Weather Info REST service can be found here: http://openweathermap.org/
|
Note
|
Starting from 9 October 2015 the API requires a valid APPID for access. |
Due to the fact that the Weather REST service requires a valid APPID for access we change it to a local rest service called helloworld-rs which is part of the JBoss EAP Quickstarts. For your convience we provide the jboss-helloworld-rs.war in support directory of this workshop. Just copy this file to $EAP_HOME/standalone/deployments and the Hello REST service will be accessible.
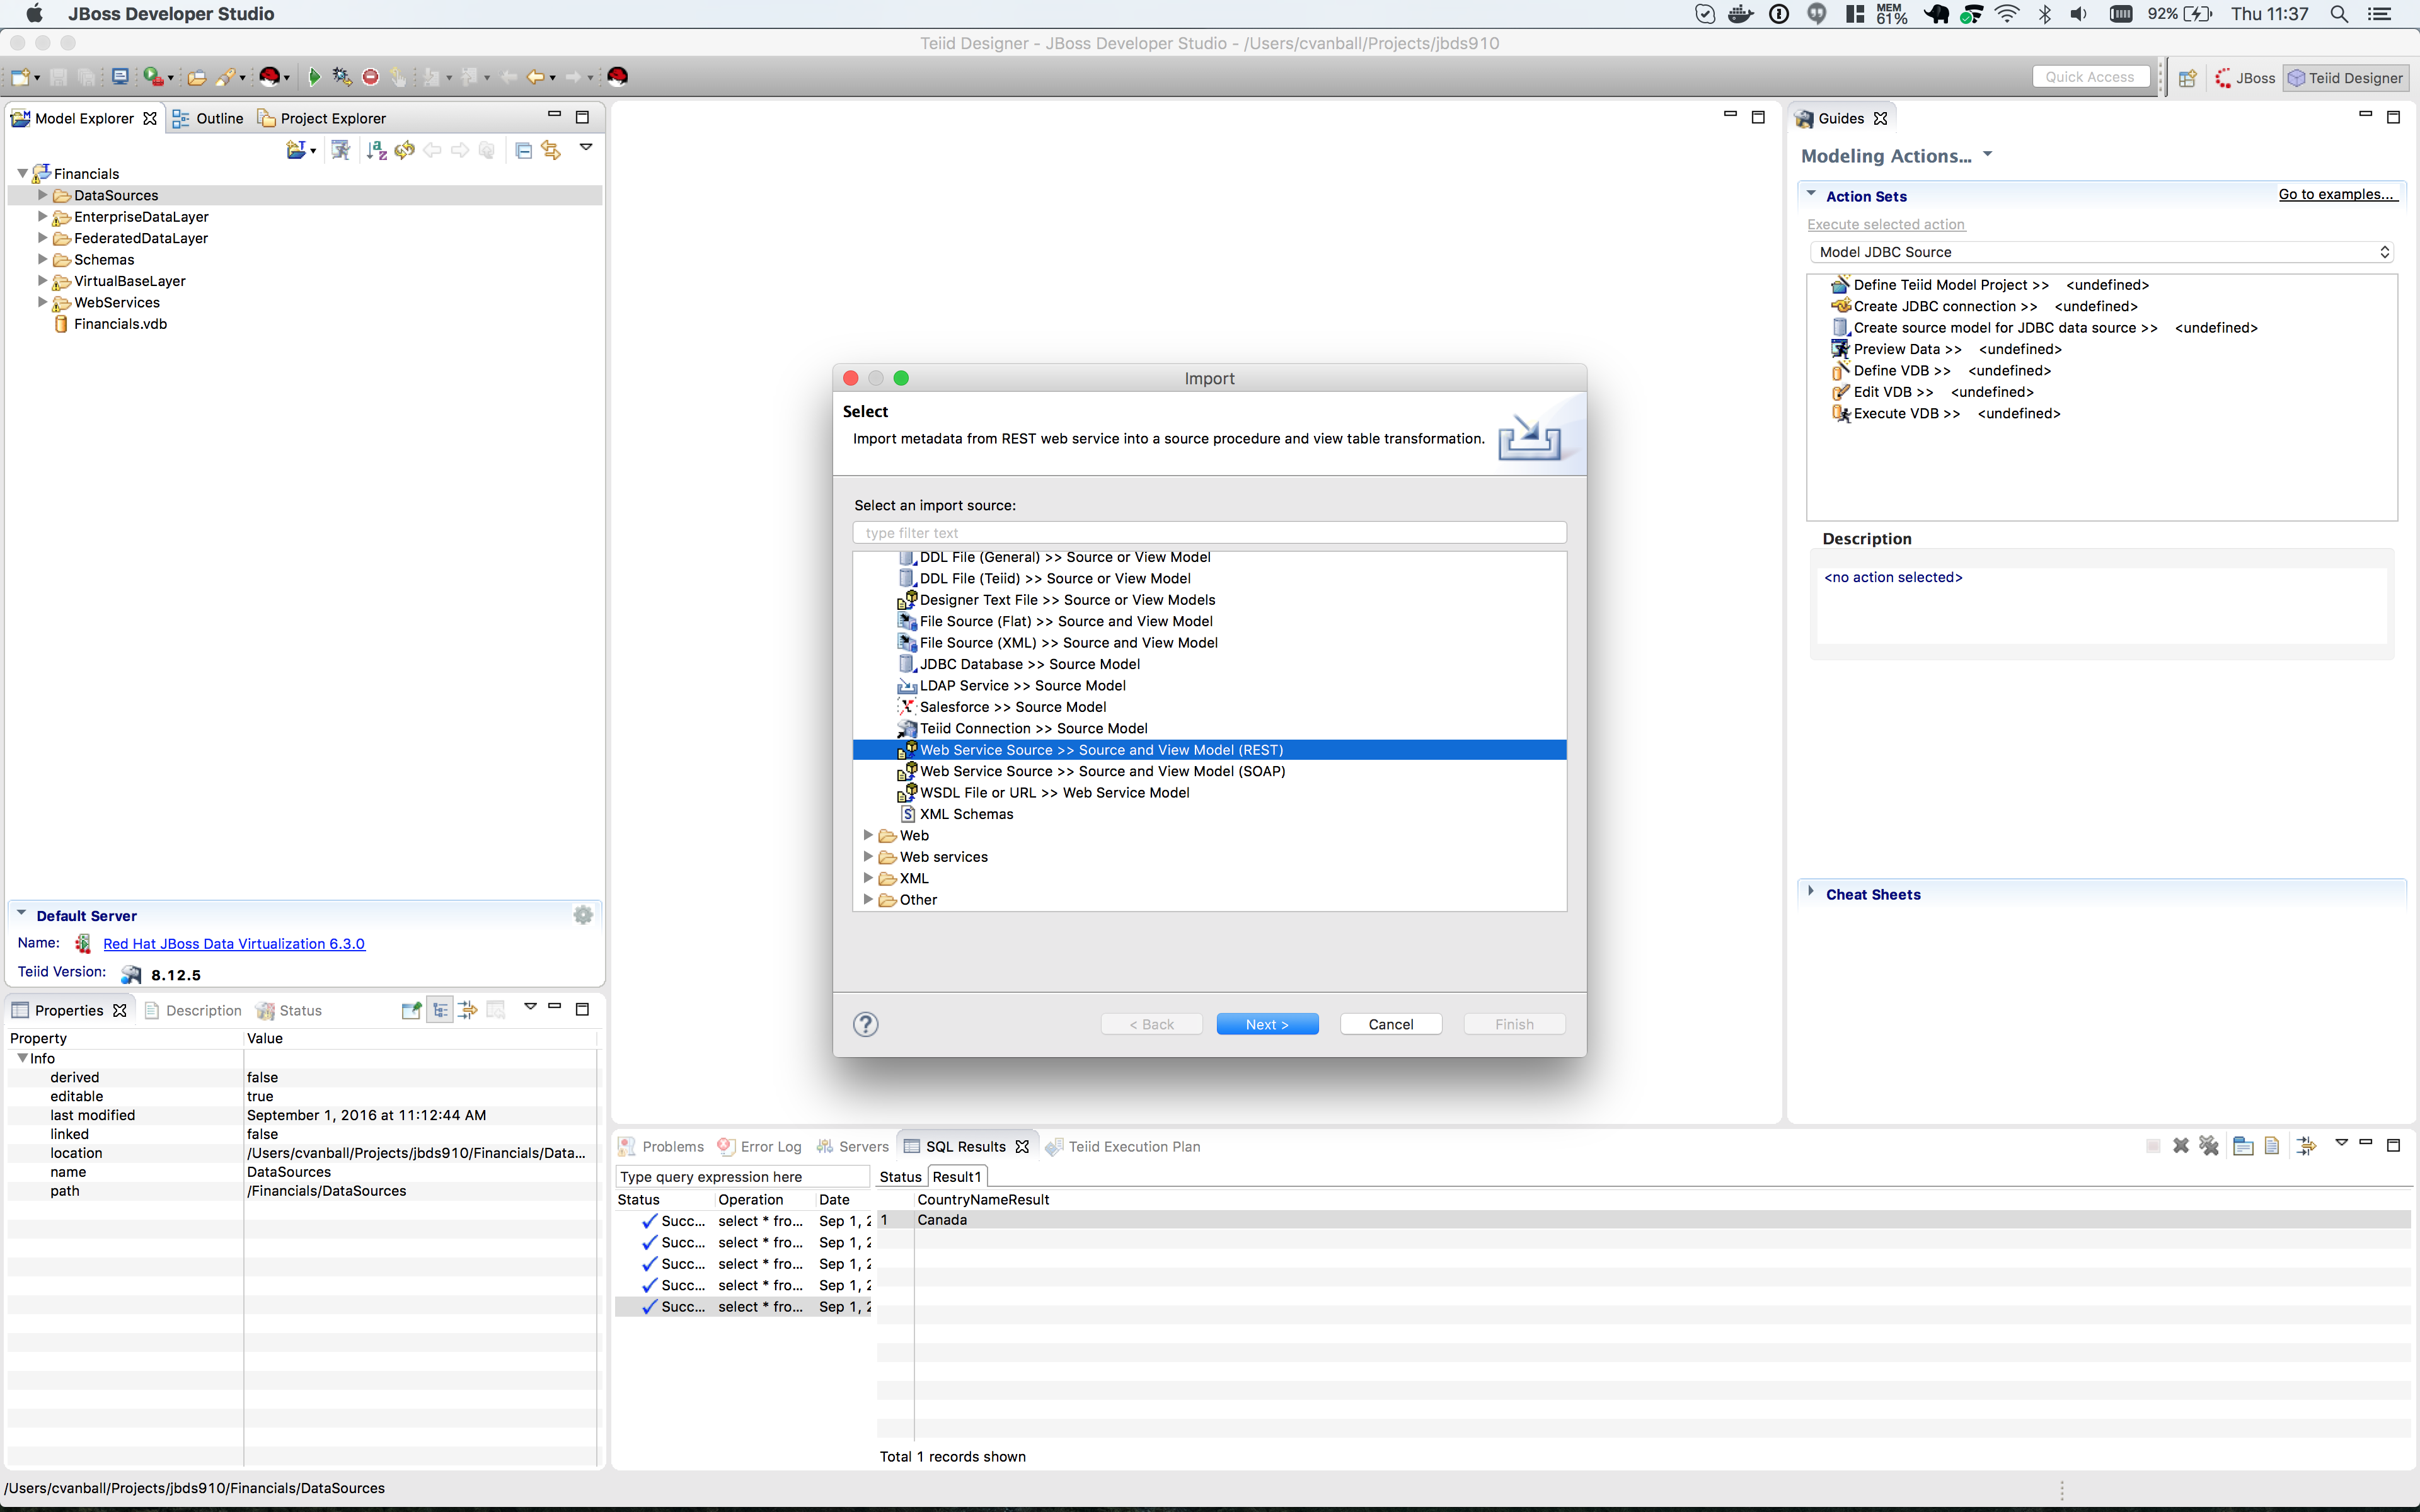
Right-click on the DataSources folder and select menu:Import…[] from the right-hand menu. The Import dialog box is shown.
Select Web Service Source >> Source and View Model (REST) located under the Teiid Designer folder from the import source list that is displayed in the Import dialog box.
Click the btn:[Next >] button to continue. The Create Relational Model from Web Service Dialog box opens. Since there are no REST Web Service Sources configured one need to create a new one. Click on the btn:[New…] button to create a new Connection Profile. The New Connection Profile dialog opens.
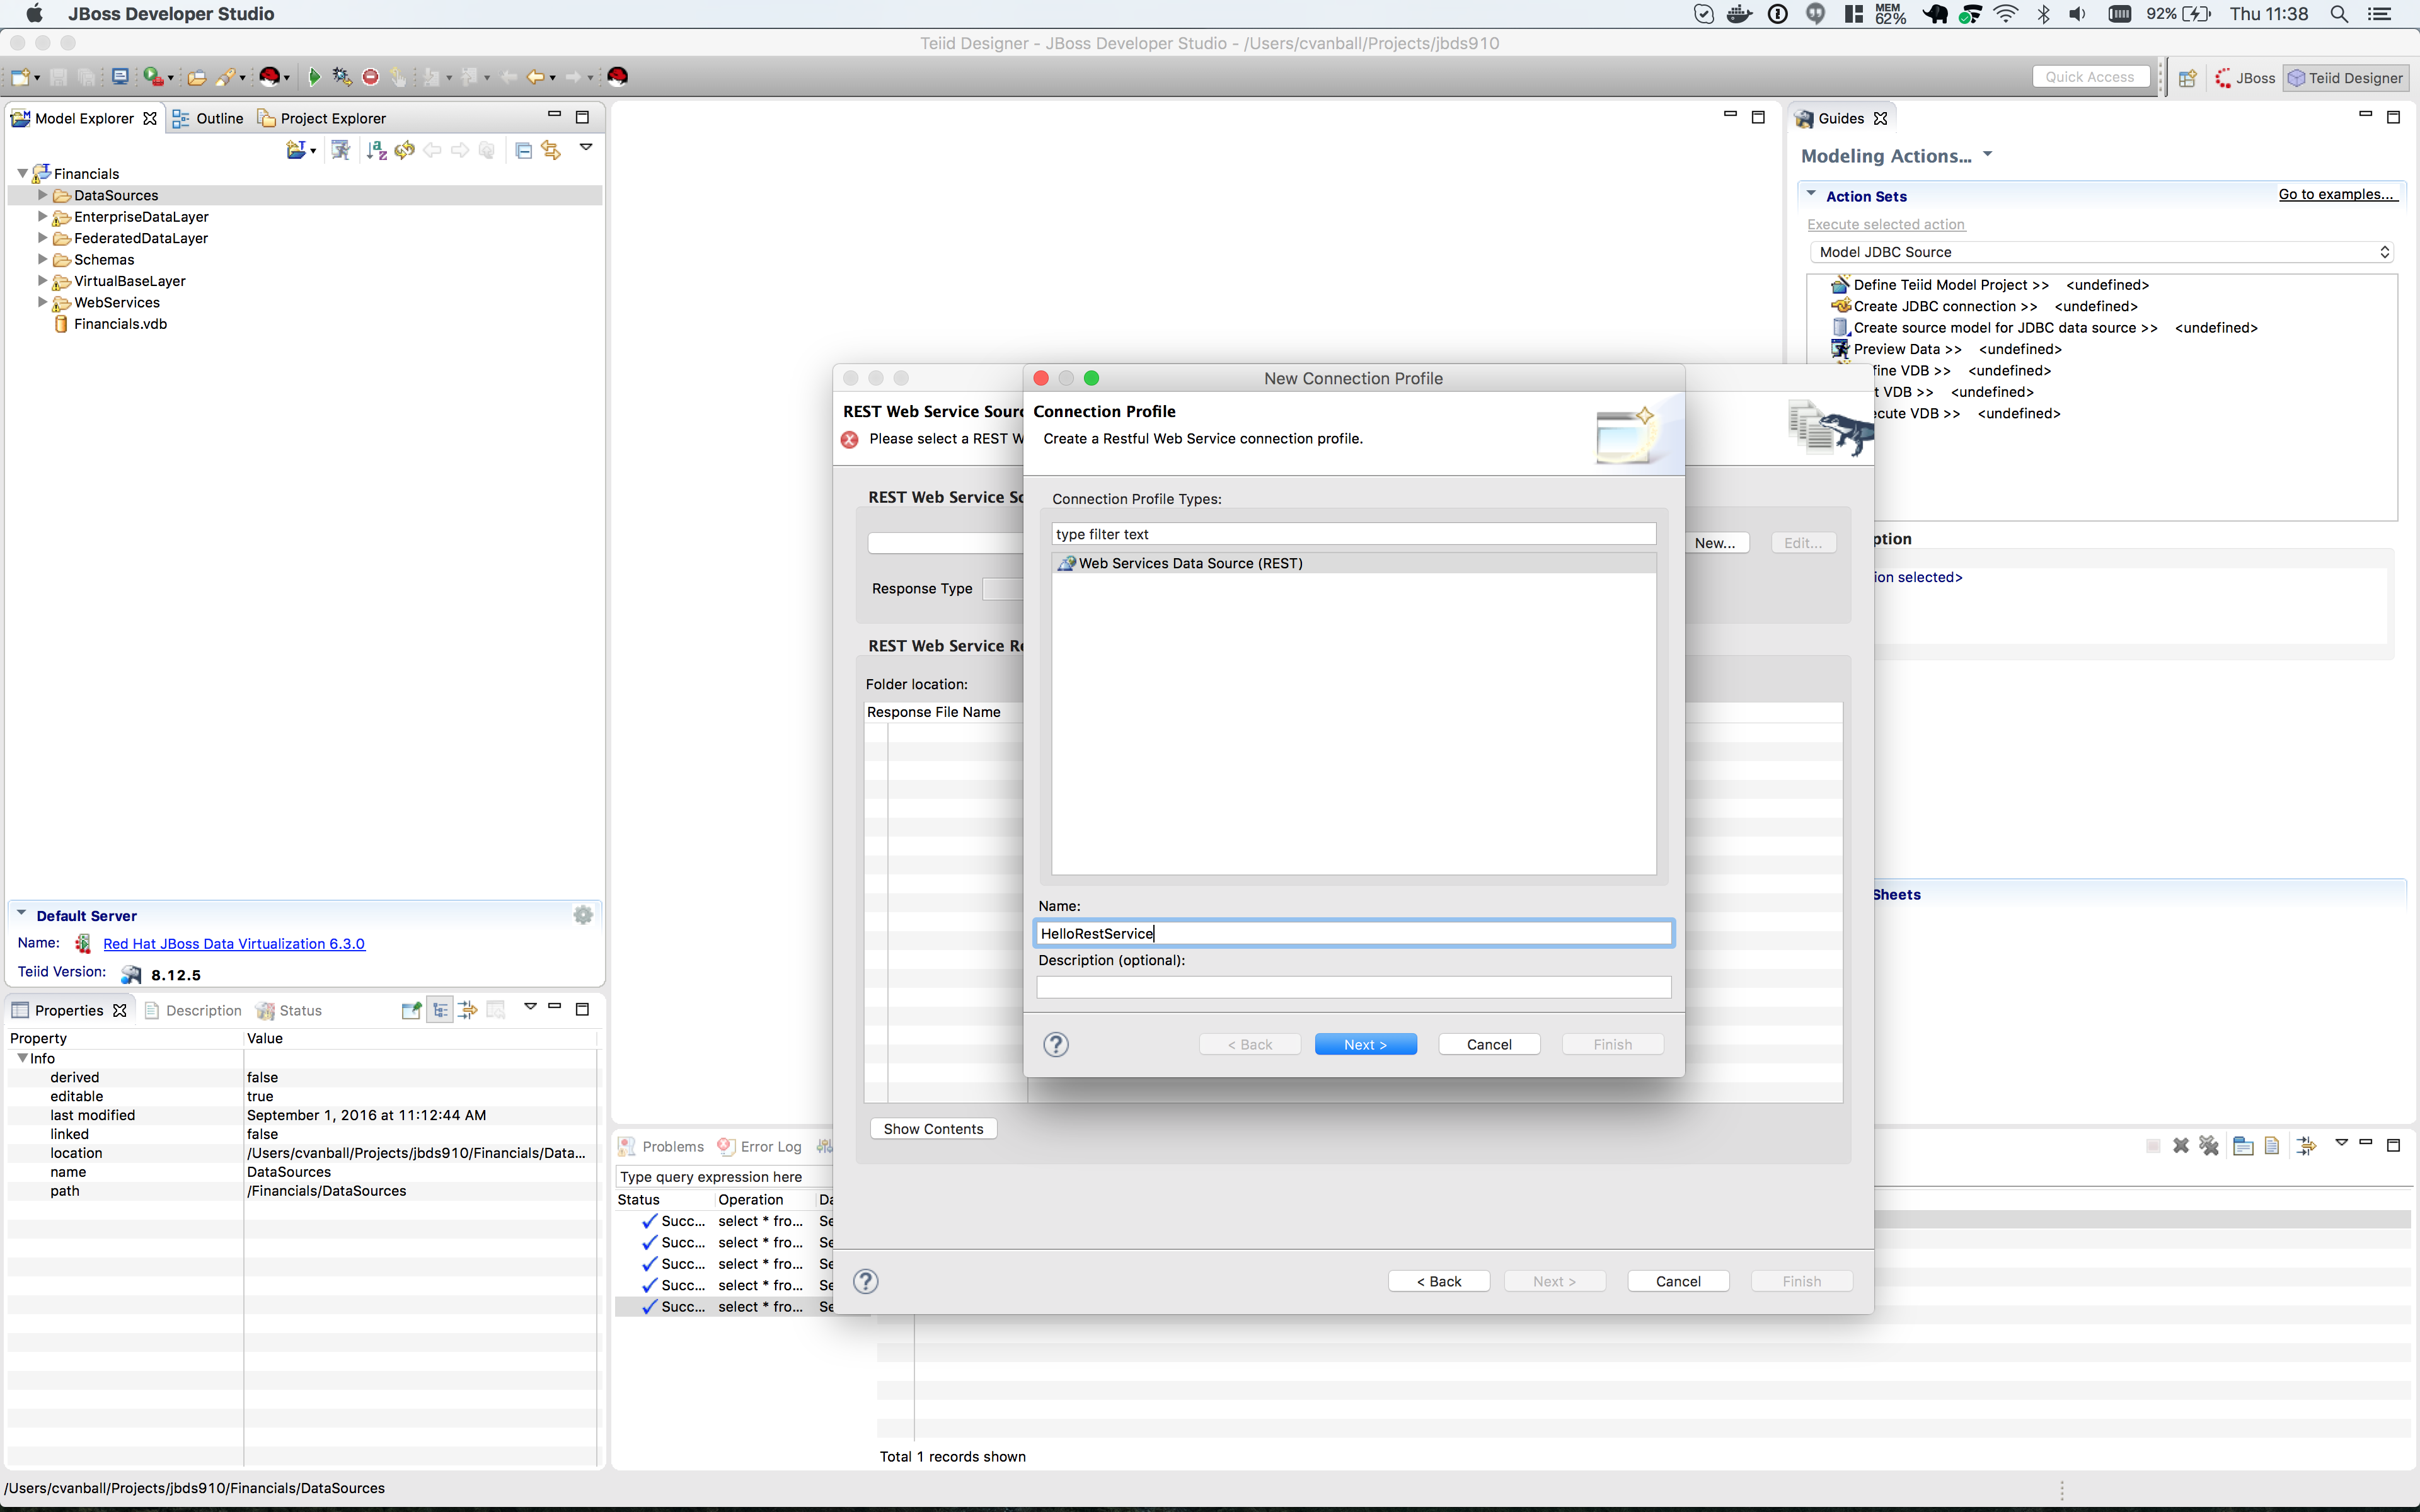
Type HelloRestService in the Name field and click btn:[Next >] to get the Web Service Connection Properties dialog.
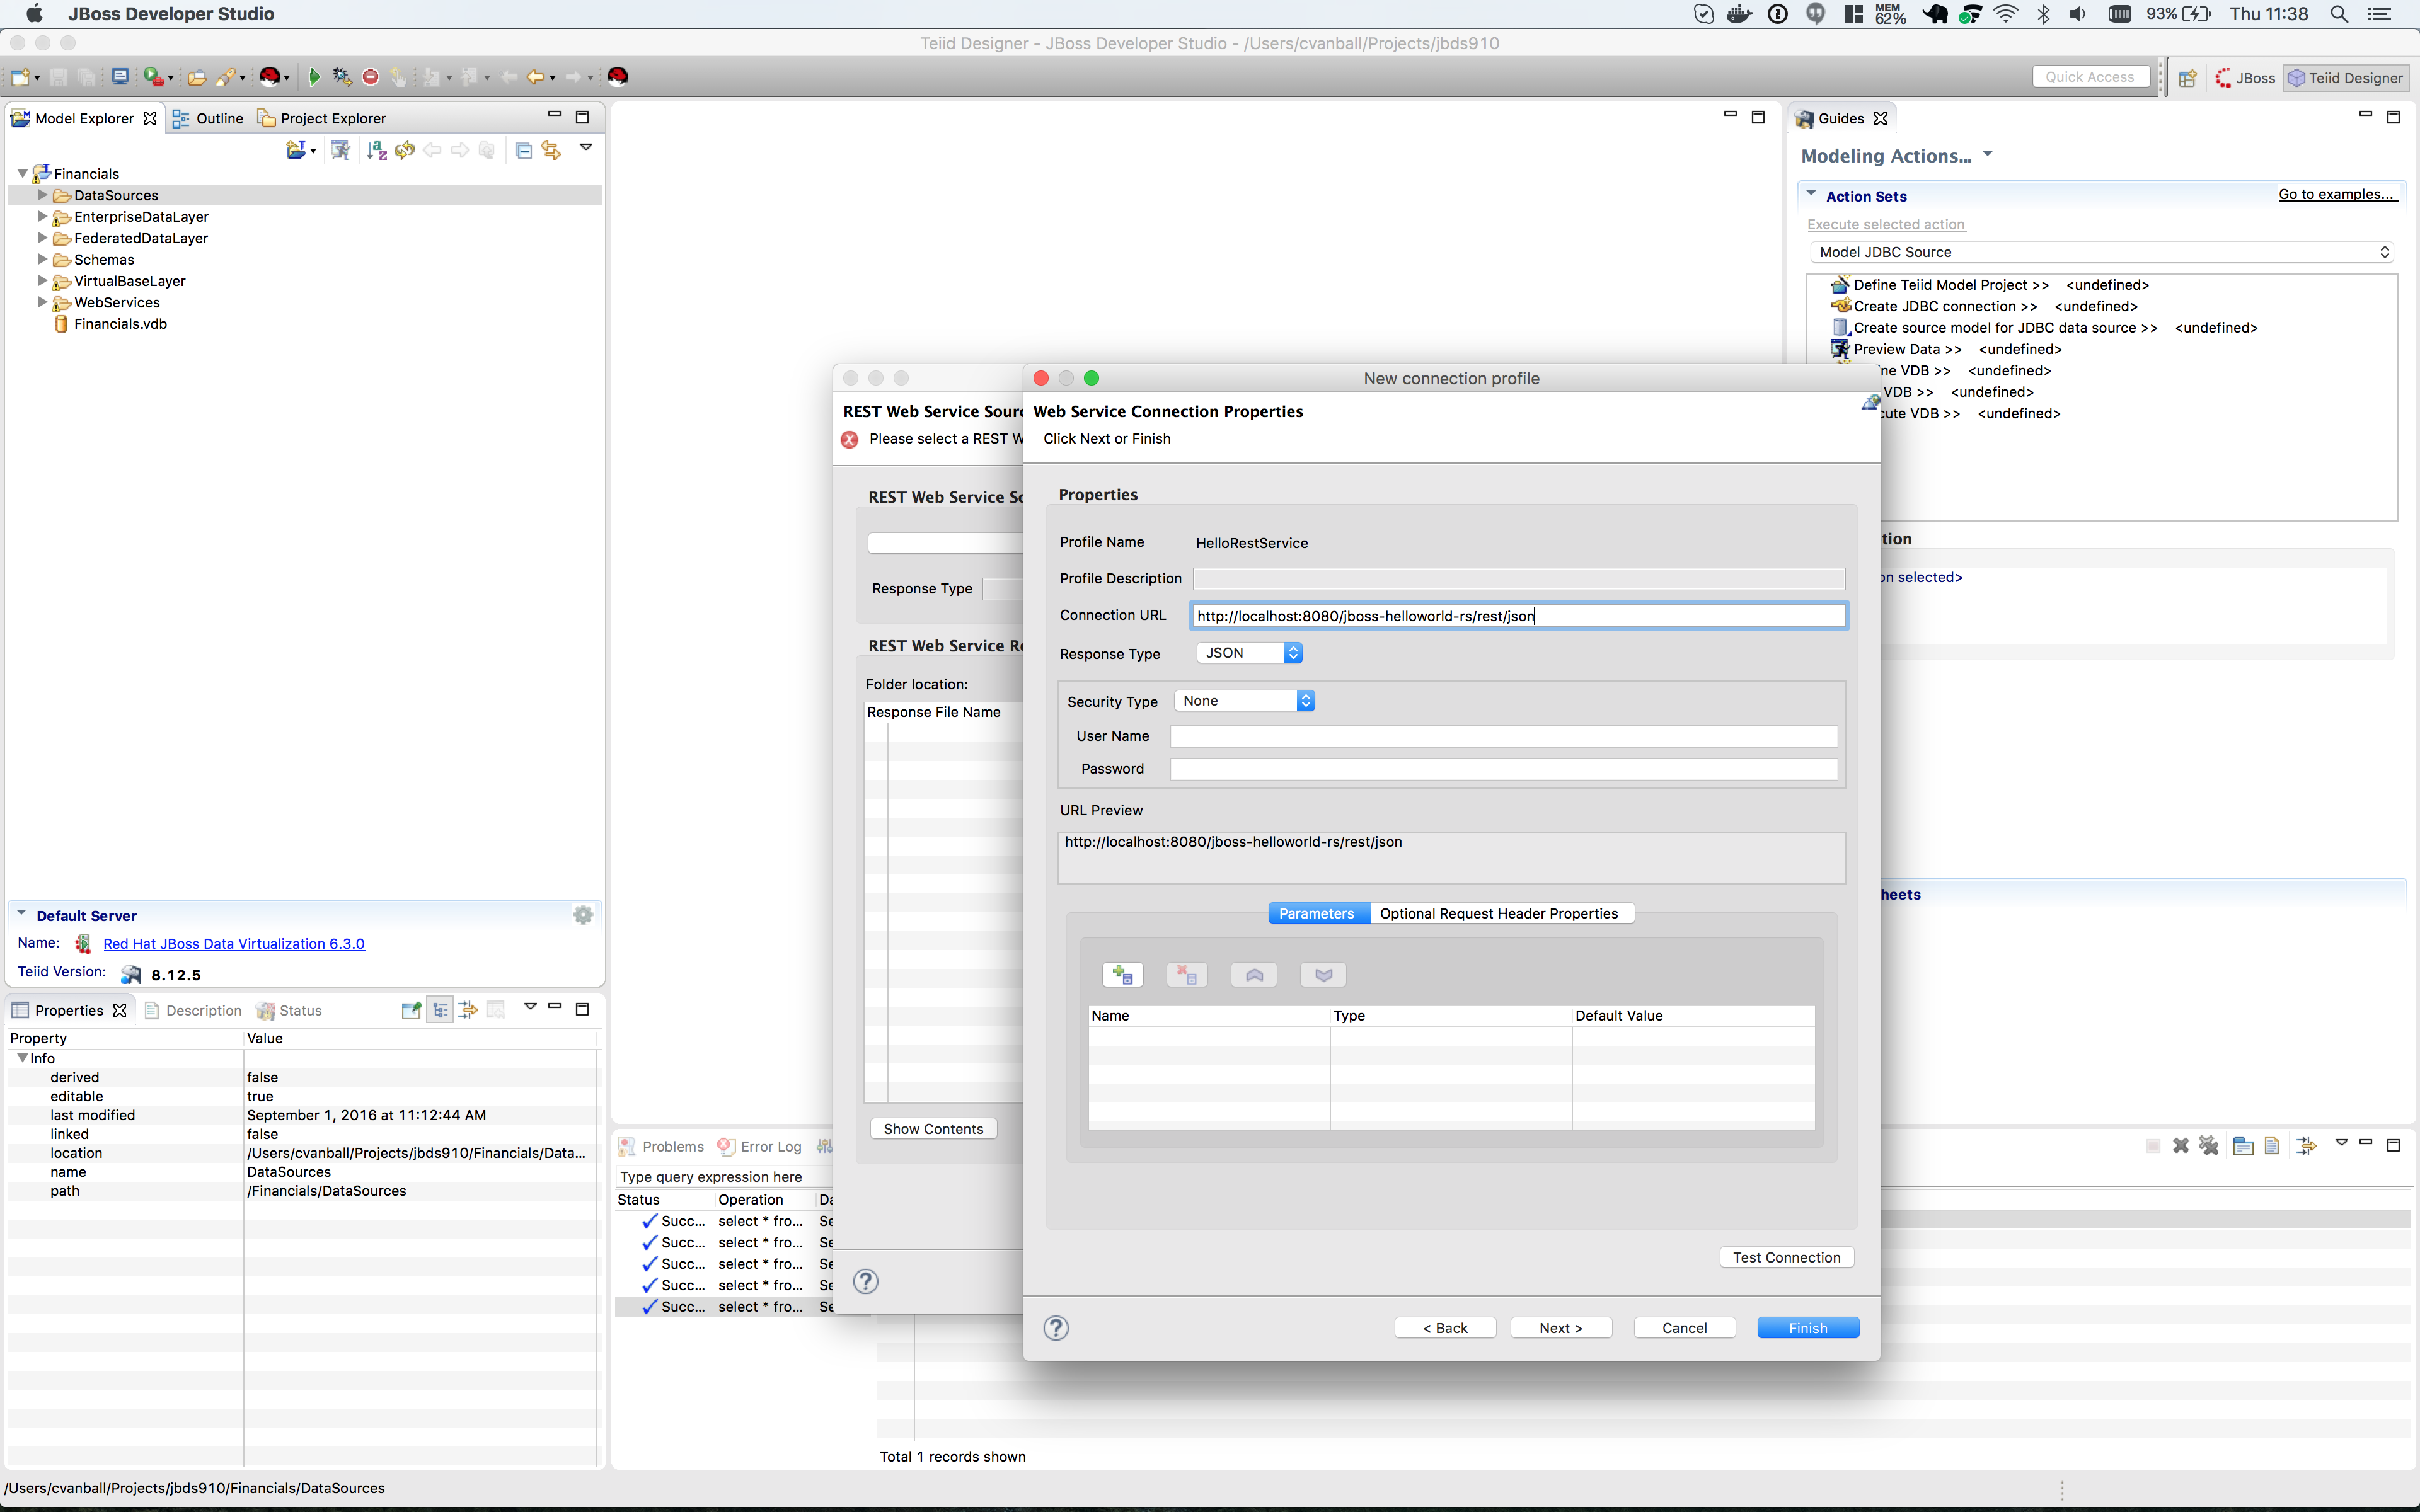
In the Connection URL field type: http://localhost:8080/jboss-helloworld-rs/rest/json
No parameters needed.
Click btn:[Test Connection] to test the defined REST service. If successfully click btn:[Next >] to see the Summary of the Connection Profile we just created.
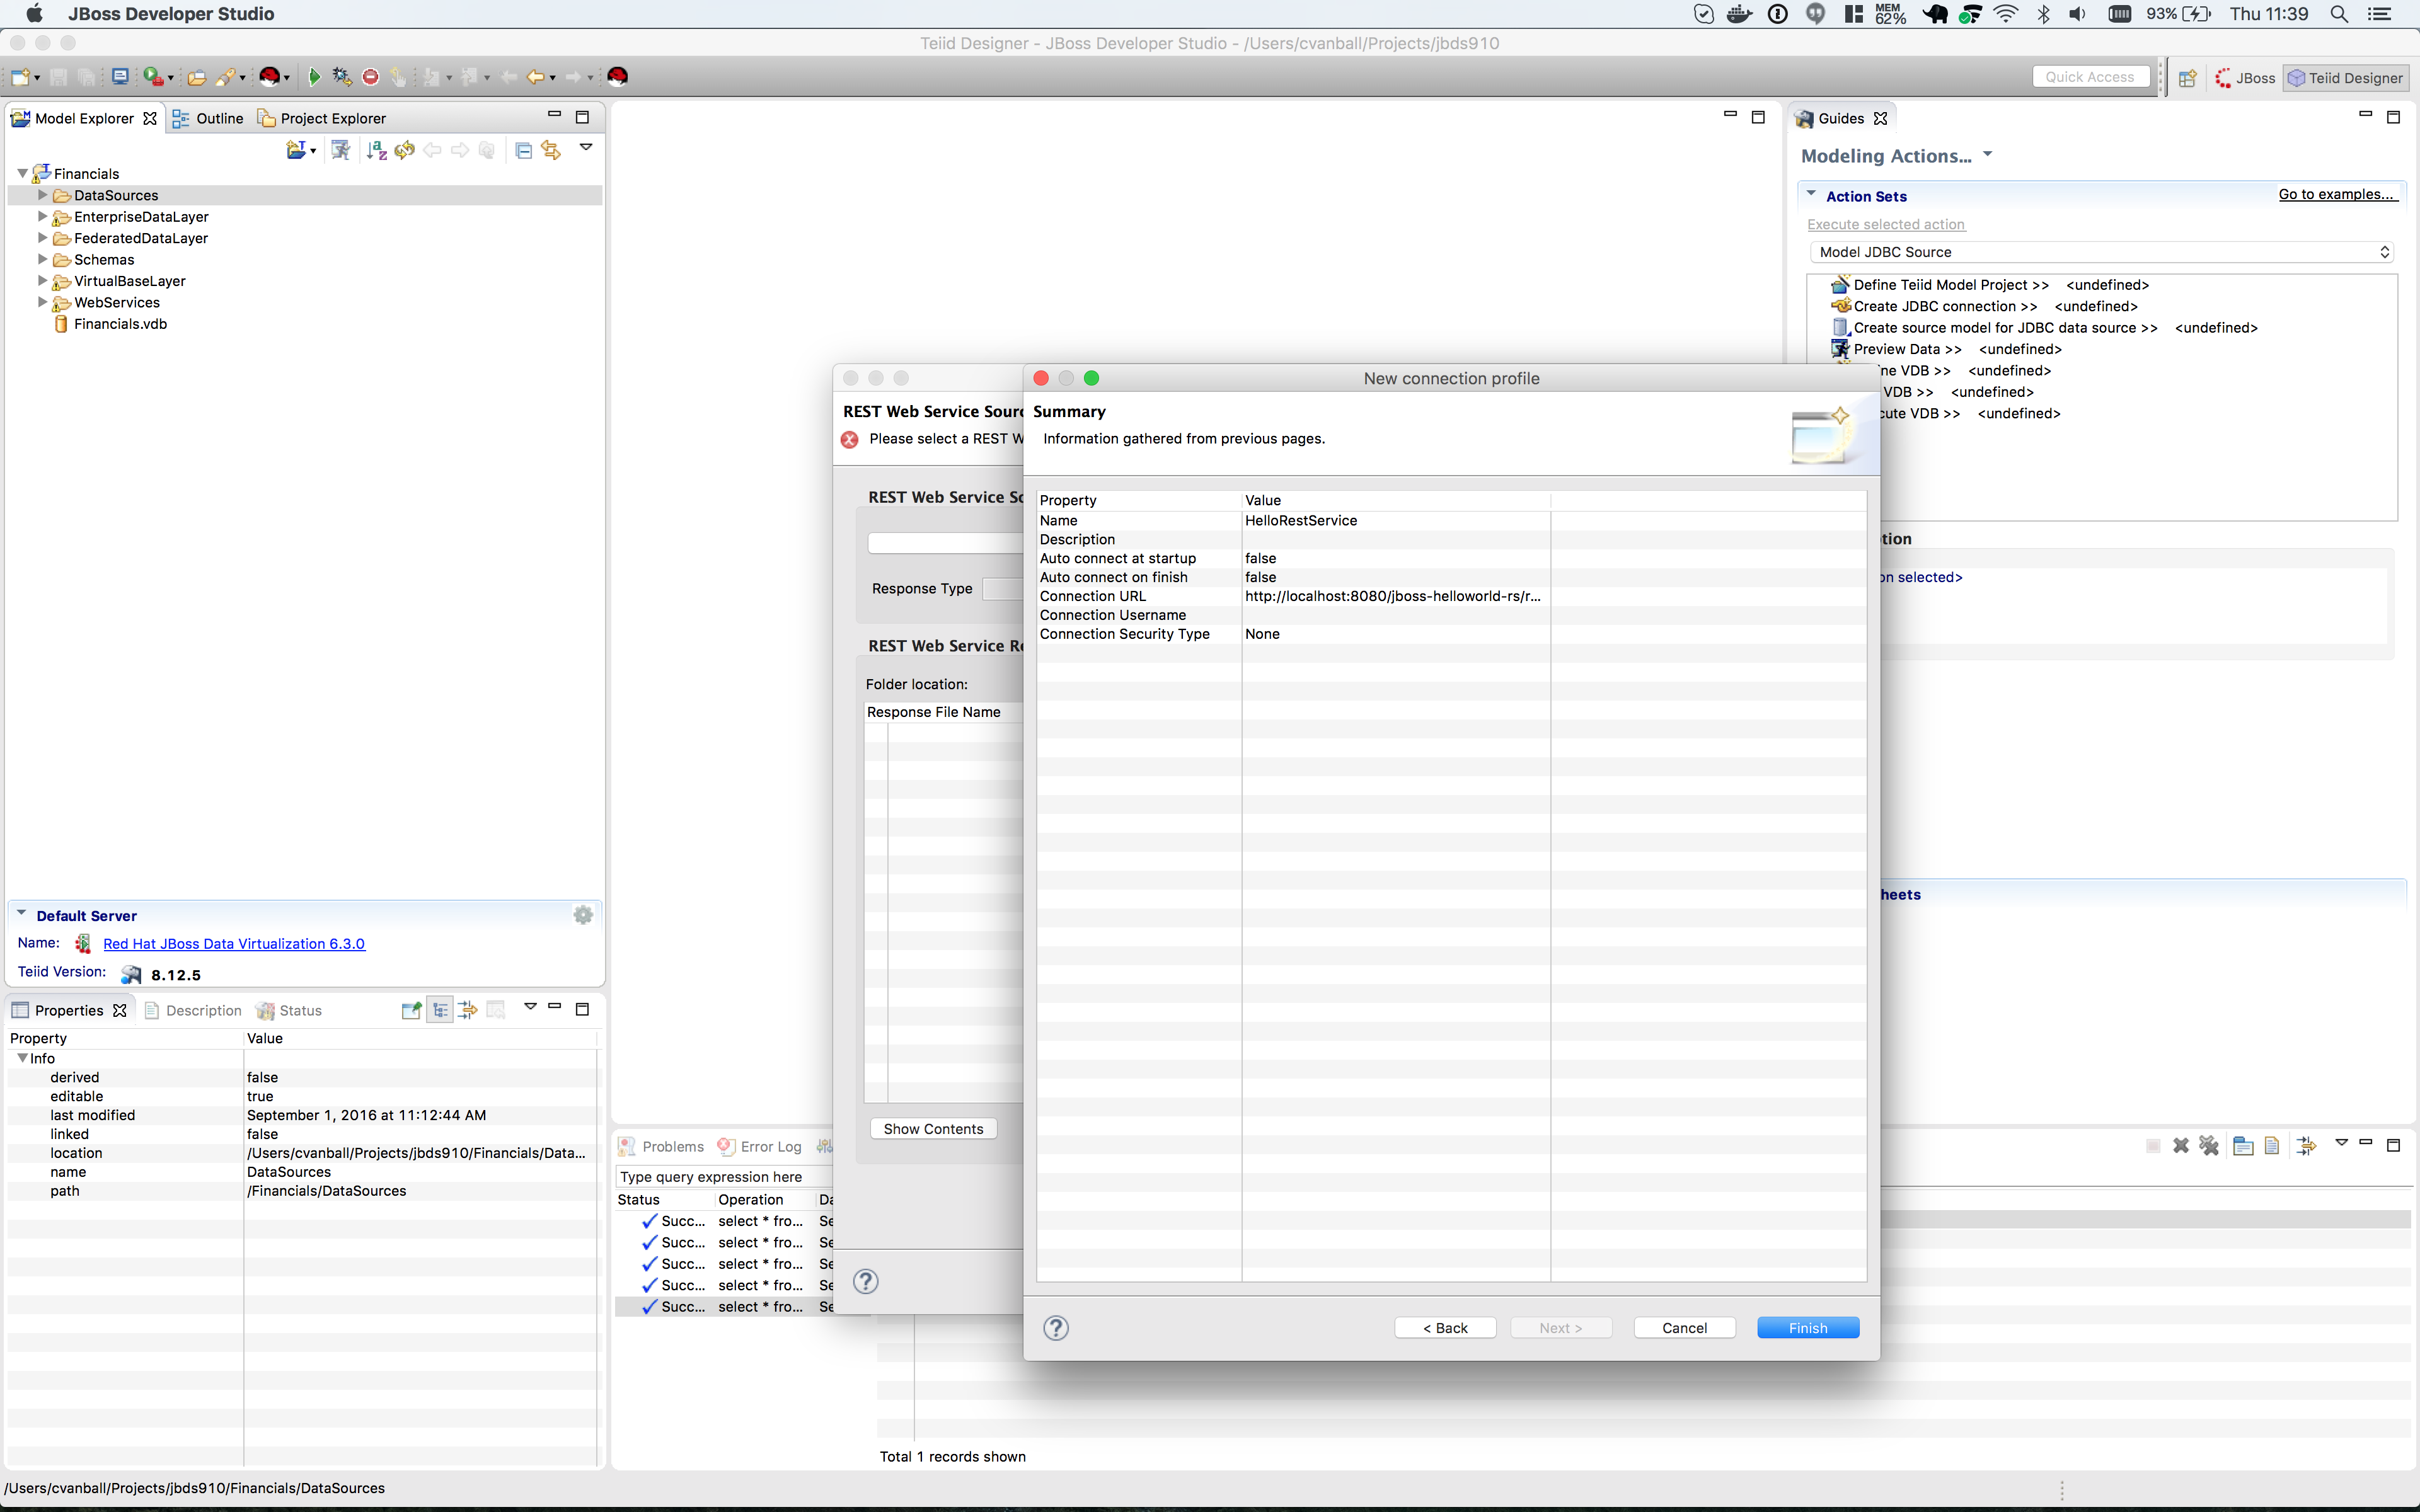
Click btn:[Finish] to view the REST Web Service Source Selection dialog.
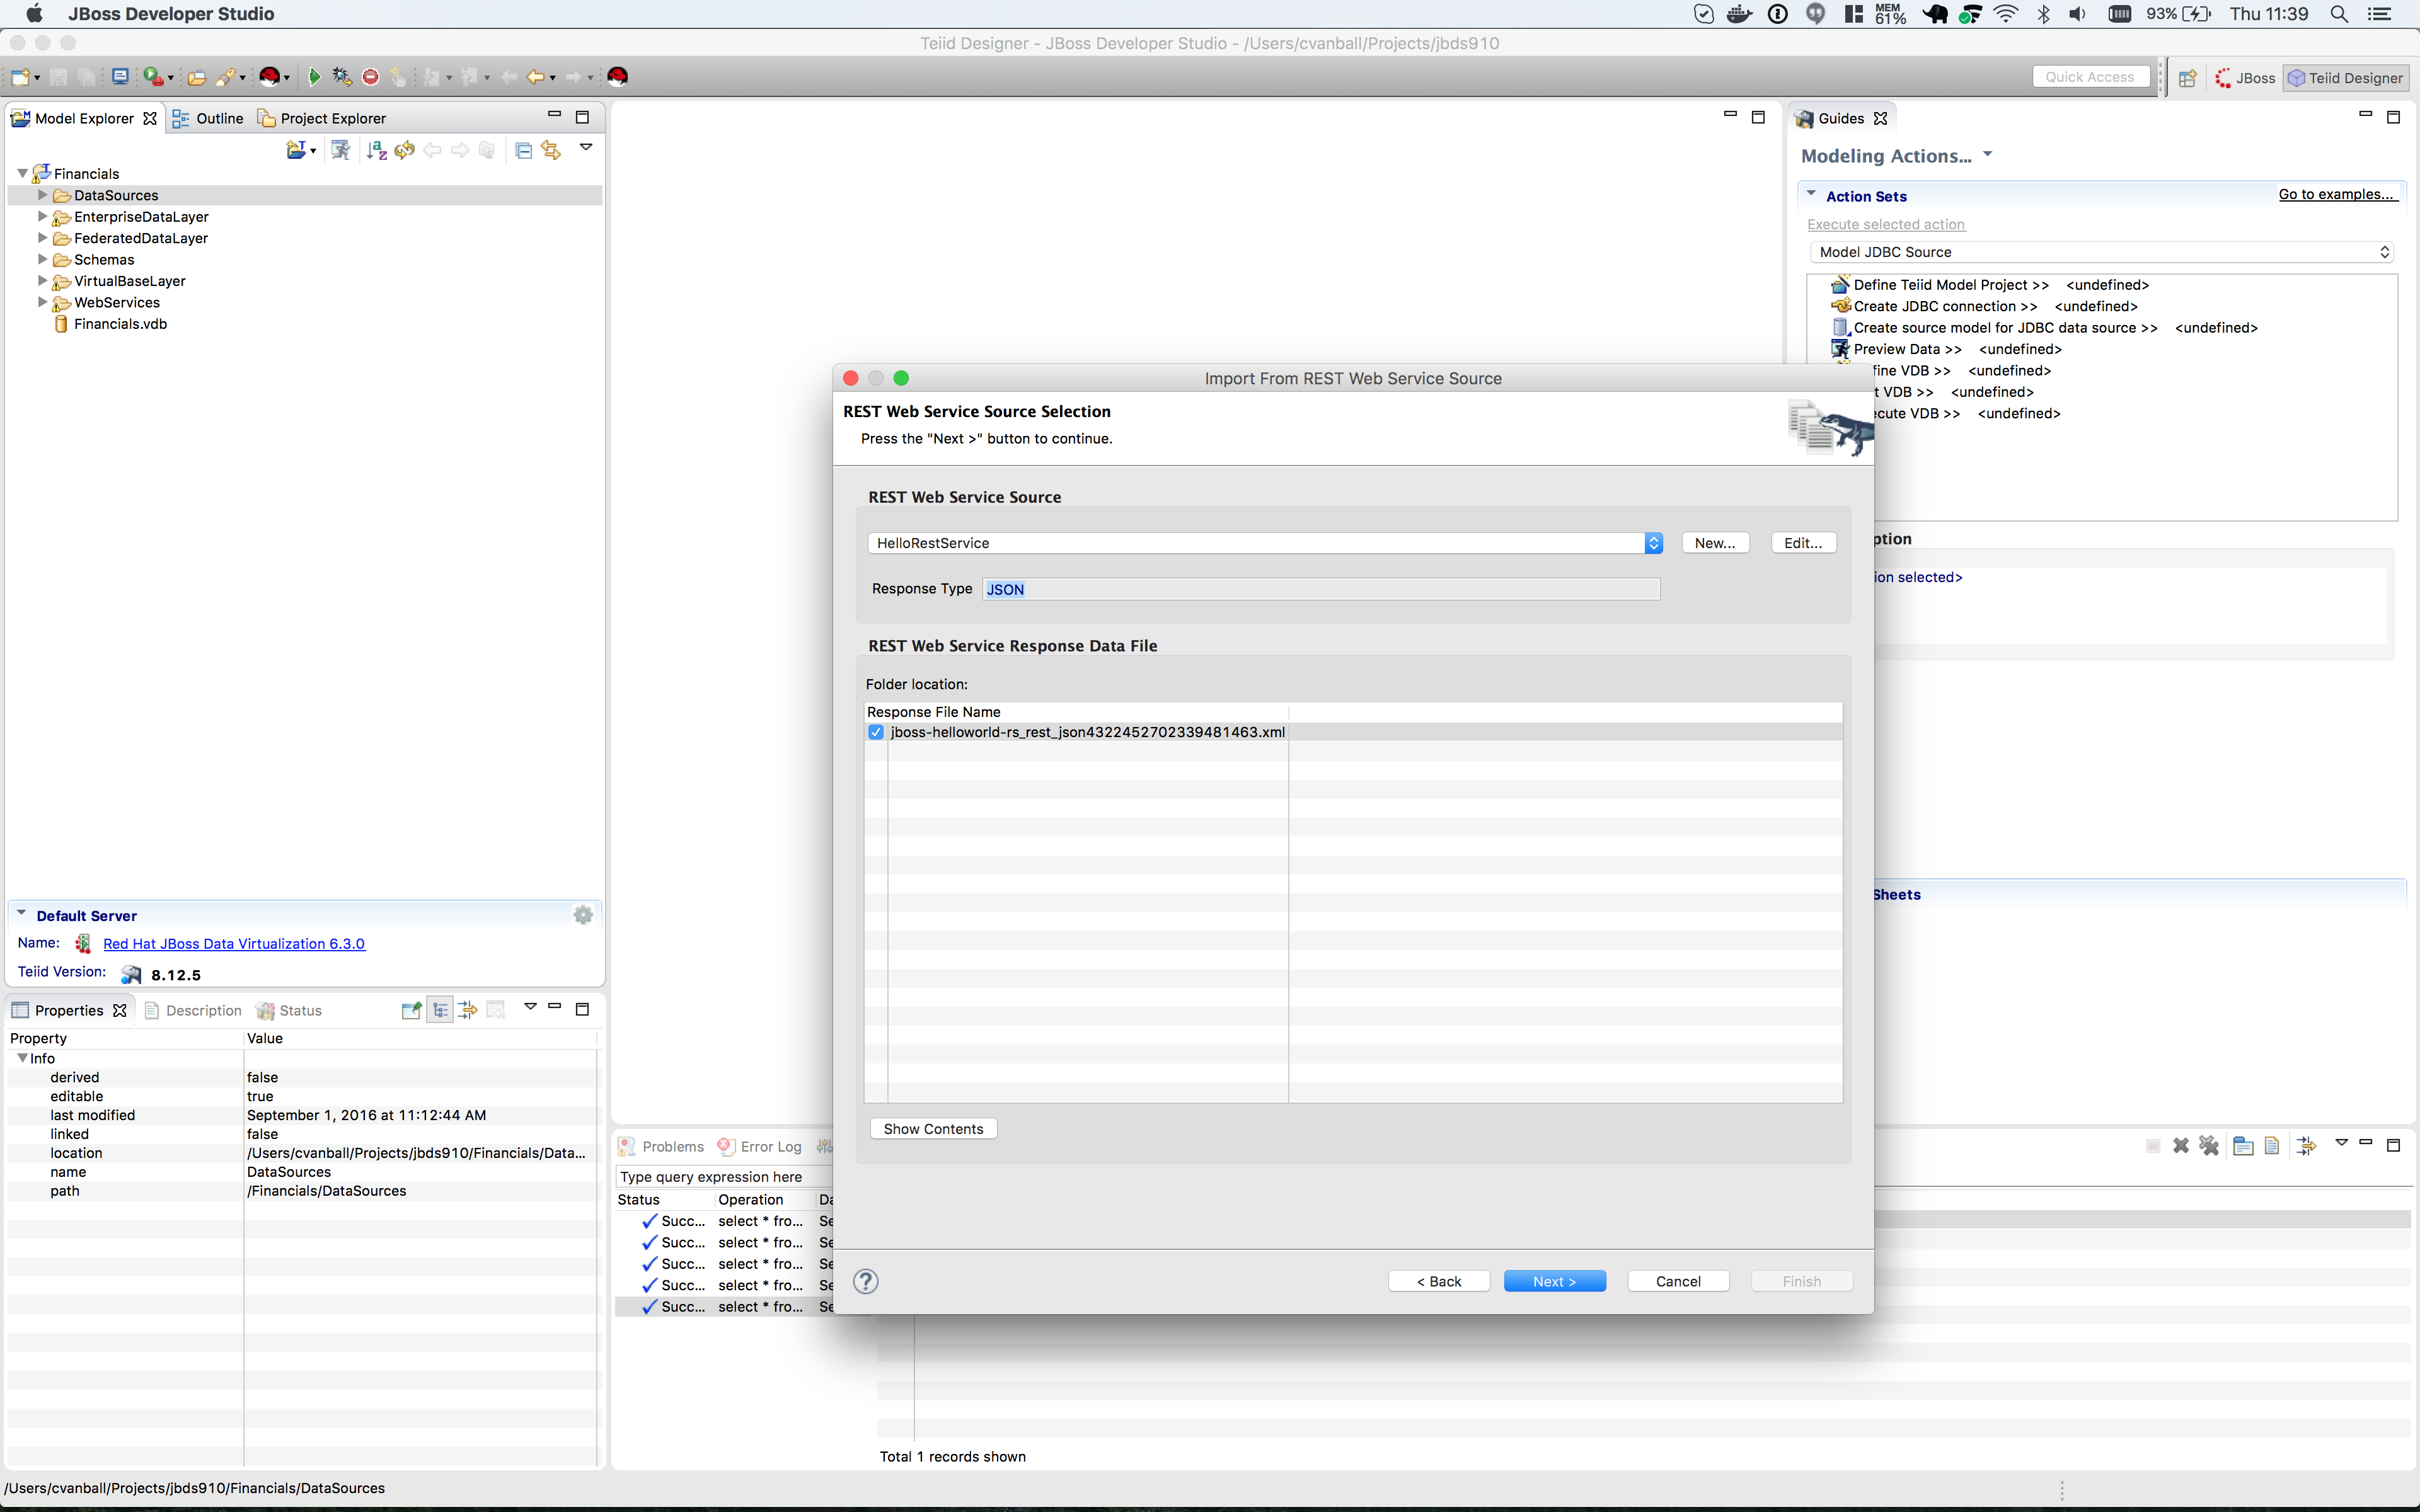
Click btn:[Next >] to view the REST Web Service Model Definition dialog.
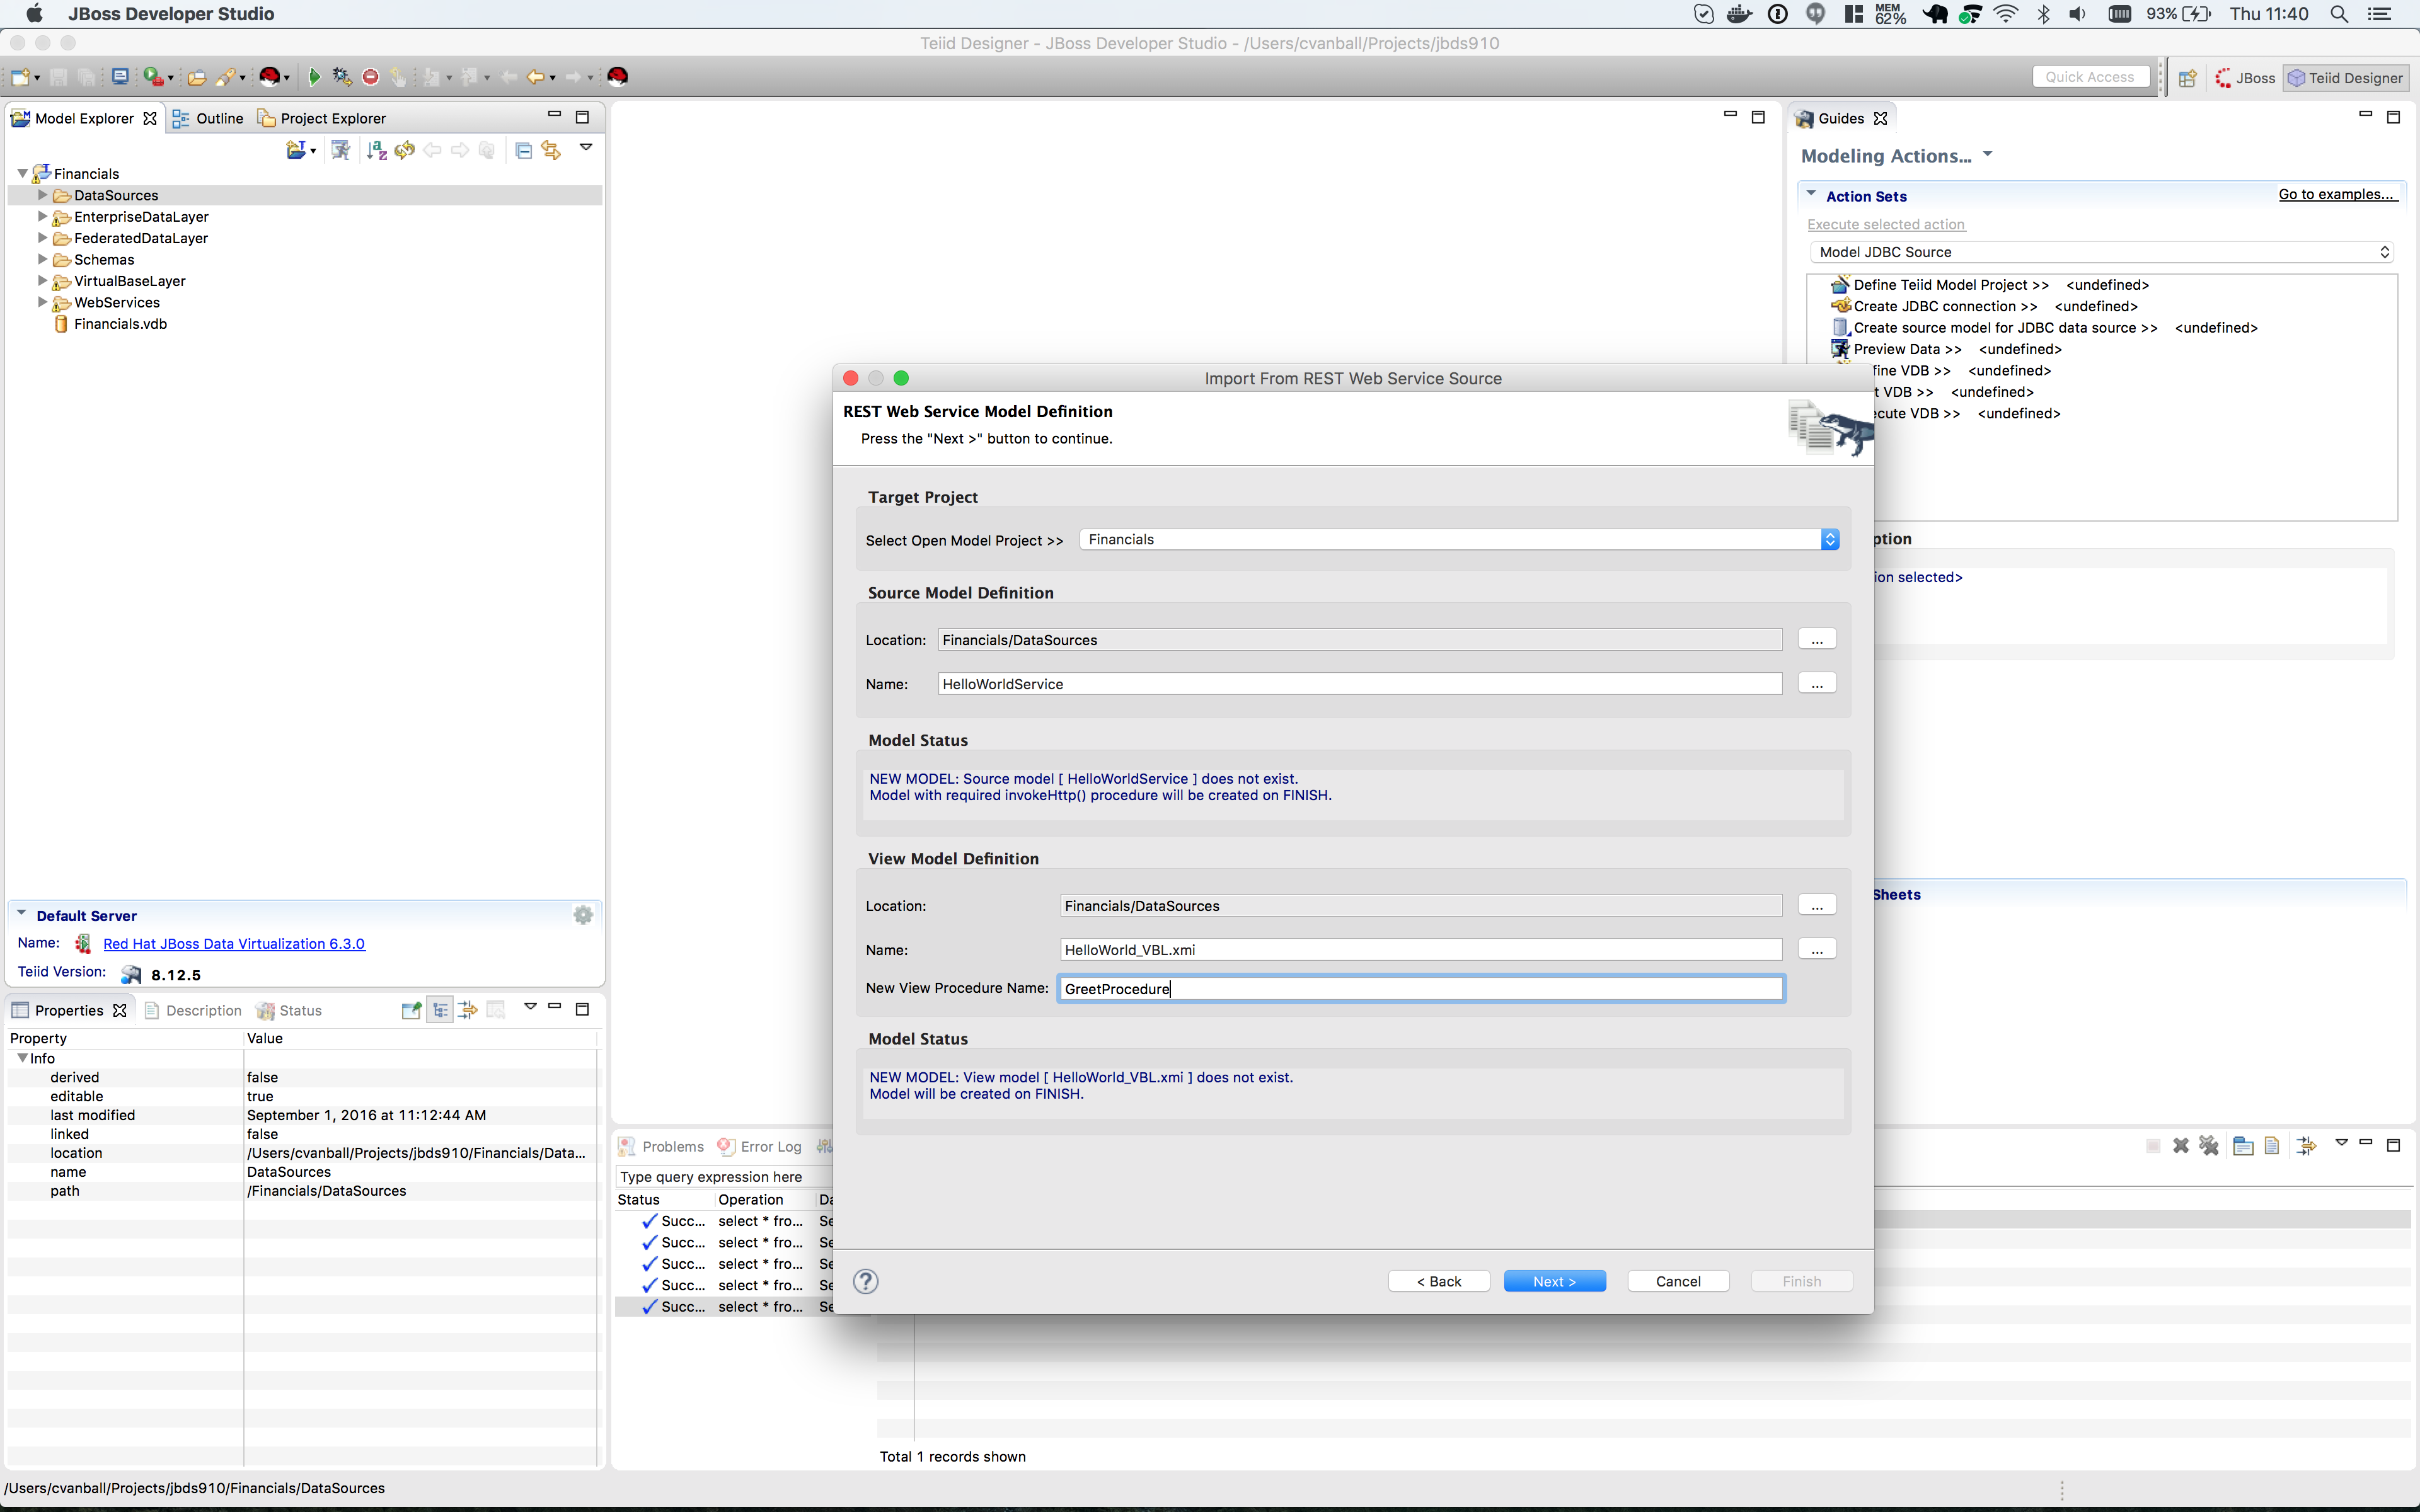
Place the Source Model definition into the DataSources folder and name it HelloWorldService. Place the View Model definition into the VirtualBaseLayer folder and name it HelloWorld_VBL. Type in the New View Procedure Name field: GreetProcedure
Click btn:[Next >] to view the XML Data File Import Option dialog.
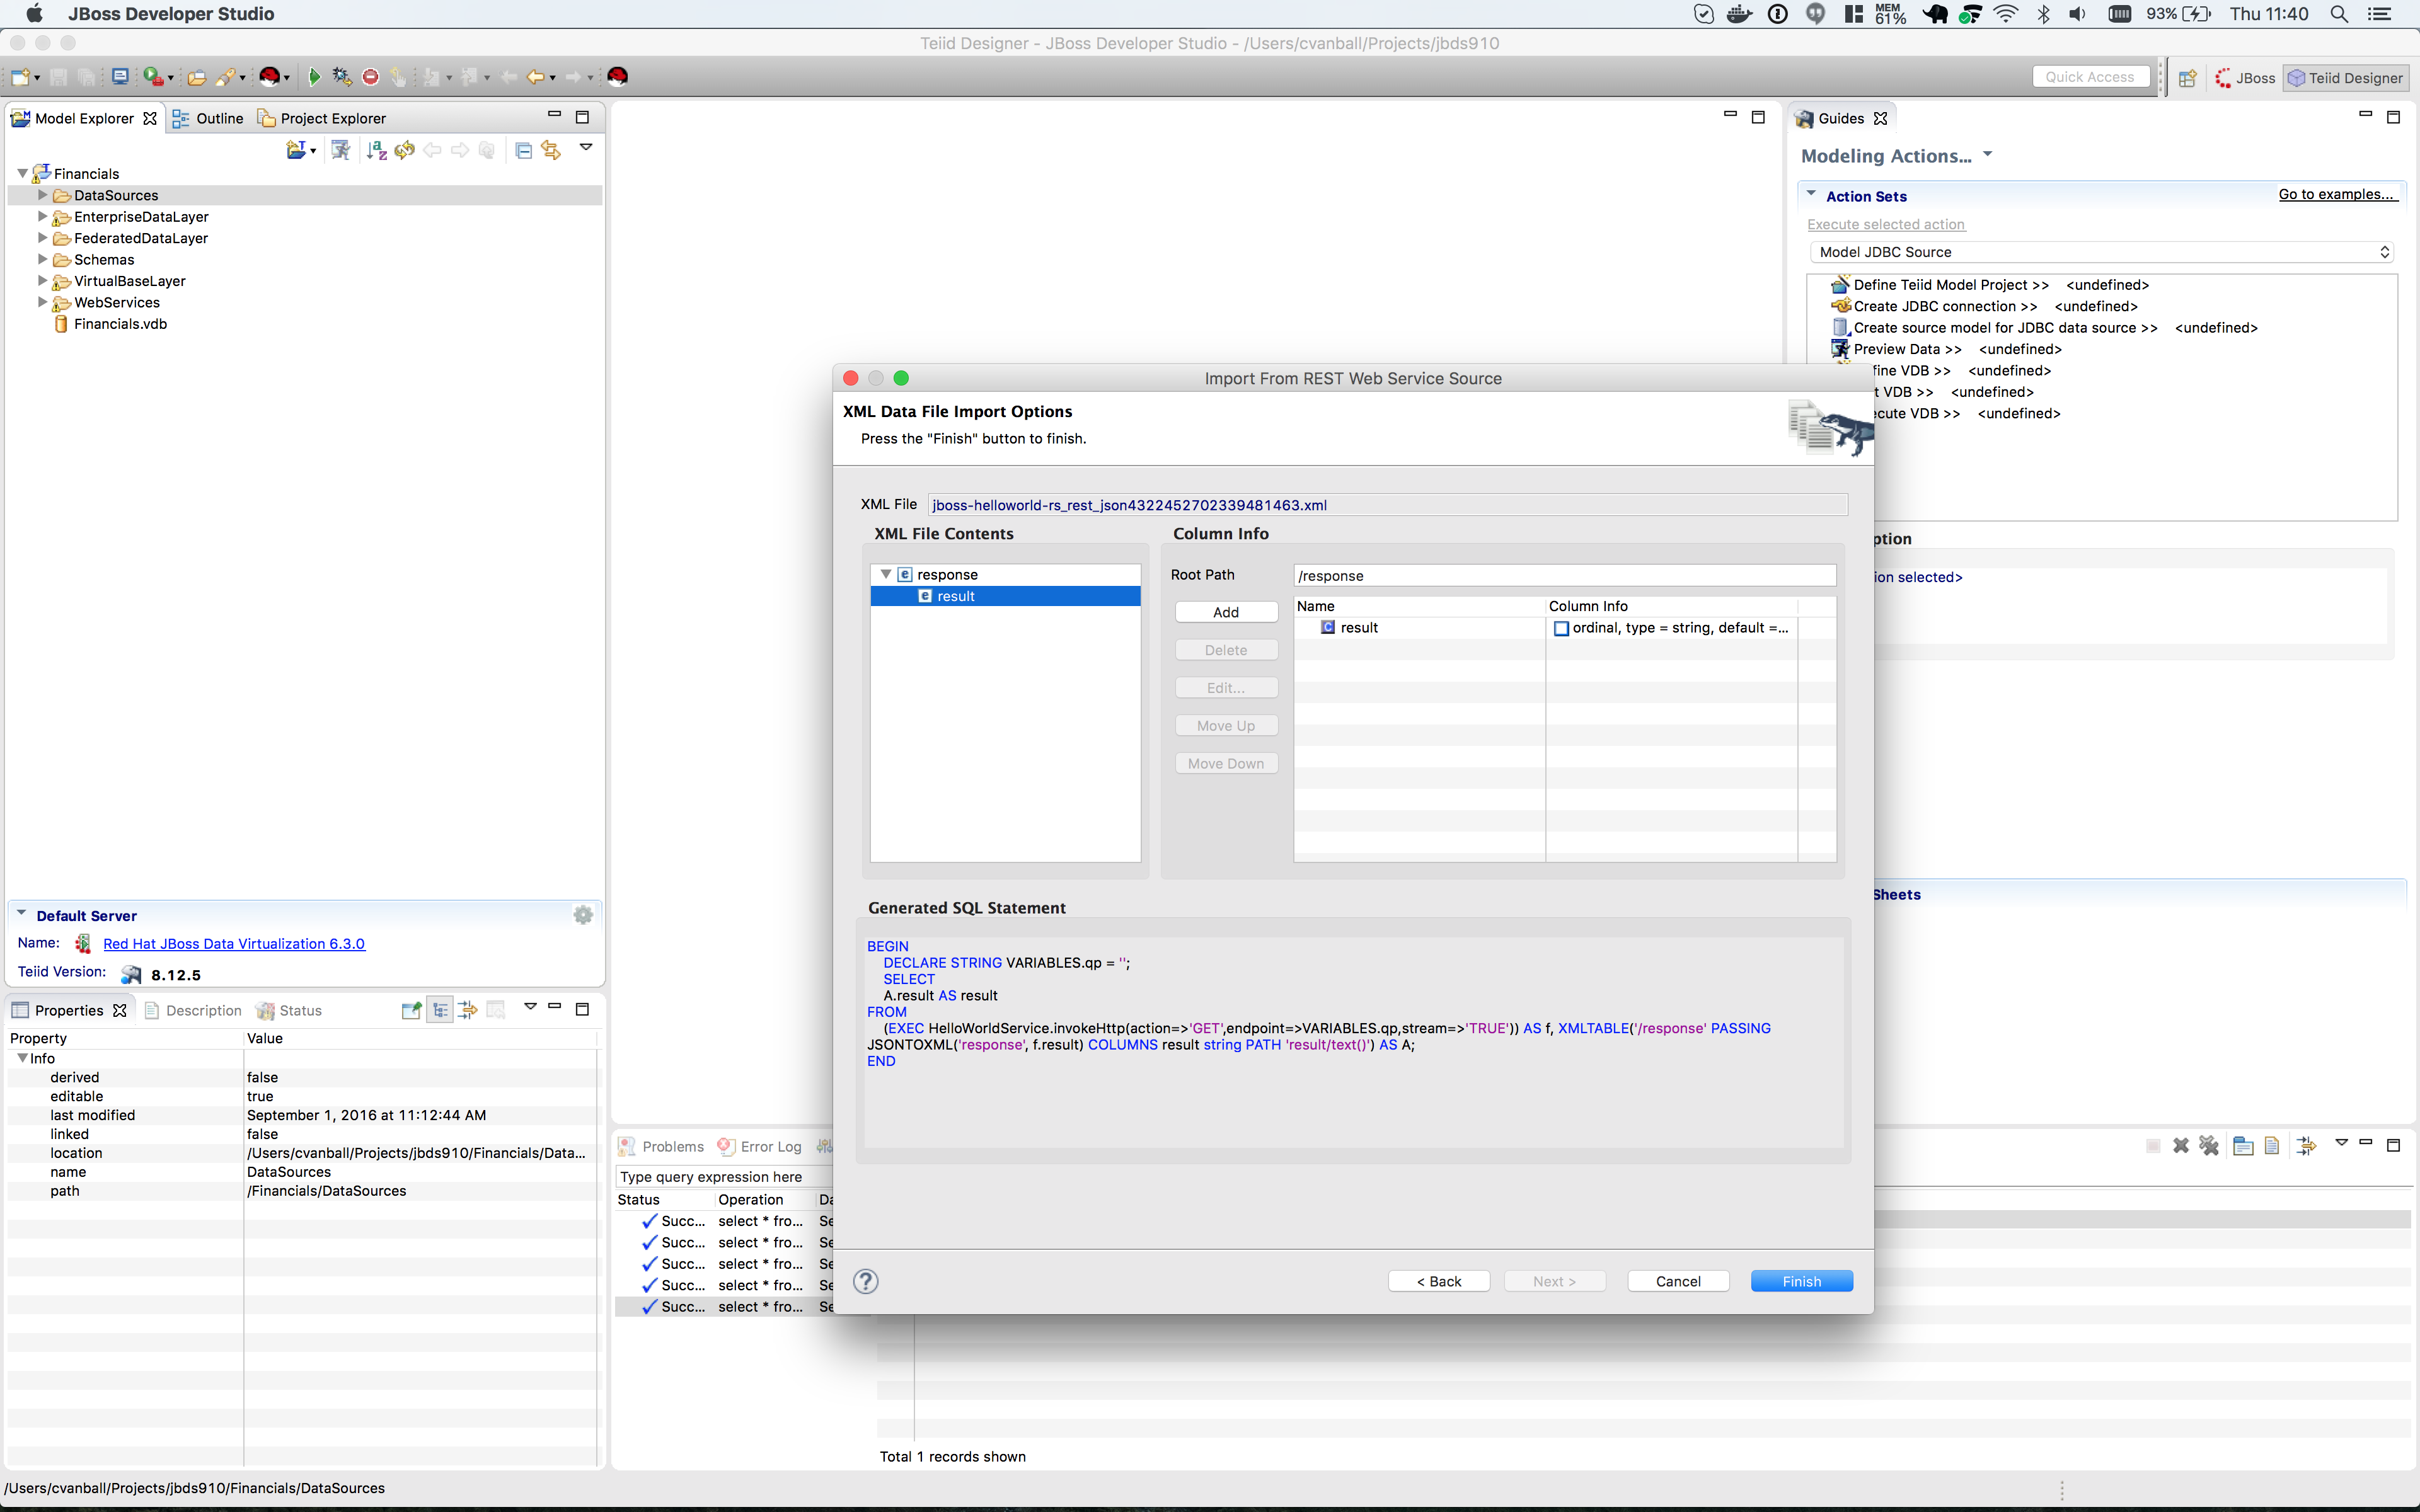
Click btn:[Finish] to complete the creation of the the WeatherInfo view model and should get a similar display as shown below.
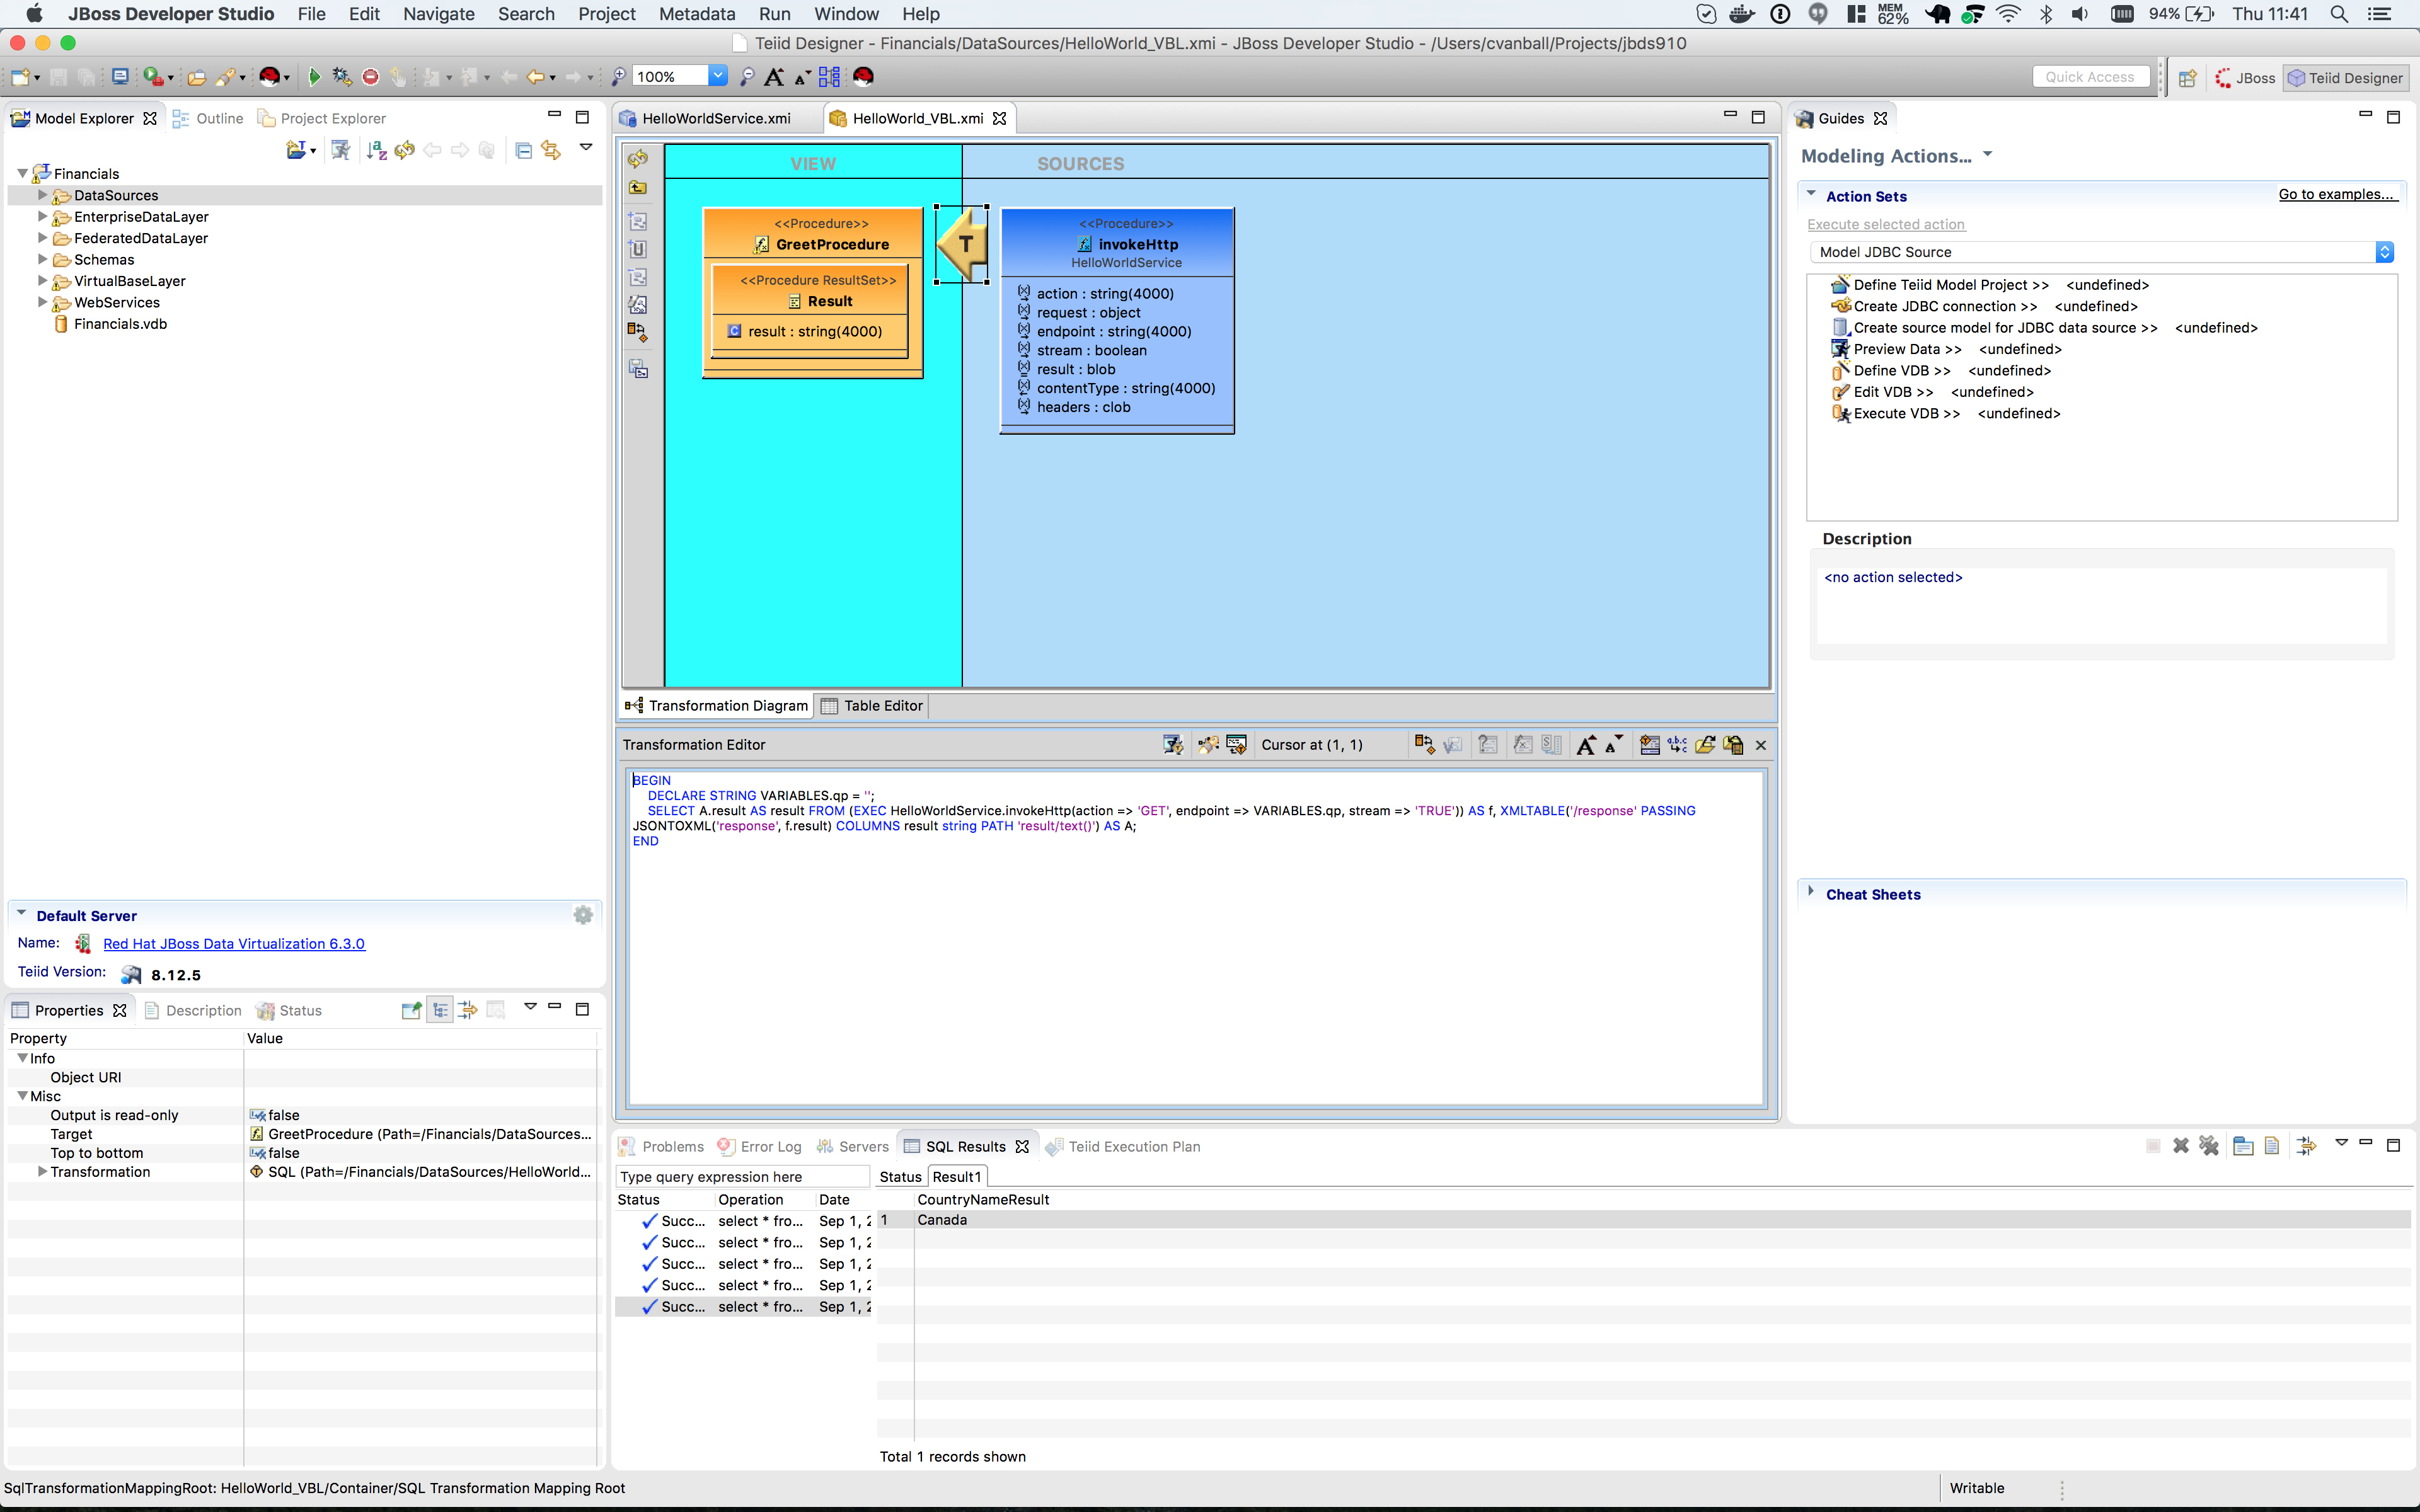
Click the Running man icon in the Transformation Editor pane. The Custom Preview Data dialog appear to customize the SQL Query.
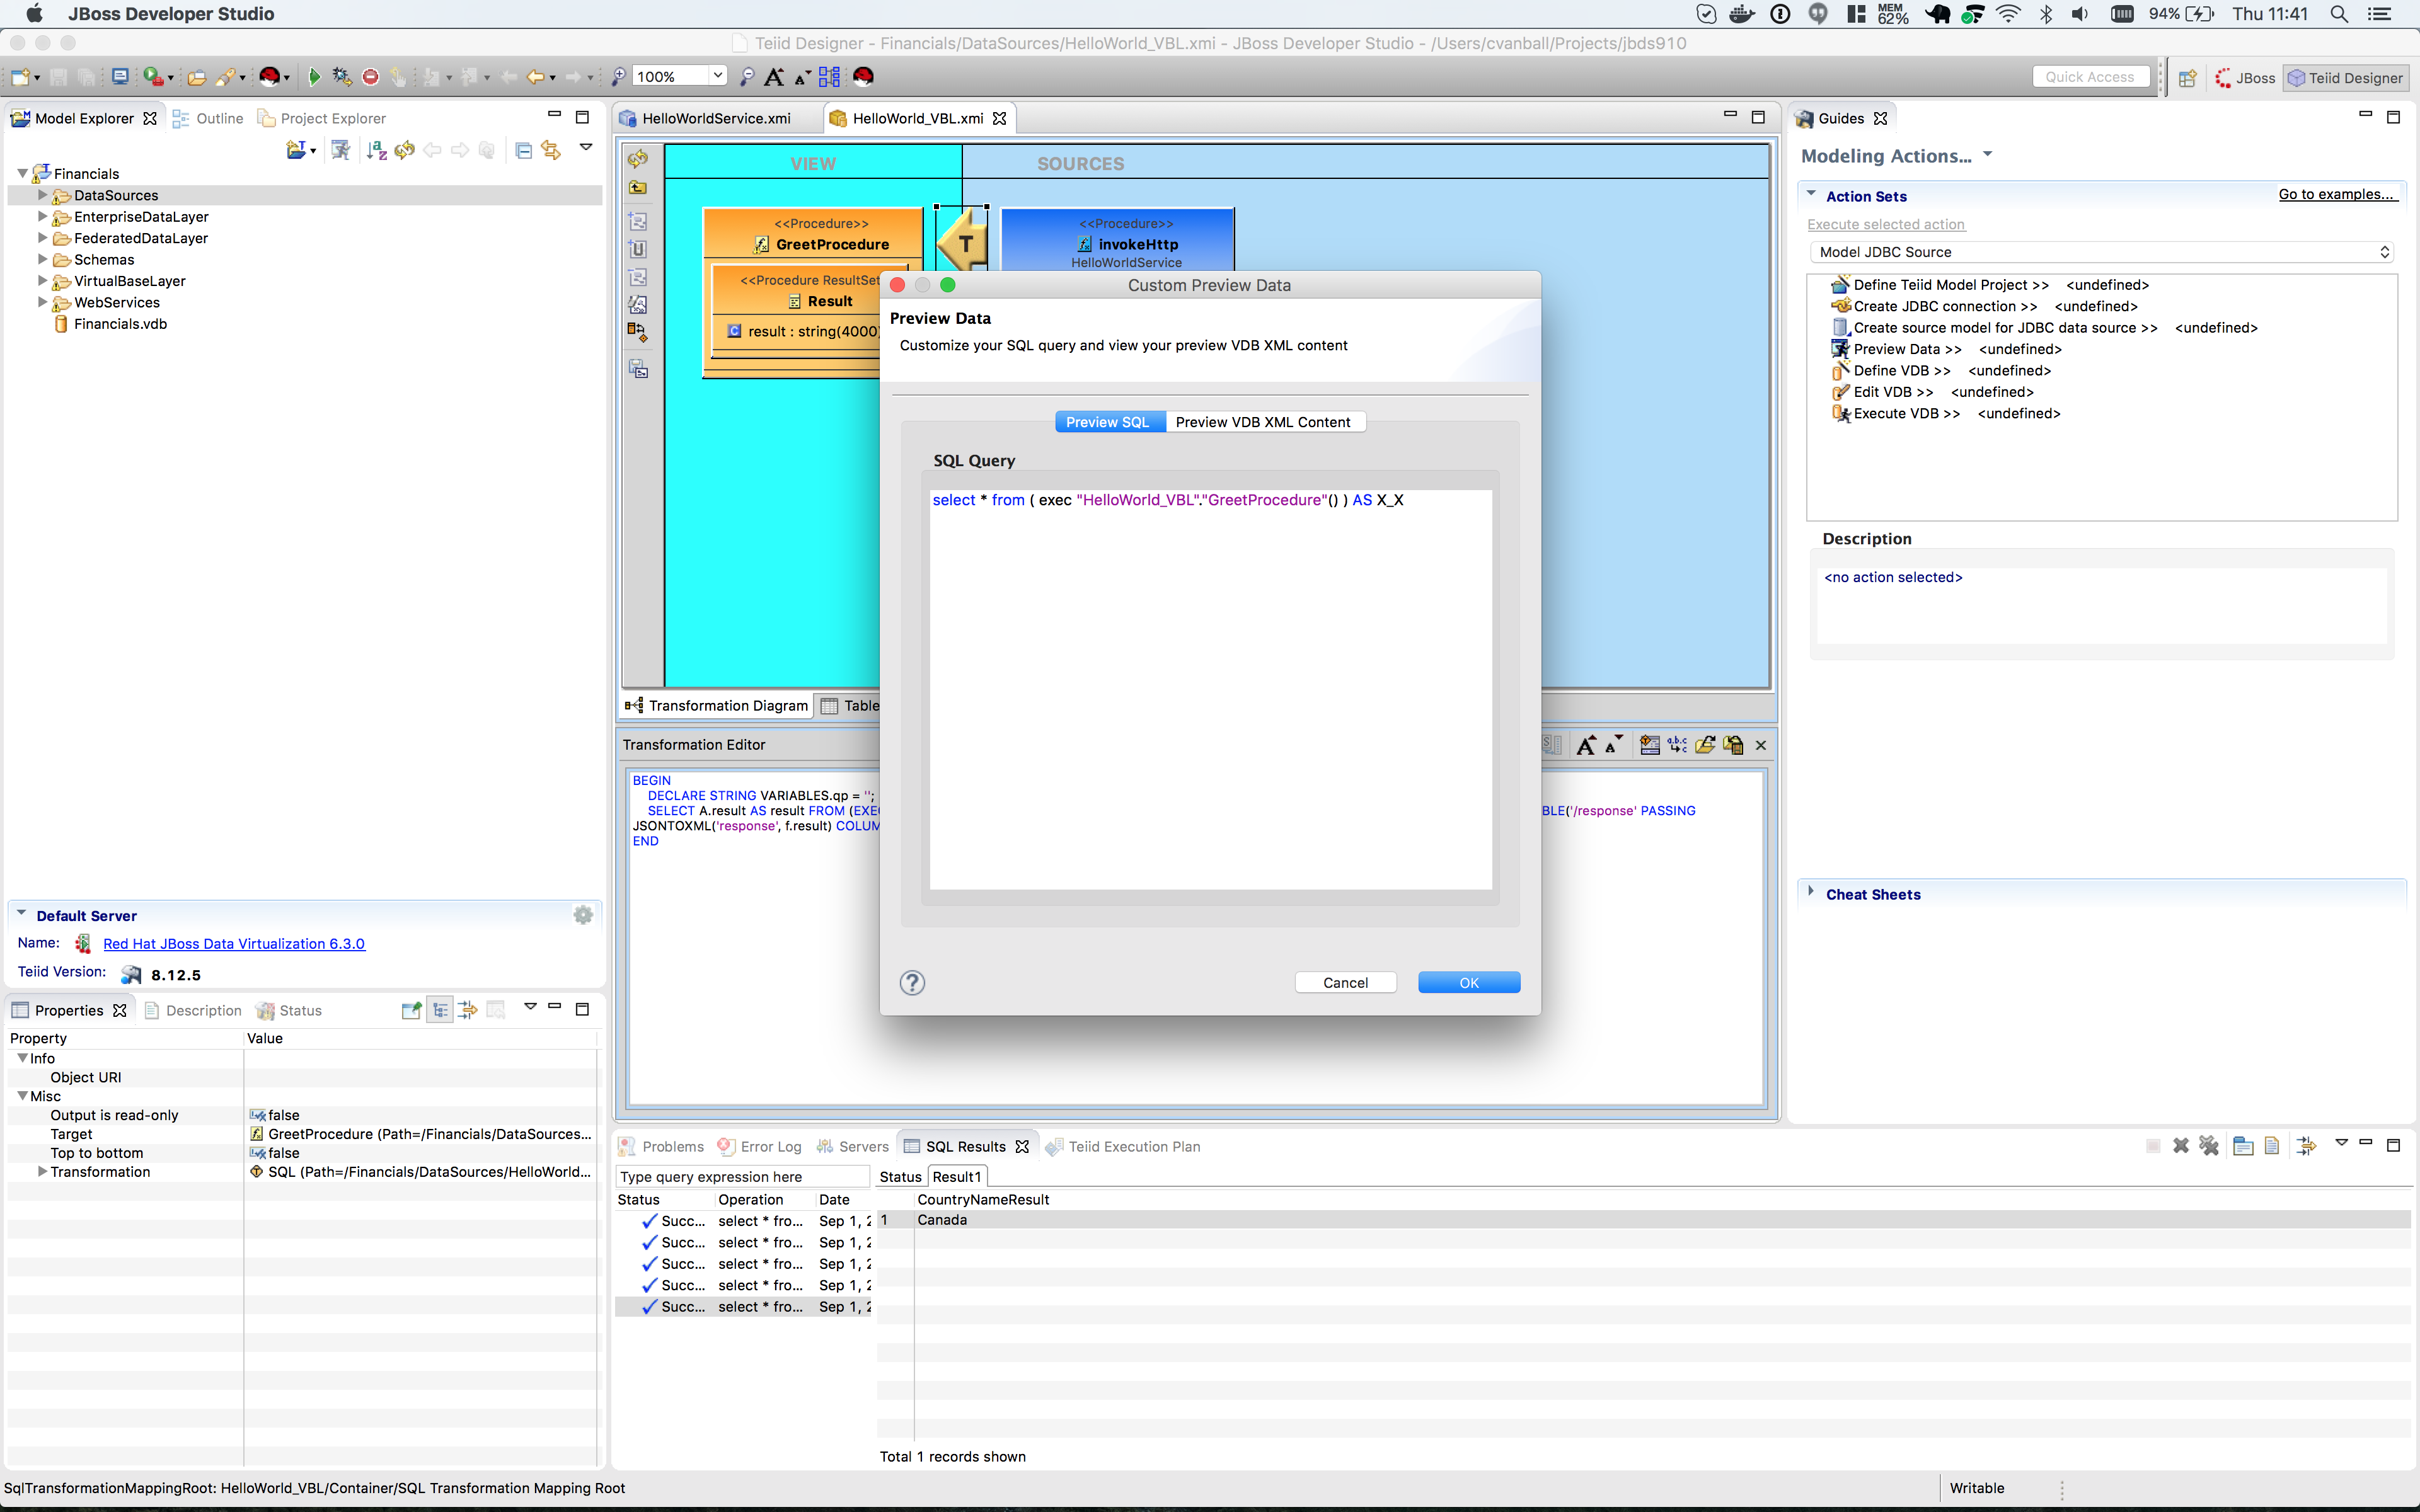
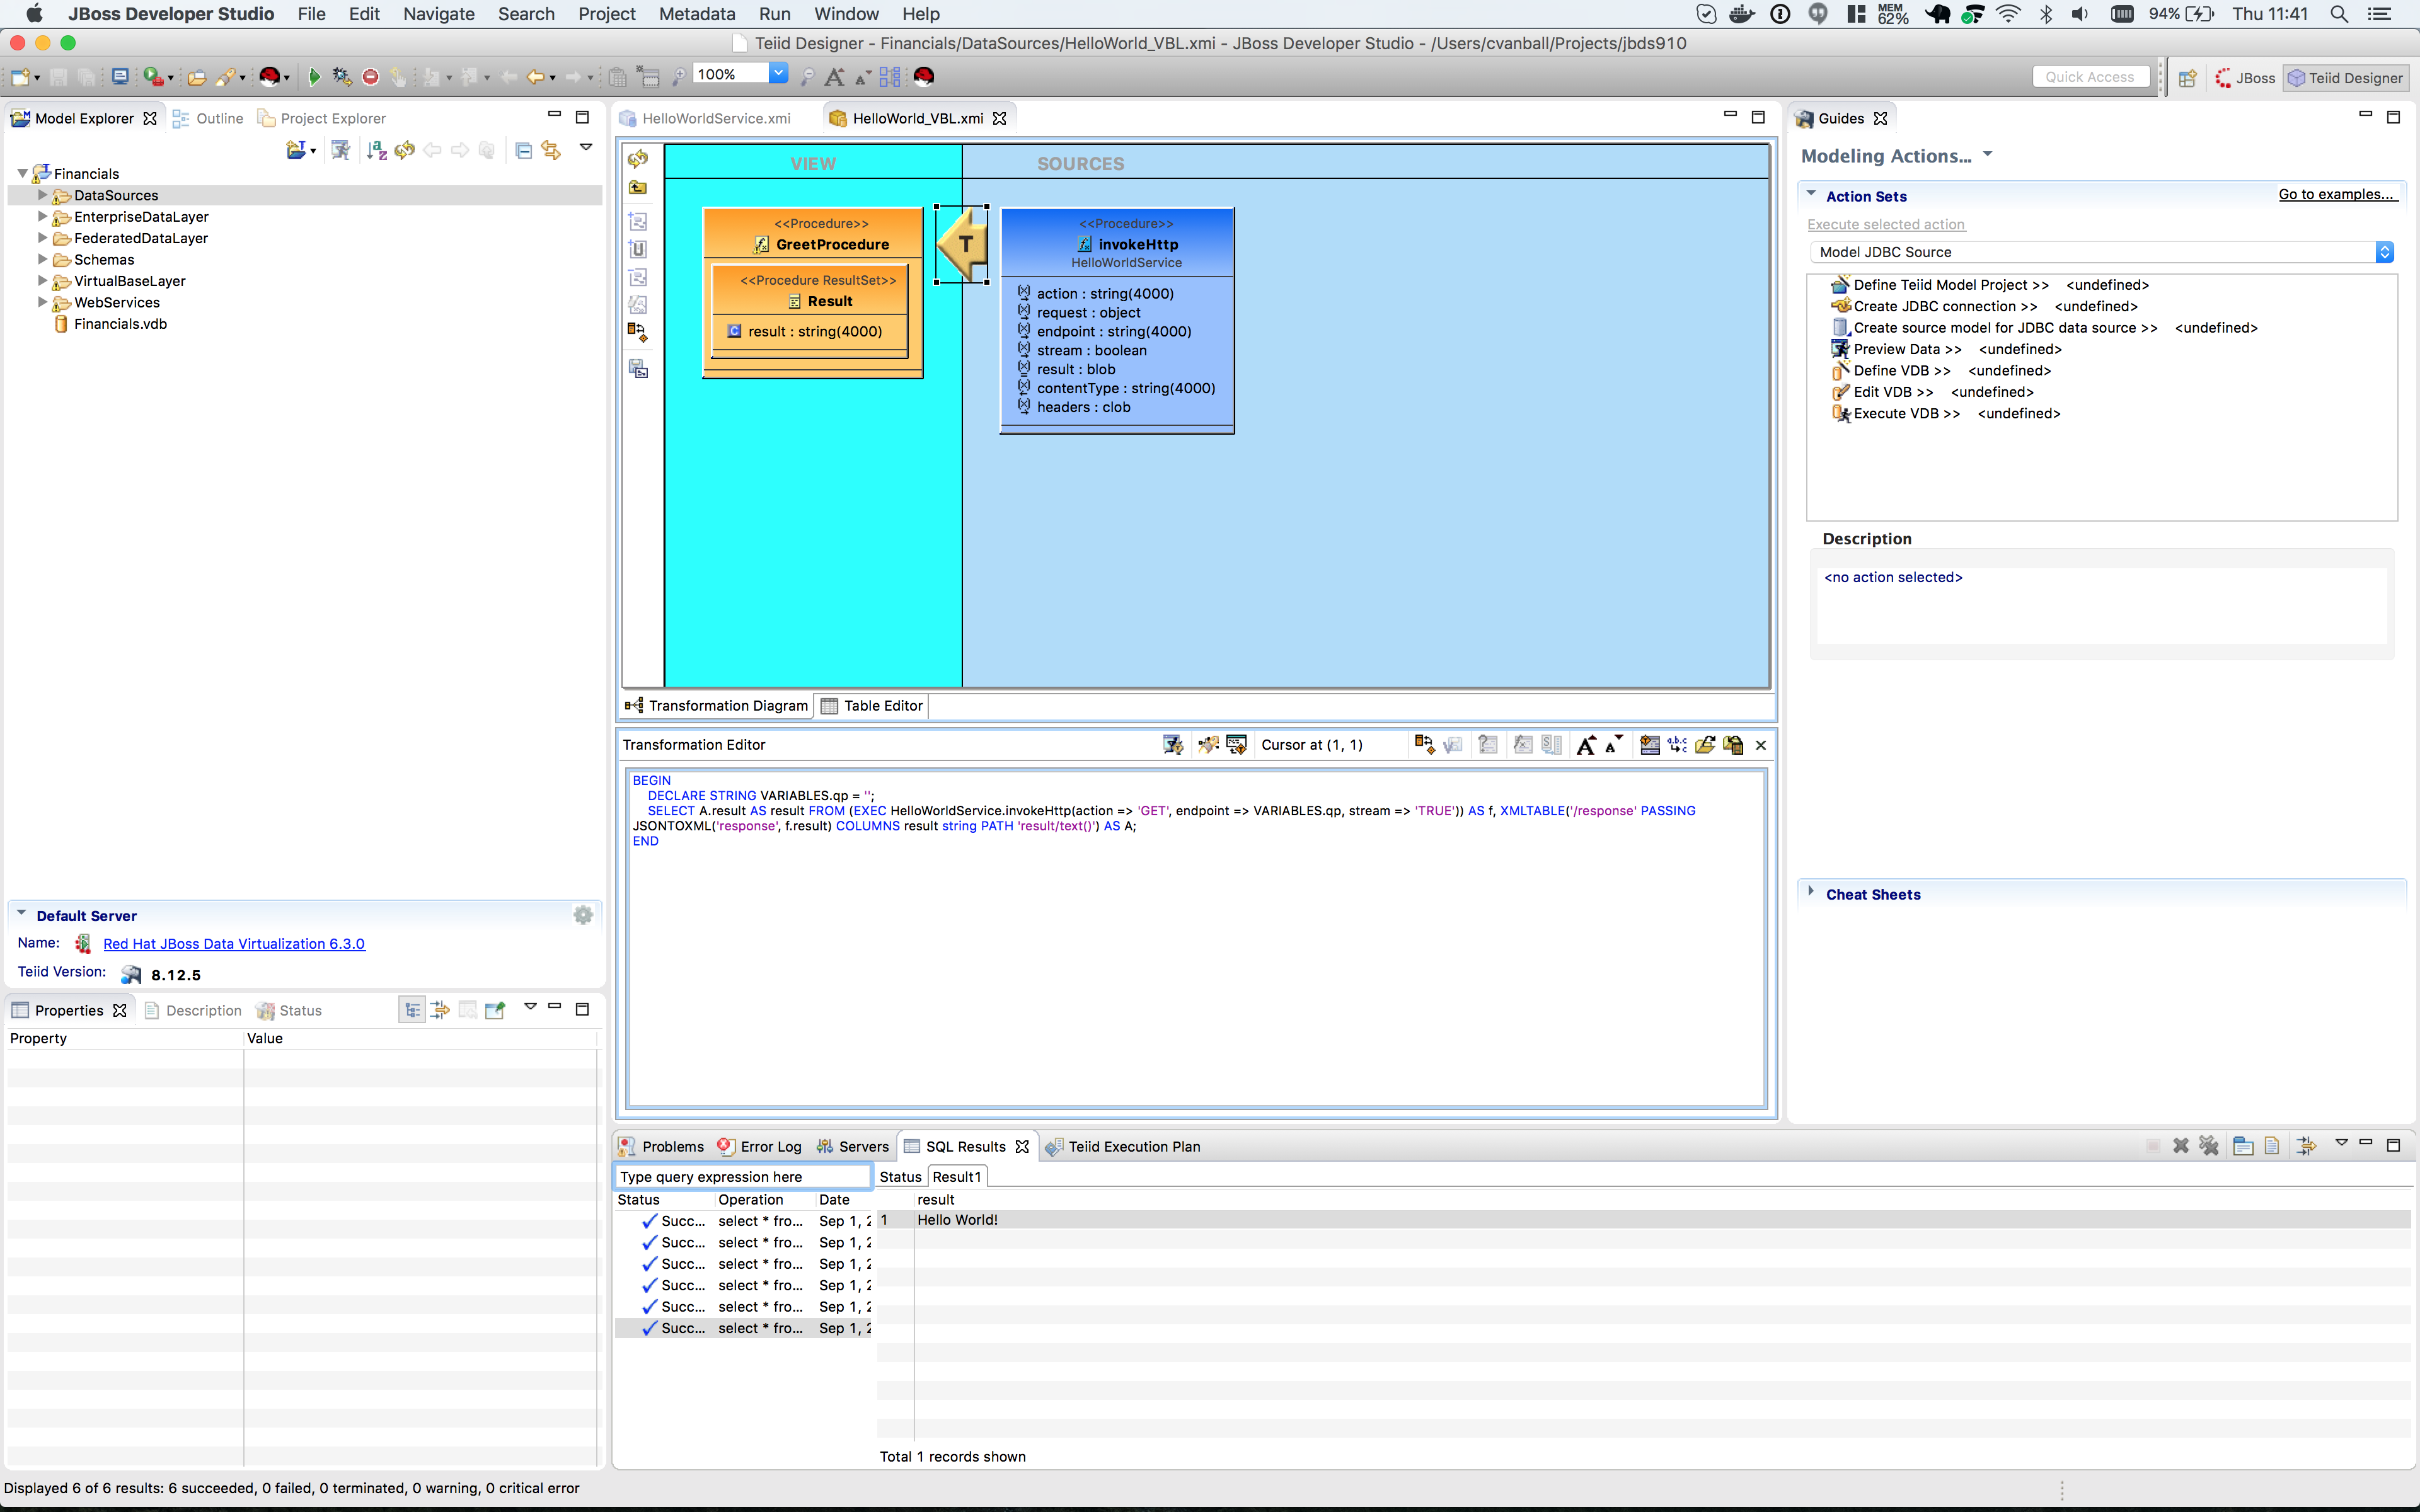
Click btn:[Ok] to run the virtual procedure in the HelloWorld_VBL view model to get the results. You should a similar screen as shown below:
Save and close the models.
Congratulations, you have now completed this lab.